- Sign In with Apple using Swift
- Enabling Sign In with Apple ID
- Using Apple Developer Account
- Using Xcode
- Sign In with Apple Entitlement
- Sign In Set up and Functionality
- Check Credential State
- Sign in with Apple with SwiftUI
- What’s Sign in with Apple, in case you don’t know yet…
- What does Sign in with Apple put on the table?
- Integration guide
- Prerequisites
- Add Sign in with Apple capability
- Add capability on Apple Developer Account
- Sign in with Apple button for Swift UI
- Request Authorization with Apple ID
- Which user authentication data does we get from Apple?
- How do we get this data?
- Handling changes
- Web and Android solution
- Communication between your backend and Apple
- Server to server developer notifications
- Register your email domains
- Upgrading users to Sign in with Apple
- Aspects to keep in mind
Sign In with Apple using Swift

Jun 10, 2019 · 3 min read

Sign In with Apple allows users to set up an account and sign in to your apps and websites with their Apple ID.
Enabling Sign In with Apple ID
There are two ways using which you can enable Sign In with Apple ID Capability.
Using Apple Developer Account
You can edit your App ID configurations in Certificates, Identifiers & Profiles.

Using Xcode
- Open your Xcode Project.
- Project Navigator→ Select Project → Select Target.
- In Project Editor, Click Signing & Capabilities.
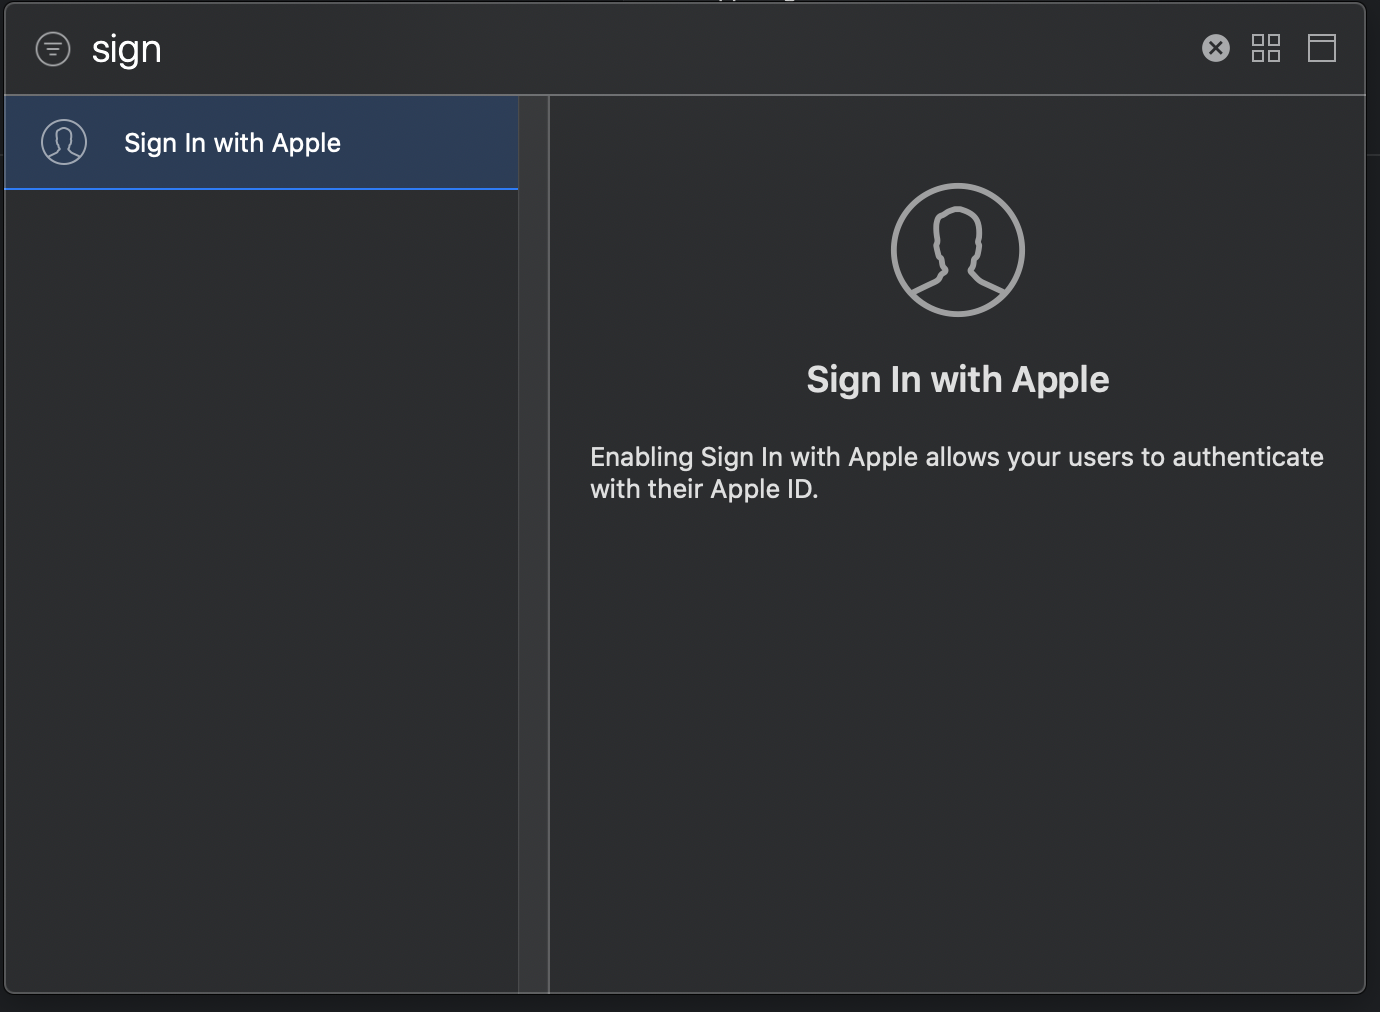
- Add Capability by clicking the + button. Search for Sign In with Apple Capability in Capability Library.
- Double-click the capability to add.

Sign In with Apple Entitlement
You need to add entitlement if you enable capability using apple developer account. If you configure capabilities using Xcode, Xcode manages the related entitlements so you don’t need to edit the entitlements file or an App ID directly.
Sign In Set up and Functionality
We need to u s e Authentication Services framework to give users the ability to sign into your services with their Apple ID.
Add Sign In with Apple Button.
Function to create a request using ASAuthorizationAppleIDProvider and initialize a controller ASAuthorizationController to perform the request.
Conform to ASAuthorizationControllerDelegate
Below function is called after successful Sign In.
You can handle error in the below function.
Check Credential State
On successful authorization, we get User Info which has User Identifier.
We can use that identifier to check the user’s credential state by calling the getCredentialState(forUserID:completion:) method:
Sign In with Apple is Complete!
Thank you. Hope this helps you. Please let me know if you have any queries.
Источник
Sign in with Apple with SwiftUI

Apple recently updated Swift UI so that integrating Sign In With Apple through it is as seamless as it gets. This and all other new SwiftUI improvements are an indication that Apple is taking seriously the new state-driven, reactive, and declarative way of creating Apple apps. Which also motivates us to update our guide about integrating Sign in with Apple, but now using SwiftUI.
First, we’ll cover the benefits of integrating Sign in with Apple in your app, so you can decide if it’s worth a feature, then in the latter part, we’ll provide a step by step Sign in with Apple integration guide for a SwiftUI app.
What’s Sign in with Apple, in case you don’t know yet…
Sign in with Apple is a new Apple service that makes it easy for users to authenticate and sign-in into your apps and websites using their Apple ID. Instead of filling out forms, verifying email addresses, and choosing new passwords, they can use Sign in with Apple to set up an account and start using your app right away.
Please note that if your app already provides other third-party social media authentication (such as Facebook, Google, Twitter, etc), Apple demands you to implement Sign in with Apple in order to publish your app in the AppStore. You can visit App Store Review Guidelines for more info about Apple Store review.
What does Sign in with Apple put on the table?
It provides a one-tap frictionless login and authentication system to your app, which means more users will log in after downloading your app, securing a faster growth in the number of app users, especially for Apple device owners who only need to check their identity through Touch Id or Face Id. By using Sign in with Apple, users don’t need to remember app credentials, apps don’t need to provide a password reset and identity and validation workflow in the app, neither provide a specific register nor login form.
Sign in with Apple is FIDO U2F standard complaint, which means security aspects are met and we don’t need to care about it. Apple adds two-factor authentication support by default, providing an extra layer of security.
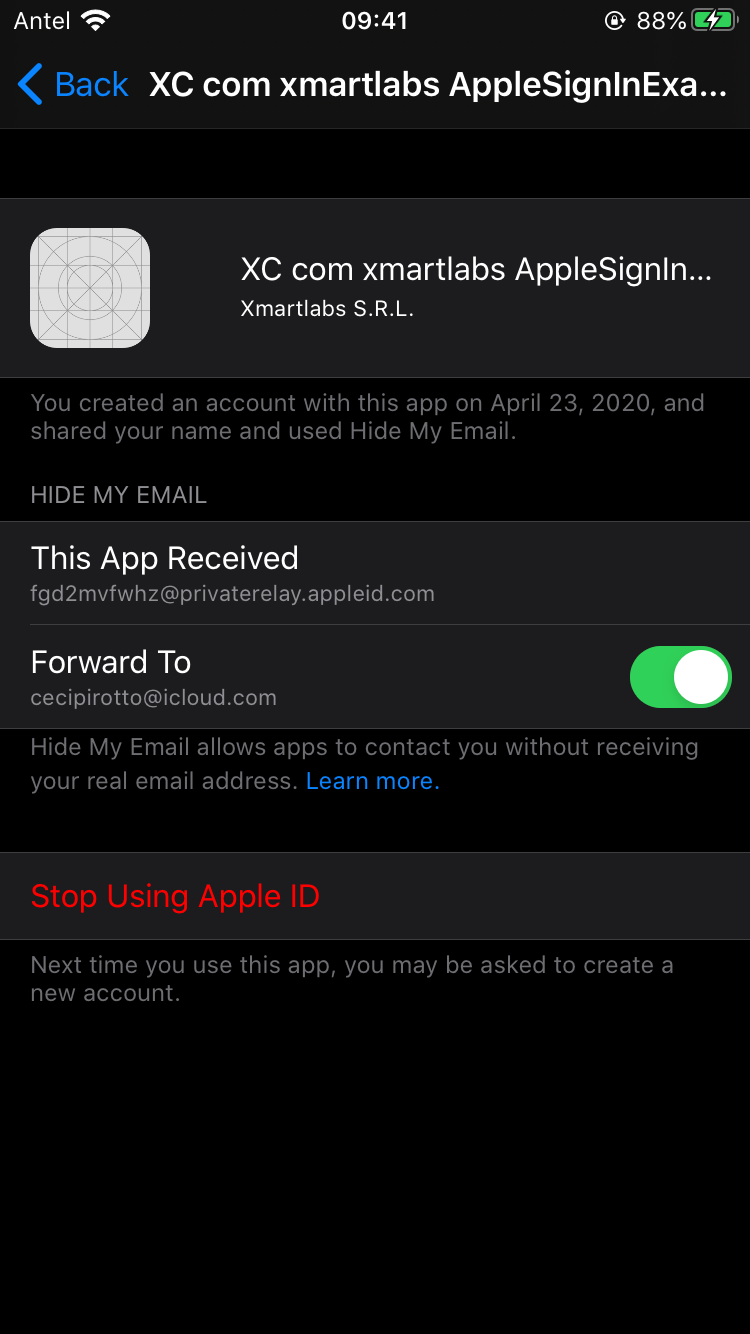
Sometimes an app user would prefer Sign in with Apple over the alternatives because it provides the ability to hide its real email. This still allows the app to reach the user real email through Apple servers, the difference is that Apple provided private emails are only reachable from the app registered email domains, so not a single user’s email has value outside app servers (which protects the user from spam servers purchasing your email address).
Even though Sign in with Apple is multiplatform which means we can make it work on the web, Android devices, Windows apps and platforms provided by Apple. The user still needs to have an Apple device to complete the two-factor authentication, upon Apple Id login the user receives a 2FA code from apple in their device. So if your app is available for non-Apple devices owners just allowing Sign in with Apple is not an option.
At this point, you should have gotten the idea behind the benefits in adopting Sign in with Apple in your app and be able to decide if it’s useful for your app. So now let’s move on to a step by step integration guide.
Integration guide
Prerequisites
iOS 14+ and Xcode 12+.
Add Sign in with Apple capability
We need to add Sign in with Apple capability to our project. Open the Xcode project file. In the project editor, select the target and open the Signing & Capabilities tab. In the toolbar, click the + Capability button to open the Capabilities library and add the Sign in with Apple capability.
Add capability on Apple Developer Account
It’s necessary to configure your project on Apple Developer Program portal. Go to Certificates, Identifiers & Profiles → Identifiers and search the identifier to the project. Search Sign in with Apple capability and if it’s not enabled, enable it. Then, click Edit and choose Enable as primary App ID option as it’s shown in the screenshot. Save the new configuration.

Go back to Certificates, Identifiers & Profile screen and go to the Keys page to register the new key. Press the + button and add the Sign in with Apple capability, then press the Configure button.

Make sure to select the correct Primary App ID and save the configuration key.

Now, we have the environment setup done, let’s get into the code.
Sign in with Apple button for Swift UI
By using the Sign in with Apple button for Swift UI you can create the authorization request and handle the response as the code snippet below shows.
Unlike UIKit implementation, there is no need to conform to protocols to handle responses. Let’s elaborate more in the SignInWithAppleButton init parameters (comment 1, 2, 3) and signInWithAppleButtonStyle modifier.
- First parameter allows us to select the button title, choosing between sign in, sign up or continue.
- Second parameter, onRequest closure, allows us to set up the request and scopes.
- The third parameter, onCompletion closure, provides a way to handle the result of the authorization process.
- signInWithAppleButtonStyle(Style) set up the button’s color and style.
Request Authorization with Apple ID
Once the app user taps the button, authorization flow starts displaying the request dialog which is completely handled by Apple, we just need to configure the request in onRequest closure.
requestedScopes specifies the contact information to be requested from the user.
Including nonce and state value in the request is optional, they’re used to make our request even more secure.
Both values are an optional opaque blob of data, sent as String in the request and will be verified later to prevent replay attacks. It’s important to generate a unique value every time you create a new request.
Which user authentication data does we get from Apple?
We’ll receive an ASAuthorization which has an ASAuthorizationCredential instance, here are the principal information included:
- User ID: The unique user ID.
- Full name: User could edit its full name before sharing it with your app.
- Email: A user’s email address, which could either be the real user email or an obscured one
- Authorization Code: Should be sent to backend which uses it to verify the token claims with Apple servers, and exchange them for refresh tokens. For more information, see Generate and Validate Tokens apple documentation.
- Identity Token: This is a JWT that contains relevant information about user’s authentication. It should be sent to the backend so it can validate and get the information’s authenticity.
- State: The state value mentioned before, it must match with state value configured in the request.
We only receive state value if it was sent in the request.
nonce value, if set up in the request, is returned embedded in the identity token and should be verified in your server.
How do we get this data?
App invokes onCompletion closure with the result of the authorization request. If successful we receive the authorization credential mentioned before.
It’s worth highlighting that we only receive all the information if it’s a new user, otherwise we don’t receive fullName neither email . Email data is always included in the identityToken JWT data.
If something goes wrong the error is shown to the user by Apple SDK through a dialog. Anyway, we might still be interested in handling the error, for instance, in order to log it.
Handling changes
Users could revoke permission for your app from Setting → Apple ID → Password & Security → Apps Using Your Apple ID.
Apple provides a way to know when an authentication change happens through ASAuthorizationAppleIDProvider.credentialRevokedNotification notification.
To handle the change we need to register for the notification:
We can check the credential state with getCredentialState as the notification handler in the code below shows. Remember that we should have saved the user identifier in our app keychain as we told earlier.
Transferred is the less common credential state since it represents that the application was recently transferred from one development team to another. UserIDs are unique within a development team so it must be migrated. For more information about how to migrate, see Apple official documentation.
Web and Android solution
Apple provides a JavaScript SDK for Android and Web integration. You can take a look at the Sign in with Apple JS documentation for information about it.
Communication between your backend and Apple
Apple provides a REST API to communicate between your app server and Apple’s authentication servers. You can use it to validate the tokens used to verify a user’s identity. You can read more about it in the following documentation.
Server to server developer notifications
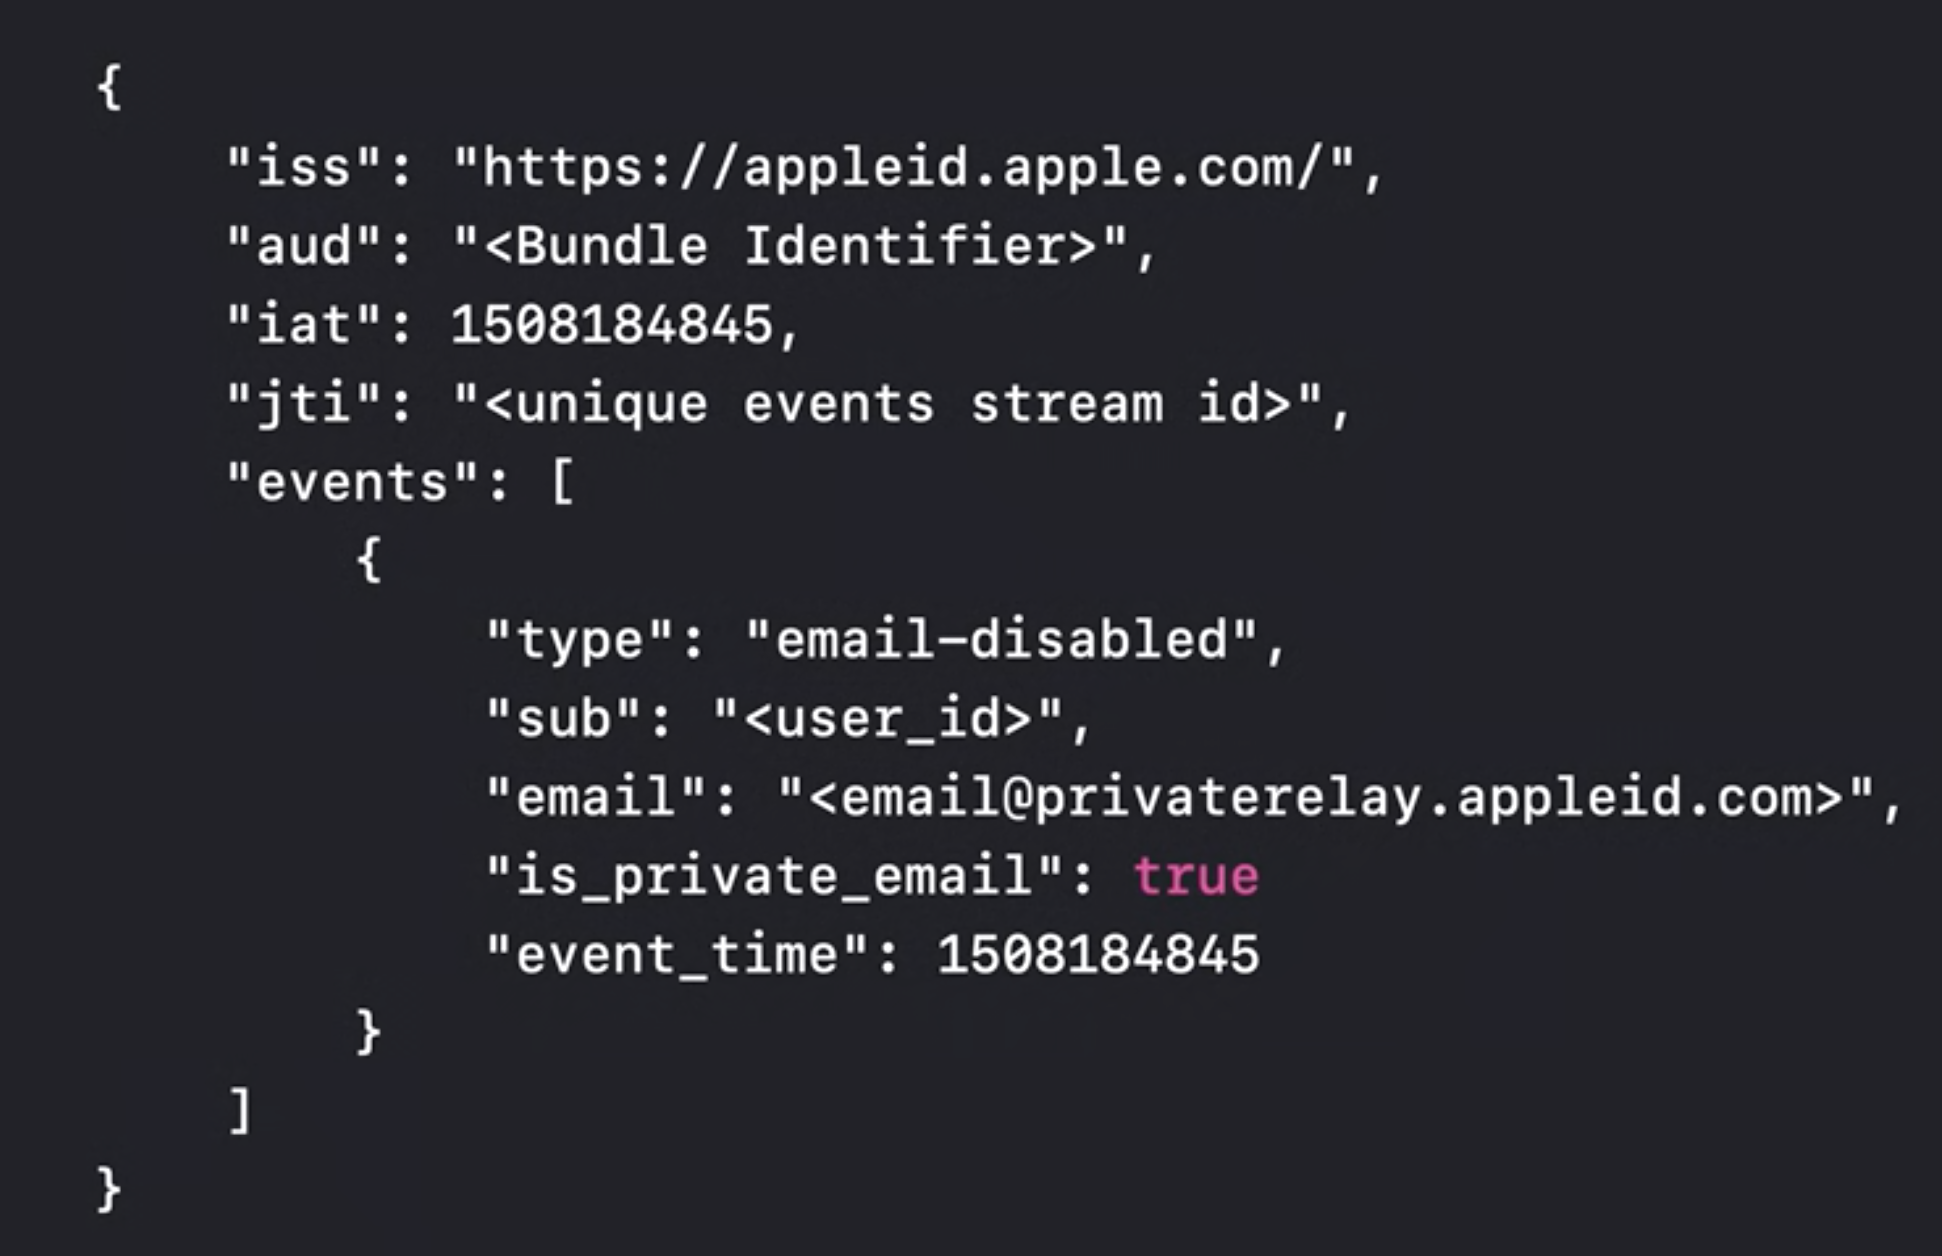
This is a new feature introduced this year which allows us to monitor the users’ authentication state. To start listening to these notifications you have to register your server endpoint on the Apple developer’s Website. Events will be sent as JSON web tokens signed by Apple. We can receive some of these events:
- consent-revoked: when a user decides to stop using their Apple ID with your application. It should be triggered as a sign out by the user.
- account-deleted: when a user deletes their Apple ID. When the user deletes their account the user identifier associated will no longer be valid.
If the user previously decided to use a private email relay for their account you can also receive these notifications:
- email-disabled: when a user has decided to stop receiving emails on their email relay.
- email-enabled: when the user opted back into receiving emails.
Here we can see how this JWT looks like:
Register your email domains
As we mentioned before, to communicate with app users who tap the hide my email option we must register the app email server domain. You must have already configured Sender Policy Framework (SPF) in order to use it at this point.
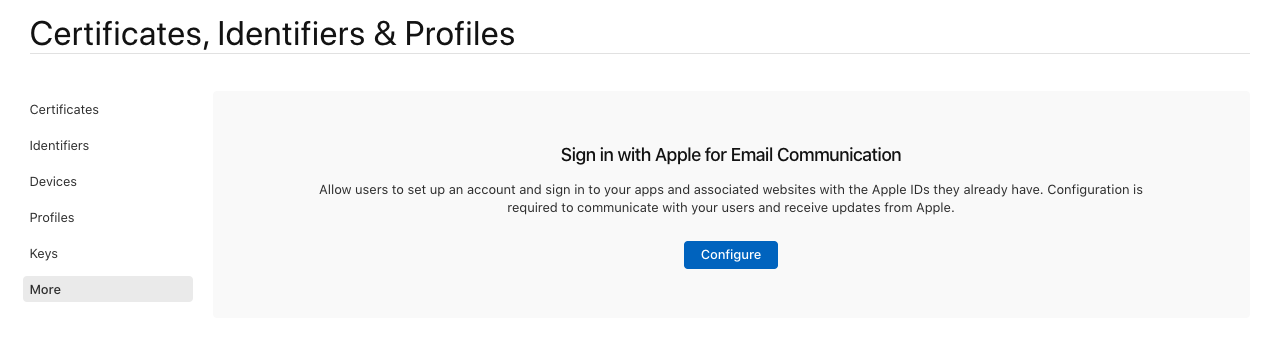
In order to configure your email domains enter to Apple Developer Program. Go to Certificates, Identifiers & Profile → More and tap Configure button
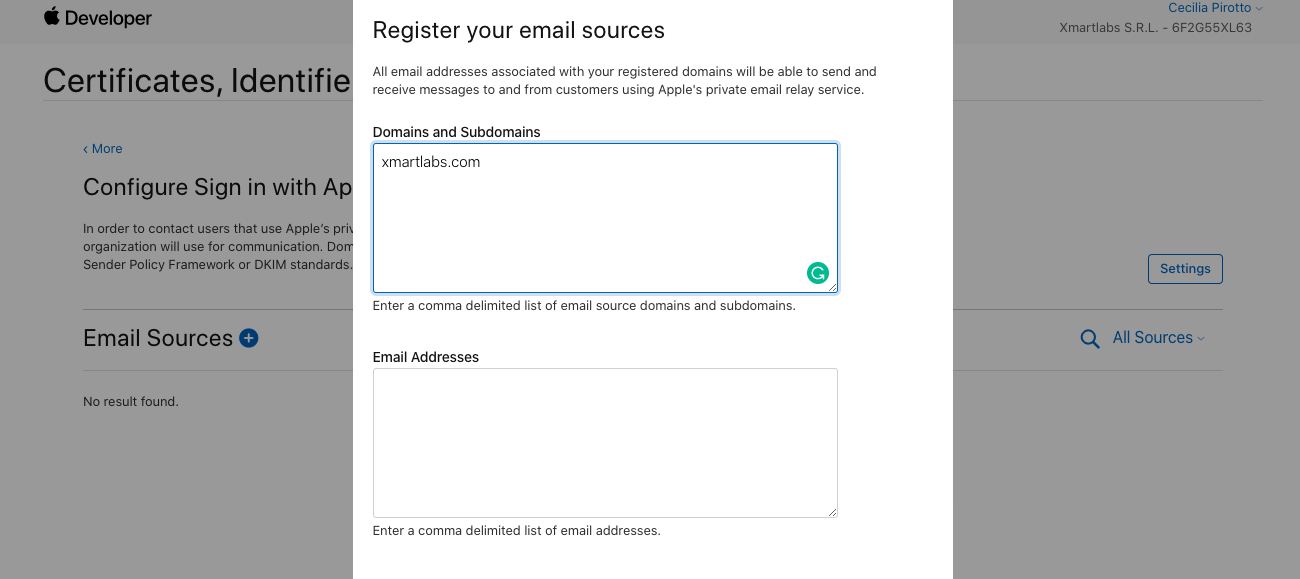
Tap + to register your email sources. In Domains and Subdomains section add your domain name, click Next and Register
The register will fail if you don’t use SPF. If you’re using Google to send mails, here you have a configuration guide.
After you get your domain registered, click Download and place the file in the specified location (https://YourDomain/.well-known/apple-developer-domain-association.txt) and click Verify.

You will see a green checkmark if your domain passes the verification:

Upgrading users to Sign in with Apple
Sign in with Apple provides multiple benefits to current app users as we have discussed, so at a certain point some app users would be interested in start using Sign in with Apple over its current authentication system. Before iOS 14, there wasn’t a simple way to do so, normally we ended up losing their account information or having a duplicated user.
iOS 14 introduced a new API to help users migrate to Sign in with Apple. This new API provides you with the support for adding your custom UI in case any custom security verification needs to be completed before asking for a Sign in with Apple credential.
Aspects to keep in mind
There are some aspects you should consider if you decide to integrate Sign in with Apple.
As we mentioned before, developers only receive the user’s email and full name once, so if there is a connection issue and you don’t save this data locally you won’t be able to recover it.
If users choose the hide my email option, it could be difficult to identify the user since the app only holds its apple identifier and its apple private email. So any communication should be done through the app.
Well, I hope now you have a better understanding of Sign in with Apple, what’s its integration cost, and if it’s desirable for your app!
Are you integrating Sign in with Apple in your app and did you encounter something that wasn’t covered in this post? Let me know in the comments. I’d be interested to add it to this blogpost.
Have questions about Sign in with Apple? I’d be happy to answer those in the comments if I can.
Источник


