- Пишем первое приложение для Android
- Установка необходимых программ и утилит
- Запуск виртуального устройства
- Список устройств
- Создание проекта
- Структура проекта
- Первые строки
- Square.java
- Player.java
- Game.java
- Определение победителя
- WinnerCheckerHorizontal.java
- WinnerCheckerVertical.java
- WinnerCheckerDiagonalLeft.java
- WinnerCheckerDiagonalRight.java
- Видео готового приложения
- The Simplest Android App: Hello World
- Prerequisites for Creating a Hello World App
- Install Android Studio
- Windows
- Linux
- Android Studio Install for Mac
- Hello World Android Application
- Create the App Project
- Create a Hello World Activity
- Configure the Hello World Project Details
- The Gradle Build System
- Explaining the Files in an Android App Project
- The manifests Folder
- The java Folder
- The res Folder
- Coding the Hello World App
- The Default Main Activity
- The Default Main Activity Java Code
- The Default Layout XML File
- Changing the Activity Layout
- The Strings File
- Running the Application
- Conclusion
- Android From Scratch: Exploring Android Sample Apps
- How to Learn Android App Development: Start With These Courses and Tutorials
- How to Get Started Making Android Apps
- Understanding the Android App Development Kit
- The Best Free To-Do List Apps for Android and How to Make One Yourself
- Build a 360-Degree Video Player App With an Android App Template
Пишем первое приложение для Android
В любом деле самое сложное — это начало. Часто бывает тяжело войти в контекст, с чем столкнулся и я, решив разработать свое первое Android-приложение. Настоящая статья для тех, кто хочет начать, но не знает с чего.
Статья затронет весь цикл разработки приложения. Вместе мы напишем простенькую игру “Крестики-Нолики” с одним экраном (в ОС Android это называется Activity).
Отсутствие опыта разработки на языке Java не должно стать препятствием в освоении Android. Так, в примерах не будут использоваться специфичные для Java конструкции (или они будет минимизированы на столько, на сколько это возможно). Если Вы пишете, например, на PHP и знакомы с основополагающими принципами в разработке ПО, эта статья будет вам наиболее полезна. В свою очередь так как, я не являюсь экспертом по разработке на Java, можно предположить, что исходный код не претендует на лейбл “лучшие практики разработки на Java”.
Установка необходимых программ и утилит
Перечислю необходимые инструменты. Их 3:
- JDK — набор для разработки на языке Java;
- Android SDK and AVD Manager — набор утилит для разработки + эмулятор;
- IDE c поддержкой разработки для Android:
- Eclipse + ADT plugin;
- IntelliJ IDEA Community Edition;
- Netbeans + nbandroid plugin;
Утилиты устанавливаются в определенном выше порядке. Ставить все перечисленные IDE смысла нет (разве только если Вы испытываете затруднения с выбором подходящей). Я использую IntelliJ IDEA Community Edition, одну из самых развитых на данный момент IDE для Java.
Запуск виртуального устройства
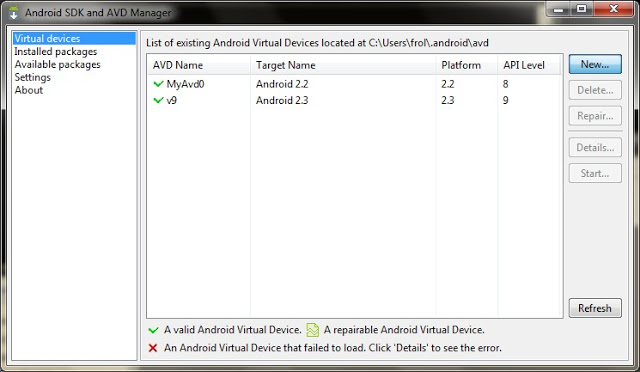
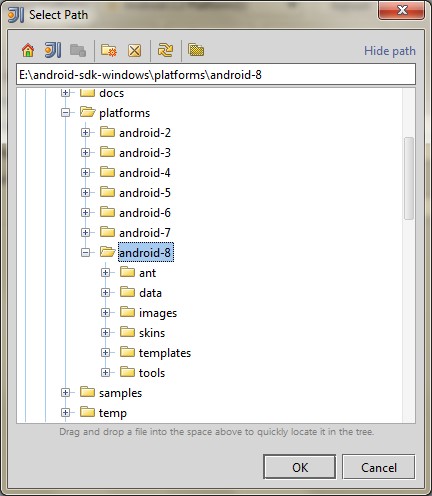
Запустив AVD Manager и установив дополнительные пакеты (SDK различных версий), можно приступить к созданию виртуального устройства с необходимыми параметрами. Разобраться в интерфейсе не должно составить труда.
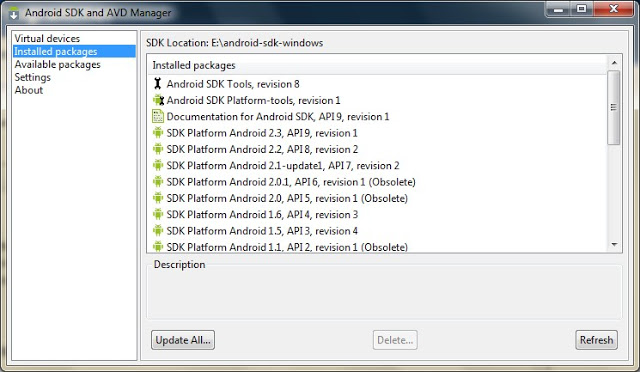
Список устройств
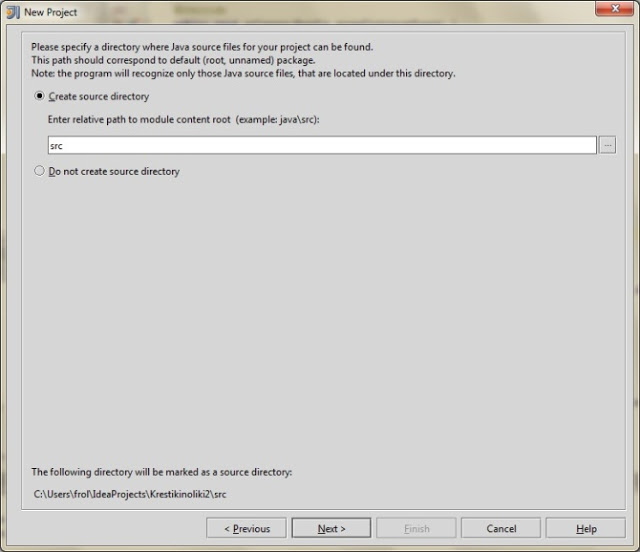
Создание проекта
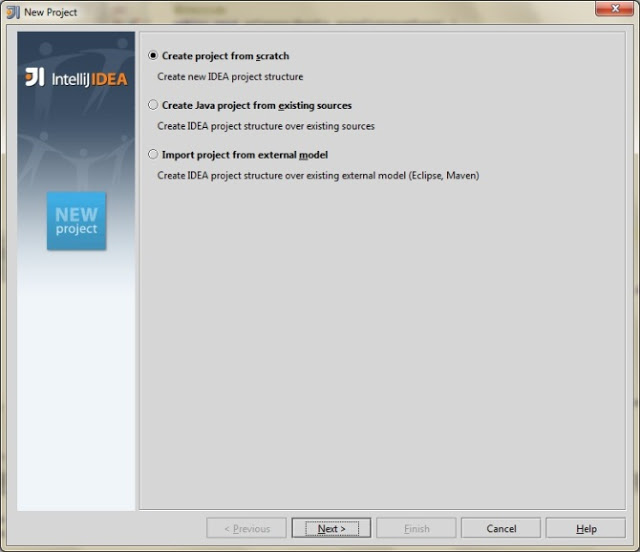
Мне всегда не терпится приступить к работе, минимизируя подготовительные мероприятия, к которым относится создание проекта в IDE, особенно, когда проект учебный и на продакшн не претендует.
Итак, File->New Project:
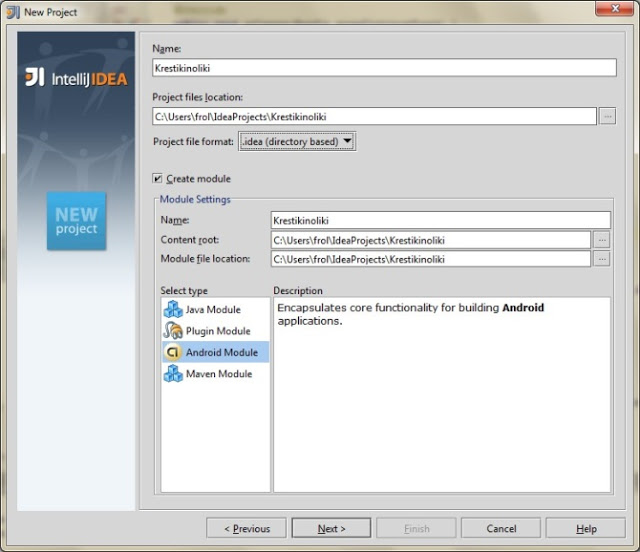


По нажатию кнопки F6 проект соберется, откомпилируется и запустится на виртуальном девайсе.
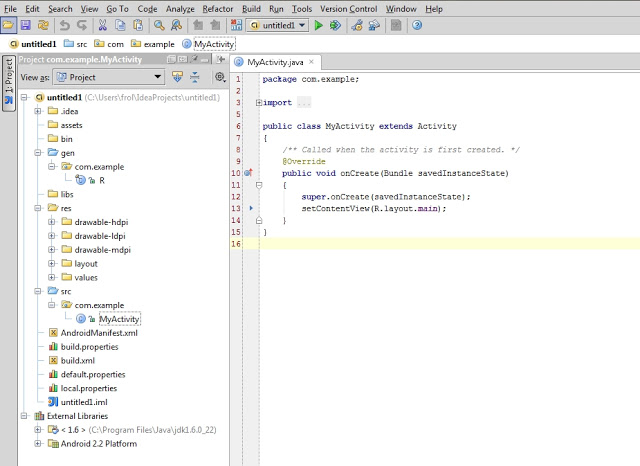
Структура проекта
На предыдущем скриншоте видна структура проекта. Так как в этой статье мы преследуем сугубо практические цели, заострим внимание лишь на тех папках, которые будем использовать в процессе работы. Это следующие каталоги: gen, res и src.
В папке gen находятся файлы, которые генерируются автоматически при сборке проекта. Вручную их менять нельзя.
Папка res предназначена для хранения ресурсов, таких как картинки, тексты (в том числе переводы), значения по-умолчанию, макеты (layouts).
src — это папка в которой будет происходить основная часть работы, ибо тут хранятся файлы с исходными текстами нашей программы.
Первые строки
Как только создается Activity (экран приложения), вызывается метод onCreate(). IDE заполнила его 2 строчками:
Метод setContentView (равносильно this.setContentView) устанавливает xml-макет для текущего экрана. Далее xml-макеты будем называть «layout», а экраны — «Activity». Layout в приложении будет следующий:
Для этого приложения идеально подойдет TableLayout. Id можно присвоить любому ресурсу. В данном случае, TableLayout присвоен При помощи метода findViewById() можно получить доступ к виду:
Теперь необходимо реализовать метод buildGameField(). Для этого требуется сгенерировать поле в виде матрицы. Этим будет заниматься класс Game. Сначала нужно создать класс Square для ячеек и класс Player, объекты которого будут заполнять эти ячейки.
Square.java
Player.java
Все классы нашего приложения находятся в папке src.
Game.java
Инициализация Game в конструкторе KrestikinolikiActivity.
Метод buildGameField() класса KrestikinolikiActivity. Он динамически добавляет строки и колонки в таблицу (игровое поле):
В строке 8 создается объект, реализующий интерфейс View.OnClickListener. Создадим вложенный класс Listener. Он будет виден только из KrestikinolikiActivity.
Осталось реализовать логику игры.
Определение победителя
К. О. подсказывает, что в крестики-нолики выирывает тот, кто выстроет X или O в линию длиной, равной длине поля по-вертикали, или по-горизонтали, или по-диагонали. Первая мысль, которая приходит в голову — это написать методы для каждого случая. Думаю, в этом случае хорошо подойдет паттерн Chain of Responsobility. Определим интерфейс
Так как Game наделен обязанностью выявлять победителя, он реализует этот интерфейс. Настало время создать виртуальных «лайнсменов», каждый из которых будет проверять свою сторону. Все они реализует интерфейс WinnerCheckerInterface.
WinnerCheckerHorizontal.java
WinnerCheckerVertical.java
WinnerCheckerDiagonalLeft.java
WinnerCheckerDiagonalRight.java
Проинициализируем их в конструкторе Game:
Победителя проверяем после каждого хода. Добавим кода в метод onClick() класса Listener
Метод gameOver() реализован в 2-х вариантах:
Для Java, gameOver(Player player) и gameOver() — разные методы. Воспользовавшись Builder’ом Toast.makeText, можно быстро создать и показать уведомление. refresh() обновляет состояние поля:
Готово! Надеюсь, эта статья помогла Вам освоиться в мире разработки под OS Android. Благодарю за внимание!
Видео готового приложения
PS: статья была опубликована по просьбе комментаторов этого поста.
Источник
The Simplest Android App: Hello World
Learning to code Android apps is a great decision. It’s fun, and it’s an in-demand skill for the tech industry. In this tutorial, you’ll learn how to build the simplest Android app: Hello World. It’s a great place to start making Android apps.
Prerequisites for Creating a Hello World App
Before you get started with this tutorial, you should have:
- a basic understanding of object-oriented programming and the Java programming language
- a computer running Windows, Linux, or macOS
Install Android Studio
Android Studio is the official integrated development environment for native Android app development. It comes with all the tools necessary for developing apps such as a powerful code editor, debugger, testing support, and performance tools. It also comes with a Gradle-based build system, fast emulators, code templates, and much more.
Android Studio is available for Windows, macOS, and Linux platforms, and you can download it from the Android Studio website.
Proceed to download the appropriate Android Studio distribution file and install it according to your operating system.
Windows
- For a .exe file (recommended), double-click to launch it.
- For a .zip file, unpack the ZIP and copy the android-studio folder into your Program Files folder. Open the android-studio/bin folder and launch the .exe file.
- Follow the setup wizard guide to complete the installation.
Linux
- Unpack the .zip file you downloaded to /usr/local for your user profile, or /opt for shared users.
- To launch Android Studio, open a terminal, go to the android-studio/bin directory, and run studio.sh.
- Choose whether to import previous Android Studio settings or not, and then click OK.
- Follow the setup wizard guide to complete the installation.
Android Studio Install for Mac
- Launch the Android Studio DMG file.
- Drag and drop Android Studio into the Applications folder, and then launch Android Studio.
- Select whether to import previous Android Studio settings, and then click OK.
- Follow the setup wizard guide to complete the installation.
Hello World Android Application
First, here’s a peek at what we’ll be building. The completed Android hello world application will look like this:


To create this simplest Android app, just follow along with the steps in this tutorial.
Create the App Project
Launch Android Studio, and you should see a welcome page, as shown below.


On the welcome page above, click Start a new Android Studio project. The next window presents the activities page, as shown below.


Create a Hello World Activity
Android Studio provides activity templates to help you get started. For the Hello World project, choose Empty Activity and click Next.
An activity is a crucial component of any Android app. It provides a screen with which users can interact to perform activities, such as making a phone call, taking a photo, or sending a message. Each Activity has a window in which to draw its user interface. The window typically fills the screen, but it may be smaller than the screen and float on top of other windows.
You can learn more about Activities and many other topics in Android development in the Android From Scratch series.


Configure the Hello World Project Details
We’ll finish creating the project by configuring some details about its name, location, and the API version it uses.
.png)
.png)
.png)
- Change the name of the application.
- Change the default Project location to your preferred directory or just leave it as the default location.
- On the minimum API level, ensure that API 15: Android 4.0.3 IceCreamSandwich is set as the Minimum SDK. This ensures that your application runs on almost all devices.
Click Finish.
The Gradle Build System
Each time you create a new application, Android Studio creates a folder for your projects and builds the project with its Gradle system. The Gradle process may take a few moments. Gradle is Android’s build system, which is responsible for the compilation, testing, and deployment of code. It makes it possible for the app to run on the device.
Explaining the Files in an Android App Project
Whenever you start a new project, Android Studio creates the necessary folder structure and files for that app. Let’s look at the different files involved in an Android app project.


The manifests Folder
The manifests folder contains the AndroidManifest.xml file. The manifest file describes essential information about your application.
The java Folder
This folder contains the Java source code files. As you can see from the editor window above, the MainActivity.java file contains the Java source code for the app’s main Activity.
The res Folder
This folder includes all non-code resources, such as:
- layouts: Layouts are XML files that define the architecture for the UI in an Activity or a component of a UI. For example, in our application, the activity_main.xml file corresponds to the main Activity.
- values: Contains the color, style, and string XML files for the application.
- drawable: This is a catch-all for graphics that can be drawn on the screen, e.g. images.
- build.gradle: This is an auto-generated file which contains details of the app such as the SDK version, build tools version, application ID, and more.
Coding the Hello World App
Now that you have a general view of the project structure, let’s describe the most critical component files that constitute the hello world application.
The Default Main Activity
The main activity is the first screen that will appear when you launch your app.
Each Activity represents a screen of the Android app’s user interface. Each Activity has a Java (or Kotlin) implementation file and an XML layout file.
The Default Main Activity Java Code
Below is the default Java code generated by the application for the main activity.
You don’t need to understand this code fully. A lot of it is boilerplate and will be the same for any app. The code defines a MainActivity class and, along with the onCreate method, defines what happens when the Activity is created. In this case, it simply initializes the view of the Activity with the layout from the activity_main layout file.
The Default Layout XML File
XML files are used for layouts. The main Activity layout XML file is found in the project’s /app/src/main/res/layout directory. Layout files are named after what they represent. For example, the Hello World application has one layout, which is the activity_main.xml named after the main Activity.
Here is the default activity_main.xml layout. It contains one text view element, with the text Hello World!
Changing the Activity Layout
As you can see, we don’t need to change much to complete our Hello World app, but we’ll make a small change so that the text stands out better—we’ll change the text colour and font size.
The Strings File
The strings.xml file provides text strings for your application. For example, a default strings file looks like this:
If you want to change your app name, you can do it here.
Running the Application
Connect your Android device to your computer with a USB cable. The right connection type should show up as connected as a media device.
You’ll also need developer options enabled on your device. If this is not already enabled, follow these steps (this will work on most Android devices):
- Open up the Settings menu on your Android phone and scroll to the bottom.
- Tap About phone and scroll down again until you see the Build number option.
- Tap the Build number multiple times. Soon, you should see a pop-up that reads something similar to You are five taps away from being a developer.
- Keep tapping until the pop-up says you’re a developer.
- Go back to the main Settings> System > Advanced. Developer options should be the second-last option. Turn the Developer options on.
In Android Studio, navigate to the top menu and select Run ‘app’. Android Studio will show a dialog where you can choose which device to run your Android app on. Choose your connected device and click the OK button.
The Hello World application should now be running on your phone. From here, you can make modify your app to whatever you want and add more features.
Conclusion
In this tutorial, I showed you how to install Android Studio and create your first app: Hello World, the simplest Android app. After following this tutorial to create your first Android app, you are on your way to a promising career in developing apps!
To learn more about Android programming, check out some of our other Android tutorials here on Envato Tuts+.


Android From Scratch: Exploring Android Sample Apps


How to Learn Android App Development: Start With These Courses and Tutorials


How to Get Started Making Android Apps


Understanding the Android App Development Kit


The Best Free To-Do List Apps for Android and How to Make One Yourself


Build a 360-Degree Video Player App With an Android App Template
Источник


