- Android Snackbar Example
- Difference between Toast and Snackbar
- Let’s Getting into Snackbar Android Example
- Create Simple Android Snackbar
- Android Snackbar with Action Callback
- Customizing the Android Snackbar
- Theming snackbars
- Implementing snackbar theming
- Android snackbar example
- Android Snackbar Example
- What is Android Snackbar
- Use Case of Android Snackbar
- 1. Normal Snackbar
- 2. Snackbar with Action
- 3. Customize your Android Snackbar
- Android Snackbar Example Application
- Conclusion
- Atomic Spin
- Atomic Object’s blog on everything we find fascinating.
- A Quick Android Snackbar Tutorial: Setup, Action Handling, and UI Customization
- Setting Up the Snackbar Example Project
- Basic Snackbar
- Snackbar Actions
- Styling the Snackbar
- Пример использования SnackBar в Android. Создаем кастомный SnackBar
- Краткое описание SnackBar в Android
- Разница между Toast и SnackBar
- Пример создания виджета SnackBar
- Пример использования SnackBar в Android
- Android Snackbar(Java/Kotlin)
- Snackbar
- Simple Snackbar
- Snackbar with Action
- Snackbar with Custom View
- Creating New Project
- Complete code in Java
Android Snackbar Example

Android Snackbar is an interesting component introduced by Material Design. Snackbars are just like Toast messages except they provide action to interact with. Snackbar will be displayed at the bottom of the screen and can be swiped off in order to dismiss them.

Difference between Toast and Snackbar
- Toast messages can be customized and printed anywhere on the screen, but a Snackbar can be only shown in the bottom of the screen.
- A Toast message doesn’t have action button, but Snackbar may have action button optionally.
- Toast message cannot be off until the time limit finish, but Snackbar can be swiped off before the time limit.
You can set how long the message will be shown using this three different values.
- Snackbar.LENGTH_LONG
- Snackbar.LENGTH_SHORT
- Snackbar.LENGTH_INDEFINITE
Let’s Getting into Snackbar Android Example
In Android Studio, Create New Project and fill all the details required to create a new project.
Open build.gradle and add Material Design dependency.
By using material dependency, you can also create components like Recyclerview, Cardview and snackbar etc. If you want to know more about other material components check below links.
Also, setup the application theme as theme.MaterialComponents.
Now, done with the project setup.
Create Simple Android Snackbar
Below is the syntax of a simple snackbar. The make function accepts three parameters. View, display message and duration of the message to be displayed.

Android Snackbar with Action Callback
You can also mention a callback interaction method using setAction() method. This allows us to take certain action when the user interacts with the snackbar.
Customizing the Android Snackbar
Snackbar comes with default white color text and #323232 background color. You can override these colors.
Theming snackbars
Snackbars support Material Theming and can be customized in terms of color and typography.
Implementing snackbar theming
Using theme attributes in res/values/styles.xml
or in code (affects only this snackbar):
Android snackbar example
Download the example from github.
Thanks for reading this post. Material design having lot of useful components like Material Button , Cardview etc. I will write more about material design in my future post.
Источник
Android Snackbar Example
In this post, we’ll learn implementation of various form of Android Snackbar widget in our application. It is an interesting component of the Material Design library. Android Snackbar is replacement of a Toast and they provide action to interact with. This blog explains Snackbar with few examples.
What is Android Snackbar
Android Snackbar used to show feedback of certain operations just like Toast. They show a message at the bottom of the device screen. Snackbar appear on the above of all other elements on the device screen and displayed for some time. They automatically disappear after timeout or after user interaction. Snackbar can be swiped off in order to dismiss them.
Use Case of Android Snackbar
Followings are use case of Snackbar in Android
- Normal Snackbar
- Snackbar with Action
1. Normal Snackbar
The below code snippet is an example of Snackbar in Android.
Snackbar class has a static method named make() that accepts three parameters. First, one is View (it used to find a suitable ancestor to display Snackbar).
Second is CharSequence or a resource ID (The text to show. Can be formatted text ) and the third one this duration (How long to display the message It can be LENGTH_SHORT, LENGTH_LONG, LENGTH_INDEFINITE or a custom duration in milliseconds.). Every parameter is annotated with @NonNull that means they should not be null.
Snackbar behaviors are best with CoordinatorLayout. They allow the Snackbar to enable behavior like swipe to dismiss, as well as automatically moving widgets just like FloatingActionButton.
Real Implementation of Snackbar
This is a real Implementation of Snackbar.
2. Snackbar with Action
Snackbar allows us to take certain actions when user interacts with the Snackbar. that allows us to take action when user interacts with the snack bar action button
TryAgainListener is
That listener handles the onClick() event of Retry button click
3. Customize your Android Snackbar
Android Snackbar does not allow set custom layout. But it follows builder pattern which allows for easy styling. Let’s see the below figure.
 material design
Snackbar provide builder methods for settings action text color like below.
Style Action Text color
Style text color, font, and text size and number of lines, etc.
Snackbar builder methods directly not provide such things. For doing that we’ll have to fetch the View first.
Now get TextView from View and apply all TextView properties as below
Background color
Android Snackbar Example Application
All conceptual part is done, let’s move to some real implementation. Open the Android Studio project and create a new project. You guys know well android redesign all design and support library and combined in two library androidx and material io
1. Open the app build.gradle add material dependencies
2. Add some color in resource file that we’ll use in this demo app
3. I have made few changes in style.xml
4. Open activity_main.xml and add below component
Inside this layout, I have added some button for display different implementation of Snackbar
5. Move to Java source file and add below code
Conclusion
In this blog, we have learned various forms of implementation of Android Snackbar. I hope you enjoyed this article. Help me by sharing this post with all your friends who learning android app development.
Источник
Atomic Spin
Atomic Object’s blog on everything we find fascinating.
A Quick Android Snackbar Tutorial: Setup, Action Handling, and UI Customization
Android Snackbars are, unfortunately, not as tasty as they sound. But they are extremely useful for showing errors or other lightweight feedback to a user–with minimal setup required. This is a brief tutorial for setting up a basic Snackbar, adding actions, and customizing its appearance.
A Snackbar is a small banner that pops up at the bottom of the user’s phone screen. It might be useful for indicating a form validation error, confirming to users that an action was taken, or alerting them to an update. In addition to providing this information, you can also offer a custom action such as “dismiss,” “retry,” “undo,” or “override.”
Setting Up the Snackbar Example Project
In this project, I have an XML file with some text and a button.
I also have a main activity, which sets an on-click listener for the button (whose ID I set as “callbackButton” in the XML file).
Your screen should look like this: 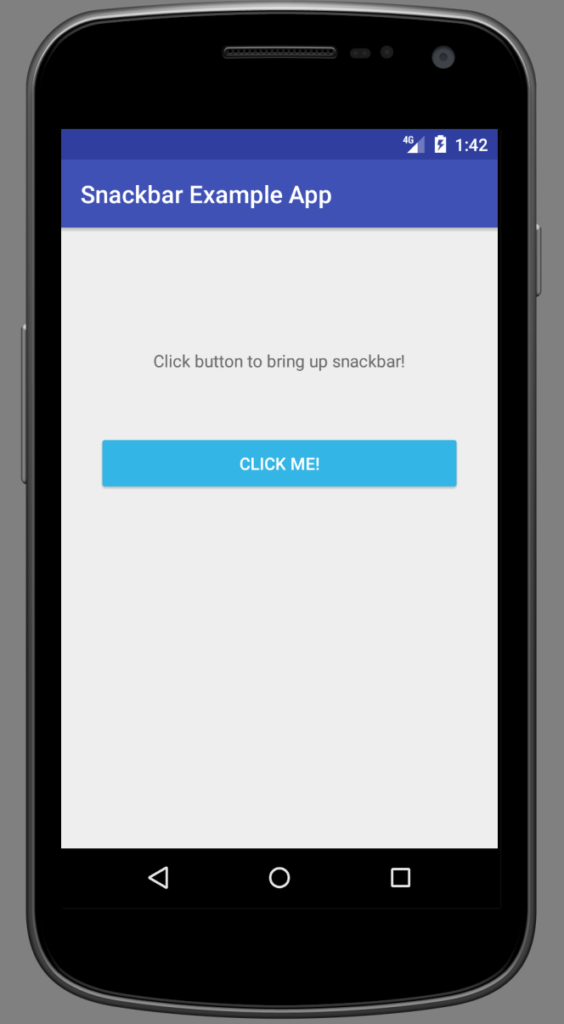
Basic Snackbar
Okay, time to add a basic Snackbar! We will call Snackbar.make(. ) and supply it with a View, a message string (or ID of string, as stored in strings.xml), and a duration. I’ve made a showSnackbar method, as we’ll be adding more Snackbar-related code in the next steps.
This is the most basic case, and it looks like this (using LENGTH_SHORT for duration). If I click the button while the Snackbar is still present, the Snackbar goes away and then pops up again.
The options for duration are Snackbar.LENGTH_SHORT , LENGTH_LONG and LENGTH_INDEFINITE . LENGTH_INDEFINITE is now included as of Android Support library version 22.2.1. Originally, SHORT and LONG were the only values, as this was meant to be a transient message to the user. A duration of LENGTH_LONG looks like this:
Snackbar Actions
Next, let’s add an action on our Snackbar. This is particularly useful in the LENGTH_INDEFINITE case; otherwise, the user is stuck with part of the screen blocked until they go to a different page. In my current project, we are using a combination of LENGTH_INDEFINITE and a “Dismiss” action for cases where a serious problem has occurred and we don’t want the user to miss a transient message.
Here, I’ve split up the original line in the showSnackbar method. I create a Snackbar with the view, message, and duration as before. Next, I set an action on it. The first parameter, the string “DISMISS,” will be displayed on the right-hand side of the Snackbar. When I click on “DISMISS,” the code in onClick() will be executed. I can click on the rest of the Snackbar with no effect.
Because the text says “DISMISS,” the onClick() simply dismisses the Snackbar. However, this can be used to (for example) retry or undo an action that just happened, or to navigate the user to a different screen.
Finally, we show() the Snackbar.
This looks like:

Styling the Snackbar
Lastly, let’s style the Snackbar. I’ve changed the font size and color of the “normal” Snackbar text, as well as the font color of the action text (“DISMISS”). You can also change the background color:
![]()
Et voilà! I hope this has been useful as an easy-to-implement way of notifying users with something less annoying than a pop-up modal.
Источник
Пример использования SnackBar в Android. Создаем кастомный SnackBar
В этом уроке мы рассмотрим пример создания и настройки разных форм виджета SnackBar в простом приложении.
Краткое описание SnackBar в Android
SnackBar — виджет библиотеки материального дизайна (Material Design) для замены всплывающего сообщения Toast .
SnackBar является простым и функциональным виджетом, который используется для отображения сообщений в нижней части приложения. К тому же этот виджет может содержать дополнительную программируемую кнопку для различных действий.
Разница между Toast и SnackBar
- Toast-сообщения можно настраивать в любом месте экрана, а SnackBar может быть показан только в нижней части экрана.
- В Toast-сообщения нет возможности добавлять элементы управления, а виджет SnackBar может содержать одну кнопку.
- Toast-сообщения нельзя закрыть до окончания указанного программистом времени, а SnackBar можно закрыть в любое время.
Пример создания виджета SnackBar
Для создания виджета SnackBar в Android необходимо использовать метод компоновки make() с тремя параметрами:
- В коде выше параметр coordLayout представляет собой корневой элемент активити.
- Параметр «https://javadevblog.com» — текстовое сообщение, которое будет показано в SnackBar
- Snackbar.LENGH_LONG — сколько времени сообщение будет показано на экране.
Вызов метода show() покажет на экране скомпонованное методом make() сообщение.
Но можно сделать и проще, если нам не нужна ссылка myAwesomeSnackbar на созданный SnackBar :
Пример использования SnackBar в Android
Создайте новый проект в Android Studio по примеру, но вместо Empty Activity используйте Basic Activity:

После создания проекта у вас будет 2 макета в папке res/layout:
Источник
Android Snackbar(Java/Kotlin)
This article is about Android Snackbar and how to use it in android application with simple examples in Java and Kotlin.
Snackbar
Snackbar is an Android Material Design component . It provide lightweight response about an operation by showing a short message at the bottom of the screen on mobile and lower left on larger devices.
A Snackbar can contain an optional action button to perform action, such as undoing an action or retrying an action.
Only one snackbar will be shown at a time.
Snackbar disappear either after a timeout or after a user interaction elsewhere on the screen (particularly after interactions that invites a new surface or activity), but can also be swiped off the screen.
Note: Snackbars work best if they are displayed inside of a CoordinatorLayout. CoordinatorLayout allows the snackbar to enable behavior like swipe-to-dismiss, as well as automatically moving widgets like FloatingActionButton.
Simple Snackbar
The below code snippet is an example of Simple Snackbar
The make function accepts three parameters:
View : Used to find a parent view to hold Snackbar’s view.
CharSequence : The text to show on snackbar.
Duration : How long to display the message. It can be LENGTH_SHORT, LENGTH_LONG, LENGTH_INDEFINITE or a custom duration in milliseconds.
- LENGTH_SHORT : Show the Snackbar for a short period of time.
- LENGTH_LONG : Show the Snackbar for a long period of time.
- LENGTH_INDEFINITE : Show the snackbar until it’s either dismissed or another snackbar is shown.
show() : Used to display the Snackbar on the screen.
Snackbar with Action
You can add an action to a Snackbar , allowing the user to respond to your message.
To add an action, use the setAction method on the object returned from make. Snackbars are automatically dismissed when the action is clicked.
setAction() : Set the action to be displayed in the Snackbar. It takes two parameters:
- text : Text to display for the action
- listener : callback to be invoked when the action is clicked.
The below code snippet is an example of how to show a snackbar with a message and an action:
Snackbar with Custom View
Android Snackbar allows you to create a customized layout for your snackbar.
To create a custom layout, define a View layout, in XML. The following snippet contains a customized layout for snackbar (saved as layout/custom_snackbar.xml):
You must use the ID of the ConstraintLayout element ( “custom_snackbar_container“) and the ID of the XML layout file “custom_snackbar.xml” to inflate the layout, as shown here:
Now pass this View object (created using custom layout) to the addView() method.
Creating New Project
1. In Android Studio , go to File ⇒ New Project , fill all the details required to create a new project and then click on finish .
2. Open build.gradle (app level), add the material dependency as shown below and then sync your project:
build.gradle
3. Rename the layout file activity_main.xml as activity_snackbar.xml and add the below code. This layout file consist of three buttons, SIMPLE SNACKBAR (To show Android standard snackbar), SNACKBAR WITH ACTION (To show snackbar with action), SNACKBAR WITH CUSTOM VIEW (To show snackbar with custom view).
activity_snackbar.xml
4. Create a new layout file custom_snackbar.xml (layout->New->Layout Resource File) and add the below code. This layout file represents the custom layout of snackbar.
custom_snackbar.xml
Complete code in Java
Create a new activity SnackbarActivityJava.java This activity contains three buttons with click listener to show the different ways of implementing the Snackbar in Java.
SnackbarActivityJava.java
When you run the application it will look like this:
Источник


