- ошибка: snap «» имеет « install-snap »выполняется изменение [дубликат]
- 2 ответа
- Solve Error: Snap “package” has “install-snap” change in progress
- error: snap “vlc” has “install-snap” change in progress
- Step 1: Find the SNAP ongoing processes
- Step 2: Note the SNAP process ID
- Step 3: Abort the “Install “package Snap task
- Step 4: Again install the package
- How to solve error: snap “packagename” has “install-snap” change in progress error
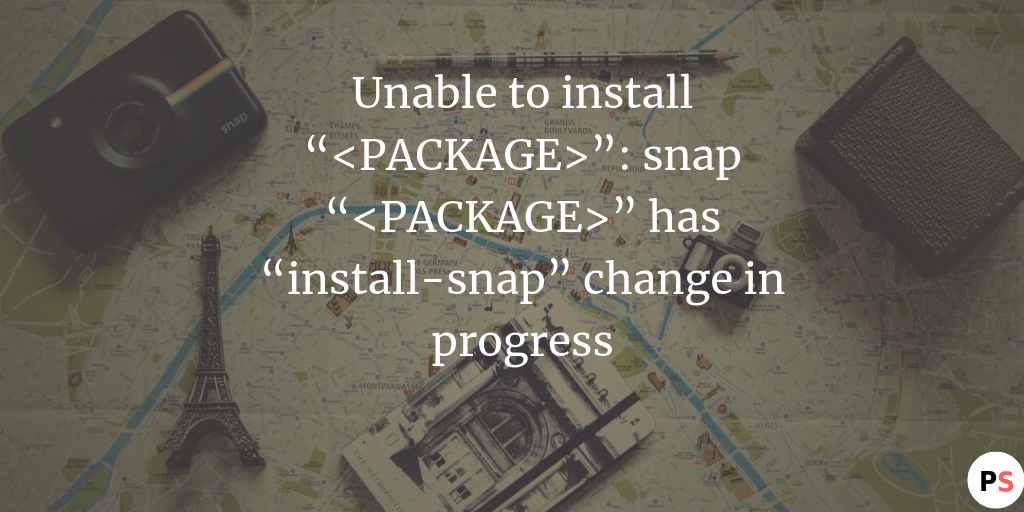
- Unable to install “package-name”: snap “package-name” has “install-snap” change in progress
- How to Install Android Studio in Ubuntu 18.04
- Method 1 (The Ubuntu Software Centre)
- Method 2 (The Snap Tool)
- Method 3 (The Zip File)
- Final setup
- About the author
- Habeeb Kenny Shopeju
ошибка: snap «» имеет « install-snap »выполняется изменение [дубликат]
Во-первых, предостережение: я понимаю, что этот вопрос касается Mate и Raspberry Pi, поэтому, если вы считаете, что это выходит за рамки этого форума, просто проигнорируйте его. Но на случай, если это может быть полезно или типично для чего-то, связанного со снимками или этой платформой, вот оно.
Я решил попробовать установить nextcloud snap. Он выдавал кучу ошибок и, казалось, завис в середине процесса (более часа). Убил и просто решил попробовать удалить. Установка выглядела так .
Когда я пытаюсь удалить nextcloud, я получаю
ошибку: не удается удалить «nextcloud»: в snap «nextcloud» происходят изменения
В первую очередь я хотел бы сделать правильно удалите оснастку и восстановите пространство из созданного ею раздела. Правильный ли термин «раздел» ??
и получил ошибку
: не могу найти изменение с идентификатором nextcloud
Я также должен отметить, что он не отображается как установленный, так как я получаю только после
$ snap list
Название Версия Rev Примечания разработчика
ubuntu-core 16.04 + 20160531.12-01 120 canonical —
Хотя это действительно отображается в .. ..
$ snap interfaces
: network nextcloud
: network-bind nextcloud
Но раздел все еще существует.
** Обновление, я снова запустил весь процесс для отладки и просто оставил его после команды «snap abort 1». В какой-то момент кажется, что что-то завершилось в фоновом режиме, потому что lsblk ничего не показывает, а запрос интерфейсов привязки ничего не показывает.
2 ответа
Команда snap на самом деле состоит из двух компонентов, сервер и клиент. Вы взаимодействуете с клиентом. Когда вы отменили операцию установки на стороне клиента, это единственное место, где вы ее отменили — клиент. Поэтому он перестал показывать вам, что он устанавливал, но все равно устанавливал (это ошибка ). (Обновление: Эта ошибка была исправлена в snapd v2.20.1.)
На стороне сервера все это происходит в «изменениях». Вы можете прочитать о них подробнее здесь, но для своих целей вы хотите просто прервать это специфическое изменение. Для этого запустите:
Обратите внимание на ID, 203, и тот факт, что это «Делаю» прямо сейчас. Чтобы прервать эту операцию, вы используете ID изменения:
И изменение должно остановиться. Однако, я должен сказать, что тот факт, что изменение «заморожено» не сулит ничего хорошего для вашей возможности прервать его. Если это не сработает, возможно, попробуйте перезагрузиться. Если это до сих пор не, кажется, исправили его, и вы в порядке, потеряв все свои оснастки и их данные, вы можете полностью сбросить состояние оснастки с помощью этот сценарий .
Источник
Solve Error: Snap “package” has “install-snap” change in progress
Snap is a universal package manager developed by the Ubuntu’s canonical team to easily install software and packages regardless of the Linux operating system the users are using. It is possible because SNAP creates its own file to store the content of the packages. This means it doesn’t matter the system is using the RPM or APT package manager; the installation process and usage will be the same for both.
However, if you are installing any package using the SNAP and anyhow you deliberately stopped the process or accidentally it happened or the system lost the internet connection. Then when you try to install the package using the snapd, you would get an error. For example, I was installing VLC and suddenly, I lost the connection, however, the installation was still processing. So, when again I tried to install the same, I got:
error: snap “vlc” has “install-snap” change in progress

So, if you are facing the same problem then here are the steps to solve this “install-snap” change in progress error:
Step 1: Find the SNAP ongoing processes
The first thing we need to know is what are the processes those keeping the SNAP busy? For that simply run command:
The above command will not only show the live process but also that are ended with or without some error.

Step 2: Note the SNAP process ID
In the above step’s screenshot, you can see the all process along with their status and ID. Now, you have to find out the package which is making our snap busy. For that simply select the one with “Doing” in the status. For example, in the above image, we have the VLC process of SNAP with Doing status. Thus, we note its ID which is “14“. In the same way, find the ID of tasks in your system.
Step 3: Abort the “Install “package Snap task
Finally, we have the ID or IDs, its time to abort them one by one. For that the command is:
For example, in our case the VLC ID is 14, therefore the command will be:
In this way, we can end all the active process IDs of the SNAP.
Step 4: Again install the package
After forcefully ended the SNAP process, you can install the package either from the Software Center or directly from the command terminal using the SNAPD. This time you will not get any error.
Источник
How to solve error: snap “packagename” has “install-snap” change in progress error
by Manikandan · January 7, 2020
Some times when you try to install the snap packages via your terminal app, you will get error: snap “packagename” has “install-snap” change in progress error. This is because of the incomplete or broken snap installation. This will happen during the installation of snap app, you stop the installation process accidentally or closed by system freeze or any other reason.
For example if you try to install the talesofmajeyal snap package and you close your terminal window accidentally. And after some time again you try to install it then you will get
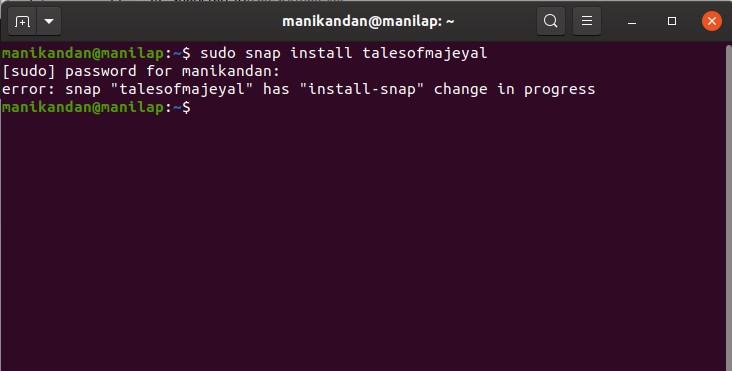
because of incomplete or broken talesofmajeyal snap installation and snap still working in the background.
Fix error: snap “packagename” has “install-snap” change in progress:
You can easily fix this error by following this easy tutorial. Open your terminal and type the below command in terminal and see the results.
Here the output is

Note that id in this output . Here its 323. You need to abort that snap operation by running the below command.
After this try to install it again. If you still get that error restart your system and try again. And try to refresh your package also.
Источник
Unable to install “package-name”: snap “package-name” has “install-snap” change in progress

May 3, 2019 · 2 min read
Please read full story @codementor.tech
Ubuntu 18.04/19.04 LTS Xenial Xerus comes with the new style of package management called Snappy or in-short snap. Snappy packages are transactional packages developed by Canonical for Ubuntu.
Due to its transactional nature, snap packages can be used in across Linux Distributions. Snap packages are very useful due to its atomic update in nature. The packages can be found and installed via command line.
The snap packages also can be d o wnloaded from websites as .snap files and it contains all the dependencies needed inside the .snap package. The installed snap softwares are installed in their respective folders and doesn’t interfere with rest of the system.
That means, if you have installed a software via typical apt-get install xyz and installed the same software via installing xyz.snap, then both the version of the same software can co-exist in your PC without interfering with each other.
Let’s talk about error “snap “” has “install-snap” change in progress”.
Here, In my case i wanted to download or install “dbeaver-ce” but i faced this error “snap dbeaver-ce has insatll-snao change in progress.” so i started google for solution and after spending few hours, I finally came with the proper solution.
Snap is probably still working on something in the background (or at least it thinks so). Open a terminal and run snap changes so see a list of ongoing changes.
You can abort ongoing change(s):
Then you should be able to successfully install dbeaver-ce through the software center.
Источник
How to Install Android Studio in Ubuntu 18.04
Android Studio demands a lot of system resources, therefore your machine needs to meet up to a couple of requirements for it to run smoothly.
Here are some important specifications your machine needs to meet:
- 64-bit distribution capable of running 32-bit applications
- GNU C Library (glibc) 2.19 or later
- 3 GB RAM minimum, 8 GB RAM recommended; plus 1 GB for the Android Emulator
- 2 GB of available disk space minimum,
- 4 GB Recommended (500 MB for IDE + 1.5 GB for Android SDK and emulator system image)
- 1280 x 800 minimum screen resolution
Now that we are done checking the necessary details, we can proceed with the installation.
Method 1 (The Ubuntu Software Centre)
The Ubuntu Software Centre remains the easiest place to install ubuntu software from. However, this is only the case when the desired software exists on the software store.
To install Android Studio from the Ubuntu Software Centre, simply search for Android Studio in the search box and you should get a couple of results.
If you are able to find the software,its installation is as easy as clicking the install button. You would get a password prompt to confirm the installation process. After a successful installation process, you should have the Android Studio icon available in your application tray.
If it installed successfully, you can skip the remaining methods and checkup the final setup section.
Method 2 (The Snap Tool)
The Snap tool can come in very handy for installation of software packages, especially when available.
Snaps are containerized software packages that make installation of software easy for users. You do not have to modify any files or type in any scary commands.
However, you need to have Snap installed on your machine in the first place.
To install Snap, use the command below:
After installing Snap successfully, you can proceed to install Android Studio with the command below:
This would take some time, therefore you have to wait for some minutes—go get a cup of coffee. It is expected to install successfully, but if for some reason installation fails due to an error like the one below:
error: This revision of snap “android-studio” was published using classic confinement and thus may perform arbitrary system changes outside of the security sandbox that snaps are usually confined to, which may put your system at risk.
You would have to add the –classic parameter to the command as seen below:
If it installed successfully, you can skip the remaining methods and checkup the final setup section.
Method 3 (The Zip File)
This is one trusted method of installing Android Studio. However, it may take some time as well as patience typing in the commands.
First: We would have to install the Java Development Kit from Oracle.
Installing the Java Development Kit requires some prerequisites which can be installed with the commands below:
Now we can proceed with installing the JDK with the command below:
This would take a while, however you should stay close by. An Oracle License agreement prompt would come up asking you to confirm an agreement to their terms.
The prompt is usually about four lines long, with an option for you to choose “Yes” or “No”. Choose “Yes” and then proceed.
After a successful installation, you can check Java version with:
Also you can check the Java compiler’s version with:
Next, we change directories to the Downloads directory and download the Android Studio zip file there. This can be done with the commands below:
Just like our previous downloads, this could take some time. After downloading, unzip the file into the /opt directory where our software files stay with the following command:
You should now have your android-studio directory unzipped in the /opt directory.
To run android studio, go to the bin directory in the unzipped android studio directory and run the
It should run fine, however close the launched application—do not proceed with the setup just yet. You can symlink the studio.sh file to the /bin directory, so you can simply run android studio from any directory on the commandline.
You can do that with the command below:
However you won’t be able to access Android Studio from your list of applications just yet, we would cover this in the final setup.
Final setup
After finishing installations, launch Android Studio again—if you used method three, type android-studio in the terminal—and proceed with the Android Studio Setup Wizard.
Running the setup wizard would take some time as the application is expected to make some other downloads.
After completion of all possible downloads, you should download the necessary SDK to develop software for your target android versions. It is expected that this comes up by default, but if it doesn’t you can download it through the following steps:
Click on “File”, then “Settings”, then “Android SDK”. You would see the Android SDKs for the different versions of android you plan to build for, then choose the ones you wish to download.
For those who installed using the third method, you can add the desktop icon to your app tray now. By clicking “Tools” and then “Create Desktop Entry.”
There you have it, Android Studio installed on your Ubuntu 18.04.
About the author

Habeeb Kenny Shopeju
I love building software, very proficient with Python and JavaScript. I’m very comfortable with the linux terminal and interested in machine learning. In my spare time, I write prose, poetry and tech articles.
Источник


