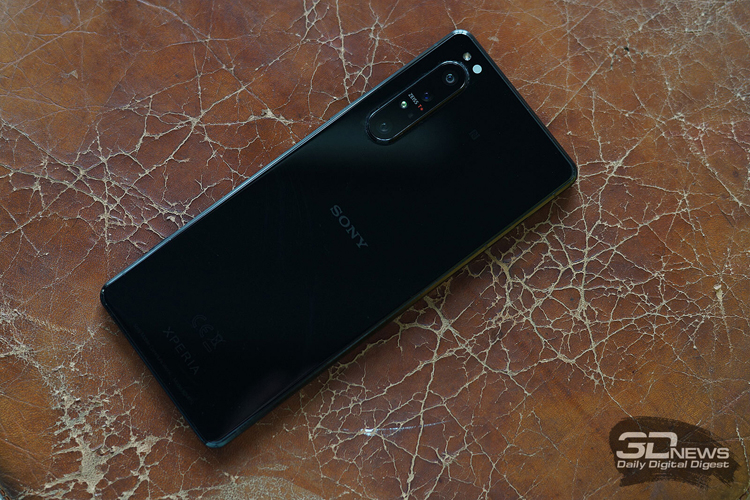
- Как прошить Sony Xperia XZ3. Обновляемся до Android 11, 10, Pie 9, Oreo 8.1
- Надо ли обновлять прошивку и тратить время
- Инструкция как установить прошивку на Sony Xperia XZ3
- Скачать прошивку
- Как получить root права
- Sony раскрыла график обновления смартфонов Xperia до Android 11
- [SODP][ROM][AOSP][XZ2, XZ2C, XZ3] SonyAOSP 11 [BETA]
- Breadcrumb
- MartinX3
- Sony [*Kim Jong*Un]official OD Chat
- MartinX3
- MartinX3
- Download and Install Pixel Experience 11 on Sony Xperia XZ3 DSDS [Android 11]
- Noteworthy: Pixel Experience 11 for Sony Xperia XZ3 DSDS with Android 11
- Get Ready to Install the Pixel Experience 11
- How to install Pixel Experience 11 for Sony Xperia XZ3 DSDS
- Check Your Smartphone Supports Project Treble (Optional)
- Basic Pre-Requirements
- Downloads
- How to Unlock Bootloader on Sony Xperia XZ3 DSDS
- How to install TWRP on Smartphone
- Here is the guide to follow the instructions:- Quick Guide
Как прошить Sony Xperia XZ3. Обновляемся до Android 11, 10, Pie 9, Oreo 8.1

Какой неудачник сказал что нельзя прошить Sony Xperia XZ3? Что за чушь?! Ещё как можно, при этом особо не напрягая мозги и не сжигая нервы, если использовать заранее подготовленную нами инструкцию.
Надо ли обновлять прошивку и тратить время

Основной смысл обновлений в том, чтобы искоренить баги, проблемы и косяки, коих в операционной системе Android предостаточно:
- Например, зависание или краш системных приложений.
- Замыленные углы снимков при хорошей камере.
- Смартфон не включается совсем.
- Телефон выключается и перезагружается когда захочет.
- При включении Wi-Fi батарея садится за пару часов – проблема с энергопотреблением.
- Глюков может быть масса, бывают случаи когда телефон сам начинает звонить на первый номер из телефонной книги. Вряд ли кто доволен таким поведением.
Есть и обычные энтузиасты, которые любят всё новое и хотят протестировать последний Android.
Инструкция как установить прошивку на Sony Xperia XZ3
Используя инструкцию вы соглашаетесь с данным документом. На всякий случай сделайте бэкап файлов, которые вам дороги!
- Зарядите телефон не менее чем на 40%. Это важно.
- Для того чтобы прошить устройство скачаем приложение TWRP Manager, загрузить его можно самостоятельно или взять в архиве с прошивкой, которую вы выберете ниже.
- Устанавливаем TWRP Manager на Android (установка такая же простая как и у любого приложения)
- Теперь скачайте файл прошивки, поместив его на карту памяти смартфона. Сам файл находится внизу статьи, для начала можете дочитать инструкцию.
- Запускаем TWRP recovery mode – выключаем телефон, потом зажимаем одновременно кнопку включения и кнопку громкости вверх, в скором времени на экране вы увидите надпись «recovery» и появится меню как на скриншоте ниже.


Всё! Теперь у вас новенькая прошивка и новые возможности.
Скачать прошивку
Наше мнение не претендует на истину первой инстанции, однако хотелось бы порекомендовать, устанавливать Android как минимум седьмой версии или выше, потому что всё что ниже уже морально устарело.
- Android 9.0 или просто пирог – новая ступень в развитии мобильных операционных систем, верх гениальности заморских программистов! URL: yourtopfile.info/android9pie
- 8.1 Орео – бывший верх гениальности тех же самых заморских программистов. URL: yourtopfile.info/android8oreo
- Семёрка Нуга (Nougat) – хорошая операционная система для среднего или бюджетного класса железа. URL: yourtopfile.info/android7nougat
- Шестёрка Маршмеллов – установить можно только в случае ностальгии по шестому Андроиду, в ином случае не надо, то же самое можно сказать и про пятую версию. URL: yourtopfile.info/android6
- Android 10 Q 2019. URL: yourtopfile.info/android10
- Android 11 2020. URL: yourtopfile.info/android11
Как получить root права
В сфере получения root прав есть две универсальные программы, (универсальные потому что поддерживают очень много устройств), получающие root за 1 клик, это ZYKURoot 2.2 – (сайт zykuroot.info), может версия есть и более новая, это на сайте надо смотреть


Инструкции к ним в общем то и не нужны, всё как обычно, подсоединяем телефон к компьютеру и нажимаем Root. Дальше сидим и ждём что скажет программа.
Источник
Sony раскрыла график обновления смартфонов Xperia до Android 11
Смартфоны Sony Xperia уже с текущего месяца начнут получать обновление операционной системы до новейшей версии Android 11. Первыми апдейт смогут загрузить обладатели флагманского аппарата Xperia 1 II, с подробным обзором которого можно ознакомиться в нашем материале.
Отмечается, что вместе с переводом на платформу Android 11 модель Xperia 1 II получит функцию записи видеоматериалов 4K HDR со скоростью 120 кадров в секунду. Возможно, будут реализованы и другие нововведения.
В конце января станет доступен апдейт Android 11 ещё для двух смартфонов — Xperia 5 II и Xperia 10 II. А с февраля перейти на эту программную платформу смогут владельцы Xperia 1 и Xperia 5.

Между тем в первом квартале наступающего года, как ожидается, дебютируют как минимум три новых смартфона Sony — модели Xperia L5 и Xperia 10 III, а также новый флагман Xperia 1 III. Логично предположить, что эти устройства будут поставляться с операционной системой Android 11 «из коробки».
По оценкам Gartner, в третьем квартале текущего года на мировом рынке было поставлено 366,7 млн умных сотовых аппаратов. Это на 5,7 % меньше по сравнению с результатом прошлогодней давности.
Источник
[SODP][ROM][AOSP][XZ2, XZ2C, XZ3] SonyAOSP 11 [BETA]
Breadcrumb

MartinX3
Recognized Contributor
This is the AOSP ROM for the Sony Xperia XZ2 (akari), XZ2C (apollo) and XZ3 (akatsuki)
This ROM build will always mainly based on Sony AOSP Code and maybe include cherry-picks.
I plan to make monthly builds, after a new security patch level, if there is no need for a critical hotfix.

Sony [*Kim Jong*Un]official OD Chat
XDA:DevDB Information
AOSP, ROM for the Xperia XZ2
ROM OS Version: Android 10
ROM Kernel: Linux 4.x
ROM Firmware Required: Latest Stock Firmware
Based On: AOSP
Version Information
Status: Beta
Current Beta Version: 11
Beta Release Date: 2020-10-23
Created 2020-10-23
Last Updated 2020-10-23
MartinX3
Recognized Contributor
Download ROM:
- Android File Host
- FTP-Server from@dhacke
Download Drivers:
- OEM (Tama) binaries
- Please use the the OEM build which came before my last release, if you getting problems like a not bootable or crashing device.
GCAM Camera App:
- Suggested GCams
Installation with a recovery:
- fastboot flash oem _a oem_*.img (Only needed until the device receives mainline support by SODP)
- Flash the ROM in a recovery
- Reboot into recovery just to make sure you’re on the new slot
- OpenGapps (Requires TWRP or a custom ROM recovery)
- Dual Sim Patcher (Requires TWRP or a custom ROM recovery)
- (In case a modification prevents your device from booting) fastboot —disable-verity —disable-verification flash vbmeta vbmeta.img
Flash the ROM without a recovery:
- Extract the payload.bin from the .zip file
- Extract the .img files with the Playload Dumper
- fastboot flash boot boot.img
- fastboot flash dtbo dtbo.img
- fastboot —disable-verity —disable-verification flash vbmeta vbmeta.img
- fastboot -w (Wipes your internal storage and the userdata)
- Now you got the AOSP recovery, to please continue with the normal installation
MartinX3
Recognized Contributor
Revoked the r43 buiild because of error
AndroidRuntime: java.lang.IllegalArgumentException: invokeOemRilRequestRaw failed with rc = -2
We need to wait until the following PRs get merged
Источник
Download and Install Pixel Experience 11 on Sony Xperia XZ3 DSDS [Android 11]
![]()
Pixel Experience is a popular custom ROM and is supported by several devices across the globe. They are among the most popular firmware distribution communities that boost performance and deliver a stock Android. Today We Guide ” install Pixel Experience 11 for Sony Xperia XZ3 DSDS with Android R.”
Whereas if you wonder why we need a custom ROM if we already have the manufacturer’s OS. However, there is always specific lifeline support from manufacturing and delays on the latest Android upgrade rollout. Several people were excited to experience the latest Android Version.
Havoc OS finally extended the support for some new devices, including the Sony Xperia XZ3 DSDS. Today we will help you with this Complete guide to download and install Havoc OS for Sony Xperia XZ3 DSDS with Android 11.
Noteworthy: Pixel Experience 11 for Sony Xperia XZ3 DSDS with Android 11
This guide helps you to enhance your android experience with Evolution X. We will share your complete guide alongside the download link. Even we also mention the requirements and steps to the installation process.
Get Ready to Install the Pixel Experience 11
Your device must have the bootloader unlocked, and you have installed the TWRP Recovery. If you have done that, Let downloaded and installed Evolution X for Sony Xperia XZ3 DSDS.
How to install Pixel Experience 11 for Sony Xperia XZ3 DSDS
We recommend you to an instant complete article before you install Evolution X on your Sony Xperia XZ3 DSDS. So you would not face any problems while installing Evolution X.
Check Your Smartphone Supports Project Treble (Optional)
- Download and Install the checks the compatibility of project treble. Download Here
- Now, Run the app
- If you are green in the test, then you are good to go.
- Also, see if you are green for the seamless system update; otherwise, you cannot proceed to install this ROM.
Basic Pre-Requirements
- Enable the USB Debugging on your Sony Xperia XZ3 DSDS.
- Download and Install Adb and Fastboot Driver: HOW TO INSTALL ADB AND FASTBOOT
- Then, Download and Manually Install Android USB Drivers on your PC
- Download ADB for Windows
- ADB for Mac Download
- Download ADB for Linux
Downloads
| Download ROM (Pixel Experience 11 with GApps Included) | Download Here |
| Download TWRP Recovery | Download Here |
Note: Don’t Flash Gapps, Already Included in ROM
How to Unlock Bootloader on Sony Xperia XZ3 DSDS
- Start with Enabling Developer mode On Sony Xperia XZ3 DSDS
- Open the settings on your Mobile, and select “About.”
- Tap seven times on “Build number.”
- Go Back to Settings, And Search “Developer option,” and Open It.
- Now, Enable OEM Unlock and power Off your mobile.
- Now, open your smartphone into a Download mode by pressing and holding the volume down button and power button.
- Enter the following command to reboot into bootloader mode.
“adb reboot bootloader.” - Now perform the command below to unlock the bootloader of Any Lenovo Smartphone.
“fastboot OEM unlock” Or “fastboot flashing unlock.” - Now, press Volume Up to unlock the bootloader.
- After that, Restart your Mobile.
How to install TWRP on Smartphone
- First, Switch Off your Smartphone
- Open your Mobile Fastboot
- Using power off your device and then hold the Volume Down + Power button
- Now, Open the ADB folder on your PC and Laptop.
- Then, select the “Address Bar” in the ADB File and type “Cmd” after hitting the enter button. Alternatively, pressing Shift + Right Key and Select open Power shell Window Here.
- Now, follow these Command in Terminal
|
Congratulations, you have successfully installed the TWRP File on Smartphone.
Here is the guide to follow the instructions:- Quick Guide
- You need to Reboot your Device in TWRP Mode.
BOOT MODES - For Recovery
First, Power off your device, hold the Volume Down + Power button and then navigate using the volume rocker.
- For Recovery
- In TWRP Mode, you need to Wipe cache, Data, and Dalvik cache. [Note: you don’t have to wipe the Vendor] (If you format instead of wipe cache, you have to reboot the recovery, or you might get an error/issue.)
- Now, Click Install and Navigate Pixel Experience 11 custom ROM After Flash it on your devices.
- Reboot your device once installations are successful.
- That’s it, and You can now enjoy the Pixel Experience 11.
Hopefully, We believe you have successfully installed Pixel Experience 11 on your Sony Xperia XZ3 DSDS. Thanks for being with us. Don’t forget to share the bugs, so we can share with developers to fix those issues in the comment section below.
Источник


