- Android Emulator
- In this document
- See also
- Keyboard Commands
- Command Line Parameters
- Creating an Android Emulator
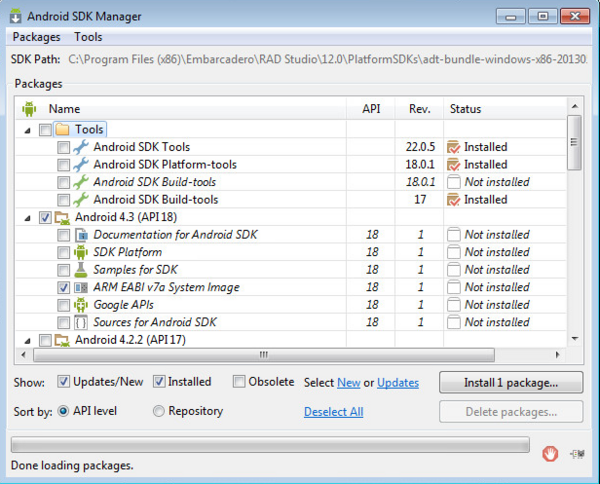
- Installing an Android System Image (Required)
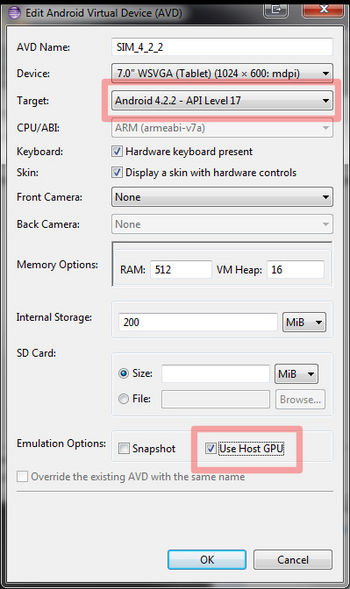
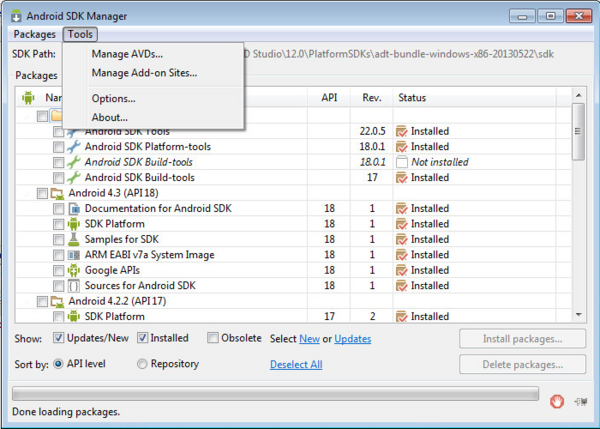
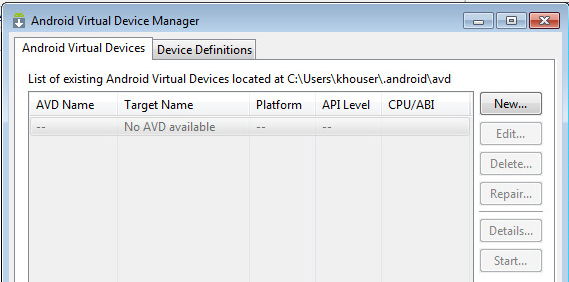
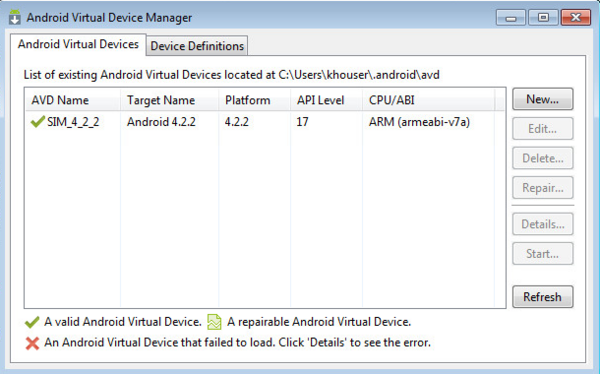
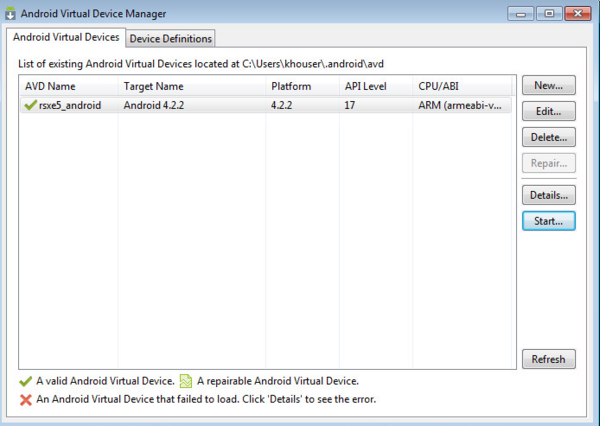
- Creating an Android Emulator Using the Android Virtual Device Manager
- Creating an Android Emulator Using the Command Line
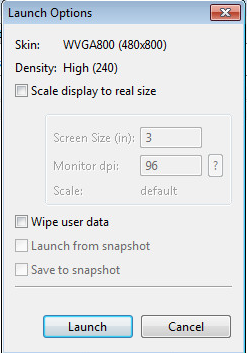
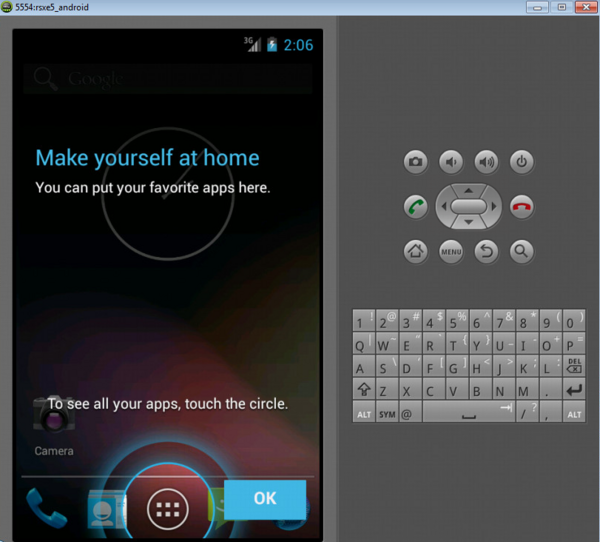
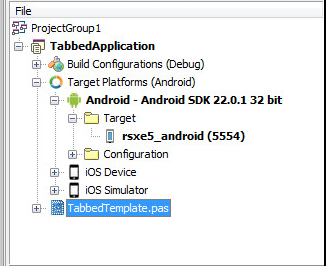
- Starting an Android Emulator
Android Emulator
In this document
See also
The Android SDK includes a mobile device emulator — a virtual mobile device that runs on your computer. The emulator lets you develop and test Android applications without using a physical device.
This document is a reference to the available command line options and the keyboard mapping to device keys. For a complete guide to using the Android Emulator, see Using the Android Emulator.
Keyboard Commands
Table 1 summarizes the mappings between the emulator keys and the keys of your keyboard.
Table 1. Emulator keyboard mapping
| Emulated Device Key | Keyboard Key |
|---|---|
| Home | HOME |
| Menu (left softkey) | F2 or Page-up button |
| Star (right softkey) | Shift-F2 or Page Down |
| Back | ESC |
| Call/dial button | F3 |
| Hangup/end call button | F4 |
| Search | F5 |
| Power button | F7 |
| Audio volume up button | KEYPAD_PLUS, Ctrl-F5 |
| Audio volume down button | KEYPAD_MINUS, Ctrl-F6 |
| Camera button | Ctrl-KEYPAD_5, Ctrl-F3 |
| Switch to previous layout orientation (for example, portrait, landscape) | KEYPAD_7, Ctrl-F11 |
| Switch to next layout orientation (for example, portrait, landscape) | KEYPAD_9, Ctrl-F12 |
| Toggle cell networking on/off | F8 |
| Toggle code profiling | F9 (only with -trace startup option) |
| Toggle fullscreen mode | Alt-Enter |
| Toggle trackball mode | F6 |
| Enter trackball mode temporarily (while key is pressed) | Delete |
| DPad left/up/right/down | KEYPAD_4/8/6/2 |
| DPad center click | KEYPAD_5 |
| Onion alpha increase/decrease | KEYPAD_MULTIPLY(*) / KEYPAD_DIVIDE(/) |
Command Line Parameters
The emulator supports a variety of options that you can specify when launching the emulator, to control its appearance or behavior. Here’s the command-line syntax of the options available to the emulator program:
Table 2. Emulator command line parameters
| Category | Option | Description | Comments |
|---|---|---|---|
| AVD | -avd or @ | Required. Specifies the AVD to load for this emulator instance. | You must create an AVD configuration before launching the emulator. For information, see Managing AVDs with AVD Manager. |
| Disk Images | -cache | Use as the working cache partition image. | An absolute or relative path to the current working directory. If no cache file is specified, the emulator’s default behavior is to use a temporary file instead. For more information on disk images, use -help-disk-images . |
| -data | Use as the working user-data disk image. | Optionally, you can specify a path relative to the current working directory. If -data is not used, the emulator looks for a file named userdata-qemu.img in the storage area of the AVD being used (see -avd ). | Search for the user-data disk image specified in -data in | is a path relative to the current working directory. If you do not specify -datadir , the emulator looks for the user-data image in the storage area of the AVD being used (see -avd ) For more information on disk images, use -help-disk-images . —> -image | Use as the system image. | Optionally, you can specify a path relative to the current working directory. Default is /system.img. |
| -initdata | When resetting the user-data image (through -wipe-data ), copy the contents of this file to the new user-data disk image. By default, the emulator copies the /userdata.img . | Optionally, you can specify a path relative to the current working directory. See also -wipe-data . For more information on disk images, use -help-disk-images . | |
| -nocache | Start the emulator without a cache partition. | See also -cache . | |
| -ramdisk | Use as the ramdisk image. | Default value is /ramdisk.img . Optionally, you can specify a path relative to the current working directory. For more information on disk images, use -help-disk-images . | |
| -sdcard | Use as the SD card image. | Default value is /sdcard.img . Optionally, you can specify a path relative to the current working directory. For more information on disk images, use -help-disk-images . | Search for system, ramdisk and user data images in . | is a directory path relative to the current working directory. |
| -wipe-data | Reset the current user-data disk image (that is, the file specified by -datadir and -data , or the default file). The emulator deletes all data from the user data image file, then copies the contents of the file at -inidata data to the image file before starting. | See also -initdata . For more information on disk images, use -help-disk-images . | |
| Debug | -debug | Enable/disable debug messages for the specified debug tags. | is a space/comma/column-separated list of debug component names. Use -help-debug-tags to print a list of debug component names that you can use. |
| -debug- | Enable/disable debug messages for the specified debug tag. | Use -help-debug-tags to print a list of debug component names that you can use in . | |
| -debug-no- | Disable debug messages for the specified debug tag. | ||
| -logcat | Enable logcat output with given tags. | If the environment variable ANDROID_LOG_TAGS is defined and not empty, its value will be used to enable logcat output by default. | |
| -shell | Create a root shell console on the current terminal. | You can use this command even if the adb daemon in the emulated system is broken. Pressing Ctrl-c from the shell stops the emulator instead of the shell. | |
| -shell-serial | Enable the root shell (as in -shell and specify the QEMU character device to use for communication with the shell. | must be a QEMU device type. See the documentation for ‘-serial dev‘ at http://wiki.qemu.org/download/qemu-doc.html for a list of device types. Here are some examples:
| |
| -show-kernel | Display kernel messages. | ||
| -trace | Enable code profiling (press F9 to start), written to a specified file. | ||
| -verbose | Enable verbose output. | Equivalent to -debug-init . You can define the default verbose output options used by emulator instances in the Android environment variable ANDROID_VERBOSE. Define the options you want to use in a comma-delimited list, specifying only the stem of each option: -debug- . Here’s an example showing ANDROID_VERBOSE defined with the -debug-init and -debug-modem options: For more information about debug tags, use . | |
| Media | -audio | Use the specified audio backend. | |
| -audio-in | Use the specified audio-input backend. | ||
| -audio-out | Use the specified audio-output backend. | Use device or WAV file for audio input. | |
| -noaudio | Disable audio support in the current emulator instance. | ||
| -radio | Redirect radio modem interface to a host character device. | ||
| -useaudio | Enable audio support in the current emulator instance. | Enabled by default. | |
| Network | -dns-server | Use the specified DNS server(s). | The value of must be a comma-separated list of up to 4 DNS server names or IP addresses. |
| -http-proxy | Make all TCP connections through a specified HTTP/HTTPS proxy | The value of can be one of the following: The http:// prefix can be omitted. If the -http-proxy command is not supplied, the emulator looks up the http_proxy environment variable and automatically uses any value matching the format described above. | |
| -netdelay | Set network latency emulation to . | Default value is none . See the table in Network Delay Emulation for supported values. | |
| -netfast | Shortcut for -netspeed full -netdelay none | ||
| -netspeed | Set network speed emulation to . | Default value is full . See the table in Network Speed Emulation for supported values. | |
| -port | Set the console port number for this emulator instance to . | The console port number must be an even integer between 5554 and 5584, inclusive. +1 must also be free and will be reserved for ADB. | |
| -report-console | Report the assigned console port for this emulator instance to a remote third party before starting the emulation. | must use one of these formats: to view more information about this topic. | |
| System | -cpu-delay | Slow down emulated CPU speed by | Supported values for are integers between 0 and 1000. Note that the does not correlate to clock speed or other absolute metrics — it simply represents an abstract, relative delay factor applied non-deterministically in the emulator. Effective performance does not always scale in direct relationship with values. |
| -gps | Redirect NMEA GPS to character device. | Use this command to emulate an NMEA-compatible GPS unit connected to an external character device or socket. The format of must be QEMU-specific serial device specification. See the documentation for ‘serial -dev’ at http://wiki.qemu.org/download/qemu-doc.html. | |
| -nojni | Disable JNI checks in the Dalvik runtime. | ||
| -qemu | Pass arguments to the qemu emulator software. |