- Полный список
- Запуск другой Activity — второго окна android-приложения
- В этом уроке
- Вы также должны прочитать
- Ответить на кнопку Отправить
- Создать Intent
- Отправка intent в другие приложения
- Запуск второй Activity
- Создание второй Activity
- Для создания новой Activity в Android Studio:
- Для создания новой Activity в Eclipse:
- 2.1: Create and Start Activities
- What you should already KNOW
- What you will LEARN
- What you will DO
- App Overview
- Task 1. Create the TwoActivities project
- 1.1 Create the TwoActivities project
- 1.2 Define the layout for the main activity
- 1.3 Define the button action
- Task 2. Create and launch the second activity
- 2.1 Create the second activity
- 2.2 Modify the Android manifest
- 2.3 Define the layout for the second activity
- 2.4 Add an intent to the main activity
- Coding challenge
- Task 3. Send data from the main activity to the second activity
- 3.1 Add an EditText to the main activity layout
- 3.2 Add a string to the main activity’s intent extras
- 3.3 Add a TextView to the second activity for the message
- 3.4 Modify the second activity to get the extras and display the message
- Task 4. Return data back to the main activity
- 4.1 Add an EditText and a Button to the second activity layout
- 4.2 Create a response intent in the second activity
- 4.3 Add TextViews to the main activity layout to display the reply
- 4.4 Get the reply from the intent extra and display it
- Solution code
- Coding challenge
- Summary
Полный список
В этом уроке мы:
— создадим и вызовем второе Activity в приложении
Урок был обновлен 12.06.2017
Мы подобрались к очень интересной теме. На всех предыдущих уроках мы создавали приложения, которые содержали только один экран (Activity). Но если вы пользуетесь смартфоном с Android, то вы замечали, что экранов в приложении обычно больше. Если рассмотреть, например, почтовое приложение, то в нем есть следующие экраны: список аккаунтов, список писем, просмотр письма, создание письма, настройки и т.д. Пришла и нам пора научиться создавать многоэкранные приложения.
Application/Library name: TwoActivity
Module name: p0211twoactivity
Package name: ru.startandroid.p0211twoactivity
Откроем activity_main.xml и создадим такой экран:
На экране одна кнопка, по нажатию которой будем вызывать второй экран.
Открываем MainActivity.java и пишем код:
Мы определили кнопку btnActTwo и присвоили ей Activity в качестве обработчика. Реализация метода onClick для кнопки пока заполнена частично — определяем, какая кнопка была нажата. Чуть позже здесь мы будем вызывать второй экран. Но сначала этот второй экран надо создать.
Если помните, при создании проекта у нас по умолчанию создается Activity.
От нас требуется только указать имя этого Activity – обычно мы пишем здесь MainActivity. Давайте разбираться, что при этом происходит.
Мы уже знаем, что создается одноименный класс MainActivity.java – который отвечает за поведение Activity. Но, кроме этого, Activity «регистрируется» в системе с помощью манифест-файла — AndroidManifest.xml.

Давайте откроем этот файл:
Нас интересует тег application. В нем мы видим тег activity с атрибутом name = MainActivity. В activity находится тег intent-filter с определенными параметрами. Пока мы не знаем что это и зачем, сейчас нам это не нужно. Забегая вперед, скажу, что android.intent.action.MAIN показывает системе, что Activity является основной и будет первой отображаться при запуске приложения. А android.intent.category.LAUNCHER означает, что приложение будет отображено в общем списке приложений Android.
Т.е. этот манифест-файл — это что-то типа конфигурации. В нем мы можем указать различные параметры отображения и запуска Activity или целого приложения. Если в этом файле не будет информации об Activity, которое вы хотите запустить в приложении, то вы получите ошибку.
Android Studio при создании модуля создала MainActivity и поместила в манифест данные о нем. Если мы надумаем сами создать новое Activity, то студия также предоставит нам визард, который автоматически добавит создаваемое Activity в манифест.
Давайте создадим новое Activity
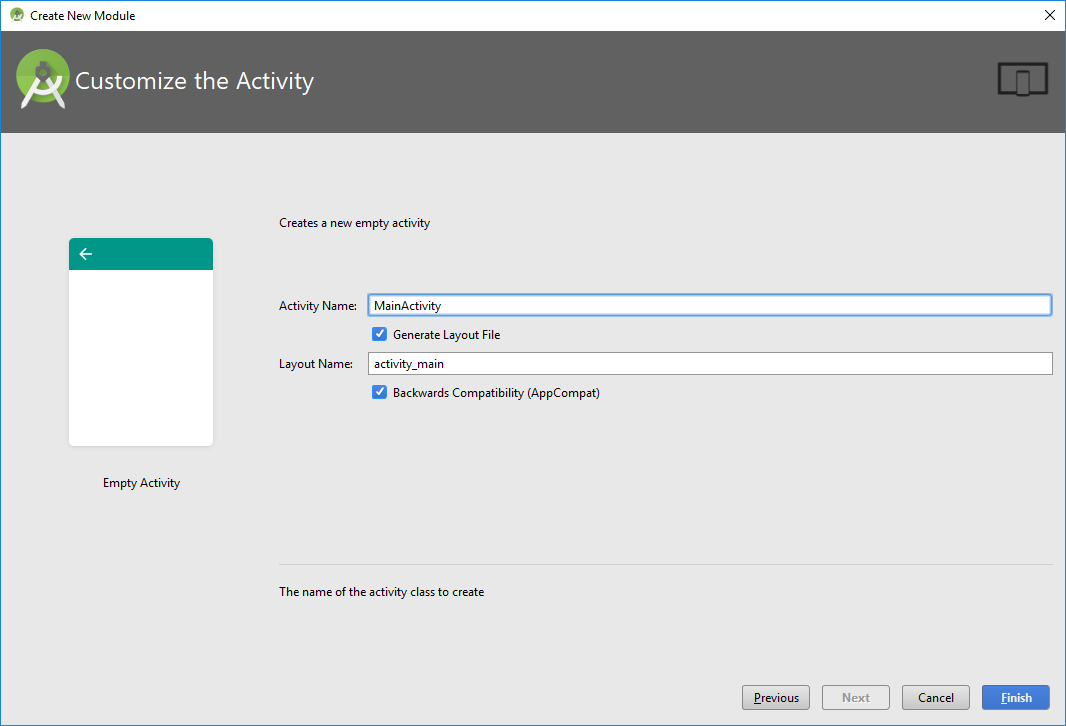
Жмем правой кнопкой на package ru.startandroid.p0211twoactivity в папке проекта и выбираем New -> Activity -> Empty Activity

В появившемся окне вводим имя класса – ActivityTwo, и layout – activity_two.
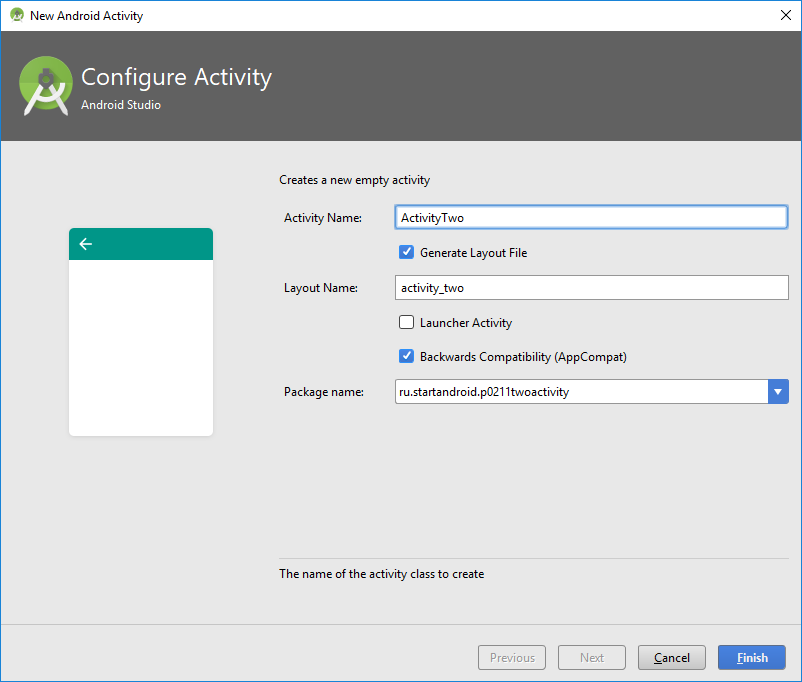
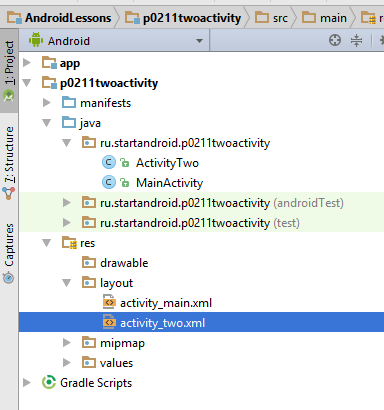
Класс ActivityTwo создан.
В setContentView сразу указан layout-файл activty_two.
Он был создан визардом
Откройте activty_two.xml и заполните следующим кодом:
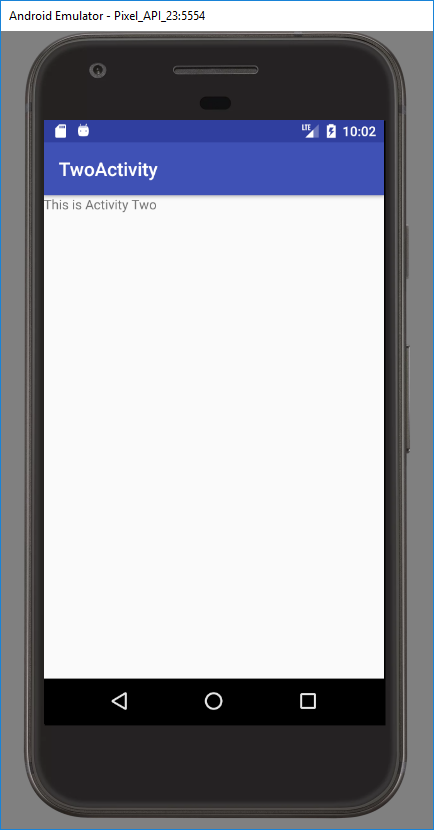
Экран будет отображать TextView с текстом «This is Activity Two».
Сохраните все. Класс ActivityTwo готов, при отображении он выведет на экран то, что мы настроили в layout-файле two.xml.
Давайте снова заглянем в файл манифеста
Появился тег activity с атрибутом name = .ActivityTwo. Этот тег совершенно пустой, без каких либо параметров и настроек. Но даже пустой, он необходим здесь.
Нам осталось вернуться в MainActivity.java и довершить реализацию метода onClick (нажатие кнопки), а именно — прописать вызов ActivityTwo. Открываем MainActivity.java и добавляем строки:
(добавляете только строки 2 и 3)
Обновите импорт, сохраните все и можем всю эту конструкцию запускать. При запуске появляется MainActivity
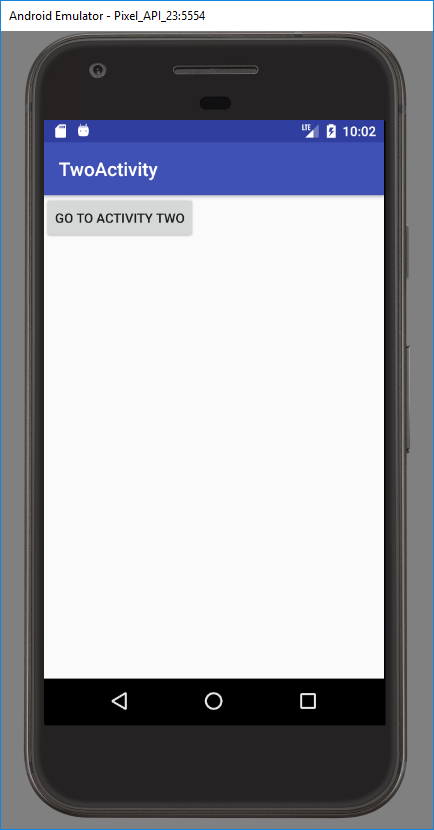
Нажимаем на кнопку и переходим на ActivityTwo
Код вызова Activity пока не объясняю и теорией не гружу, урок и так получился сложным. Получилось много текста и скриншотов, но на самом деле процедура минутная. Поначалу, возможно, будет непонятно, но постепенно втянемся. Создадим штук 5-6 новых Activity в разных проектах и тема уляжется в голове.
Пока попробуйте несколько раз пройти мысленно эту цепочку действий и усвоить, что для создания Activity необходимо создать класс (который наследует android.app.Activity) и создать соответствующую запись в манифест-файле.
На следующем уроке:
— разбираемся в коде урока 21
— теория по Intent и Intent Filter (не пропустите, тема очень важная)
— немного о Context
Присоединяйтесь к нам в Telegram:
— в канале StartAndroid публикуются ссылки на новые статьи с сайта startandroid.ru и интересные материалы с хабра, medium.com и т.п.
— в чатах решаем возникающие вопросы и проблемы по различным темам: Android, Kotlin, RxJava, Dagger, Тестирование
— ну и если просто хочется поговорить с коллегами по разработке, то есть чат Флудильня
— новый чат Performance для обсуждения проблем производительности и для ваших пожеланий по содержанию курса по этой теме
Источник
Запуск другой Activity — второго окна android-приложения
В этом уроке
Вы также должны прочитать
После завершения предыдущего урока, у вас есть приложение, которое показывает активити (один экран) с текстовым полем и кнопкой. В этом уроке вы добавим код к MainActivity , который запустит новую активити , когда пользователь нажмет на кнопку Отправить..
Ответить на кнопку Отправить
Чтобы ответить на событие нажатия кнопки, откройте fragment_main.xml файла макета и добавьте android:onClick атрибут к элементу:
android:onClick значение атрибута, «sendMessage» , это имя метода в вашей активити , который система вызывает когда пользователь нажимает кнопку.
Откройте MainActivity класс (расположенный в каталоге проекта src/ ) и добавьте соответствующий метод:
Чтобы система смогла найти этот метод с именем, заданным в android:onClick , сигнатура должна быть именно такой, как вы видели. В частности, метод должен:
- Быть public
- Имейте void в качестве возвращаемого значения
- Иметь View в качестве единственного параметра (это будет View , на котором нажали)
Далее, вы заполните этот метод, чтобы прочитать содержимое текстового поля и доставить этот текст в другую активити .
Создать Intent
Intent это объект, который обеспечивает связывание отдельных компонент во время выполнения (например, двух активити ). Intent представляет «намерение что-то сделать». Вы можете использовать интент для широкого круга задач, но чаще всего они используются, чтобы начать другую активити .
Внутри sendMessage() метода, создайте Intent для запуска активити под названием DisplayMessageActivity :
Для этого требуется импортировать Intent класс:
Полезный совет: В Eclipse, нажмите Ctrl + Shift + O для импортирования недостающих классов (Cmd + Shift + O на Mac). В Android Studio команда для импорта Alt+Enter.
Конструктор, используемый здесь принимает два параметра:
- Context в качестве первого параметра( this используется, поскольку Activity класс является подклассом Context )
- Class компонента приложения, в который система должна доставить Intent (в данном случае активность, которая должна быть запущена)
Отправка intent в другие приложения
Intent, созданный в этом уроке считается явным, поскольку Intent указывает точный компонент приложения, в которое интент следует отправить. Тем не менее, интенты также могут быть неявными, в этом случае Intent не указывает нужный компонент, позволяя любой программе установленной на устройстве отвечать на интенты, пока она удовлетворяет спецификациям мета-данных действия, задаваемыми в различных Intent параметрах. Для получения дополнительной информации читайте курс Взаимодействие с другими приложениями.
Примечание: Ссылка на DisplayMessageActivity вызовет ошибку, если вы используете интегрированную среду разработки, такую как Eclipse например, потому что класс еще не существует. Игнорируйте ошибку на данный момент; вы скоро создадите класс.
Intent не только позволяет начать другую Activity, но также может выполнять связь данных в Activity. В sendMessage() методе, используйте findViewById() для получения EditText элемента и добавьте его текстовое значение в Intent:
Примечание: Вам необходим оператор импорта для android.widget.EditText . Вы определите EXTRA_MESSAGE константу буквально сейчас.
Intent может нести коллекцию различных типов данных в виде пары ключ-значение, называемых Extras. Метод putExtra() принимает имя ключа в первом параметре и значение во втором параметре.
Для того, чтобы Activity смогла запросить дополнительные данные, вы должны определить ключ для дополнений вашего интента, используя общедоступную константу. Так что добавьте EXTRA_MESSAGE определение в начало MainActivity класса:
Вообще это хорошая практика, определять ключи для Intent Extras используя имя пакета вашего приложения в качестве префикса. Это гарантирует, что они уникальны, в случае когда ваше приложение взаимодействует с другими приложениями.
Запуск второй Activity
Для запуска активити, вызовите startActivity() и передайте в него ваш Intent . Система получает этот вызов и запускает экземпляр Activity указанный в Intent .
С помощью этого нового кода, полный sendMessage() метод, который вызывается кнопкой Отправить теперь выглядит следующим образом:
Теперь вам нужно создать DisplayMessageActivity класс для того, чтобы это работало.
Создание второй Activity
Для создания новой Activity в Android Studio:
В главном меню выберите File>New>Activity>Blank Activity.
Заполните поля в окне мастера создания активити:
- Activity Name: DisplayMessageActivity
- Layout Name: activity_display_message
- Title: Моё сообщение
- Hierarchial Parent: com.example.myfirstapp.MainActivity
Остальные поля оставьте по умолчанию. Нажмите Finish.
Для создания новой Activity в Eclipse:
- Нажмите New
 на панели инструментов.
 - В появившемся окне, откройте Android папку и выберите Android Activity. Нажмите Next.
- Выберите BlankActivity и нажмите Next.
- Заполните информацию о Activity:
- Project: MyFirstApp
- Activity Name: DisplayMessageActivity
- Layout Name: activity_display_message
- Fragment Layout Name: fragment_display_message
- Title: Моё сообщение
- Hierarchial Parent: com.example.myfirstapp.MainActivity
- Navigation Type: None
Нажмите Finish.
 на панели инструментов.
Рисунок 1. Мастер новой активити в Eclipse.
Если вы используете инструменты командной строки, создайте новый файл с именем DisplayMessageActivity.java в проекте в src/ каталоге, рядом с оригиналом MainActivity.java файлом.
Откройте DisplayMessageActivity.java файл. Если вы использовали Android Studio или Eclipse для создания этой Activity:
- Класс уже включает в себя реализацию требуемого onCreate() метода. Вы обновите реализацию этого метода позже.
- Есть также реализация onCreateOptionsMenu() метода, но вам это не будет нужно в данном приложении, так что вы можете удалить его.
- Есть также реализация onOptionsItemSelected() , который обрабатывает поведение панели действий для кнопки Вверх . Оставьте его как есть.
- Может быть также PlaceholderFragment класс, который расширяет Fragment . Вам не нужен будет этот класс в окончательном варианте этой активити .
Фрагменты разбивают функциональность приложений и пользовательский интерфейс на модули, которые можно будет повторно использовать. Для более подробной информации о фрагментах см.Руководство по Фрагментам. Окончательный вариант этой активити не использует фрагменты.
Примечание: Ваша активити может выглядеть иначе, если вы не использовали последнюю версию ADT плагина. Убедитесь, что вы установили последнюю версию ADT плагина для завершения этого курса.
DisplayMessageActivity класс должен выглядеть следующим образом:
Источник
2.1: Create and Start Activities
Contents:
An activity represents a single screen in your app with which your user can perform a single, focussed task such as dial the phone, take a photo, send an email, or view a map. Activities are usually presented to the user as full-screen windows.
An app usually consists of multiple activities that are loosely bound to each other. Typically, one activity in an application is specified as the «main» activity, which is presented to the user when the app is launched. Each activity can then start other activities in order to perform different actions.
Each time a new activity starts, the previous activity is stopped, but the system preserves the activity in a stack (the «back stack»). When a new activity starts, that new activity is pushed onto the back stack and takes user focus. The back stack abides to the basic «last in, first out» stack mechanism, so, when the user is done with the current activity and presses the Back button, that current activity is popped from the stack (and destroyed) and the previous activity resumes.
Android activities are started or activated with an intent. Intents are asynchronous messages that you can can use in your activity to request an action from another activity (or other app component). You use intents to start one activity from another and to pass data between activities.
There are two kinds of intents: explicit and implicit. An explicit intent is one in which you know the target of that intent, that is, you already know the fully-qualified class name of that specific activity. An implicit intent is one in which you do not have the name of the target component, but have a general action to perform. In this practical you’ll learn about explicit intents. You’ll find out about implicit intents in a later practical.
What you should already KNOW
From the previous practicals, you should be able to:
- Create and run apps in Android Studio.
- Create and edit UI elements with the graphical Layout Editor, or directly in an XML layout file.
- Add onClick functionality to a button.
What you will LEARN
You will learn to:
- Create a new activity in Android studio.
- Define parent and child activities for «Up» navigation.
- Start activities with explicit intents.
- Pass data between activities with intent extras.
What you will DO
In this practical, you will:
- Create a new Android app with two activities.
- Pass some data (a string) from the main activity to the second using an intent, and display that data in the second activity.
- Send a second different bit of data back to the main activity, also using intents.
App Overview
In this chapter you will create and build an app called TwoActivities that, unsurprisingly, contains two activities. This app will be built in three stages.
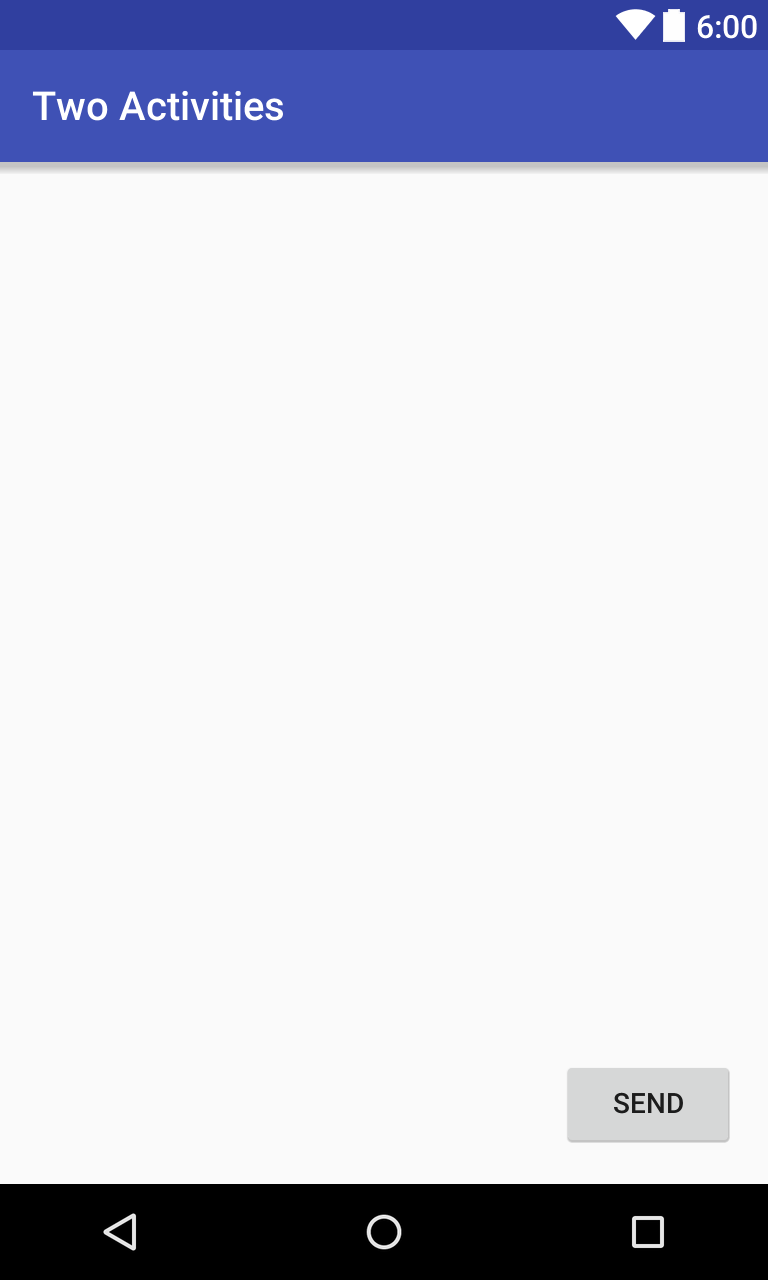
In the first stage, create an app whose main activity contains only one button (Send). When the user clicks this button, your main activity uses an intent to start the second activity. 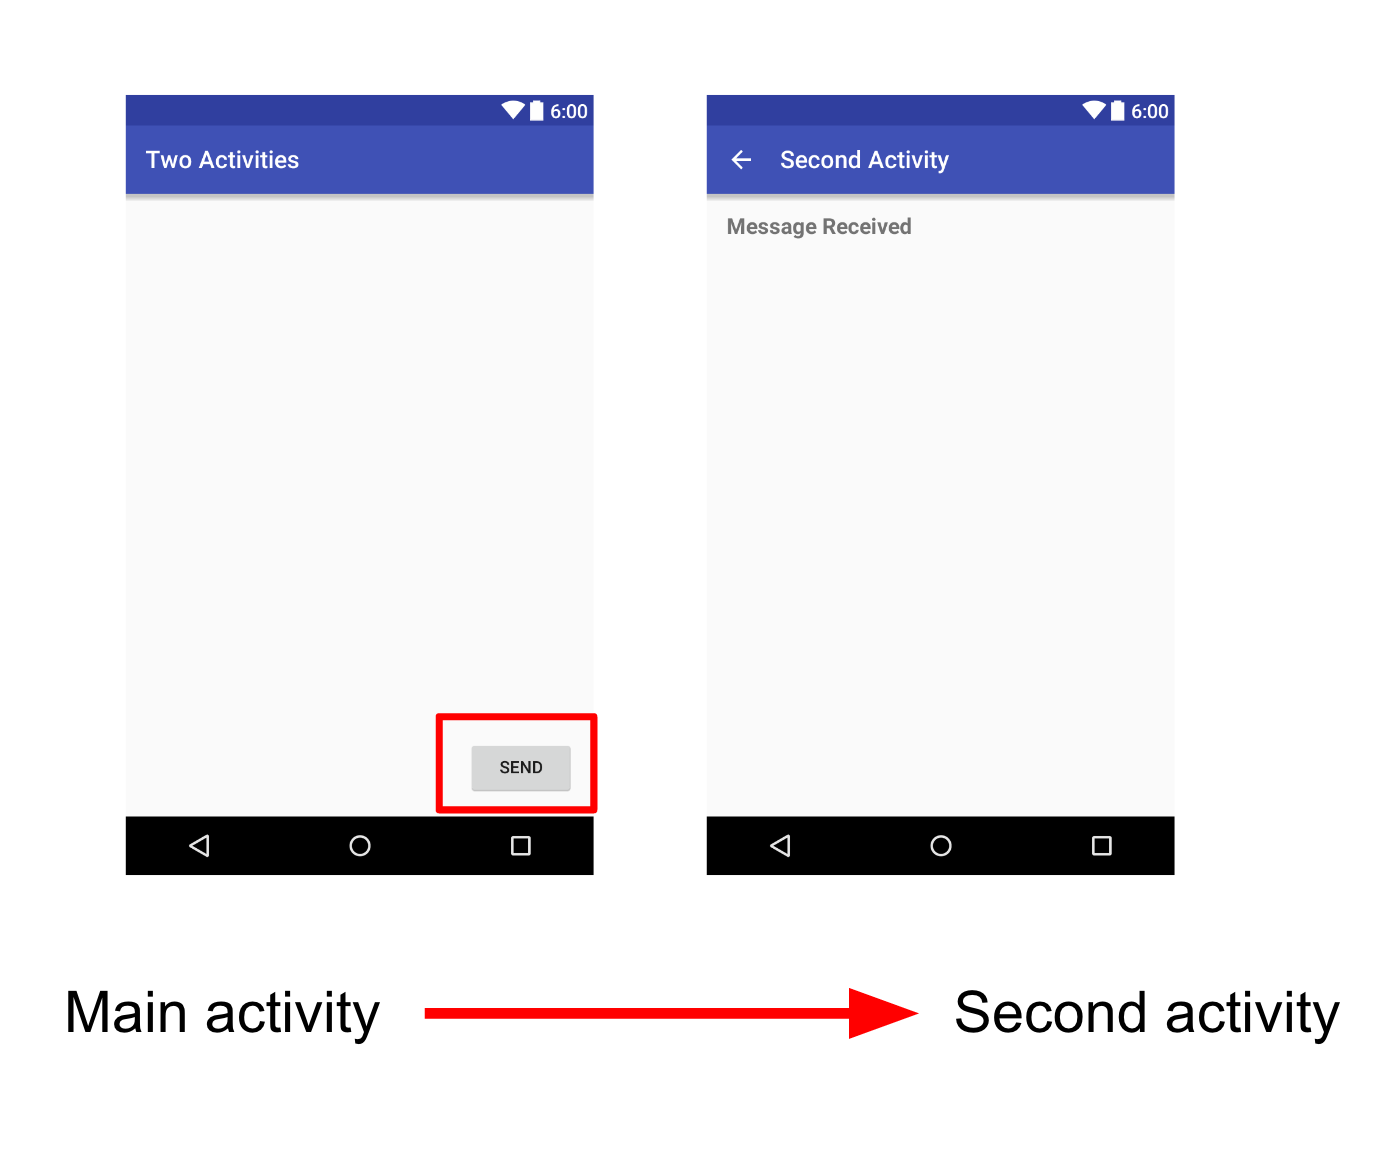
In the second stage, you’ll add an EditText view to the main activity. The user enters a message and clicks Send. The main activity uses an intent to both start the second activity, and to send the user’s message to the that activity. The second activity displays the message it received. 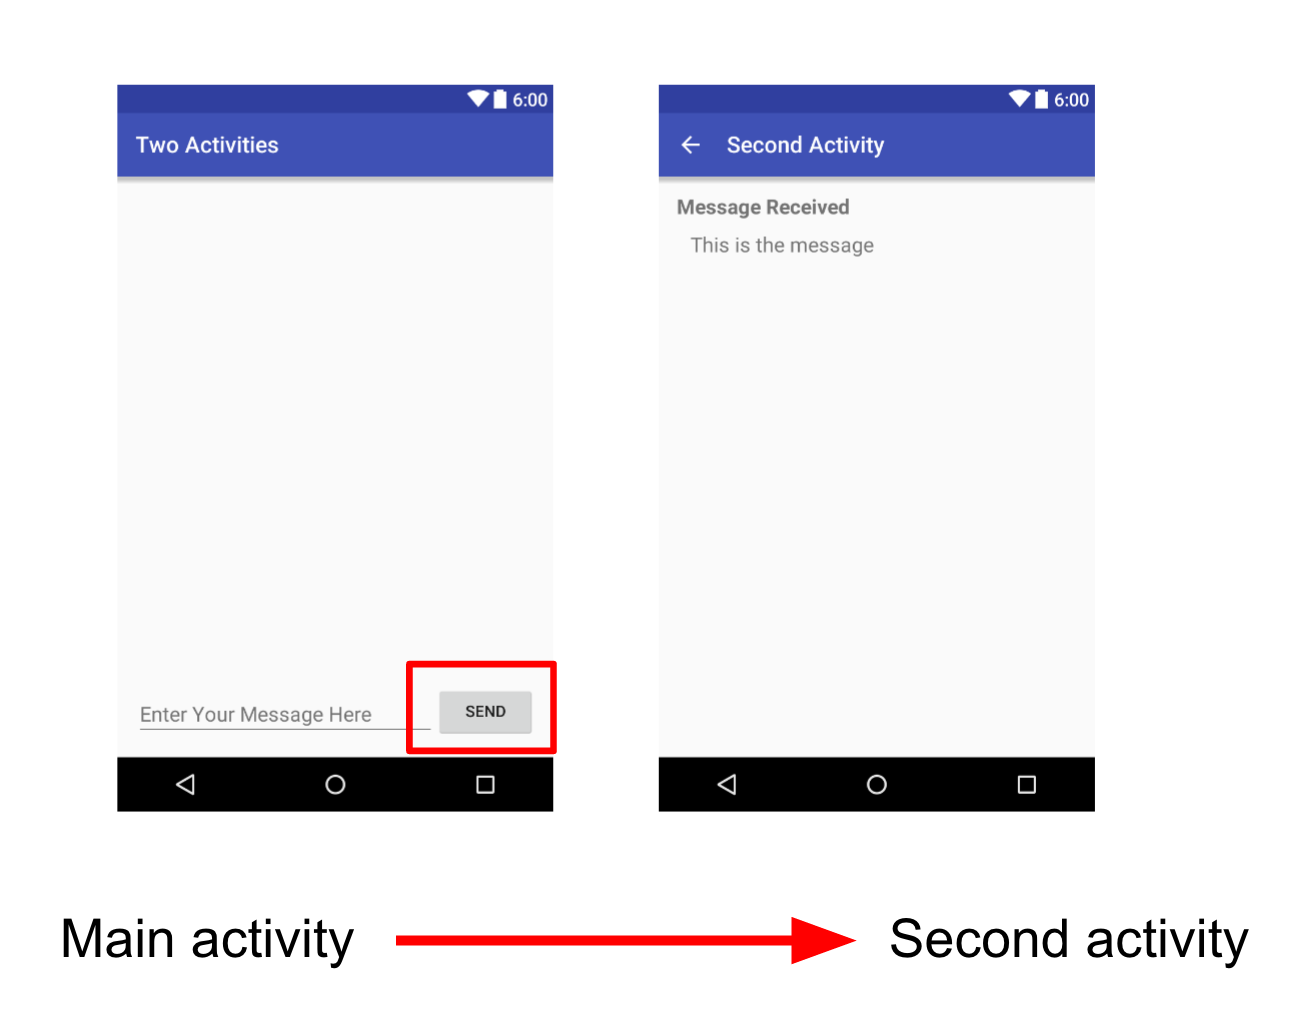
In final stage of the TwoActivities app, add an EditText view and a Reply button to the second activity. The user can now type a reply message and click Reply, and the reply is displayed on the main activity. At this point, use an intent here to pass the reply message back from the second activity to the main activity. 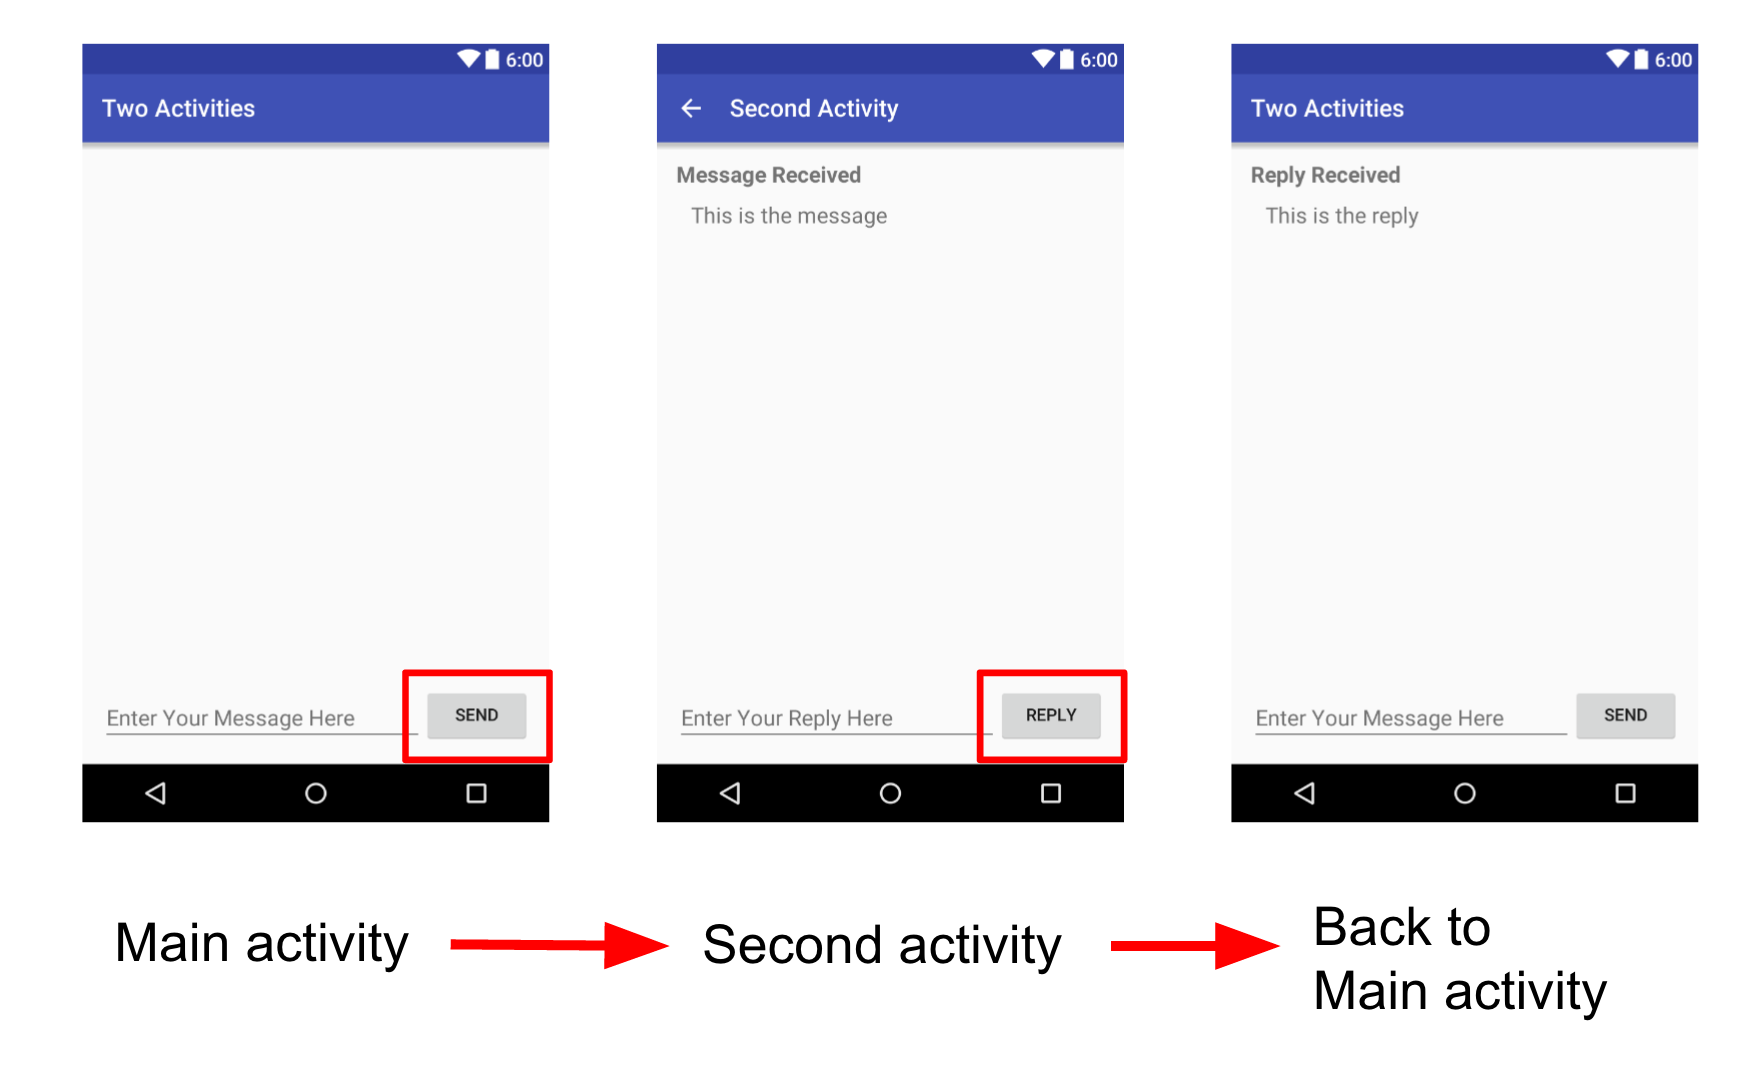
Task 1. Create the TwoActivities project
In this task you’ll set up the initial project with a main activity, define the layout, and define a skeleton method for the onClick button event.
1.1 Create the TwoActivities project
Start Android Studio and create a new Android Studio project.
Call your application «Two Activities» and change the company domain to «android.example.com.» Choose the same Minimum SDK that you used in the previous projects.
1.2 Define the layout for the main activity
- Open res/layout/activity_main.xml . In the Layout Editor, click the Text tab at the bottom of the screen and change the root view group to RelativeLayout, as you’ve done in previous exercises.
- Click the Design tab at the bottom of the screen and delete the TextView that says «Hello World.»
- Add a Button to the layout in any position.
Switch to the XML Editor (click the Text tab) and modify these attributes in the Button:
| Attribute | Value |
| android:id | «@+id/button_main» |
| android:layout_width | wrap_content |
| android:layout_height | wrap_content |
| android:layout_alignParentRight | «true» |
| android:layout_alignParentBottom | «true» |
| android:layout_alignParentEnd | «true» |
| android:text | «Send» |
| android:onClick | «launchSecondActivity» |
This may generate an error that «Method launchSecondActivity is missing in MainActivity.» Please ignore this error for now. It will be addressed it in the next task.
Set the Resource name to button_main and click OK.
This creates a string resource in the values/res/string.xml file, and the string in your code is replaced with a reference to that string resource.
Solution code: Depending on your version of Android Studio, your code will look something like the following.
1.3 Define the button action
In this task,you will implement the onClick method you defined in the layout.
- In the XML Editor, place the cursor on the word «launchSecondActivity» .
Press Alt-Enter (Option-Enter on the Mac) and select Create ‘launchSecondActivity(View)’ in ‘MainActivity.
The MainActivity.java files opens, and Android Studio generates a skeleton method for the onClick handler.
Inside launchSecondActivity , add a log statement that says «Button Clicked!»
LOG_TAG will show as red. The definitions for that variable will be added in a later step.
At the top of the class, add a constant for the LOG_TAG variable:
This constant uses the name of the class itself as the tag.
Solution code:
Task 2. Create and launch the second activity
Each new activity you added to your project has its own layout and Java files, separate from those of the main activity. They also have their own elements in the Android manifest. As with the main activity, new activities you create in Android Studio also extend from the AppCompatActivity class.
All the activities in your app are only loosely connected with each other. However, you can define an activity as a parent of another activity in the AndroidManifest.xml file. This parent-child relationship enables Android to add navigation hints such as left-facing arrows in the title bar for each activity.
Activities communicate with each other (both in the same app and across different apps) with intents. There are two types of intents, explicit and implicit. An explicit intent is one in which the target of that intent is known, that is, you already know the fully-qualified class name of that specific activity. An implicit intent is one in which you do not have the name of the target component, but have a general action to perform. You’ll learn about implicit intents in a later practical.
In this task you’ll add a second activity to our app, with its own layout. You’ll modify the Android manifest to define the main activity as the parent of the second activity. Then you’ll modify the onClick event method in the main activity to include an intent that launches the second activity when you click the button.
2.1 Create the second activity
- Click the app folder for your project and choose File > New > Activity > Empty Activity.
- Name the new activity «SecondActivity.» Make sure Generate Layout File is checked, and layout name will be filled in as activity_second.
Click Finish. Android Studio adds both a new activity layout (activity_second) and a new Java file (SecondActivity) to your project for the new activity. It also updates the Android manifest to include the new activity.
2.2 Modify the Android manifest
- Open manifests/AndroidManifest.xml .
- Find the element that Android Studio created for the second activity.
Add these attributes to the element:
| Attribute | Value |
| android:label | «Second Activity» |
| android:parentActivityName | «.MainActivity» |
The label attribute adds the title of the activity to the action bar.
The parentActivityName attribute indicates that the main activity is the parent of the second activity. This parent activity relationship is used for «upward» navigation within your app. By defining this attribute, the action bar for the second activity will appear with a left-facing arrow to enable the user to navigate «upward» to the main activity.
| Attribute | Value |
| android:name | «android.support.PARENT_ACTIVITY» |
| android:value | «com.example.android.twoactivities.MainActivity» |
The element provides additional arbitrary information about the activity as key-value pairs. In this case these attributes accomplish the same thing as the android:parentActivityName attribute — they define a relationship between two activities for the purpose of upward navigation. These attributes are required for older versions of Android. android:parentActivityName is only available for API levels 16 and higher.
Solution code:
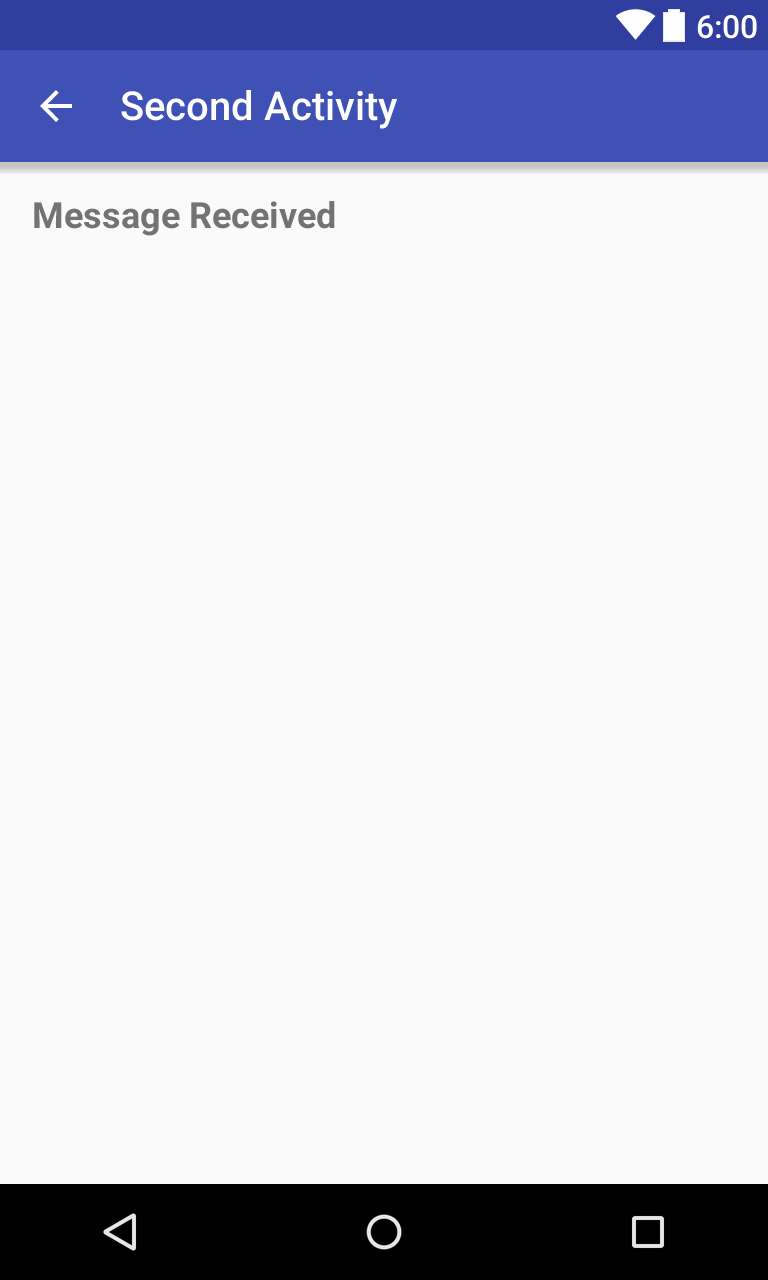
2.3 Define the layout for the second activity
- Open res/layout/activity_second.xml and change the root view group to RelativeLayout, as you’ve done in previous exercises.
Add a TextView («Plain Textview» in the Layout Editor). Give the TextView these attributes:
| Attribute | Value |
| android:id | «@+id/text_header» |
| android:layout_width | wrap_content |
| android:layout_height | wrap_content |
| android:layout_marginBottom | «@dimen/activity_vertical_margin» |
| android:text | «Message Received» |
| android:textAppearance | «?android:attr/textAppearanceMedium» |
| android:textStyle | «bold» |
The value of textAppearance is a special Android theme attribute that defines basic font styles for small, medium, and large fonts. You’ll learn more about themes in a later lesson.
Solution code: Depending on your version of Android Studio, your code will look something like the following.
2.4 Add an intent to the main activity
In this task you’ll add an explicit intent to the main activity. This intent is used to activate the second activity when the Send button is clicked.
- Open the Java file for MainActivity (java/com.example.android.twoactivities/MainActivity).
Create a new intent in the launchSecondActivity() method.
The Intent constructor takes two arguments for an explicit intent: an application Context and the specific component that will receive that intent. Here you should use this as the context, and SecondActivity.class as the specific class.
When you click the Send button the main activity sends the intent and the Android system launches the second activity. That second activity appears on the screen. To return to the main activity, click the Android Back button at the bottom left of the screen, or you can use the left arrow at the top of the second activity to return to the main activity.
Coding challenge
Challenge: What happens if you remove the android:parentActivityName and the elements from the manifest? Make this change and run your app.
Task 3. Send data from the main activity to the second activity
In the last task, you added an explicit intent to the main activity that activated the second activity. You can also use intents to send data from one activity to another.
In this task, you’ll modify the explicit intent in the main activity to include additional data (in this case, a user-entered string) in the intent extras. You’ll then modify the second activity to get that data back out of the intent extras and display it on the screen.
3.1 Add an EditText to the main activity layout
- Open res/layout/activity_main.xml.
Add an EditText view (Plain Text in the Layout Editor.) Give the EditText these attributes:
| Attribute | Value |
| android:id | «@+id/editText_main» |
| android:layout_width | match_parent |
| android:layout_height | wrap_content |
| android:layout_toLeftOf | «@+id/button_main» |
| android:layout_toStartOf | «@+id/button_main» |
| android:layout_alignParentBottom | «true» |
| android:hint | «Enter Your Message Here» |
The new layout for the main activity looks like this: 
Solution code: Depending on your version of Android Studio, your code will look something like the following.
3.2 Add a string to the main activity’s intent extras
Your intent object can pass data to the target activity in two ways: in the data field, or in the intent extras. The intent’s data is a URI indicating the specific data to be acted on. If the information you want to pass to an activity through an intent is not a URI, or you have more than one piece of information you want to send, you can put that additional information into the intent extras instead.
The intent extras are key/value pairs in a Bundle. A bundle is a collection of data, stored as key/value pairs. To pass information from one activity to another, you put keys and values into the intent extra bundle from the sending activity, and then get them back out again in the receiving activity.
- Open java/com.example.android.twoactivities/MainActivity .
- Add a public constant at the top of the class to define the key for the intent extra:
- Add a private variable at the top of the class to hold the EditText object. Import the EditText class.
- In the onCreate() method, use findViewByID to get a reference to the EditText instance and assign it to that private variable:
- In the launchSecondActivity() method, just under the new intent, get the text from the EditText as a string:
- Add that string to the intent as an extra with the EXTRA_MESSAGE constant as the key and the string as the value:
Solution code:
3.3 Add a TextView to the second activity for the message
- Open res/layout/activity_second.xml .
Add a second TextView. Give the TextView these attributes:
| Attribute | Value |
| android:id | «@+id/text_message» |
| android:layout_width | wrap_content |
| android:layout_height | wrap_content |
| android:layout_below | «@+id/text_header» |
| android:layout_marginLeft | «@dimen/activity_horizontal_margin» |
| android:layout_marginStart | «@dimen/activity_horizontal_margin» |
| android:textAppearance | «?android:attr/textAppearanceMedium» |
The new layout for the second activity looks the same as it did in the previous task, because the new TextView does not (yet) contain any text, and thus does not appear on the screen.
Solution code: Depending on your version of Android Studio, your code will look something like the following.
3.4 Modify the second activity to get the extras and display the message
- Open java/com.example.android.twoactivities/SecondActivity .
- In the onCreate() method, get the intent that activated this activity:
- Get the string containing the message from the intent extras using the MainActivity.EXTRA_MESSAGE static variable as the key:
- Use findViewByID to get a reference to the TextView for the message from the layout (you may need to import the TextView class):
- Set the text of that TextView to the string from the intent extra:
- Run the app. When you type a message in the main activity and click Send, the second activity is launched and displays that message.
Solution code:
Task 4. Return data back to the main activity
Now that you have an app that launches a new activity and sends data to it, the final step is to return data from the second activity back to the main activity. You’ll also use intents and intent extras for this task.
4.1 Add an EditText and a Button to the second activity layout
- Copy the EditText and Button from the main activity layout file and paste them into the second layout.
In the activity_second.xml file, modify the attribute values for both the Button and EditText views. Use these values:
| Old attribute (Button) | New attribute (Button) |
| android:id=»@+id/button_main» | android:id=»@+id/button_second» |
| android:onClick= «launchSecondActivity» | android:onClick=»returnReply» |
| android:text= «@string/button_main» | android:text= «@string/button_second» |
| Old attribute (EditText) | New attribute (EditText) |
| android:id=»@+id/editText_main» | android:id=»@+id/editText_second» |
| android:layout_toLeftOf= «@+id/button_main» | android:layout_toLeftOf= «@+id/button_second» |
| android:layout_toStartOf= «@+id/button_main» | android:layout_toStartOf= «@+id/button_second» |
| android:hint= «@string/editText_main» | android:hint= «@string/editText_second» |
Open res/values/strings.xml and add string resources for the button text and the hint in the EditText:
In the XML layout editor, place the cursor on «returnReply» , press Alt-Enter (Option-Enter on the Mac) and select Create ‘returnReply(View)’ in ‘SecondActivity’.
The SecondActivity.java files open, and Android Studio generates a skeleton method for the onClick handler. You will implement this method in the next task.
The new layout for the second activity looks like this: 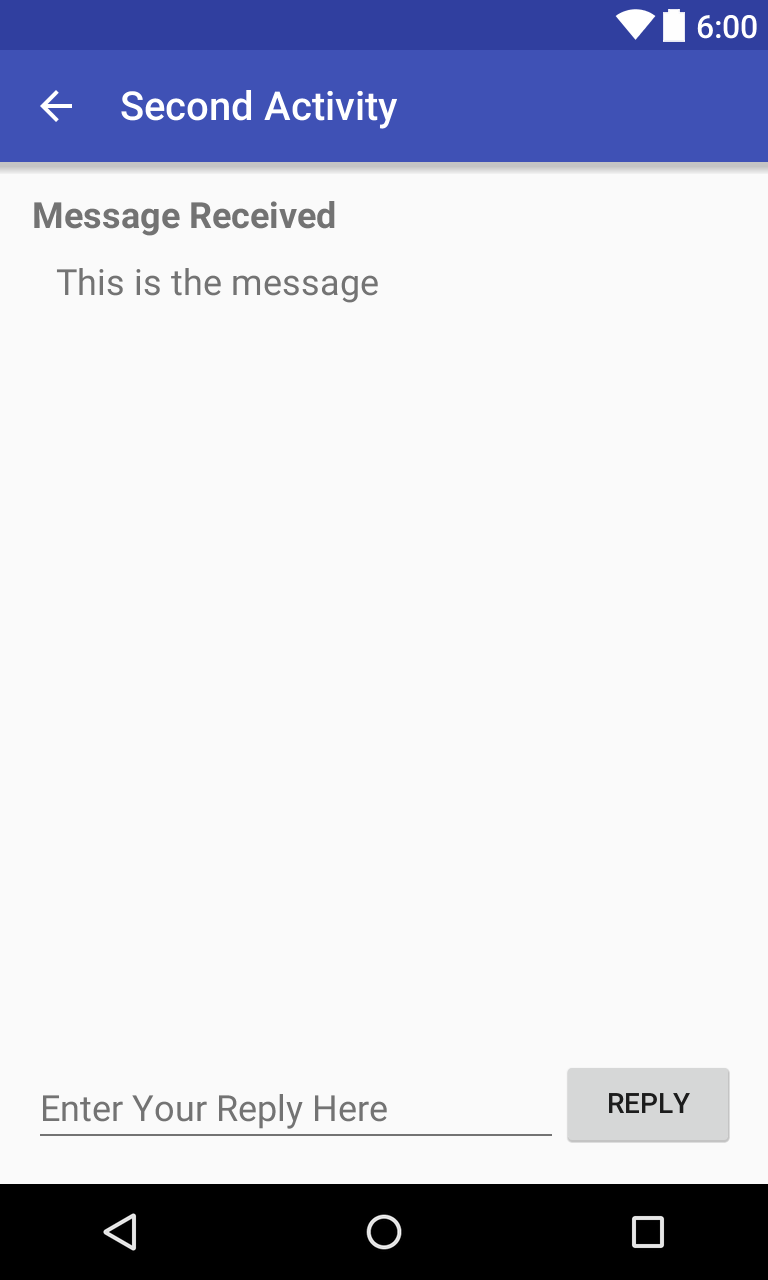
Solution code: Depending on your version of Android Studio, your code will look something like the following.
4.2 Create a response intent in the second activity
- Open java/com.example.android.twoactivities/SecondActivity .
- At the top of the class, add a public constant to define the key for the intent extra:
- Add a private variable at the top of the class to hold the EditText object.
- In the onCreate() method, use findViewByID() to get a reference to the EditText instance and assign it to that private variable:
- In the returnReply() method, get the text of the EditText as a string:
- Create a new intent for the response.
Solution code:
4.3 Add TextViews to the main activity layout to display the reply
The main activity needs a way to display the reply sent back from the second activity. In this task you’ll add TextViews to the main activity layout to display that reply. To make this easier, you will copy the TextViews you used in the second activity.
- Copy the two TextViews for the message display from the second activity layout file and paste them into the main layout above the existing EditText and Button views.
Modify the attribute values for both of these new TextViews. Use these values:
| Old attribute (header TextView) | New attribute (header TextView) |
| android:id=»@+id/text_header» | android:id=»@+id/text_header_reply» |
| android:text=»@string/text_header» | android:text= «@string/text_header_reply» |
| Old attribute (message TextView) | New attribute (message TextView) |
| android:id=»@+id/text_message» | android:id=»@+id/text_message_reply» |
| android:layout_below= «@+id/text_header» | android:layout_below= «@+id/text_header_reply» |
The layout for the main activity looks the same as it did in the previous task—although you have added two new TextViews to the layout. However, since you set the TextViews to invisible, they do not appear on the screen.
Solution code: Depending on your version of Android Studio, your code will look something like the following.
4.4 Get the reply from the intent extra and display it
When you use an explicit intent to start another activity, you may not expect to get any data back — you’re just activating that activity. In that case, you use startActivity() to start the new activity, as you did earlier in this lesson. If you want to get data back from the activated activity, however, you’ll need to start it with startActivityFromResult().
In this task you’ll modify the app to start the second activity and expect a result, to extract that return data from the intent, and to display that data in the TextViews you created in the last task.
- Open java/com.example.android.twoactivities/MainActivity .
- Add a public constant at the top of the class to define the key for a particular type of response you’re interested in:
- Add two private variables to hold the reply header and reply TextViews:
- In the onCreate() method, use findViewByID to get references from the layout to the reply header and reply TextView. Assign those view instances to the private variables:
- In the launchSecondActivity() method, modify the call to startActivity( ) to be startActivityForResult() , and include the TEXT_REQUEST key as an argument:
- Create the onActivityResult() callback method with this signature:
- Inside onActivityResult(), call super.onActivityResult() :
- Add code to test for both TEXT_REQUEST (to process the right intent result, in case there are multiple ones) and the RESULT_CODE (to make sure the request was successful):
- Inside the inner if block, get the intent extra from the response intent ( data ). Here the key for the extra is the EXTRA_REPLY constant from SecondActivity:
- Set the visibility of the reply header to true:
- Set the reply textview text to the reply, and set its visibility to true:
Now, when you send a message to the second activity and get a reply back, the main activity updates to display the reply. 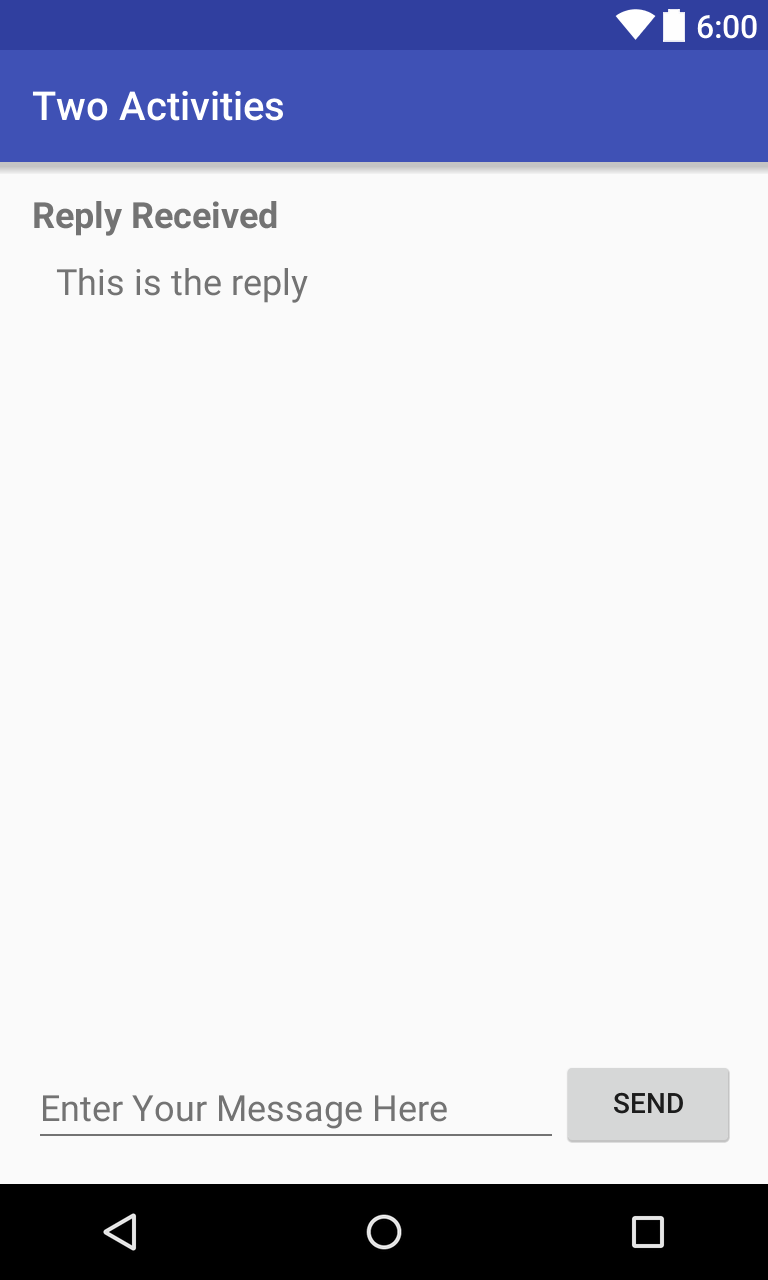
Solution code:
Solution code
Android Studio project: TwoActivities
Coding challenge
Note: All coding challenges are optional and are not prerequisites for later lessons.
Challenge: Create an app with three buttons labelled: Text One, Text Two, and Text Three. When any of those buttons are clicked, launch a second activity. That second activity should contain a ScrollView that displays one of three text passages (you can include your choice of passages). Use intents to both launch the second activity and intent extras to indicate which of the three passages to display.
Summary
In this practical, you have learned that:
- An Activity is an application component that provides a single screen focussed on a single user task.
- Each activity has its own user interface layout file.
- You can assign your activities a parent/child relationship to enable «upward» navigation within your app.
- To implement an activity in your app, do the following:
- Create an activity Java class.
- Implement a user interface for that activity.
- Declare that new activity in the app manifest.
- When you create a new project for your app, or add a new activity to your app, in Android Studio (with File > New > Activity), template code for each of these tasks is provided for you.
- Intents allow you to request an action from another component in your app, for example, to start one activity from another. Intents can be explicit or implicit.
- With explicit intents you indicate the specific target component to receive the data.
- With implicit intents you specify the functionality you want but not the target component.
- Intents can include data on which to perform an action (as a URI) or additional information as intent extras.
- Intent extras are key/value pairs in a bundle that are sent along with the intent.
- Views can be made visible or invisible with the android:visibility attribute
Источник


