- How to Install ADB on Windows, MAC, and Linux [UPDATED – 2019]
- Guide To Install ADB and Fastboot
- Allows USB debugging On Android Devices
- Install ADB on Windows Desktop
- How to Install ADB on MAC
- How to Install ADB on Linux
- First Android 10 MIUI 10.4.8.0 Rolls Out For Redmi K20 Pro [Download Now]
- Download Android 10 MIUI 10.4.8.0 For Redmi K20 Pro
- Android 10 Q Higlights
- How to flash this ROM?
- How To Install Android 10 on your Android [Download Links]
- Android 10 Features
- Pre-Requirements to Android 10 ROMS
- Download Android 10 for Your Android
- Android 10 For Xaiomi phones
- Android 10 For OnePlus phones
- Android 10 For MotoRola phones
- Android 10 For Asus phones
- Android 10 for Samsung Phones
- How to Install the Androdi 10 On Your Android
How to Install ADB on Windows, MAC, and Linux [UPDATED – 2019]
Here we are again with a nice How-to Guide for the Android Lovers. This post is about the ADB and fastboot drivers and how to Install ADB on Windows, MAC, and Linux. ADB, Android Debug Bridge, is a command-line utility which helps you to run the ADB and fastboot commands on your android devices. In a simple way, we can say that ADB and FASBTOOT are the tools which allow you send terminal commands to your phone from your computer via USB. They both serve different functions, but they are must for the Android Phone users.
Suppose you want to customize your Android Devices like Install TWRP on the phone, Root the Android Phone to make changes in the system or Install Custom ROM on your Stock Android phone. Then you need to run some ADB and Fastboot commands. At that time you need these ADB and fastboot drivers on your Windows, MAC, and Linux.

There are so may tutorial are available on the internet to install the ADB setup files, but sometime they will not work or outdated. So here we are providing you the latest ADB drivers and that is direct from the Google Servers. Which means these ADB drivers are updated and work on any System and Android Devices. All you have to follow the below mention tutorial to setups the ADB and fastboot drivers on Windows, MAC, and Linux. So let’s get started and install ADB on your desktop.
Table of Contents
Guide To Install ADB and Fastboot
NOTE:- Install ADB on Your Desktop is a half process to complete the whole ADB setup you need to make some changes on your smartphone or tablet to accept the ADB commands.
Allows USB debugging On Android Devices
1. Open the Setting page on your device.
2. From here Tap on the About Phone option generally near the bottom of the list (this is hidden behind the “System” option in Google’s latest Android Oreo version).
3. In the about phone section of your phone, Tap the Build Number option 7 times to enable Developer Mode. And you will see a popup message on your screen “You are now a developer”.

4. Now go back to the Settings page and you should see a new Developer Options menu here.
5. Go in there and scroll down to USB debugging and turn the toggle on. This will enable the USB debugging On Android.

Now all you have to setup the ADB files on your desktop. Follow the rest of the instructions for your particular operating system.
Install ADB on Windows Desktop
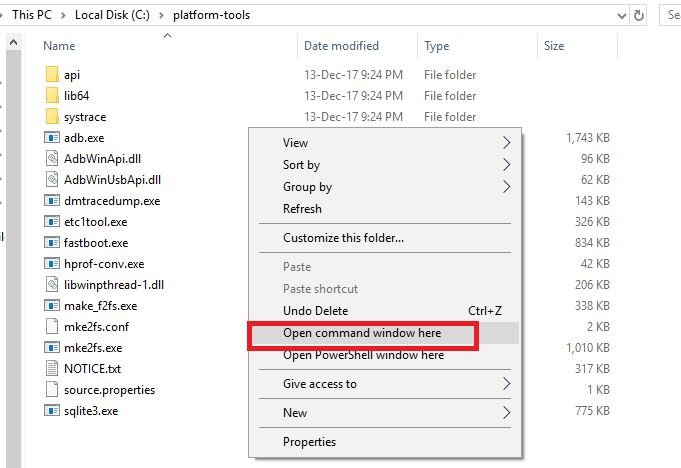
2. Unzip the folder on your Windows C Drive. (C:\platform-tools).

3. Open the ADB Platform-Tools folder. Next, open a terminal window in the folder where you have ADB and fastboot installed. On Windows, you can right-click and click open command window here. (Some Windows 10 users may see “PowerShell” instead of “command prompt”.)
4. Now connect your phone to the Windows PC with the USB cable.
5. Now enter the following command in the command prompt window to check the connection between PC and Phone.
Your device’s serial number should appear in the command window.

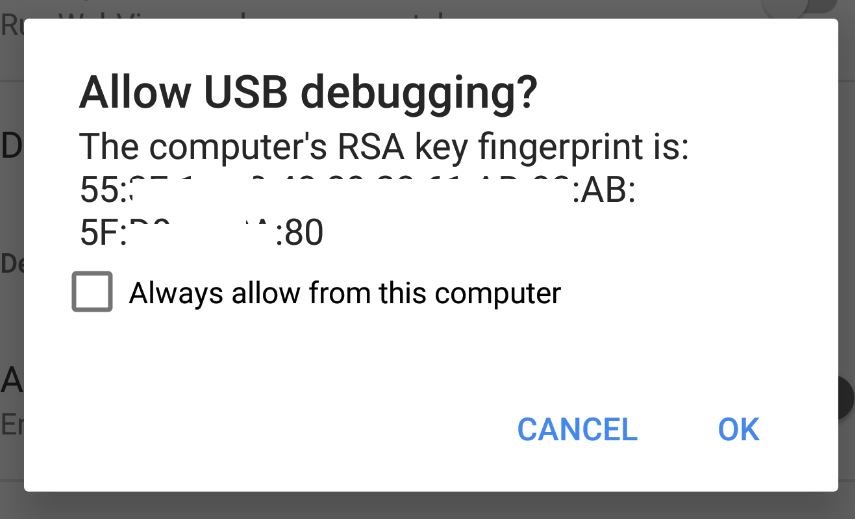
6. Also on your phone’s screen, you should see a pop screen to allow or deny USB Debugging access. Grant USB Debugging access when prompted (and tap the always allow check box if you never want to see that prompt again).
That’s it! Now you can now run any ADB command on your device form your Windows PC.
How to Install ADB on MAC
2. Now extract the folder on your desktop.
3. Open Terminal on Your MAC.
4. Now to browse to the folder you extracted ADB into, enter the following command on Terminal window.
On my MAC the command looks like this cd /Users/Sid/Desktop/platform-tools/
5. Now connect your phone to the MAC with the USB cable.
6. Now enter the following command in the Terminal window to check the connection between MAC and Phone.
7. Now on your device, you’ll see an “Allow USB debugging” prompt. Allow the connection.
Voila! You successfully install the ADB on MAC OS.
How to Install ADB on Linux
2. Now extract the folder on your Linux desktop.
3. Open the Terminal app on your Linux machine to follow the next step to install ADB.
4. Now to browse to the folder you extracted ADB into, enter the following command on Terminal window.
On my MAC the command looks like this cd /Users/Sid/Desktop/platform-tools/
5. Now connect your Android Device to the Linux with the USB cable.
6. Now enter the following command in the Terminal window to check the connection between Linux and Android SmartPhone.
7. Now on your device, you’ll see an “Allow USB debugging” prompt. Allow the connection.
Voila! You successfully install the ADB on your Linux Desktop.
So with this way you easily install and setup ADB on your Windows, MAC, and Linux. You can also check some of the Other guides here to install ADB and fastboot, Fastest Method to Setup ADB and Fastboot on Windows and Install ADB and Fastboot on Mac, Linux, Chrome OS With Nexus Tool Script
Источник
First Android 10 MIUI 10.4.8.0 Rolls Out For Redmi K20 Pro [Download Now]
Finally, the Global stable version of latest Android Q 10 MIUI 10.4.8.0 rolls out for the Redmi K20 Pro users. The latest build comes with the latest Android Security Patch and powered with the latest Android Q OS. Android 10 is available for Google pixel and other devices and now the Xiaomi Redmi K20 Pro joins this list. Android Q is the latest OS from Google and you can check some of the new features of Android 10 here.
This is the good news for all the Redmi K20 Pro users who are waiting for the Android Q update from a long time. Now they can enjoy all the Android 10 features with this new MIUI 10.4.8.0 build. The update is rolled out in batches and some of the Indian Redmi K20 Pro users already get this update.
If you are still waiting for the update, then you can download the Android 10 MIUI 10.4.8.0 from our download section and update your phone with this new build. Below is the full guide which you can use on your Redmi K20 Pro and install the Android 10 MIUI 10.4.8.0 update.
Table of Contents
Download Android 10 MIUI 10.4.8.0 For Redmi K20 Pro
You can download the flash-able zip file which is also known as MIUI Recovery ROM from its official direct links below.
Update your Phone with the Choose Update package method. Check out the full guide here how to Install MIUI 10 Recovery ROM on Xiaomi phone here.
Just flash the zip file with the Custom Reoicvery and update your phone with Android 10 MIUI 10.4.8.0.
Warning: this ROM is not for Redmi K20 / Mi 9T codename Davinci.
Android 10 Q Higlights
Android 10 comes with some new features like New gesture navigation, more dark mode, Live Captioning, new privacy and security features, Family Link in the Digital Wellbeing app.

How to flash this ROM?
Flashing MIUI zip file is easy. You can do it either from the stock Mi recovery or from a custom recovery such as TWRP, Orange Fox, Pitch Black, etc.
So with this way you can update your Redmi K20 Pro with the latest Android 10 MIUI 10.4.8.0 update. If you have any question and facing some problem during this process then, leave the comments below.
Updated your phone to Android 10 already? Share your experience down below.
Источник
How To Install Android 10 on your Android [Download Links]
Here is the Guide to install Android 10 on your android phone. After the release of Android 10 by Google for the Pixel phones, most of the developers are working on Android 10 Custom ROMs and many of them released the stable version of Android 10. Some popular custom ROM like Lineage OS and Pixel experience are available for many smartphones. And all these custom rom are based on the latest build of Android 10.
Android 10 (aka Android Q) is now official and Pixel devices, Essential Phone, Redmi K20 Pro, OnePlus 7 Pro devices are receiving the latest Android version update. But most of the devices are missing this update, and if you are waiting for Android 10 for your phone, then here is the guide which helps you to update your devices with the latest Android 10 update.

Here in this post, we will share with you a List of Android 10 Custom ROM Supported devices and the ROMS download link too. Which you can install on your phone with the help of Custom TWRP recovery and enjoy all the features of Android 10. But before that first, take a look at the Android 10 features and overview.
Table of Contents
Android 10 Features
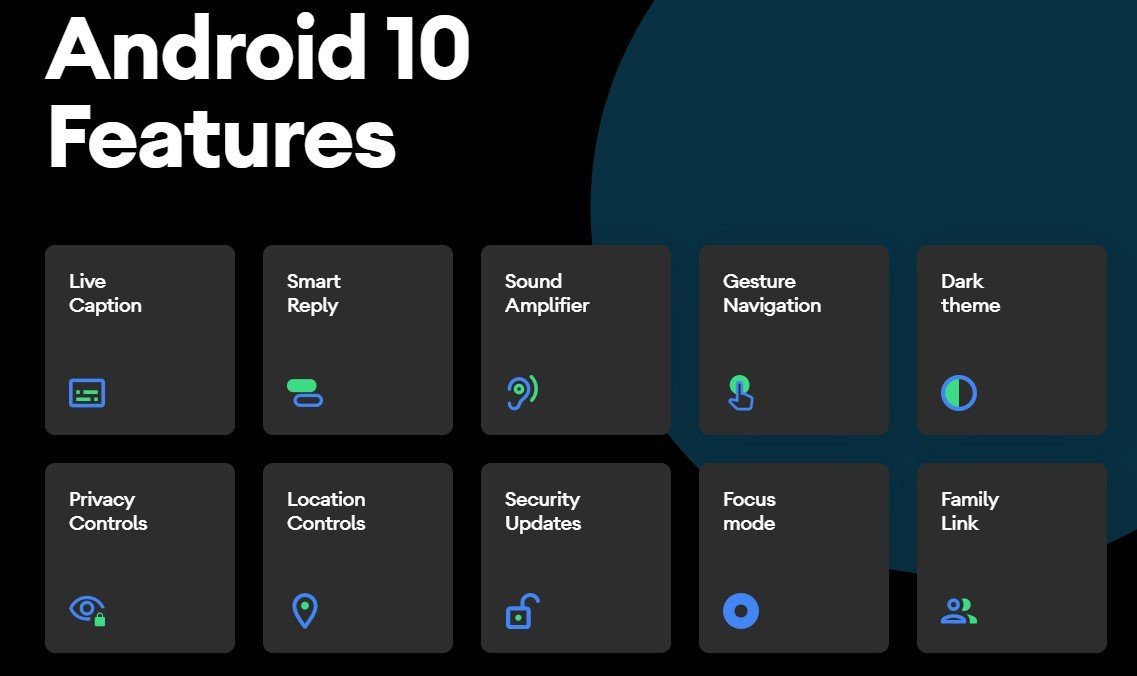
Dark theme – Android’s new Dark theme uses true black to keep your battery alive longer. Plus, it also changes how your Google apps look, like Calendar and Photos.1
Gesture Navigation – In Android 10 you will see the new Gesture Navigation. That’s totally different from the last android versions. In the new update, the back button is now ditched and you can easily go backward or forward via swiping left or right. Gestures are now quicker and more intuitive than ever.
Sound Amplifier – With Sound Amplifier, your phone can boost sound, filter background noise, and fine-tune to how you hear best. Yes, this also the new feature in Android 10. And many users are waiting for this feature from long time.
Smart Reply – Smart Reply is one of handy feature in Android 10 update. With this new feature, you can quickly reply to the message that you receive in your notification panel.
Live Caption – With a single tap, Live Caption automatically captions videos, podcasts, and audio messages. This feature will be available on Google Pixel smartphones very soon.
Focus Mode – The focus mode is the improved version of Digital Wellbeing which allows users to select and control app usage. Digital Wellbeing was introduced in Android 9.0 Pie version.
Family Link – Now with this new features you can manage your phone for your family or kids that what content they see. You can set screen time limits, view app activity, manage apps and content restrictions, and see where they are.
Pre-Requirements to Android 10 ROMS
- Make sure that the bootloader of your smartphone is unlocked.
- You should have a custom TWRP recovery installed on your phone.
- Take a full backup of your device data. In case anything goes wrong, you can restore the backup.
- Charge your device battery up to 60% at least for a smoother process.
Download Android 10 for Your Android
Here is a list of Android 10 Custom ROM Supported devices that you can easily download from here. Just download the ROM zip file and follow the below mention installtion instruction on your device to update your phone with Android 10 update.
Android 10 For Xaiomi phones
- Xiaomi Mi 8 (dipper) Android 10: Click Here
- Xiaomi Mi A1 (tissot): Click Here
- Xiaomi Mi A2 (jasmine_sprout): Click Here
- Xiaomi Mi Mix (lithium): Click Here
- Xiaomi Poco F1 (beryllium): Click Here
- Xiaomi Redmi 3S/3X (land): Click Here
- Xiaomi Redmi 6 Pro (sakura): Click Here
- Xiaomi Redmi K20 Pro/Mi 9T Pro (raphael): Click Here
- Xiaomi Redmi Note 5 Global/Pro (whyred): Click Here
- Xiaomi Redmi Note 5/Plus (vince): Click Here
- Xiaomi Redmi Note 7 (lavender): Click Here
- Xiaomi Redmi Note 7 Pro (violet): Click Here
Android 10 For OnePlus phones
- OnePlus 5 (cheeseburger) Android 10: Click Here
- OnePlus 5T (dumpling): Click Here
- OnePlus 6 (enchilada): Click Here
- OnePlus 7: Click Here
- OnePlus 7 Pro: Click Here
Android 10 For MotoRola phones
- Motorola Moto G5S Plus (sanders): Click Here
Android 10 For Asus phones
- Asus Zenfone Max Pro M1 (X00TD): Click Here
- Asus Zenfone Max Pro M2 (X01BD): Click Here
Android 10 for Samsung Phones
- Samsung Galaxy Grand Prime: Click Here
- Samsung Galaxy Tab E 9.6: Click Here
- Sprint Galaxy Tab E 8.0: Click Here
- Samsung Galaxy J5: Click Here
- Samsung Galaxy Alpha: Click Here
- Samsung Galaxy S2: Click Here
- Samsung Galaxy S4: Click Here
- Samsung Galaxy S4 Mini: Click Here
- Samsung Galaxy Mega 6.3: Click Here
- Samsung Galaxy J: Click Here
- Samsung Galaxy Tab A 9.7: Click Here
- Samsung Galaxy S6: Click Here
- Samsung Galaxy S7: Click Here
- Samsung Galaxy S7 Edge: Click Here
- Samsung Galaxy Note 3: Click Here
- Samsung Galaxy S5 [klte]: Click Here
- Samsung Galaxy S5 Plus: Click Here
- Galaxy S5 Active: Click Here
- Samsung Galaxy Tab S3: Click Here
- Samsung Galaxy J7 Prime: Click Here
- Samsung Galaxy Note 4: Click Here
- Samsung Galaxy A3 2017: Click Here
- Samsung Galaxy A7 2017: Click Here
- Samsung Galaxy A5 2017: Click Here
- Samsung Galaxy Ace 2: Click Here
- Samsung Galaxy A8 2018: Click Here
- Galaxy S6 edge: Click Here
- Samsung Galaxy J2 Core: Click Here
- Galaxy A7 2018: Click Here
- Samsung Galaxy Jean: Click Here
- Samsung Galaxy Tab S4: Click Here
- Samsung Galaxy Tab A Series: Click Here
So, guys, that was the list of Android devices that are supported with Android 10 [Custom ROM development]. Now, just in case, if you can’t didn’t find your device on the list, then don’t worry at all. We would be updating the list from time-to-time. So check after some time, we will update the Androdi 10 Download List soon.
How to Install the Androdi 10 On Your Android
No matter which Android smartphone you own, the custom ROM installation will always the same. Follow the process and install the Android 10 Update on your device.
1. First, install the custom TWRP recovery on your phone, Without this you can’t flash the Androdi 10 Custom ROM on your phone.
2. Now boot your phone in custom TWRP recovery. Once your phone in the TWRP custom recovery mode. Go to Wipe button, then select “Advanced Wipe” from the following screen. From here, tick the boxes next to the Dalvik Cache, System, Data, and Cache options, then swipe the slider at the bottom of the screen.

3. Go back to TWRP main menu, tap on “Install” and select the Android 10 ROM zip file and flash it. And after that Flash the Google Apps zip file ( If needed for Your ROM ).

4. Once your ROM is successfully flashed you’ll see “Wipe cache/dalvik” option Tap on it and after that Reboot System.

So this way you can install the Androdi Q update on your phone with the help of custom recovery. If you have any question about the guide or facing some problem during the process then leave the comments below, and we will help you to fix it up.
Источник


