- 5 Free Ways to Run Android Apps on Your PC
- Mirror Your Phone With Windows
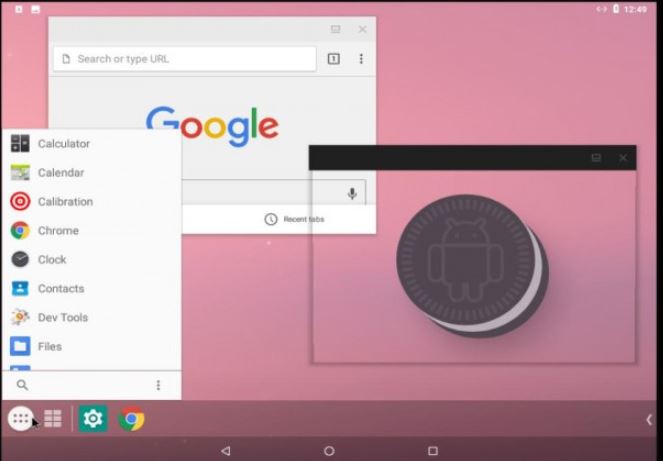
- Run Your Favorite Apps With BlueStacks
- Emulate Full Android Experience With Genymotion
- Run Android Directly on Your PC With Android-x86
- Install Android Apps From the Amazon Appstore
- Основы работы с 2D графикой на Android
- Теория
- Best Android OS for PC 64 bit or 32 bit for 2022 to download
- 6 Best Android os for PC in 2022
- Android-x86 Project – Run Android on Your PC
- Phoenix OS- Android OS for PC
- Fyde OS
- OpenThos Android OS
- PrimeOS
- Windows 11 – Android Subsystem
- Chromium OS
- BlissOS- Android OS
- Remix OS (Dead)
- Shashlik
5 Free Ways to Run Android Apps on Your PC
Want to use Android apps on a PC? These are the apps, services, and OSes that can make it happen.


Ever wish you could run an Android app or game on your PC so you weren’t relegated to a tiny phone screen? Maybe you need to test a feature on Android, but don’t have an Android device handy. Your options will depend on what mobile device you own or what version of Windows you’re running, but here are a few ways to run Android (and its apps) on your computer.
Mirror Your Phone With Windows
For apps installed on your phone, you don’t need anything fancy to get Android on your PC. Microsoft’s Your Phone app allows you to connect your Android mobile device to Windows in order to access apps, view notifications and photos, and send messages. You can even add Android apps to Favorites or pin them directly to the Windows taskbar.
If you want to mirror your phone screen directly, just click the phone screen image in the Your Phone desktop app. Grant permission to the app on your phone, and your phone screen will be displayed in Windows. You can then navigate the phone screen with the click of the mouse.
This isn’t always the ideal solution. While the feature will work with many Android phone manufacturers, it works best with Samsung phones. Some features require a Windows 10 PC running the May 2020 Update or later with at least 8GB of RAM and Android 11. If you’re looking to play games, this may come with some delay and graphical blurriness, and you won’t be able to easily share files from your PC directly to an app in Android. But for quick access to Android apps you already have installed, it definitely works in a pinch.
Run Your Favorite Apps With BlueStacks
If you’re just looking to run a couple apps and don’t need the emulator to look like Android, you should try BlueStacks. Over the years, it’s become the best Android app emulator around, and it’s packed with features that ensure your apps and games run smoothly. Since it uses virtualization to emulate Android, you’ll want to jump into your computer’s BIOS and enable Intel VT-x or AMD-V, if your computer supports it, for best performance.
Install BlueStacks as you would any other Windows or Mac app. BlueStacks 5, the latest version of the software, takes up 5GB of space on your computer (plus any apps you download). Open the app, and you’ll be greeted with a customized home screen and access to the Play Store. Download any apps you want, and they will appear on the BlueStacks home screen and your Windows desktop as their own shortcuts. Just double-click an icon to run the app in question.
BlueStacks is great for apps that don’t have corresponding desktop apps, but the emulator really shines when it comes to games. The emulator features built-in mappings for your mouse and keyboard, which you can customize to the touch controls you find on different Android games.
You can also adjust the resolution, DPI, FPS, and amount of CPU or RAM allocated to the emulator, ensuring you get the best balance between speed and graphical fidelity. (This is useful given that BlueStacks is fairly resource-intensive, as many virtual machines are.)
BlueStacks does, unfortunately, come with some ads and clutter, but it’s not as intrusive as it once was, and it’s a small price to pay for the functionality you get—especially considering the Android version options it offers.
Emulate Full Android Experience With Genymotion
If you’re looking to explore the Android operating system itself—rather than individual apps—Genymotion is a decent emulator. Its main product is designed for developers and costs money to use, but there is a free version of the software you can download for personal use; you just need to first create an account on the website.
Genymotion uses VirtualBox to emulate Android, so you’ll either need to have VirtualBox installed on your PC or download the version with VirtualBox bundled. Install it like you would any other program, ensuring you select the Personal Use version during the wizard. (And, like BlueStacks, you’ll want to enable Intel VT-x or AMD-V from your computer’s BIOS if you have it.)
When you start Genymotion, it’ll present you with a list of device templates you can install—this determines the screen resolution, Android version, and resources allotted to the emulator. Install the template you want and double-click it to enter Android. You’ll be able to navigate around the home screen, launch apps, and emulate certain events like GPS location.
Note that you’ll start with a very barebones version of Android that doesn’t even come with many of Google’s apps or modern features, though you can add the Play Store by clicking the Open Gapps icon in the sidebar to install it.
Also, no matter which template you choose, you won’t get any custom versions of Android—picking the Samsung Galaxy S10 template, for example, won’t get you Samsung’s One UI. It just determines the resolution and specs of the virtual machine. (Genymotion does support Android versions from 4.4 all the way up to 10.0, though.)
Genymotion works well for exploring Android’s settings and other built-in features, though I wouldn’t necessarily use it to run individual apps, as it doesn’t integrate as well with your PC as something like BlueStacks. If Genymotion doesn’t suit your needs, Google’s official Android software development kit also comes with an Android emulator, though setup is more complex.
Run Android Directly on Your PC With Android-x86
If you’re looking for something a bit more full-featured, the Android-x86 project gets you as close as you can get to true Android on your PC. Android-x86 is an open-source project that ports Android to the x86 platform, allowing you to run it on your computer instead of an ARM-based phone or tablet.
To run Android-x86, you have a couple of options. If you want to run Android on its own, as a desktop operating system for your PC, you can download it as an ISO disc image and burn it to a USB drive with a program like Rufus. Then, insert that USB drive into the PC in question, reboot, and enter the boot menu (usually by pressing a key like F12 during the boot process).
By booting from your Android-x86 USB drive, you’ll either be able to run Android in a live environment—without having any effect on your PC—or install it to your PC’s hard drive for permanent usage (and better performance).
Alternatively, if you want to run Android-x86 on top of your existing operating system, you can download the disc image and run it inside VirtualBox. This is, again, a bit more advanced if you aren’t familiar with VirtualBox, but our guide to running Windows on a Mac can get you acquainted with the process.
The official site has some tips for getting Android-x86 up and running in a virtual machine as well. It’s more work than using something like BlueStacks, but it’s also closer to pure Android, which is a nice perk.
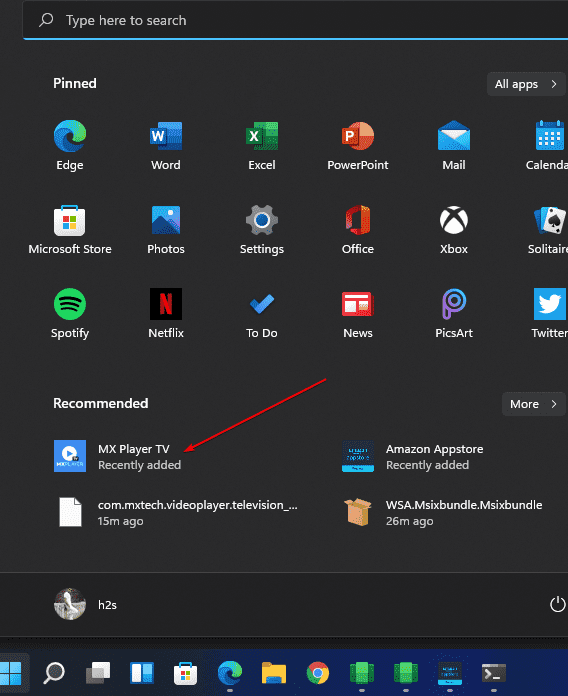
Install Android Apps From the Amazon Appstore
With Windows 11, Microsoft adds built-in support for Android apps, but for now it’s limited to those enrolled in the Windows Insider beta program, who can currently play around with 50 apps from the Amazon Appstore. You’ll also need a PC that can run Windows 11.
Windows 11 taps into a feature called Windows Subsystem for Android, which makes Android apps compatible with Microsoft’s own OS. You’ll need to install the Amazon Appstore from the Microsoft Store, which will prompt you to install Windows Subsystem. Here’s a full rundown.
Like What You’re Reading?
Sign up for Tips & Tricks newsletter for expert advice to get the most out of your technology.
This newsletter may contain advertising, deals, or affiliate links. Subscribing to a newsletter indicates your consent to our Terms of Use and Privacy Policy. You may unsubscribe from the newsletters at any time.
Your subscription has been confirmed. Keep an eye on your inbox!
Источник
Основы работы с 2D графикой на Android
Здравствуйте, читатели Хабра!
Совсем недавно я начал изучать программирование под android и конечно сразу поставил перед собой интересную цель — сделать небольшую игру.
Ознакомившись за пару дней с Java (отличный курс: intuit.ru/department/pl/javapl/) и почитав developer.android.com, перешел к самому главному пункту — к графике. И теперь предлагаю вам разобрать работу с ней на простом примере.
Теория
Для вывода 2D графики android предоставляет два пути:
а) Выводить графику в объекте View, который находится в вашем layout.
В этом случае вся графика/анимация управляется самим андроидом и вы, грубо говоря, только определяете какую картинку показать.
Этот способ подходит, если вы хотите вывести простую статичную графику, которая не должна динамично изменяться.
б) Рисовать графику напрямую на канве (Canvas). В этом случае вы вручную вызываете методы канвы для рисования картинок, геометрических объектов и текста.
Вы должны использовать этот способ, если графика в вашей программе должна часто обновляться/перерисовываться. Это как раз то, что нам нужно для игры.
Вариант «б» можно реализовать двумя способами:
1) В том же Activity, в котором находится наш класс View для вывода графики, мы зызываем метод invalidate(), который обновляет содержимое канвы.
2) Создаем отдельный поток, который обновляет содержимое канвы настолько быстро, насколько может (в этом случае не нужно вызывать invalidate()).
В первом случае изображение будет обновляться только по нашему требованию, что подходит для простых игр типа шахмат, которые не требует большого fps. Его мы и будем использовать в примере.
Сначала импортируем нужные пакеты.
import android.app.Activity;
import android.os.Bundle;
import android.view.View;
import android.view.MotionEvent;
import android.content.Context;
import android.graphics.Canvas;
import android.graphics.Bitmap;
import android.graphics.BitmapFactory;
В нашем Activity создадим класс GraphicsView, расширяющий View и определим внутри него метод onDraw(), в котором будут находиться команды рисования.
public class Game extends Activity
<
@Override
public void onCreate(Bundle savedInstanceState)
<
super.onCreate(savedInstanceState);
GraphicsView myview=new GraphicsView(this); // создаем объект myview класса GraphicsView
setContentView(myview); // отображаем его в Activity
>
public class GraphicsView extends View
<
public GraphicsView(Context context)
@Override
protected void onDraw(Canvas canvas)
<
// здесь будут находиться код, рисующий нашу графику
>
Для примера будем выводить картинку, а именно, стандартную иконку приложения.
protected void onDraw(Canvas canvas)
<
// загружаем иконку из ресурсов в объект myBitmap
Bitmap myBitmap = BitmapFactory.decodeResource(getResources(), R.drawable.icon);
// рисуем myBitmap на канве в координатах 10, 10
canvas.drawBitmap(myBitmap, 10, 10, null);
>
Можете запустить программу и вы увидите следующее:

Каждый раз, когда нам необходимо обновить содержимое GraphicsView (например при изменении координат выводимой картинки), мы должны вызвать invalidate(), который говорит андроиду, что мы хотели бы перерисовать содержимое GraphicsView, и он вызовет наш метод onDraw(). Давайте будем вызывать его при касании экрана.
Определим у нашего класса GraphicsView метод onTouchEvent().
public boolean onTouchEvent(MotionEvent event)
<
if(event.getAction() == MotionEvent.ACTION_DOWN) < invalidate() >
return true;
>
Теперь, запустив программу и коснувшись экрана, мы будем вызывать invalidate(). Но, так как код внутри onDraw() у нас не меняется, то и никаких изменений на экране мы не увидим.
Давайте менять координаты картинки на те, в которых произошло прикосновение.
Дополним код командами event.getX() и event.getX(). При прикосновении к экрану они получат координаты касания. Сохраним их в переменных touchX и touchY.
public boolean onTouchEvent(MotionEvent event)
<
if(event.getAction() == MotionEvent.ACTION_DOWN)
<
touchX = event.getX();
touchY = event.getY();
invalidate();
>
return true;
>
Вернемся к onDraw. Зададим переменные типа float с начальными нулевыми значениями и затем впишем их вместо фиксированных координат рисунка.
float touchX = 0;
float touchY = 0;
@Override
protected void onDraw(Canvas canvas)
<
// загружаем иконку из ресурсов в объект myBitmap
Bitmap myBitmap = BitmapFactory.decodeResource(getResources(), R.drawable.icon);
// рисуем myBitmap на канве в координатах касания
canvas.drawBitmap(myBitmap, touchX, touchY, null);
>
Можете запустить программу и коснуться экрана — картинка переместится в точку касания.
Надеюсь, что этот пример послужит вам толчком для дальнейшего изучения программирования для Android и возможно создания вашей первой игры.
Источник
Best Android OS for PC 64 bit or 32 bit for 2022 to download
There are only a couple of handful Android OSs for PC available in the software market that can be installed either on the bare PC system or Virtual Machine for having the Android experience without compromising base OS such as Windows 10/8/7.
Android is now one of the popular operating systems available for small handheld devices like smartphones to big TVs. However, this smart OS somewhere still lacking behind when we talk about PC or Laptop computers. It is because Android-primarily meant for smartphones. Although, there are few good emulators available that let you virtually install the Android OS on the Windows operating system but not on a bare machine such as Bluestack and Memu. Moreover, you can also use the Virtual Machines to use the Android OS for both Windows 10 or Linux PC to experience it before installing it as your primary OS.
6 Best Android os for PC in 2022
The year2021 is about to go, thus we have updated this article for the upcoming 2022. In this article, we will talk about the free/opensource & best Android OS ( operating systems) for PC for both 64 bit & 32-bit systems.
Android-x86 Project – Run Android on Your PC
When it comes to running the latest Android OS for pc then the Android-x86 is one of the best open-source Android projects available for PC. Android-x86 OS project offers compatible ISO images for both 64-bit 32-bit computer systems. If you are about to install the Android OS on some old PC then it is recommended to download the 32-bit version… The latest Android OS they offer while writing this article was Android Oreo. The users can create a bootable USB drive with the Android-x86 to run it directly from the boot.
To get some feel like Windows OS, the user can Add the Taskbar which is a launcher that comes with OS to get the Start menu and recent apps tray in landscape devices. Furthermore, as there are no sensors in our PC systems to sense the portrait mode or landscape, developers enabled ForceDefaultOrientation to run all portrait apps in landscape mode by default.
It supports both 64-bit and 32-bit kernel and userspace, OpenGL ES 3.x hardware acceleration for Intel/AMD/Nvidia, VMware and QEMU, OpenGL ES 2.0 via SwiftShader for software rendering on unsupported GPU devices, hardware-accelerated codecs on devices with Intel HD & G45 graphics family, secure booting from UEFI and installing to UEFI disk, Text-based GUI installer, Theme support to GRUB-EFI, Multi-touch, Audio, Wifi, Bluetooth, Sensors, Camera and Ethernet (DHCP only), Auto-mount external USB drive and sd card; Support arm arch apps via the native bridge mechanism. (Settings -> Android-x86 options). This Android OS for PC is an open-source project licensed under GNU General Public License (GPL) 2.0 or later.
Phoenix OS- Android OS for PC
It is another best Android-PC-based operating system with a much familiar interface that is easy to use just like Windows 10. The Phoenix OS’s current version is based on Android 7.1. It supports the keyboard and mouse in the same way as we use in Windows, macOS, or Linux PCs. It also features a few retro features such as desktop, multi-window, mouse, and keyboard operation, etc.
Furthermore, Phoenix supports shortcut keys such as Ctrl+C, Win+D, Alt+Tab, and Alt+F4. Besides common peripheral device support, it also has the ethernet compatibility to obtain an IP address automatically, manually configure IP, DNS, gateway, etc. You don’t need to download Parallel apps like applications to create dual instances of apps like Whatsapp, Instagram, etc.
It has an inbuilt function for that even a user can run identical apps in multiple windows cumulatively. To save processing power the Phoenix system uses a strict management strategy. Phoenix Android OS for PC also imposes strict restrictions on implicit broadcast and background wake-up mechanisms, which can effectively prevent the application from self-starting or waking up the device.
It has a multi-browsing capability like PC and features the AD blocker too including three different user interfaces. For productive tasks, this Android OS for PC comes with a pre-installed version of WPS offices suite, Ever note and other applications to create documents, excel sheets, manage emails, and more with large screen support…
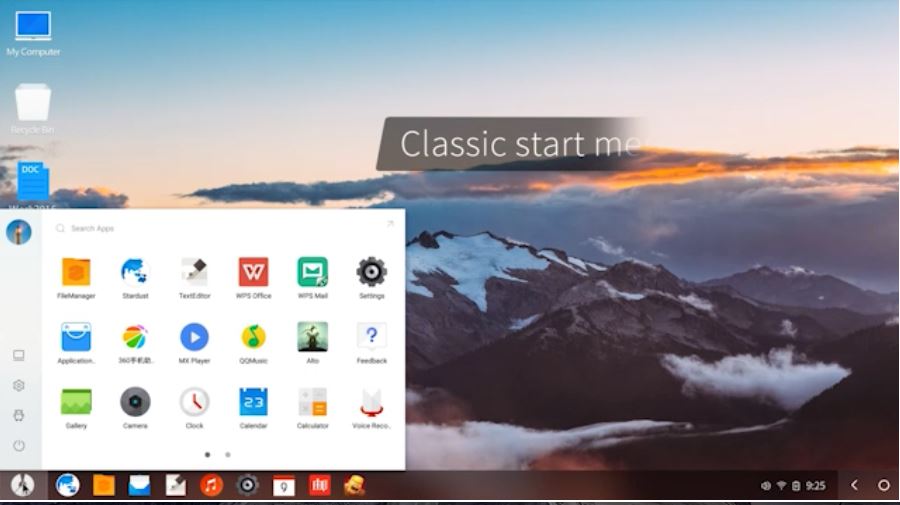
You can even play games like Pubg, Asphalt, Fortnite directly on the PC with a keyboard and mouse. The File management, Global search, built-in archiving and unarchiving support, LAN, and Drag and drop support are also there. The Phoenix is available in multiple formats one is for Desktop and the other for tablets. It can be downloaded in the form of an ISO image as well as a .exe executable file for Windows.
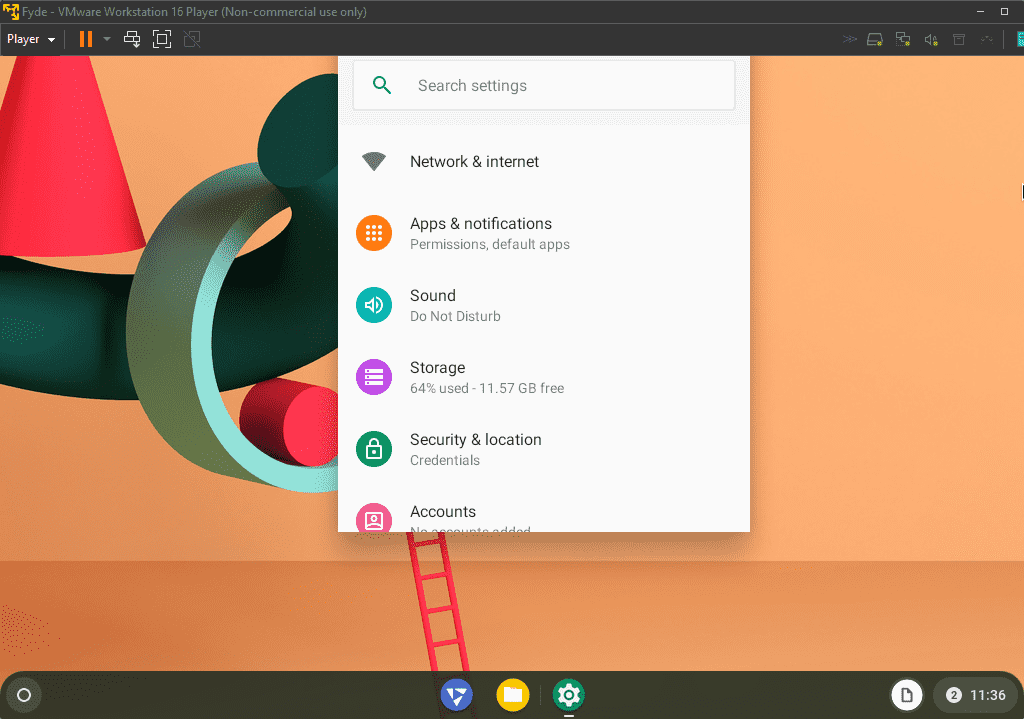
Fyde OS
FydeOS ( earlier known as FlintOS) is for those who are looking for Chromium OS with working Android. Yes, it has native support to Android AK files which allow users to install any apps with just a few clicks. Apart from that, it comes with an inbuilt app store to offer pre-select applications. Although it’s still in development, works fine if you want to install it. Virtual Image for VirtualBox/Vmware is also available to download.
Well, although Android is there the OS doesn’t come with Play Store support. As it developed to bring Chrome OS into the hands of Chinese users. The users require 2GB of RAM and at least 16GB of free hard disk storage space. If you’re a developer, you can check out the Fyde operating system code on GitHub. This Android+Chrome OS easily run on the old and new hardware system.
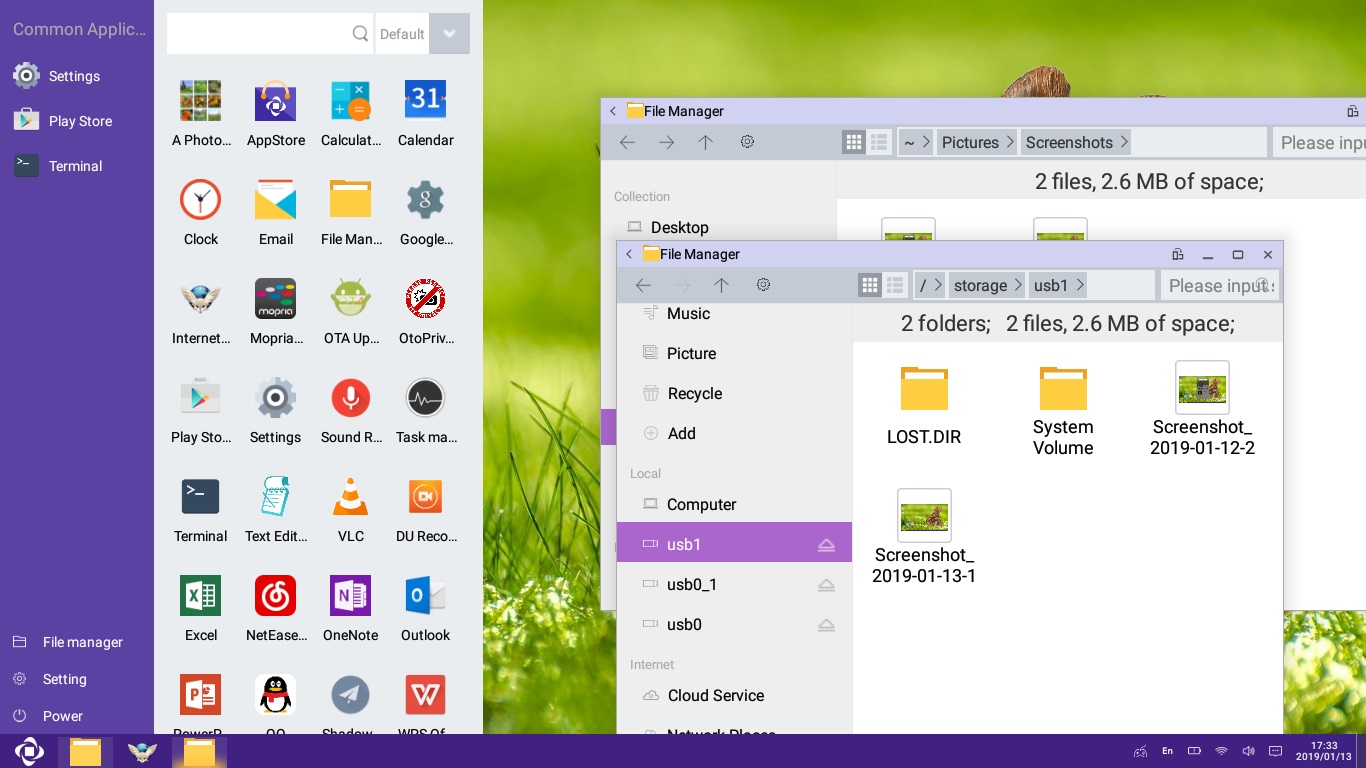
OpenThos Android OS
OpenThos is the Android-based operating system that can provide a full-fledged Android X86 experience on PC with additional apps and functions. It is based on a free and open-source (Foss) Android OS called Android-X86, although the base of both PC Android operating systems is the same, the look and feel are quite different. The OpenThos looks very professional with Windows 10 like interfaces such as Taskbar, My computer icon, and right side notification panel.
PrimeOS
PrimeOS is an Android-based OS for a Laptop/PC. It is also based on the open-source Android x86 project. It enables you to experience Android with a complete desktop interface. PrimeOS supports the whole Android application ecosystem with the multiwindow feature.
PrimeOS is also equipped with a key mapping tool that lets you set Android game controls to keyboard/mouse. Now play any Android game on any PC and make the highest score ever. It can convert your PC into an Android Machine with a much better experience than an emulator.
The System Requirements for PrimeOS are: It supports a wide range of Intel/AMD-based processors both 32-bit & 64-bit instruction systems and UEFI & Legacy boot too. The minimum RAM it needs is 2GB and Storage is a minimum of 6GB.

Windows 11 – Android Subsystem
It may sound a little bit wired that we have listed Windows 11 as an Android operating system. But if you don’t know just like the Linux integration, Microsoft also has integrated Android system in its Windows 11 operating system. This allows the user to run most of the Android application like any other Windows program natively, directly from the Application launcher or Taskbar shortcut icon. However, currently while writing this article the Win 11 was still in the development stage, nevertheless, if someone wants to give its Android system before the final version will be available for the public type out our tutorial-
Chromium OS
If you want to have the facility of both Chromium, Linux, and Android OS, then try to install ChromeOS on your PC or laptop. It is an operating system developed by Google and offers lightweight which not only requires low hardware resources but also consumes less battery power if you are using a Laptop. The interface is quite easy to use, designed generally for those who want to use apps available on Play Store, Chrome Store, and Debian Linux supported. However, the thing which might not sound good in the process of its installation is the complexity and the user needs to have some knowledge of how OS installation works. However, working of Android properly in ChromeOS on some third-party hardware is still less. If you want to give a hand to this, try out our tutorial: How to install Chrome OS on Laptop or PC.
BlissOS- Android OS
BlissOS Android operating system was developed by a team effort of different developers such as Chainfire, CM/LineageOS, Android-x86, Jide, and others. The BlissOS is for your x86-based devices which include desktops, laptops, tablets, maker boards, and a lot more. It supports both BIOS/CSM and UEFI boot.
The builds of the BlissOs are compatible with PC, MacBooks, and Chromebooks that come with CPUs from Intel and AMD, and GPUs from Intel, AMD, or Nvidia.
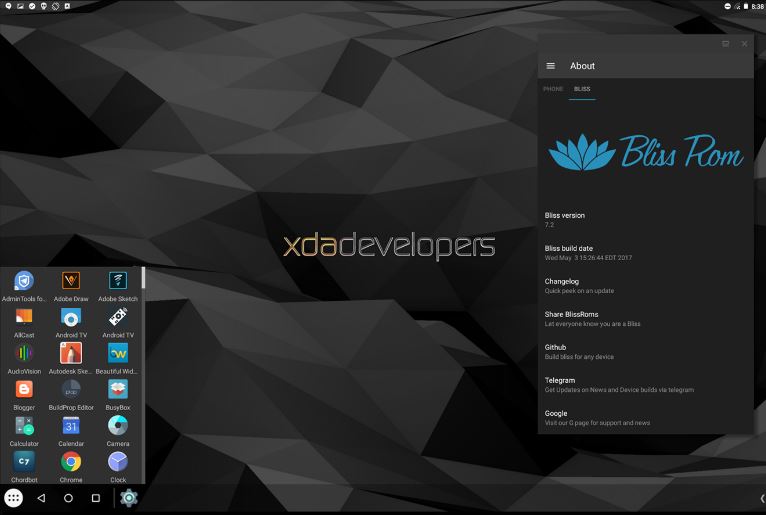
To give a more desktop-like feel the developers have integrated the Taskbar launcher developed by the farmerbb along with an orientation app that forces installed apps to start in the landscape mode. For gamers, the BlissOS includes Octopus. The Octopus is a solution that allows users to map the on-screen controls with gamepads, mouses, keyboards, developed by the Phoenix OS team. It can be downloaded separately to work with the above-mentioned Android OS for PC too. However, it is still in its beta stage and also has glitches.

Download BlissOS for PC from Sourceforge and the Official website.
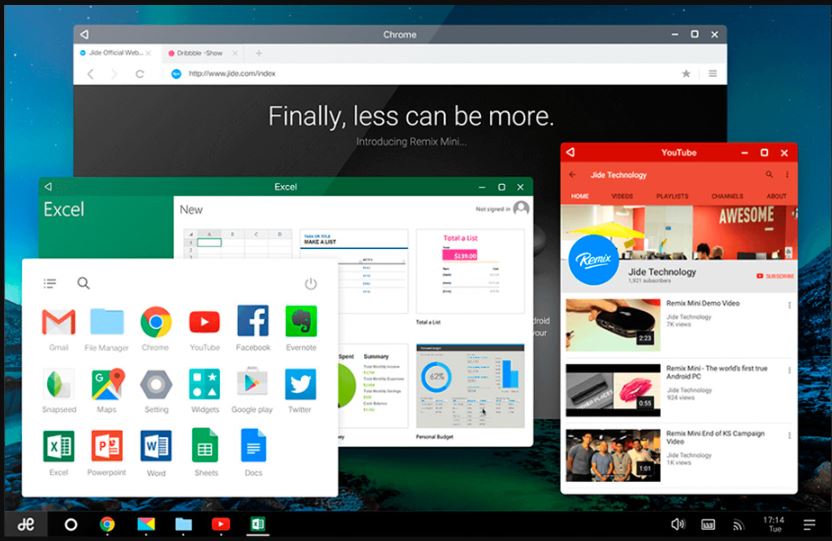
Remix OS (Dead)
Note: The Remix OS has discontinued Android OS for PC and now getting no more updates. The developers have abandoned it to work on some other enterprise project, however, it is still available on the website to download.
It was one of the best Android OS and if someone wants to experience it then he/she can. It is available for personal computers with x86 and ARM architectures. It allowed PC users to run Android mobile apps on any compatible Intel-based PC. The Remix OS is based on Android-x86 and is available to free download, it supports 32-bit & 64-bit systems and UEFI boot. The system requirements of Remix OS are a 2 GHz dual-core processor(at least), 2 GB system memory and a minimum of 8 GB of free hard drive space. The last update of this Android OS for PC was based on Android Marshmallow.
Few other options to run Android on PC.
Maru introduced a different approach to running Android on PC. It is available for some selected smartphones as firmware that once installed on the smartphone; can be used as both smartphones and when connected to PC gives a complete desktop experience. Your phone runs independently of your desktop so you can take a call and work on your big screen at the same time. Just like the Samsung DeX.
You can read more about it on their official website.
Shashlik
This is not an Android OS as mentioned above but an approach to run the Android applications on Linux desktops in the easiest form. It’s a Linux base that we can nest inside our session. OpenGL and graphics are all rendered on the host ensuring fast performance. Shashlik provides an incredibly stripped-down Android base that boots directly into the loaded app, but with a running activity manager and daemons so that intents still work correctly.
Furthermore, you can see the best available emulators to run the Android on PC not natively but virtually: 10 Best Android Emulators For Windows 10 and Mac PC
Источник


