- Делаем сервер из Android-телефона
- Часть первая. Прошивка
- Часть вторая. Настройка PostmarketOS
- Настройка сети
- Android Debug Bridge (adb)
- How adb works
- Enable adb debugging on your device
- Connect to a device over Wi-Fi (Android 11+)
- Connect to a device over Wi-Fi (Android 10 and lower)
- Query for devices
- Emulator not listed
- Send commands to a specific device
- Install an app
- Set up port forwarding
- Copy files to/from a device
- Stop the adb server
- Issuing adb commands
- Issue shell commands
- Call activity manager ( am )
- Specification for intent arguments
- Call package manager ( pm )
- Call device policy manager ( dpm )
- Take a screenshot
- Record a video
- Read ART profiles for apps
- Reset test devices
- sqlite
Делаем сервер из Android-телефона
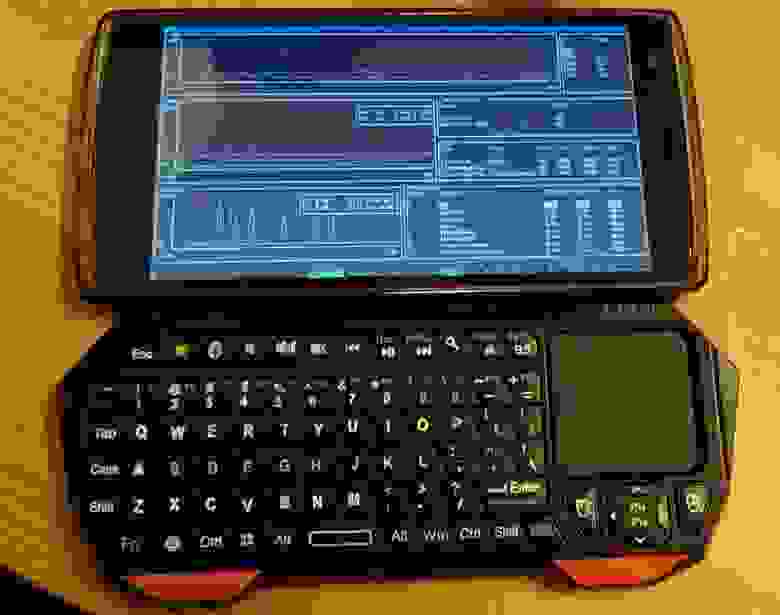
Некоторое время назад мне пришла в голову интересная идея — превратить свои старые телефоны (их скопилось немало за десять лет) в серверы, в качестве альтернативы покупке Raspberry Pi.
На то было несколько причин: во-первых, у телефонов есть батарея, что для сервера практически бесплатный мини-UPS, во-вторых, внутренняя память смартфона (UFS) работает быстрее и надёжнее, чем SD-карта. В-третьих, у телефонов имеется экран, по которому можно отслеживать состояние сервера.
Ну и в-четвёртых, мне просто было жаль их выбрасывать. Консьюмеризм в наше время предписывает каждый год-два покупать новые смартфоны, производители блокируют возможности железа, которые им невыгодны, прекращают поддержку старых моделей, оставляя людей беспомощными. Миллионы смартфонов отправляются на свалку истории каждый год, хотя каждый из них это мощный компьютер.
TL;DR: в этом посте будут разобраны вопросы установки PostmarketOS на смартфон,
поднятия на нём в качестве примера Docker и веб-приложения в нём.
Сразу хочу оговориться — я понимаю, что есть типовые решения, например Termux или UserLAnd, и спектр поддерживаемых устройств у них шире. Но все они работают как надстройки над основной системой, Android, и подвержены её ограничениям, таким как агрессивное сокращение энергопотребления или перенос задач на LITTLE-ядра при выключении экрана. Будущее Termux, например, вообще неясно из-за всё более жёстких гаек безопасности в Android 11. UserLAnd, помимо этого, работает через PRoot, который при всей своей пользе ощутимо замедляет процессы с большим количеством системных вызовов. В этой статье мы разбираем именно создание сервера на железе без Android.
Часть первая. Прошивка
Проект PostmarketOS был создан именно ради этой цели — сохранение вычислительных устройств после прекращения их поддержки производителями. Список поддерживаемых устройств можно найти здесь.
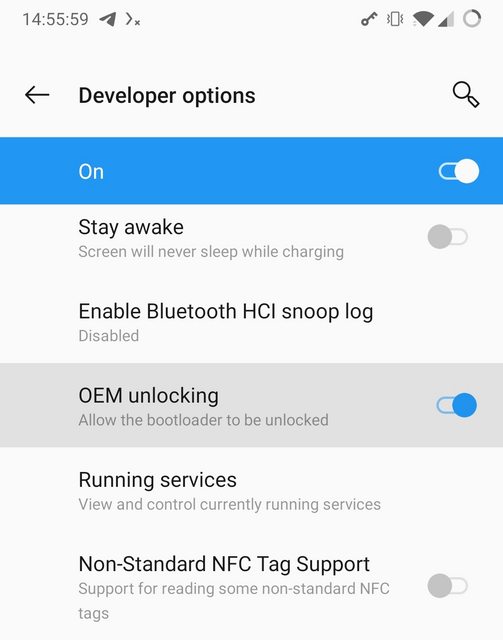
Для установки требуется телефон с разблокированным загрузчиком. В качестве примера буду использовать OnePlus One из-за простоты разлочки со стороны производителя. Для каждого производителя список шагов разный, ниже привожу обобщённые действия для смартфона 2018-2021 года выпуска:
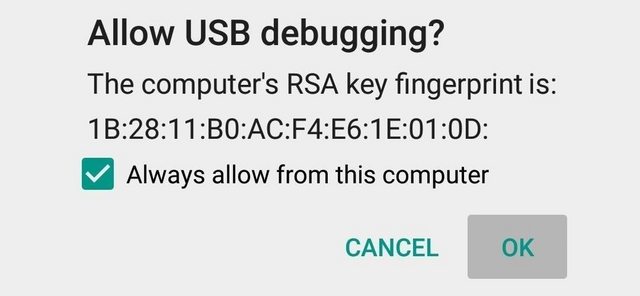
Далее авторизуем подключение на самом телефоне
После разблокировки телефон сбросит данные снова перезагрузится в Android, перезапустите его в режим fastboot комбинацией клавиш или повторите релевантные для этого шаги 3 и 4.
Если разблокировка прошла успешно, далее можно следовать стандартной процедуре установки PmOS:
На этом этапе pmbootstrap запросит пароль и задаст довольно много вопросов о том, как сконфигурировать систему и целевое устройство. Итоговый результат будет записан в
Пару слов по поводу разных конфигураций. Здесь есть несколько важных пунктов — ядро mainline или downstream , графическая среда mate , weston и т.д., канал обновлений edge или stable . Интуиция при выборе значений должна быть такой:
- Если планируете пользоваться графикой, ставьте пароль из цифр. Некоторые графические среды поддерживают только цифровую клавиатуру на экране ввода пин-кода.
- Выбирайте edge в качестве канала обновлений. PostmarketOS разрабатывается быстро, и много опакеченного ПО ещё долго не будет в stable .
- Выбирайте ядро downstream если хотите максимум работающей «из коробки» второстепенной периферии после установки. Выбирайте ядро mainline если вам нужен OpenGL/OpenCL и современные возможности ядра, такие как контейнеризация и cgroups.
- Выбирайте графическую систему phosh , sway или plasma-mobile если у ваc ядро mainline и имеется графическое ускорение. В противном случае остановитесь на mate или xfce4 . Внимательно смотрите страницу вики для вашего устройства.
Затем с помощью pmbootstrap install сразу же начинаем сборку образа целевой системы. После сборки её предлагается установить самому, так как механизм установки варьируется от модели к модели. Пример того, как это делается стандартно, и как вышло у меня, ниже.
Есть хорошие шансы, что всё сработает как надо с первого раза. К сожалению, загрузчики и реализацию fastboot каждый производитель телефонов пишет по-своему, отчего попытки установки превращаются в смерть от тысячи иголок. В моём случае fastboot наотрез отказывался прошивать образы такого размера. Пришлось воспользоваться сторонним recovery, чтобы продвинуться дальше:
После завершения процесса sideload жмём «Reboot to system». Должен пойти процесс загрузки ядра и далее самой PostmarketOS.
Часть вторая. Настройка PostmarketOS
По сути своей, PostmarketOS построена на основе дистрибутива Linux под названием Alpine. Это позволяет создать работающую систему минимального размера, что для большого количества старых устройств с ограниченной внутренней памятью критично.
Однако, есть и подводные камни. О них ниже:
- Alpine построен на основе лаконичного libc под названием Musl. Плохая новость тут в том, что большинство других дистрибутивов работает на основе glibc, что означает невозможность установки ПО простым переносом бинарников с Raspbian или Ubuntu ARM, как позволяет, например, Golang или Rust.
- Система инициализации в дистрибутиве — OpenRC. Если вы знакомы с Gentoo, это для вас не будет озарением, но OpenRC куда ближе к прародителю sysvinit, чем к общепринятому в индустрии systemd. Имейте в виду.
- Для уменьшения размера используется Busybox, поэтому команды grep / sed / find и т.д. имеют ограниченный набор опций по умолчанию. Устанавливайте их GNU-версии и стандартный Bash-шелл отдельно, чтобы получить полный набор.
Итак, после загрузки телефона с PostmarketOS нам необходимо каким-то образом с ним взаимодействовать. Если вы ставили оболочку Phosh или Plasma Mobile, скорее всего вы сможете это сделать напрямую с тачскрина телефона. Если по каким-то причинам графический интерфейс не сработал, подключайте телефон к компьютеру USB-кабелем, PostmarketOS автоматически создаст дополнительную сеть:
После чего к телефону можно будет подключиться с именем и паролем пользователя, который вы указывали при pmbootstrap install :
Если вы видите эти строчки — значит PostmarketOS установлена верно. В противном случае попробуйте посмотреть секцию Troubleshooting для вашего устройства на вики PmOS, измените конфигурацию для pmbootstrap install или спросите мейнтейнеров в IRC или Matrix чате (все три пункта ваш покорный слуга в итоге и сделал).
Настройка сети
Если не получилось настроить WiFi сеть через графическую оболочку, ниже пример как сделать это через консоль. Предварительно подключите телефон к USB-интерфейсу вашего ПК.
Источник
Android Debug Bridge (adb)
Android Debug Bridge (adb) is a versatile command-line tool that lets you communicate with a device. The adb command facilitates a variety of device actions, such as installing and debugging apps, and it provides access to a Unix shell that you can use to run a variety of commands on a device. It is a client-server program that includes three components:
- A client, which sends commands. The client runs on your development machine. You can invoke a client from a command-line terminal by issuing an adb command.
- A daemon (adbd), which runs commands on a device. The daemon runs as a background process on each device.
- A server, which manages communication between the client and the daemon. The server runs as a background process on your development machine.
adb is included in the Android SDK Platform-Tools package. You can download this package with the SDK Manager, which installs it at android_sdk /platform-tools/ . Or if you want the standalone Android SDK Platform-Tools package, you can download it here.
For information on connecting a device for use over ADB, including how to use the Connection Assistant to troubleshoot common problems, see Run apps on a hardware device.
How adb works
When you start an adb client, the client first checks whether there is an adb server process already running. If there isn’t, it starts the server process. When the server starts, it binds to local TCP port 5037 and listens for commands sent from adb clients—all adb clients use port 5037 to communicate with the adb server.
The server then sets up connections to all running devices. It locates emulators by scanning odd-numbered ports in the range 5555 to 5585, the range used by the first 16 emulators. Where the server finds an adb daemon (adbd), it sets up a connection to that port. Note that each emulator uses a pair of sequential ports — an even-numbered port for console connections and an odd-numbered port for adb connections. For example:
Emulator 1, console: 5554
Emulator 1, adb: 5555
Emulator 2, console: 5556
Emulator 2, adb: 5557
and so on.
As shown, the emulator connected to adb on port 5555 is the same as the emulator whose console listens on port 5554.
Once the server has set up connections to all devices, you can use adb commands to access those devices. Because the server manages connections to devices and handles commands from multiple adb clients, you can control any device from any client (or from a script).
Enable adb debugging on your device
To use adb with a device connected over USB, you must enable USB debugging in the device system settings, under Developer options. To use adb with a device connected over Wi-Fi, see Connect to a device over Wi-Fi.
On Android 4.2 and higher, the Developer options screen is hidden by default. To make it visible, go to Settings > About phone and tap Build number seven times. Return to the previous screen to find Developer options at the bottom.
On some devices, the Developer options screen might be located or named differently.
You can now connect your device with USB. You can verify that your device is connected by executing adb devices from the android_sdk /platform-tools/ directory. If connected, you’ll see the device name listed as a «device.»
Note: When you connect a device running Android 4.2.2 or higher, the system shows a dialog asking whether to accept an RSA key that allows debugging through this computer. This security mechanism protects user devices because it ensures that USB debugging and other adb commands cannot be executed unless you’re able to unlock the device and acknowledge the dialog.
For more information about connecting to a device over USB, read Run Apps on a Hardware Device.
Connect to a device over Wi-Fi (Android 11+)
Android 11 and higher support deploying and debugging your app wirelessly from your workstation using Android Debug Bridge (adb). For example, you can deploy your debuggable app to multiple remote devices without physically connecting your device via USB. This eliminates the need to deal with common USB connection issues, such as driver installation.
To use wireless debugging, you need to pair your device to your workstation using a pairing code. Your workstation and device must be connected to the same wireless network. To connect to your device, follow these steps:
- On your workstation, update to the latest version of the SDK Platform-Tools.
- On the device, enable developer options.
- Enable the Wireless debugging option.
- On the dialog that asks Allow wireless debugging on this network?, click Allow.
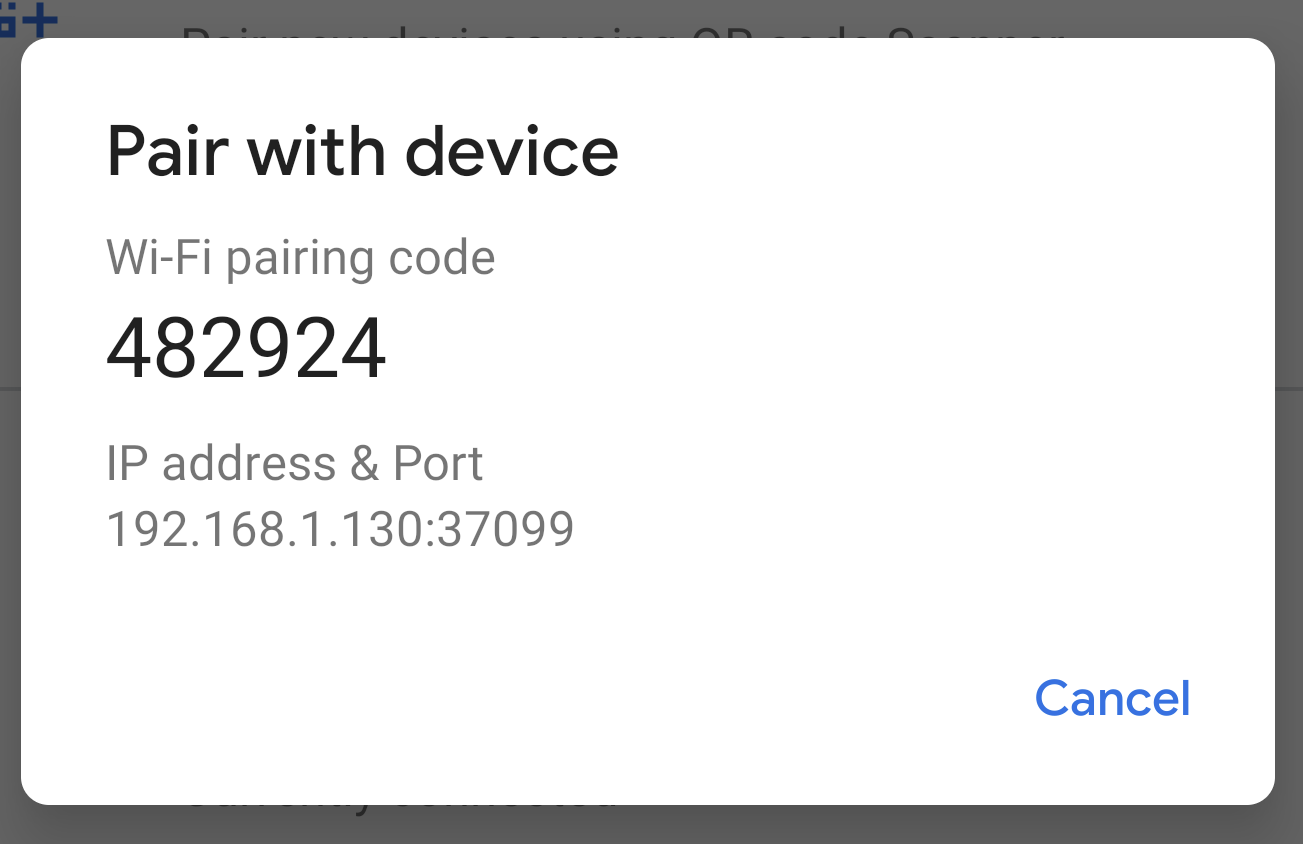
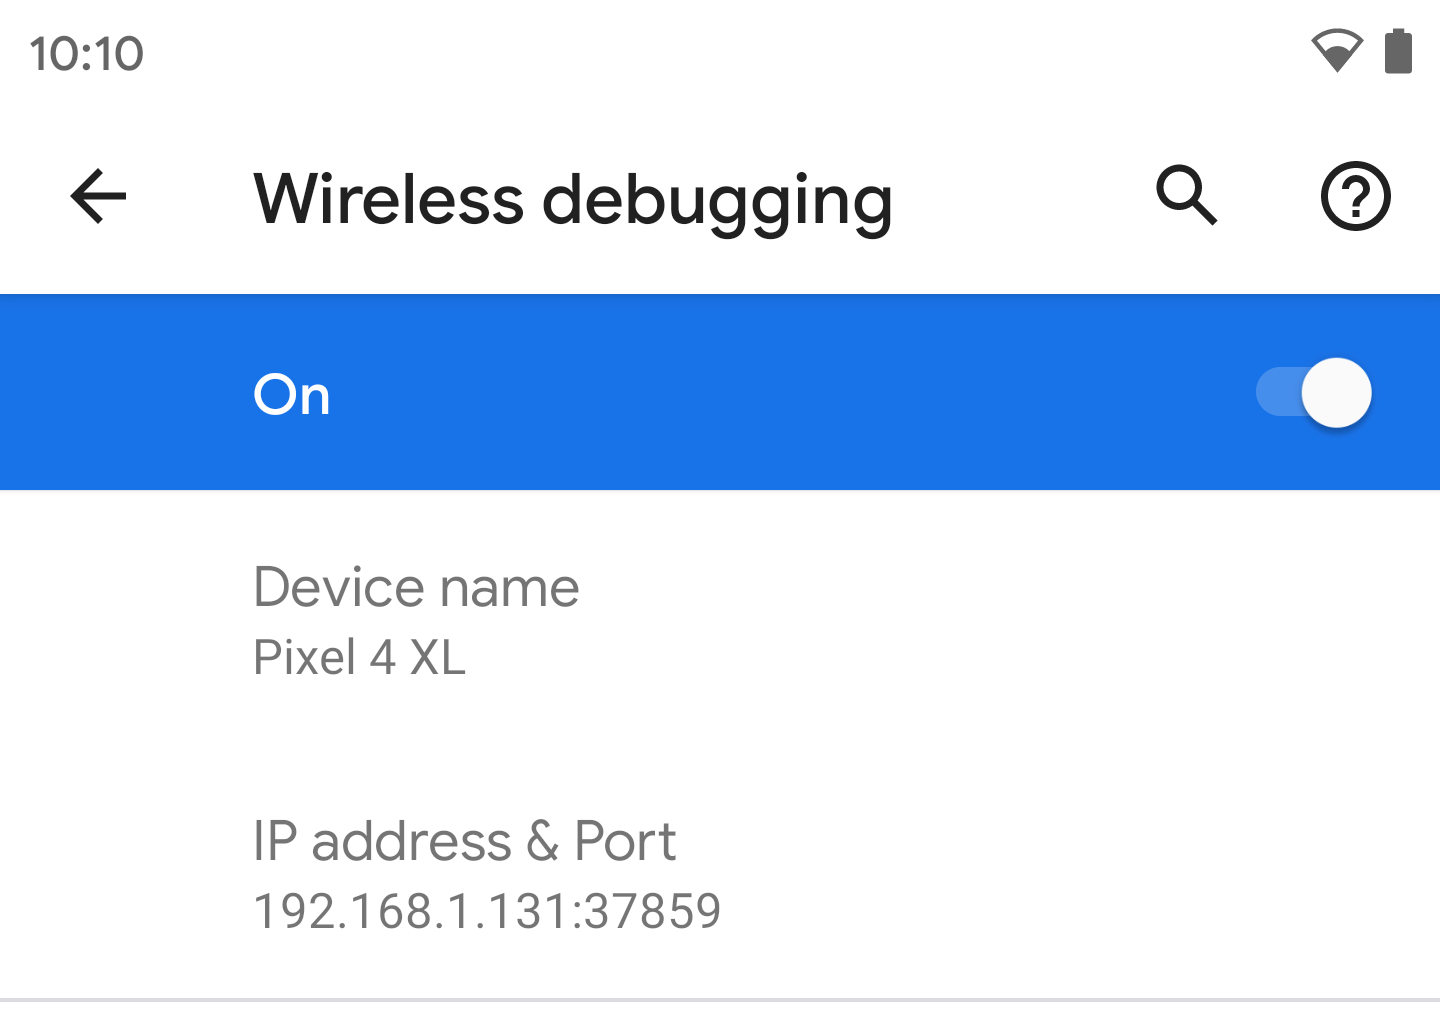
- Select Pair device with pairing code. Take note of the pairing code, IP address, and port number displayed on the device (see image).
- On your workstation, open a terminal and navigate to android_sdk /platform-tools .
- Run adb pair ipaddr : port . Use the IP address and port number from step 5.
- When prompted, enter the pairing code that you received in step 5. A message indicates that your device has been successfully paired.
- (For Linux or Microsoft Windows only) Run adb connect ipaddr : port . Use the IP address and port under Wireless debugging.
Connect to a device over Wi-Fi (Android 10 and lower)
adb usually communicates with the device over USB, but you can also use adb over Wi-Fi given the following:
- To connect to a device running Android 11 (and later), see the Wi-Fi section in Run Apps on a Hardware Device.
- To connect to a device running earlier versions of Android, there are some initial steps you must do over USB. These steps are described below.
- If you’re developing for Wear OS, see the guide to debugging a Wear OS app, which has special instructions for using adb with Wi-Fi and Bluetooth.
- Connect your Android device and adb host computer to a common Wi-Fi network accessible to both. Beware that not all access points are suitable; you might need to use an access point whose firewall is configured properly to support adb.
- If you are connecting to a Wear OS device, turn off Bluetooth on the phone that’s paired with the device.
- Connect the device to the host computer with a USB cable.
- Set the target device to listen for a TCP/IP connection on port 5555.
- Disconnect the USB cable from the target device.
- Find the IP address of the Android device. For example, on a Nexus device, you can find the IP address at Settings >About tablet (or About phone) >Status >IP address. Or, on a Wear OS device, you can find the IP address at Settings >Wi-Fi Settings >Advanced >IP address.
- Connect to the device by its IP address.
- Confirm that your host computer is connected to the target device:
You’re now good to go!
If the adb connection is ever lost:
- Make sure that your host is still connected to the same Wi-Fi network your Android device is.
- Reconnect by executing the adb connect step again.
- Or if that doesn’t work, reset your adb host:
Then start over from the beginning.
Query for devices
Before issuing adb commands, it is helpful to know what device instances are connected to the adb server. You can generate a list of attached devices using the devices command.
In response, adb prints this status information for each device:
- Serial number: A string created by adb to uniquely identify the device by its port number. Here’s an example serial number: emulator-5554
- State: The connection state of the device can be one of the following:
- offline : The device is not connected to adb or is not responding.
- device : The device is now connected to the adb server. Note that this state does not imply that the Android system is fully booted and operational because the device connects to adb while the system is still booting. However, after boot-up, this is the normal operational state of an device.
- no device : There is no device connected.
- Description: If you include the -l option, the devices command tells you what the device is. This information is helpful when you have multiple devices connected so that you can tell them apart.
The following example shows the devices command and its output. There are three devices running. The first two lines in the list are emulators, and the third line is a hardware device that is attached to the computer.
Emulator not listed
The adb devices command has a corner-case command sequence that causes running emulator(s) to not show up in the adb devices output even though the emulator(s) are visible on your desktop. This happens when all of the following conditions are true:
- The adb server is not running, and
- You use the emulator command with the -port or -ports option with an odd-numbered port value between 5554 and 5584, and
- The odd-numbered port you chose is not busy so the port connection can be made at the specified port number, or if it is busy, the emulator switches to another port that meets the requirements in 2, and
- You start the adb server after you start the emulator.
One way to avoid this situation is to let the emulator choose its own ports, and don’t run more than 16 emulators at once. Another way is to always start the adb server before you use the emulator command, as explained in the following examples.
Example 1: In the following command sequence, the adb devices command starts the adb server, but the list of devices does not appear.
Stop the adb server and enter the following commands in the order shown. For the avd name, provide a valid avd name from your system. To get a list of avd names, type emulator -list-avds . The emulator command is in the android_sdk /tools directory.
Example 2: In the following command sequence, adb devices displays the list of devices because the adb server was started first.
To see the emulator in the adb devices output, stop the adb server, and then start it again after using the emulator command and before using the adb devices command, as follows:
For more information about emulator command-line options, see Using Command Line Parameters.
Send commands to a specific device
If multiple devices are running, you must specify the target device when you issue the adb command. To specify the target, use the devices command to get the serial number of the target. Once you have the serial number, use the -s option with the adb commands to specify the serial number. If you’re going to issue a lot of adb commands, you can set the $ANDROID_SERIAL environment variable to contain the serial number instead. If you use both -s and $ANDROID_SERIAL , -s overrides $ANDROID_SERIAL .
In the following example, the list of attached devices is obtained, and then the serial number of one of the devices is used to install the helloWorld.apk on that device.
Note: If you issue a command without specifying a target device when multiple devices are available, adb generates an error.
If you have multiple devices available, but only one is an emulator, use the -e option to send commands to the emulator. Likewise, if there are multiple devices but only one hardware device attached, use the -d option to send commands to the hardware device.
Install an app
You can use adb to install an APK on an emulator or connected device with the install command:
You must use the -t option with the install command when you install a test APK. For more information, see -t .
For more information about how to create an APK file that you can install on an emulator/device instance, see Build and Run Your App.
Note that, if you are using Android Studio, you do not need to use adb directly to install your app on the emulator/device. Instead, Android Studio handles the packaging and installation of the app for you.
Set up port forwarding
You can use the forward command to set up arbitrary port forwarding, which forwards requests on a specific host port to a different port on a device. The following example sets up forwarding of host port 6100 to device port 7100:
The following example sets up forwarding of host port 6100 to local:logd:
Copy files to/from a device
Use the pull and push commands to copy files to and from an device. Unlike the install command, which only copies an APK file to a specific location, the pull and push commands let you copy arbitrary directories and files to any location in a device.
To copy a file or directory and its sub-directories from the device, do the following:
To copy a file or directory and its sub-directories to the device, do the following:
Replace local and remote with the paths to the target files/directory on your development machine (local) and on the device (remote). For example:
Stop the adb server
In some cases, you might need to terminate the adb server process and then restart it to resolve the problem (e.g., if adb does not respond to a command).
To stop the adb server, use the adb kill-server command. You can then restart the server by issuing any other adb command.
Issuing adb commands
You can issue adb commands from a command line on your development machine or from a script. The usage is:
If there’s only one emulator running or only one device connected, the adb command is sent to that device by default. If multiple emulators are running and/or multiple devices are attached, you need to use the -d , -e , or -s option to specify the target device to which the command should be directed.
You can see a detailed list of all supported adb commands using the following command:
Issue shell commands
You can use the shell command to issue device commands through adb, or to start an interactive shell. To issue a single command use the shell command like this:
To start an interactive shell on a device use the shell command like this:
To exit an interactive shell, press Control + D or type exit .
Note: With Android Platform-Tools 23 and higher, adb handles arguments the same way that the ssh(1) command does. This change has fixed a lot of problems with command injection and makes it possible to now safely execute commands that contain shell metacharacters, such as adb install Let\’sGo.apk . But, this change means that the interpretation of any command that contains shell metacharacters has also changed. For example, the adb shell setprop foo ‘a b’ command is now an error because the single quotes ( ‘ ) are swallowed by the local shell, and the device sees adb shell setprop foo a b . To make the command work, quote twice, once for the local shell and once for the remote shell, the same as you do with ssh(1) . For example, adb shell setprop foo «‘a b'» .
Android provides most of the usual Unix command-line tools. For a list of available tools, use the following command:
Help is available for most of the commands via the —help argument. Many of the shell commands are provided by toybox. General help applicable to all toybox commands is available via toybox —help .
See also Logcat Command-Line Tool which is useful for monitoring the system log.
Call activity manager ( am )
Within an adb shell, you can issue commands with the activity manager ( am ) tool to perform various system actions, such as start an activity, force-stop a process, broadcast an intent, modify the device screen properties, and more. While in a shell, the syntax is:
You can also issue an activity manager command directly from adb without entering a remote shell. For example:
Table 2. Available activity manager commands
| Command | Description | |||||||||||||||||||||||||||||||||||||||||||||||||||||||||||||||||||||||||||||
|---|---|---|---|---|---|---|---|---|---|---|---|---|---|---|---|---|---|---|---|---|---|---|---|---|---|---|---|---|---|---|---|---|---|---|---|---|---|---|---|---|---|---|---|---|---|---|---|---|---|---|---|---|---|---|---|---|---|---|---|---|---|---|---|---|---|---|---|---|---|---|---|---|---|---|---|---|---|---|
| start [ options ] intent | Start an Activity specified by intent . Options are:
| |||||||||||||||||||||||||||||||||||||||||||||||||||||||||||||||||||||||||||||
| startservice [ options ] intent | Start the Service specified by intent . Options are:
| |||||||||||||||||||||||||||||||||||||||||||||||||||||||||||||||||||||||||||||
| force-stop package | Force stop everything associated with package (the app’s package name). | |||||||||||||||||||||||||||||||||||||||||||||||||||||||||||||||||||||||||||||
| kill [ options ] package | Kill all processes associated with package (the app’s package name). This command kills only processes that are safe to kill and that will not impact the user experience. Options are:
| |||||||||||||||||||||||||||||||||||||||||||||||||||||||||||||||||||||||||||||
| kill-all | Kill all background processes. | |||||||||||||||||||||||||||||||||||||||||||||||||||||||||||||||||||||||||||||
| broadcast [ options ] intent | Issue a broadcast intent. Options are:
| |||||||||||||||||||||||||||||||||||||||||||||||||||||||||||||||||||||||||||||
| instrument [ options ] component | Start monitoring with an Instrumentation instance. Typically the target component is the form test_package / runner_class . Options are:
| |||||||||||||||||||||||||||||||||||||||||||||||||||||||||||||||||||||||||||||
| profile start process file | Start profiler on process , write results to file . | |||||||||||||||||||||||||||||||||||||||||||||||||||||||||||||||||||||||||||||
| profile stop process | Stop profiler on process . | |||||||||||||||||||||||||||||||||||||||||||||||||||||||||||||||||||||||||||||
| dumpheap [ options ] process file | Dump the heap of process , write to file . Options are:
| |||||||||||||||||||||||||||||||||||||||||||||||||||||||||||||||||||||||||||||
| set-debug-app [ options ] package | Set app package to debug. Options are:
| |||||||||||||||||||||||||||||||||||||||||||||||||||||||||||||||||||||||||||||
| clear-debug-app | Clear the package previous set for debugging with set-debug-app . | |||||||||||||||||||||||||||||||||||||||||||||||||||||||||||||||||||||||||||||
| monitor [ options ] | Start monitoring for crashes or ANRs. Options are:
| |||||||||||||||||||||||||||||||||||||||||||||||||||||||||||||||||||||||||||||
| screen-compat | Control screen compatibility mode of package . | |||||||||||||||||||||||||||||||||||||||||||||||||||||||||||||||||||||||||||||
| display-size [reset | width x height ] | Override device display size. This command is helpful for testing your app across different screen sizes by mimicking a small screen resolution using a device with a large screen, and vice versa. Example: | |||||||||||||||||||||||||||||||||||||||||||||||||||||||||||||||||||||||||||||
| display-density dpi | Override device display density. This command is helpful for testing your app across different screen densities on high-density screen environment using a low density screen, and vice versa. Example: | |||||||||||||||||||||||||||||||||||||||||||||||||||||||||||||||||||||||||||||
| to-uri intent | Print the given intent specification as a URI. See the Specification for intent arguments. | |||||||||||||||||||||||||||||||||||||||||||||||||||||||||||||||||||||||||||||
| to-intent-uri intent | Print the given intent specification as an intent: URI. Specification for intent argumentsFor activity manager commands that take an intent argument, you can specify the intent with the following options: -a action Specify the intent action, such as android.intent.action.VIEW . You can declare this only once. -d data_uri Specify the intent data URI, such as content://contacts/people/1 . You can declare this only once. -t mime_type Specify the intent MIME type, such as image/png . You can declare this only once. -c category Specify an intent category, such as android.intent.category.APP_CONTACTS . -n component Specify the component name with package name prefix to create an explicit intent, such as com.example.app/.ExampleActivity . -f flags Add flags to the intent, as supported by setFlags() . —esn extra_key Add a null extra. This option is not supported for URI intents. -e | —es extra_key extra_string_value Add string data as a key-value pair. —ez extra_key extra_boolean_value Add boolean data as a key-value pair. —ei extra_key extra_int_value Add integer data as a key-value pair. —el extra_key extra_long_value Add long data as a key-value pair. —ef extra_key extra_float_value Add float data as a key-value pair. —eu extra_key extra_uri_value Add URI data as a key-value pair. —ecn extra_key extra_component_name_value Add a component name, which is converted and passed as a ComponentName object. —eia extra_key extra_int_value [, extra_int_value . ] Add an array of integers. —ela extra_key extra_long_value [, extra_long_value . ] Add an array of longs. —efa extra_key extra_float_value [, extra_float_value . ] Add an array of floats. —grant-read-uri-permission Include the flag FLAG_GRANT_READ_URI_PERMISSION . —grant-write-uri-permission Include the flag FLAG_GRANT_WRITE_URI_PERMISSION . —debug-log-resolution Include the flag FLAG_DEBUG_LOG_RESOLUTION . —exclude-stopped-packages Include the flag FLAG_EXCLUDE_STOPPED_PACKAGES . —include-stopped-packages Include the flag FLAG_INCLUDE_STOPPED_PACKAGES . —activity-brought-to-front Include the flag FLAG_ACTIVITY_BROUGHT_TO_FRONT . —activity-clear-top Include the flag FLAG_ACTIVITY_CLEAR_TOP . —activity-clear-when-task-reset Include the flag FLAG_ACTIVITY_CLEAR_WHEN_TASK_RESET . —activity-exclude-from-recents Include the flag FLAG_ACTIVITY_EXCLUDE_FROM_RECENTS . —activity-launched-from-history Include the flag FLAG_ACTIVITY_LAUNCHED_FROM_HISTORY . —activity-multiple-task Include the flag FLAG_ACTIVITY_MULTIPLE_TASK . —activity-no-animation Include the flag FLAG_ACTIVITY_NO_ANIMATION . —activity-no-history Include the flag FLAG_ACTIVITY_NO_HISTORY . —activity-no-user-action Include the flag FLAG_ACTIVITY_NO_USER_ACTION . —activity-previous-is-top Include the flag FLAG_ACTIVITY_PREVIOUS_IS_TOP . —activity-reorder-to-front Include the flag FLAG_ACTIVITY_REORDER_TO_FRONT . —activity-reset-task-if-needed Include the flag FLAG_ACTIVITY_RESET_TASK_IF_NEEDED . —activity-single-top Include the flag FLAG_ACTIVITY_SINGLE_TOP . —activity-clear-task Include the flag FLAG_ACTIVITY_CLEAR_TASK . —activity-task-on-home Include the flag FLAG_ACTIVITY_TASK_ON_HOME . —receiver-registered-only Include the flag FLAG_RECEIVER_REGISTERED_ONLY . —receiver-replace-pending Include the flag FLAG_RECEIVER_REPLACE_PENDING . —selector Requires the use of -d and -t options to set the intent data and type. URI component package You can directly specify a URI, package name, and component name when not qualified by one of the above options. When an argument is unqualified, the tool assumes the argument is a URI if it contains a «:» (colon); it assumes the argument is a component name if it contains a «/» (forward-slash); otherwise it assumes the argument is a package name. Call package manager ( pm )Within an adb shell, you can issue commands with the package manager ( pm ) tool to perform actions and queries on app packages installed on the device. While in a shell, the syntax is: You can also issue a package manager command directly from adb without entering a remote shell. For example: Table 3. Available package manager commands.
Call device policy manager ( dpm )To help you develop and test your device management (or other enterprise) apps, you can issue commands to the device policy manager ( dpm ) tool. Use the tool to control the active admin app or change a policy’s status data on the device. While in a shell, the syntax is: You can also issue a device policy manager command directly from adb without entering a remote shell: Table 4. Available device policy manager commands
|
