- NavigationUI
- Introduction
- Adding Coffee Tracker
- Options menu
- Toolbar
- Bottom Tabs
- Navigation Drawer
- Summary
- Навигация для Android с использованием Navigation Architecture Component: пошаговое руководство
- Часть 1. Подготовительные работы
- 1.1. Создание проекта
- 1.2. Зависимости (Dependencies)
- 1.3. Страницы: создание фрагментов
- 1.4. Адреса: файл ресурсов типа «Navigation»
- 1.5. Фрейм: виджет NavHostFragment
- Часть 2. Элементы навигации
- 2.1. Навигация с помощью кнопок
- 2.2. Боковое меню (drawer)
- 2.2.1. Ресурсный файл меню
- 2.2.2. Шаблон DrawerLayout и виджет NavigationView в макете активности
- 2.2.3. Подключение бокового меню в классе активности
- 2.3. Кнопка и название фрагмента на панели инструментов
- 2.4. Нижнее меню (Bottom Navigation)
- 2.5. Всплывающее меню (Overflow Menu)
- Краткие выводы и ссылка на github
NavigationUI

This is the second MAD Skills article series on Navigation. In this article we’ll take a look at another use case where UI components, such as action bar, bottom tabs or a drawer, are used to navigate between different parts of an app. If you prefer to consume this content in a video format, check it out here:
Introduction
In the previous navigation series, Chet developed an app for tracking donuts. But what goes well with a donut? (besides a second donut): Coffee! So I decided to add functionality to track coffee as well.
I need to add more destinations in the app so it might be a good idea to add a navigation drawer or bottom tabs to help users to navigate. But how do we integrate navigation with these UI components? Through click listeners to manually trigger navigation actions?
No! No listeners required. Instead, NavigationUI class can help you to navigate between different destinations by matching destination and menu ids. Let’s dive in and see how that works.
Adding Coffee Tracker

To add this feature I copy the donut related classes into a new package and rename them. This might not be the best approach for a real app, but helps us quickly add coffee tracking functionality to the existing app. If you want to follow along, you can check out this repo which contains all the changes on Donut Tracker app to start with NavigationUI .
With these changes I also update the navigation graph with the new destinations and actions from coffeeFragment to coffeeDialogFragment and from selectionFragment to donutFragment . I’ll use these destination ids later 😉

With the navigation graph updated we can start to tie things together and enable navigation to SelectionFragment !
Options menu
The app currently has an options menu which does … nothing. To make it do something, in the onOptionsItemSelected() function I need to call onNavDestinationSelected() for the selected menu item and pass in the navController . This function will navigate to the destination associated with the given MenuItem as long as destination and MenuItem id s match.
Now that the navigation controller knows about the menu items, I match the MenuItem id s with the destination id s which I created earlier. With this, navigation is able to map the MenuItem s with the destinations.
Toolbar
The app now navigates to selectionFragment but the title stays the same. We would like the title to be updated and show a back button when we are on the selectionFragment .
First I need to add an AppBarConfiguration object which is used by the NavigationUI to manage the behavior of the Navigation button in the upper-left corner of your app.
This button changes behavior depending on your destination level. For example, when you are at the Top-level destination, the Up button is not displayed since there is no higher level destination.
By default, the start destination of your app is the only top-level destination but you can define multiple top-level destinations. For example, in our app, I can add both donutList and coffeeList destinations as top level destinations.
Next, I go to the MainActivity class, get an instance of navController , and the toolbar and validate whether the setSupportActionBar() function is called. I also update the toolbar reference passed to this function.
To add navigation support to the default action bar, I call the setupActionBarWithNavController() function. This function expects two parameters, the navController and the appBarConfiguration .
Next, I override the onSupportNavigationUp() function and call navigateUp() with appBarConfiguration on nav_host_fragment to support up navigation or showing the menu icon, depending on the current destination.
Now I navigate to the selectionFragment , and you can see that the label is updated and the back button is shown, which will let our users go back where they come from.

Bottom Tabs
This doesn’t look too bad so far, but the app doesn’t have a way to navigate to the coffeeList fragment. I will fix that next!
I’ll start with adding bottom tabs. To do that I add bottom_nav_menu.xml and declare two menu items. NavigationUI relies on the MenuItem id s to match the destinations id s from the navigation graph. I also set the icons and the title for each destination.
Now that the MenuItem s are ready, I add the BottomNavigationView to the layout of mainActivity and set the bottom_nav_menu which I created earlier as the menu property of the BottomNavigationView .
To wire up the bottom tabs, I pass the navController to BottomNavigationView by calling the setupWithNavController() function. To keep things more organized, let’s do that in a new method and call this method in onCreate() .
Notice I didn’t call any navigation action from the navigation graph. Actually the navigation graph doesn’t even have a route to the coffeeList fragment. Like I did earlier with the ActionBar , BottomNavigationView automatically handles the navigation for us by using matching id s of MenuItem s and navigation destinations!
Navigation Drawer
This looks great but if your device has a large screen bottom tabs might not offer the best user experience. To fix this I’ll use another layout file which has a w960dp qualifier to target larger/wider devices.
This layout already has a Toolbar and FragmentContainerView similar to the default activity_main layout. I need to add a NavigationView and also add nav_drawer_menu as the menu attribute of the NavigationView . Next, I’ll add a divider between the NavigationView and FragmentContainerView .
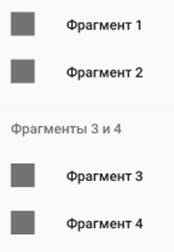
With this, the NavigationView is always on screen on wide screen devices instead of the BottomNavigationView . Now that the layout is ready, I create a nav_drawer_menu.xml and add the donutList and coffeeList destinations as a part of the primary group. As the final MenuItem , I add the selectionFragment destination.
Now that the layouts are ready let’s switch to MainActivity and set up the drawer to work with the NavigationController . Similar to what I did for BottomNavigationView , I create a new method and pass the navController to NavigationView by calling the setupWithNavController() function. To keep things more organized, let’s do that in a new method and call this method in onCreate() .
Now when I run the app on a wide screen device, I see that the navigation drawer is set up with the MenuItem s, since the MenuItem id s match the destination id s in the navigation graph.

Notice how the back arrow is automatically displayed on top left as I navigate. If you want to, you can change the AppBarConfiguration to include the CoffeeList as a top level destination as well.
Summary
That is it! Well at least for this time. Donut Tracker app didn’t need bottom tabs or a navigation drawer but with the new functionality and destinations, NavigationUI helped us greatly to organize the navigation in the app.
We didn’t really need to do much, except for adding the UI components and matching the MenuItem and destinations id s. You can check out the complete code and compare the changes with the stater code.
Источник
Навигация для Android с использованием Navigation Architecture Component: пошаговое руководство
Попробуем, пользуясь официальным руководством и примерами кода, построить работающую систему навигации для будущего многоэкранного приложения в соответствии со стандартами Navigation Architecture Component. Статья включает следующие разделы:
Часть 1. Подготовительные работы
— 1.1. Создание проекта
— 1.2. Зависимости (Dependencies)
— 1.3. Страницы: создание фрагментов
— 1.4. Адреса: файл ресурсов типа «Navigation»
— 1.5. Фрейм: виджет NavHostFragment
Часть 2. Элементы навигации
— 2.1. Навигация с помощью кнопок
— 2.2. Боковое меню (Drawer)
— 2.3. Панель инструментов: Toolbar вместо ActionBar
— 2.4. Нижнее меню (Bottom Navigation)
— 2.5. Всплывающее меню (Overflow Menu)
Краткие выводы и ссылка на github
Часть 1. Подготовительные работы
1.1. Создание проекта
Нам понадобятся базовые знания Котлина, IDE Android Studio версии не ниже 3.3, смартфон или эмулятор с версией API 14 или выше.
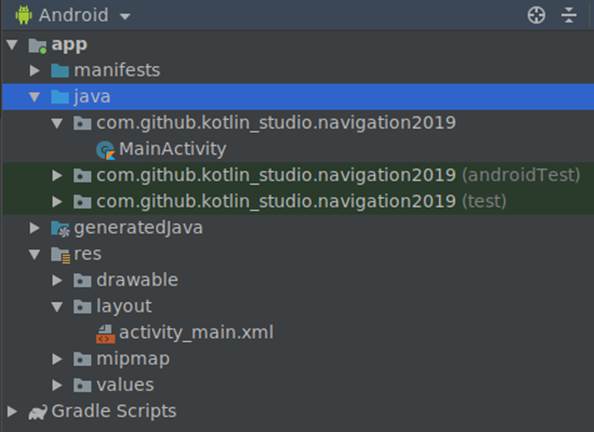
Создадим в Android Studio новый проект под названием «Navigation2019».

IDE создаст файл главной активности «MainActivity.kt» и его макет (шаблон) «activity_main.xml».
1.2. Зависимости (Dependencies)
Откроем файл «build.gradle» модуля (не проекта, а именно модуля) и в блок «dependencies» добавим необходимые зависимости:

Мы использовали библиотеки версии 1.0.0, но в будущем ситуация может измениться. Проверить, какие версии библиотек являются актуальными, можно здесь.
1.3. Страницы: создание фрагментов
Фрагменты — это «страницы» нашего будущего приложения. Кликнув правой кнопкой на каталоге с файлами классов, командой «New -> Fragment -> Fragment(Blank)» создадим «Fragment1».
IDE создаст kt-файл с классом фрагмента и xml-файл с макетом фрагмента. Таким же образом сгенерируем ещё три фрагмента («Fragment2», «Fragment3», «Fragment4»). Мы будем использовать их для создания четырёх разных типов навигации по приложению.
1.4. Адреса: файл ресурсов типа «Navigation»
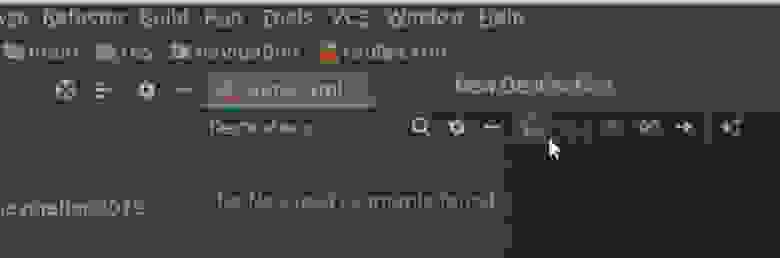
Кликнув правой кнопкой мыши по папке «res», создадим файл ресурсов типа «Navigation» с названием «routes.xml» («маршруты»).

Откроем созданный файл и с помощью кнопки «New Destination» добавим в навигационную схему наши фрагменты.
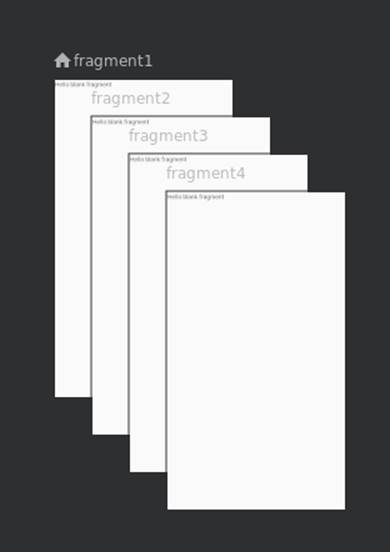
«Хватаясь» мышкой за точку в середине правой стороны фрагмента, соединим фрагменты друг с другом так, как они должны быть связаны в приложении.
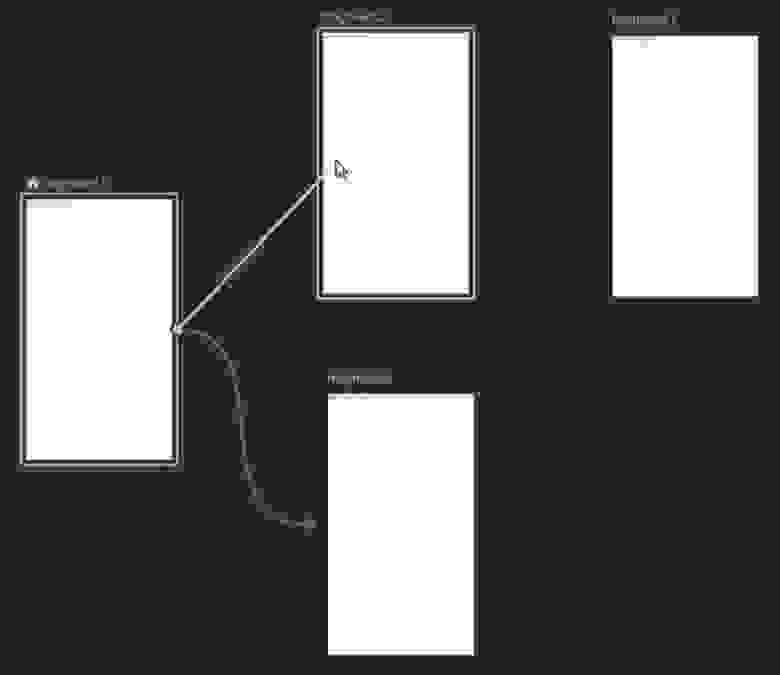
В соответствии с их названиями, наши фрагменты получат идентификаторы (id) «fragment1», «fragment2», «fragment3», «fragment4». Это «адреса», которые будут использоваться при указании пунктов назначения («destinations») в инструкциях навигационному контроллеру.
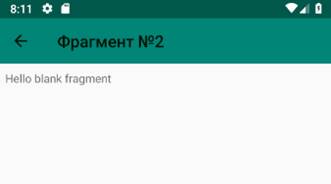
Кроме «id», каждый тег «fragment» содержит ещё три параметра: «name», «label» и «layout». Параметры «name» и «layout» нас сейчас не интересуют. Единственное, что стоит отредактировать в файле «routes.xml» — это названия («label») фрагментов. Заменим их на «Фрагмент №1», «Фрагмент №2», «Фрагмент №3» и «Фрагмент №4».

1.5. Фрейм: виджет NavHostFragment
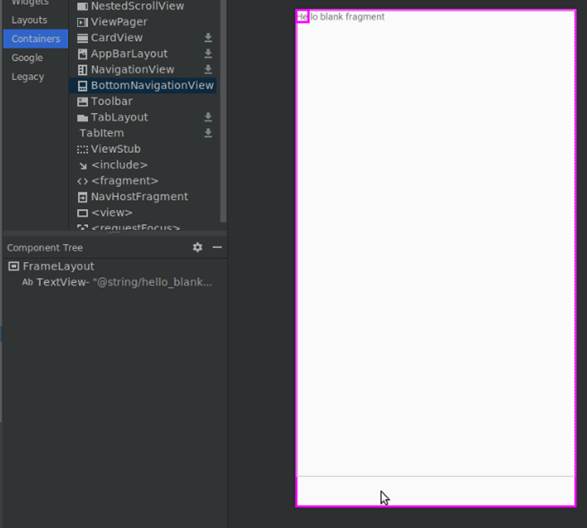
Откроем файл макета «res/layout/activity_main.xml» и удалим текстовый виджет «Hello World!», он нам не понадобится. В палитре (Palette) выберем раздел «Контейнеры» (Containers) и перетащим оттуда на макет активности виджет NavHostFragment (указав наш файл «routes» в качестве источника информации для него). Он выполнит роль фрейма, в котором будут выводиться различные фрагменты приложения.
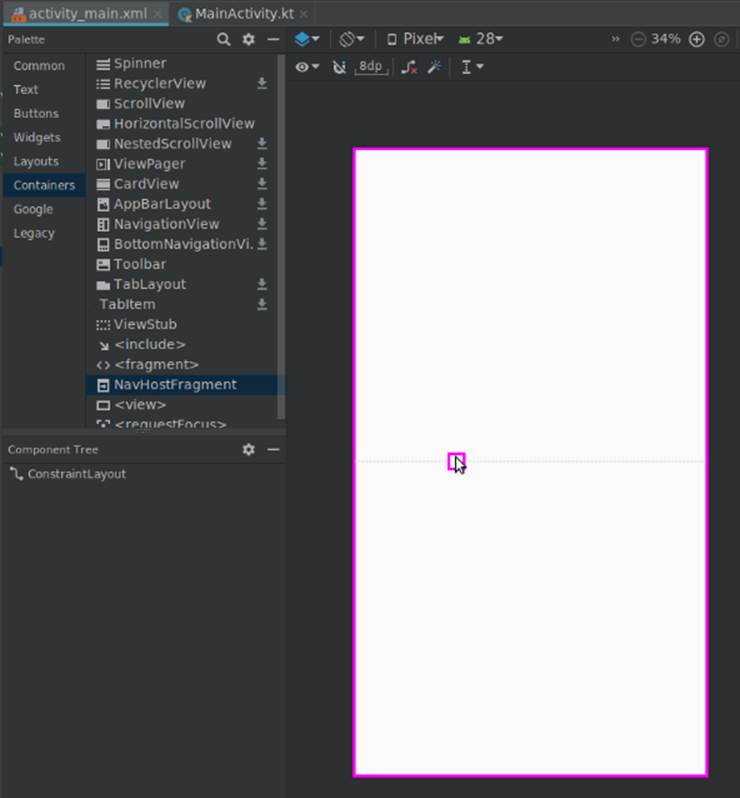

Изменим id фрагмента на «navFragment». Код макета главной активности будет выглядеть теперь так:
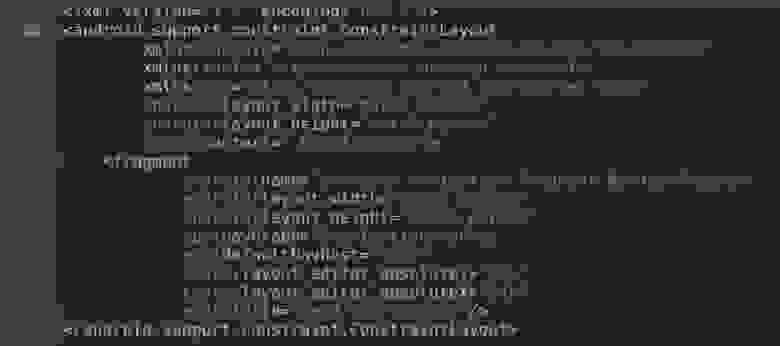
На этом подготовительные работы завершены, теперь можно приступать непосредственно к созданию элементов навигации.
Часть 2. Элементы навигации
2.1. Навигация с помощью кнопок
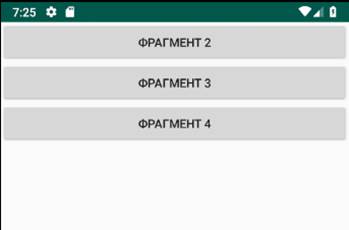
Откроем макет первого фрагмента («fragment_fragment1.xml»). Удалим ненужный текстовый виджет, изменим тип макета с «FrameLayout» на линейный вертикальный и добавим три кнопки с идентификаторами «button2», «button3», «button4» и соответствующими названиями «Фрагмент 2», «Фрагмент 3», «Фрагмент 4».
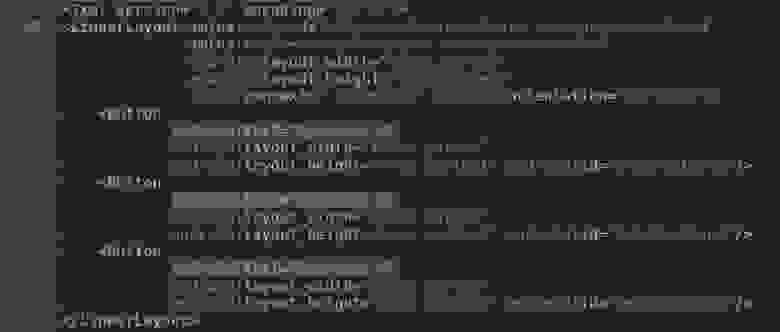
В методе «onCreateView» фрагмента получим ссылку на навигационный контроллер (объект «NavController») и запрограммируем поведение при нажатии на кнопки: командой «setOnClickListener» для каждой кнопки создадим слушателя кнопки, который при клике по кнопке будет передавать навигационному контроллеру адрес (id) точки назначения вместе с командой переместиться (navigate) на указанный адрес.

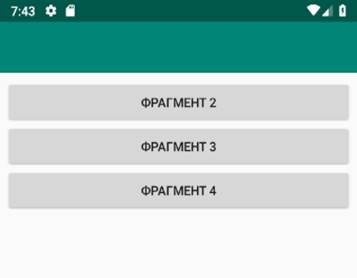
Проверим, как работают наши кнопки.
Одна кнопка — одна строчка кода — и клик по кнопке перемещает нас к указанному фрагменту. Просто, не так ли?
Но без меню не очень удобно, приходится использовать кнопку «Назад» для возвращения на стартовый экран.
2.2. Боковое меню (drawer)
2.2.1. Ресурсный файл меню
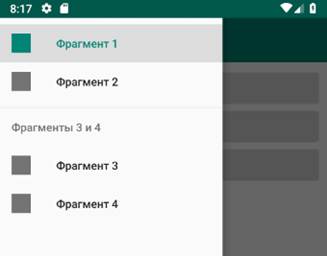
В каталоге «res/menu» создадим ресурсный файл меню «drawer_menu.xml». Добавим в него пункты меню, каждый из которых представляет собой тег «item» с параметрами «id» (должен соответствовать таковому в навигационном графе «routes.xml», «title» (заголовок, он может быть другим), «icon» (мы используем одну и ту же картинку для всех пунктов, но, конечно же, они могут быть разными) и др. Наше меню будет выглядеть так:
2.2.2. Шаблон DrawerLayout и виджет NavigationView в макете активности
Откроем файл макета активности «activity_main.xml».
После первого тега (xml version…) добавим начало тега «DrawerLayout».

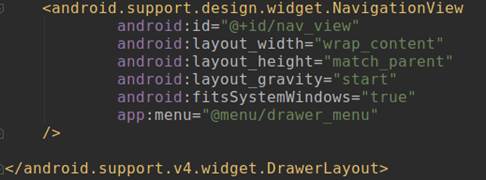
В конец файла добавим виджет «NavigationView» и окончание тега «DrawerLayout».
2.2.3. Подключение бокового меню в классе активности
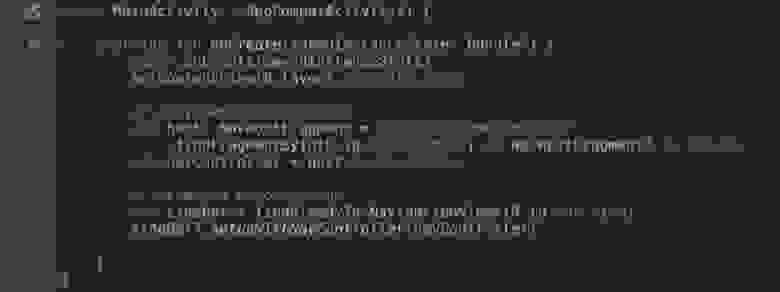
Откроем файл «MainActivity.kt» и в методе «onCreate» получим ссылку на «navController» (в активности это выглядит чуть сложнее, чем было во фрагментах).

Затем включим боковое меню:

Код класса теперь выглядит так:
Теперь меню появляется в ответ на свайп от левого края экрана:

Хорошо было бы добавить и кнопку слева-вверху для вызова бокового меню, верно?
2.3. Кнопка и название фрагмента на панели инструментов
Существующий по умолчанию ActionBar, как рекомендует официальное руководство, заменим на Toolbar.
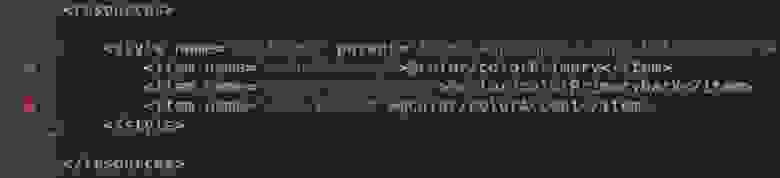
Чтобы отключить существующий ActionBar, в файле «res/values/styles.xml» найдём строку
и заменим «DarkActionBar» на «NoActionBar».
Отлично, ActionBar мы отключили.
Теперь добавим Toolbar. Откроем файл «activity_main.xml», в палитре (Palette) выберем раздел «Контейнеры» (Containers) и перетащим оттуда на макет активности виджет «Toolbar». Панель инструментов добавлена, но она пока пуста.
Переходим в файл активности «MainActivity.kt». Чтобы на Toolbar вывести кнопку и название текущего фрагмента, в метод «onCreate()» добавим следующие строки:

Toolbar теперь выводит название фрагмента и кнопку «Вверх» (Up) для вложенных фрагментов.
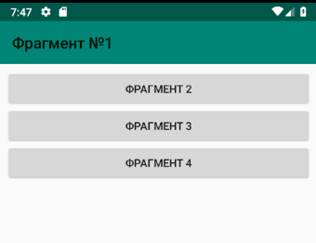
Кнопка «вверх» в android’е почему-то обозначается стрелкой «влево»:
Чтобы на стартовом экране приложения выводилась кнопка-гамбургер, нам необходимо в конфигурацию панели инструментов добавить параметр «drawerLayout», который содержит id виджета DrawerLayout из файла «activity_main.xml».


Клик по этой кнопке выводит боковое меню.
2.4. Нижнее меню (Bottom Navigation)
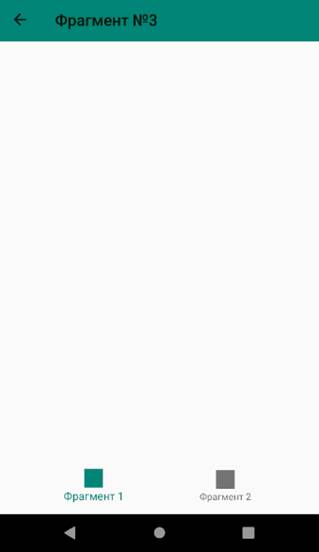
Иногда бывает необходимо акцентировать внимание пользователя на определённых действиях, и эффективно сделать это помогает нижнее меню. Добавим его в третий фрагмент.
Сначала создадим ресурсный файл меню «bottom_nav_menu.xml» с парой ссылок. Затем откроем макет фрагмента №3 (файл «fragment_fragment3.xml») и перетащим на него виджет «BottomNavigationView», попутно согласившись с предложением IDE добавить в dependencies библиотеку «com.android.support:design».
Если бы мы создавали нижнее меню не для одного фрагмента, а сразу для всех, то в метод «onCreate» класса активности (файл «MainActivity.kt») нужно было бы включить следующий код:

Конечно, и виджет «BottomNavigationView» в таком случае надо было бы поместить в макет активности, а не фрагмента.
Но поскольку данное меню нам требуется только во фрагменте №3, то и редактировать мы будем класс фрагмента (файл «Fragment3.kt»), а код будет выглядеть чуть сложнее:

В итоге мы получим нижнее меню, которое будет выводиться только в 3-м фрагменте.
То же самое, но с другими ссылками, сделаем и в 4-м фрагменте.
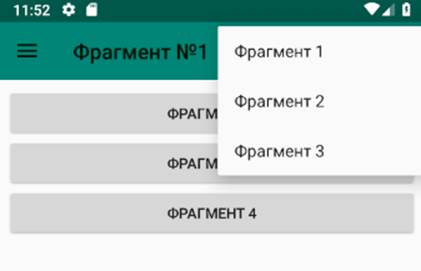
2.5. Всплывающее меню (Overflow Menu)
Ещё один вид меню — всплывающее меню, которое выводится при клике по кнопке (трём вертикально расположенным точкам) в правом верхнем углу экрана.

Создадим ресурсный файл меню «top_right_menu.xml» с необходимыми ссылками.
В файле «MainActivity» в метод «onCreate» перед «toolBar.setupWithNavController. » добавим строку «setSupportActionBar(toolBar)».

И далее в этом же классе переопределим два метода:
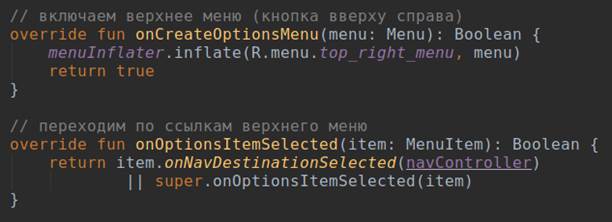
Нажатие на верхнюю правую кнопку теперь отображает всплывающее меню:
Краткие выводы и ссылка на github
Очевидно, что Navigation Architecture Component существенно облегчает труд разработчика. Сложные в прошлом задачи теперь решаются несколькими строчками кода.
Поскольку главной целью данной публикации было осветить базовые алгоритмы создания навигации в android-приложении, многие детали реализации были умышленно оставлены за кадром.
Мой график работы обычно не позволяет поддерживать дискуссии, но Ваши комментарии в любом случае будут полезны для посетителей сайта и потому всегда приветствуются.
Источник


