- Android TV
- Device preparation
- Configuration
- Configuration Variables
- Full Configuration
- ADB Setup
- 1. Python ADB Implementation
- 2. ADB Server
- ADB Troubleshooting
- Services
- media_player.select_source
- androidtv.adb_command
- androidtv.learn_sendevent (for faster ADB commands)
- androidtv.download and androidtv.upload
- Custom State Detection
- Как я управляю телевизором с помощью смартфона на Android. Вы тоже так можете
- Как узнать, поддерживает ли телевизор Smart TV
- Как добавить телевизор в SmartThings
- Как управлять телевизором из приложения
- Как управлять телевизором с помощью Алисы
- Стоит ли покупать Mi Box
Android TV
The androidtv platform allows you to control an Android TV device or Amazon Fire TV device.
When setting up this integration, it is recommended that you do NOT use an ADB server and instead use the built-in Python ADB implementation. This simplifies the setup and makes it easier to troubleshoot issues. If there are stability issues with this approach, then you may wish to try using an ADB server. See the ADB Setup section for more information.
Device preparation
To set up your device, you will need to find its IP address and enable ADB debugging. For Android TV devices, please consult the documentation for your device.
For Fire TV devices, the instructions are as follows:
- Turn on ADB Debugging on your Amazon Fire TV:
- From the main (Launcher) screen, select Settings.
- Select My Fire TV > Developer Options.
- Select ADB Debugging.
- Find Amazon Fire TV device IP address:
- From the main (Launcher) screen, select Settings.
- Select My Fire TV > About > Network.
Configuration
Configuration Variables
The IP address for your Android TV / Fire TV device.
The friendly name of the device.
The port for your Android TV / Fire TV device.
The path to your adbkey file; if not provided, Home Assistant will generate a key for you (if necessary).
The IP address of the ADB server. If this is provided, the integration will utilize an ADB server to communicate with the device.
The port for the ADB server.
Whether or not to retrieve the running apps as the list of sources.
A dictionary where the keys are app IDs and the values are app names that will be displayed in the UI; see example below. If a name is not provided, the app will never be shown in the sources list. (These app names are configured in the backend package and do not need to be included in your configuration.)
If this is true, then only the apps you specify in the apps configuration parameter and those specified in the backend library will be shown in the sources list.
The type of device: auto (detect whether it is an Android TV or Fire TV device), androidtv , or firetv .
A dictionary whose keys are app IDs and whose values are lists of state detection rules; see the section Custom State Detection for more info.
An ADB shell command that will override the default turn_on command.
An ADB shell command that will override the default turn_off command.
Determines if album art should be pulled from what is shown onscreen.
Full Configuration
ADB Setup
This integration works by sending ADB commands to your Android TV / Fire TV device. There are two ways to accomplish this.
1. Python ADB Implementation
The default approach is to connect to your device using the adb-shell Python package. As of Home Assistant 0.101, if a key is needed for authentication and it is not provided by the adbkey configuration option, then Home Assistant will generate a key for you.
Prior to Home Assistant 0.101, this approach did not work well for newer devices. Efforts have been made to resolve these issues, but if you experience problems then you should use the ADB server option.
2. ADB Server
The second option is to use an ADB server to connect to your Android TV and Fire TV devices.
Using this approach, Home Assistant will send the ADB commands to the server, which will then send them to the Android TV / Fire TV device and report back to Home Assistant. To use this option, add the adb_server_ip option to your configuration. If you are running the server on the same machine as Home Assistant, you can use 127.0.0.1 for this value.
ADB Troubleshooting
If the setup for your Android TV or Fire TV device fails, then there is probably an issue with your ADB connection. Here are some possible causes.
You have the wrong IP address for the device.
ADB is not enabled on your device.
You are already connected to the Android TV / Fire TV via ADB from another device. Only one device can be connected, so disconnect the other device, restart the Android TV / Fire TV (for good measure), and then restart Home Assistant.
You need to approve the ADB connection; see the note in the ADB Setup section above.
Some Android TV devices (e.g., Philips TVs running Android TV) only accept the initial ADB connection request over their Wi-Fi interface. If you have the TV wired, you need to connect it to Wi-Fi and try the initial connection again. Once the authentication has been granted via Wi-Fi, you can connect to the TV over the wired interface as well.
If your device drops off WiFi, breaking the ADB connection and causing the entity to become unavailable in Home Assistant, you could install a wake lock utility (such as Wakelock) to prevent this from happening. Some users have reported this problem with Xiaomi Mi Box devices.
If you are using the Python ADB implementation approach, as mentioned above, there may be some issues with newer devices. In this case, you should use the ADB server approach instead.
Services
media_player.select_source
You can launch an app on your device using the media_player.select_source command. Simply provide the app ID as the source . You can also stop an app by prefixing the app ID with a ! . For example, you could define scripts to start and stop Netflix as follows:
androidtv.adb_command
The service androidtv.adb_command allows you to send either keys or ADB shell commands to your Android TV / Fire TV device. If there is any output, it will be stored in the ‘adb_response’ attribute (i.e., state_attr(‘media_player.android_tv_living_room’, ‘adb_response’) in a template) and logged at the INFO level.
| Service data attribute | Optional | Description |
|---|---|---|
| entity_id | no | Name(s) of Android TV / Fire TV entities. |
| command | no | Either a key command or an ADB shell command. |
In an action of your automation setup it could look like this:
Available key commands include:
The full list of key commands can be found here.
You can also use the command GET_PROPERTIES to retrieve the properties used by Home Assistant to update the device’s state. These will be stored in the media player’s ‘adb_response’ attribute and logged at the INFO level. This information can be used to help improve state detection in the backend androidtv package, and also to define your own custom state detection rules.
A list of various intents can be found here.
androidtv.learn_sendevent (for faster ADB commands)
When sending commands like UP, DOWN, HOME, etc. via ADB, the device can be slow to respond. The problem isn’t ADB, but rather the Android command input that is used to perform those actions. A faster way to send these commands is using the Android sendevent command. The challenge is that these commands are device-specific. To assist users in learning commands for their device, the Android TV integration provides the androidtv.learn_sendevent service. Its usage is as follows:
| Service data attribute | Optional | Description |
|---|---|---|
| entity_id | no | Name(s) of Android TV / Fire TV entities. |
- Call the androidtv.learn_sendevent service.
- Within 8 seconds, hit a single button on your Android TV / Fire TV remote.
- After 8 seconds, a persistent notification will appear that contains the equivalent command that can be sent via the androidtv.adb_command service. This command can also be found in the adb_response attribute of the media player in Home Assistant, and it will be logged at the INFO level.
As an example, a service call in a script could be changed from this:
androidtv.download and androidtv.upload
You can use the androidtv.download service to download a file from your Android TV / Fire TV device to your Home Assistant instance.
| Service data attribute | Optional | Description |
|---|---|---|
| entity_id | no | Name of Android TV / Fire TV entity. |
| device_path | no | The filepath on the Android TV / Fire TV device. |
| local_path | no | The filepath on your Home Assistant instance. |
Similarly, you can use the androidtv.upload service to upload a file from Home Assistant instance to Android TV / Fire TV devices.
| Service data attribute | Optional | Description |
|---|---|---|
| entity_id | no | Name(s) of Android TV / Fire TV entities. |
| device_path | no | The filepath on the Android TV / Fire TV device. |
| local_path | no | The filepath on your Home Assistant instance. |
Custom State Detection
The Android TV integration works by polling the Android TV / Fire TV device at a regular interval and collecting a handful of properties. Unfortunately, there is no standard API for determining the state of the device to which all apps adhere. Instead, the backend androidtv package uses three of the properties that it collects to determine the state: audio_state , media_session_state , and wake_lock_size . The correct logic for determining the state differs depending on the current app, and the backend androidtv package implements app-specific state detection logic for a handful of apps. Of course, it is not feasible to implement custom logic for each and every app in the androidtv package. Moreover, the correct state detection logic may differ across devices and device configurations.
The solution to this problem is the state_detection_rules configuration parameter, which allows you to provide your own rules for state detection. The keys are app IDs, and the values are lists of rules that are evaluated in order. Valid rules are:
- ‘standby’ , ‘playing’ , ‘paused’ , ‘idle’ , or ‘off’
- If this is not a map, then this state will always be reported when this app is the current app
- If this is a map, then its entries are conditions that will be checked. If all of the conditions are true, then this state will be reported. Valid conditions pertain to 3 properties (see the example configuration above):
- ‘media_session_state’
- ‘audio_state’
- ‘wake_lock_size’
- ‘media_session_state’ = try to use the media_session_state property to determine the state
- ‘audio_state’ = try to use the audio_state property to determine the state
Источник
Как я управляю телевизором с помощью смартфона на Android. Вы тоже так можете
Можно ли управлять телевизором со смартфона на Android? Ответ на этот вопрос хотят получить ну практически все. Ведь это, во-первых, очень технологично и современно, а, во-вторых, пульт может завалиться неизвестно куда, а переключать каналы или тем более запускать YouTube с кнопок на корпусе телевизора – то ещё удовольствие. В своё время передо мной тоже встал этот вопрос, но я решил его при помощи простого Android-приложения. Рассказываю, что это за приложение, как оно работает и чем его заменить в случае несовместимости.
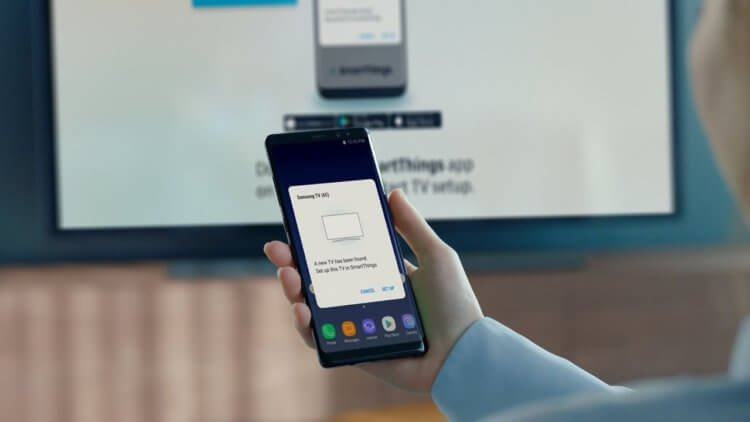
Я уже давно управляю телевизором с помощью смартфона
Приложение, о котором идёт речь, называется SmartThings от Samsung. Оно доступно в Google Play абсолютно бесплатно, поэтому скачать его может кто угодно. Другое дело, что его совместимость конкретно с вашим телевизором не гарантируется. Для того, чтобы связать смартфон с приложением и телевизор, важно, чтобы последний поддерживал функцию Smart TV.
Как узнать, поддерживает ли телевизор Smart TV
Если вы не знаете, обладает ли ваш телевизор функцией Smart TV, есть несколько способов проверить:
- Внимательно осмотрите коробку телевизора – как правило, производители пишут о поддержке Smart TV на самом видном месте и большими буквами;
- Если коробка не сохранилась, проверьте пульт – на нём тоже зачастую есть кнопка под названием Smart, которая активирует так называемый умный режим;
- Если такой кнопки нет (например, у меня её нет), проверьте, возможно ли подключить телевизор к интернету – если можно, значит Smart TV точно есть;
- Ну, и последний способ – скачать приложение SmartThings и проверить совместимость вашего телевизора с ним в списке совместимых моделей.
Как добавить телевизор в SmartThings
Если у вас телевизор с поддержкой Smart TV, значит, им можно управлять со смартфона при помощи приложения SmartThings. Правда, перед эти нужно будет создать пару.
- Для этого скачайте и запустите приложение, а потом выберите комнату;
- В открывшемся окне выберите «Добавить устройство»;
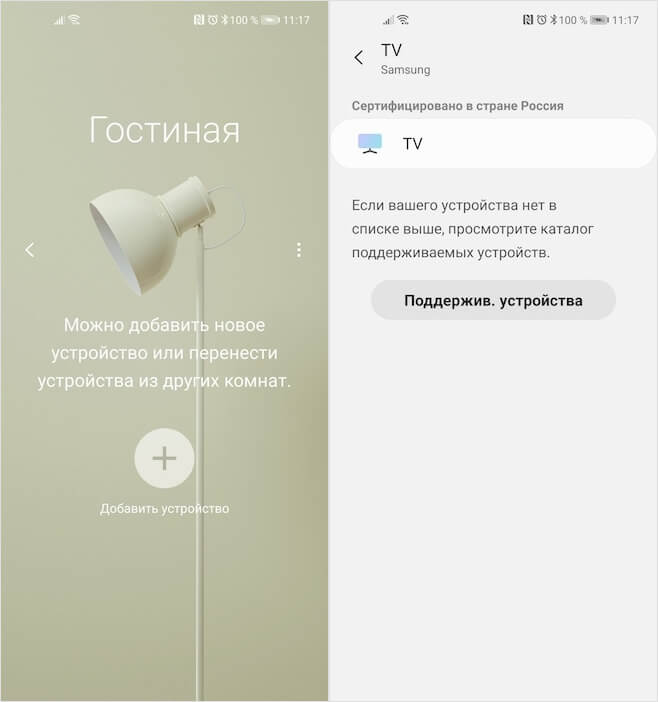
Управлять телевизором от Samsung можно через приложение SmartThings
- Выберите тип устройства, которое хотите добавить;
- Включите телевизор и введите в приложение пин-код с экрана;
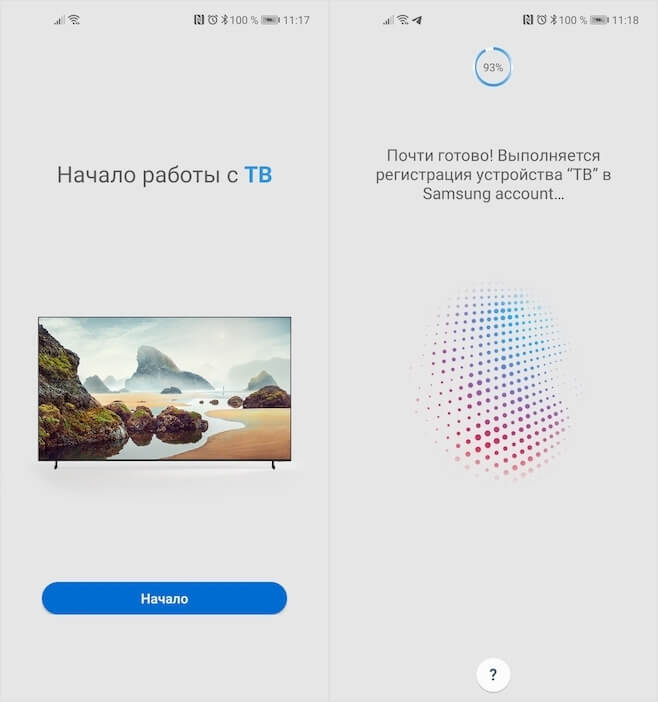
Обязательно авторизуйтесь в учётной записи Samsung
- Авторизуйтесь или зарегистрируйтесь в системе Samsung SmartThings;
- Нажмите на карточку телевизора и управляйте им со смартфона.
Как управлять телевизором из приложения
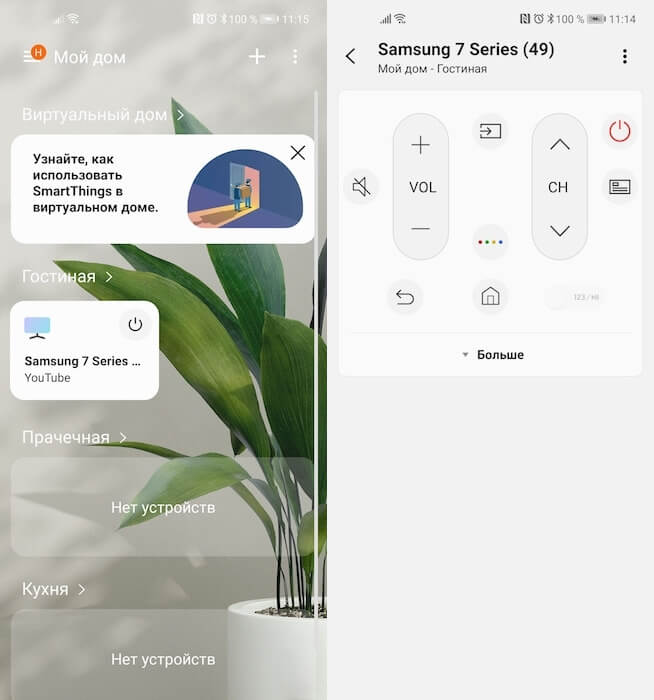
Управлять телевизором через приложение удобнее, чем с пульта
Samsung удалось реализовать очень удобную систему управления телевизором с сенсорного экрана. Особенно мне нравится, что приложение предлагает своего рода трекпад, с помощью которого очень удобно перемещаться по интерфейсу, пролистывая содержимое экрана, и набирать текст в поиске. Если на пульте нужно множество раз нажать на стрелку в поисках нужной буквы, набирая название нужного фильма или сериала в том или ином сервисе, то трекпад решает эту проблему на раз-два.
Кроме того, приложение позволяет обходиться без пульта, когда действительно нет никакого желания вставать и искать его непонятно где. У меня такие ситуации происходят чуть ли не каждый день, когда все уже легли, а посмотреть очередную серию «Беспринципных» или «Эпидемии» хочется. Тогда я просто беру смартфон, который всегда под рукой, запускаю приложение и включаю с него телевизор, а потом так же легко отключаю его, при этом не имея ни малейшего понятия о том, где валяется пульт.
Как управлять телевизором с помощью Алисы
Но умный телевизор хорош тем, что позволяет управлять им не только из приложения, но и голосом. Например, я подключил свой телевизор к Алисе и теперь могу просто попросить голосового помощника включить его или выключить, поставить воспроизведение на паузу или возобновить его. В общем, очень круто и удобно. Работает это не менее просто:
- Скачайте приложение Яндекса на смартфон;
- Перейдите в раздел с умными устройствами;
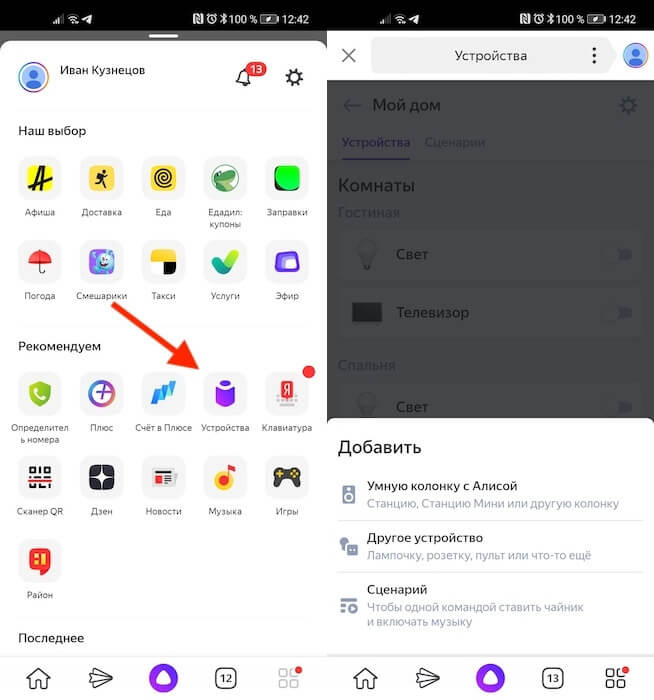
Чтобы управлять телевизором голосом, нужно добавить его в приложение Яндекса
- Выберите «Управление устройствами» — «+»;
- Найдите в списке Samsung SmartThings, авторизуйтесь с учётной записью SmartThings и подтвердите привязку – все доступные устройства свяжутся с Алисой автоматически.
Стоит ли покупать Mi Box
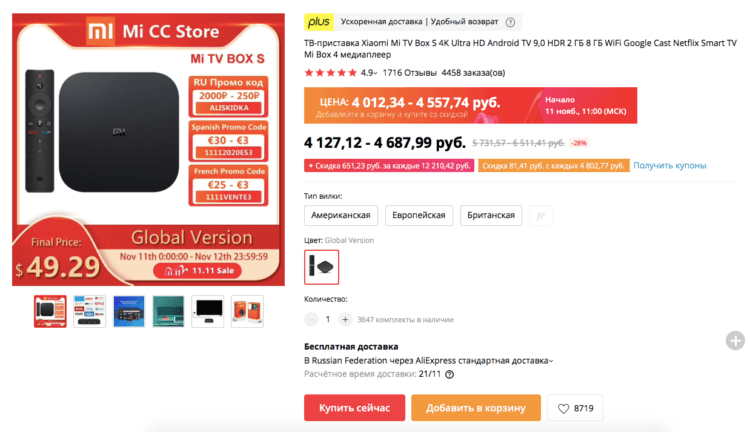
Mi Box — во многом лучше, чем Smart TV
Всё это, конечно, очень круто, скажут многие. Но что делать, если умного телевизора дома нет, а управлять им со смартфона или при помощи голоса хочется? На самом деле вариант есть, и это Mi Box от Xiaomi.
Xiaomi Mi Box – это буквально умная приставка, или, если хотите, дешёвый аналог Apple TV. Она работает на базе Android TV и, подключаясь к телевизору, добавляет поддержку функции Smart TV. То есть с её помощью можно сделать любой, даже самый глупый телевизор умным. Но это не единственное её преимущество:
- Поддержка 4K
- Поддержка Google Ассистента
- Поддержка Wi-Fi 5 ГГц
- Поддержка Dolby Atmos
- Встроенный Chromecast
- Возможность устанавливать приложения и игры
- Возможность стримить картинку со смартфона
По сути, Mi Box не просто превращает ваш телевизор в умный, а выступает в том числе в роли игровой консоли. Ведь благодаря Android TV, на базе которой работает приставка, она поддерживает и игры как Apple TV. Но если Apple TV стоит 15 тысяч рублей, то Mi Box – всего 4,5 тысячи. Это же супер-цена, за которую приставку Xiaomi можно купить в каждую комнату и не сильно при этом разориться на покупке телевизора. А если добавить его в приложение Mi Home, то можно будет управляться одним только смартфоном.

Новости, статьи и анонсы публикаций
Свободное общение и обсуждение материалов

Что мертво, умереть не может. Именно этот девиз должна была взять себе Nokia, если бы не авторские права. Потому что, кажется, ни один другой производитель смартфонов не умирал и не возвращался назад так много раз. Несмотря на это, фанаты бренда продолжают цепляться за любые возможности оправдать его, раз за разом предрекая ему небывалый успех. Причём первое время в это действительно веришь, ведь после очередного воскрешения Nokia врывается на рынок довольно бодро, выпуская кучу новых устройств и обещая им всем небывалую поддержку. Правда, по итогу всё скатывается на дно.

iPhone – не мой смартфон. Я понял это почти сразу после того, как перенёс на него все свои данные со старого Honor View 20, но решил не рубить сплеча и попользоваться им какое-то время. В конце концов, привычка – величина не постоянная, она может и измениться. Но, как оказалось, суть моих претензий к iPhone сводится отнюдь не к моим собственным привычкам, а к объективным недостаткам и iOS, и аппаратного обеспечения фирменных смартфонов Apple, которые уступают аппаратам на Android.
Официально установленных сроков программной поддержки Android-смартфонов не существует. Google вообще не требует от производителей, чтобы они обновляли свои аппараты в течение определённого времени. Просто так сложилось, что сначала этот период составлял 3 года (2 новых версии Android и 1 год обновлений безопасности), а потом увеличился до 4 лет, но и то не у всех. Несмотря на это, существует довольно много смартфонов, которые обновляются по два года, а то и по одному. Хорошо, что хоть Google со своими сервисами выручает. Но есть производители, которые обещают обновлять свои смартфоны по 5 лет и даже дольше.
А еще когда в нормальном телефоне ест ИК порт, то спокойно можно управлять любой другой домашней техникой без родных пультов. Это же не айФон малофункциональный.
Источник


