- How To Install And Run Android Studio On Linux
- 1. Install Android Studio On Linux Steps.
- 2. Start Android Studio On Linux.
- 3. Specify Android SDK And JDK Path In Android Studio.
- 4. Add Android SDK Command Tool In System PATH.
- Установка Android Studio в Ubuntu 20.04
- Системные требования Android Studio:
- Установка Android Studio в Ubuntu
- 1. Установка из snap-пакета
- 2. Установка из центра приложений
- 3. Установка с официального сайта
- 4. Установка в JetBrains Toolbox
- Как удалить Android Studio
- Выводы
- Android Studio Ubuntu Tutorial
- Install Android Studio on Ubuntu 20.04
- Step 1: Update apt cache
- Step 2: Install Java Development Kit
- Step 3: Add a repository for Android Studio
- Step 4: Update apt cache
- Step 5: Install Android Studio
- Perform Android Studio’s initial configuration
- Create your first Android Application
- Conclusion
- About the author
- Kamran Sattar Awaisi
How To Install And Run Android Studio On Linux
This article will tell you how to install and run the android studio on Linux. It is not similar to Windows and macOS. If you are a beginner to the android studio, this is very helpful to you.
1. Install Android Studio On Linux Steps.
- Download related android studio version from android studio official website. It is just a zip file.
- Unzip the download zip file to a local directory for example /home/zhaosong/WorkSpace/Tool/android-studio-ide-181.5056338-linux.
- Please note there is also another subfolder named android-studio in the above folder. Now the android studio has been installed successfully.
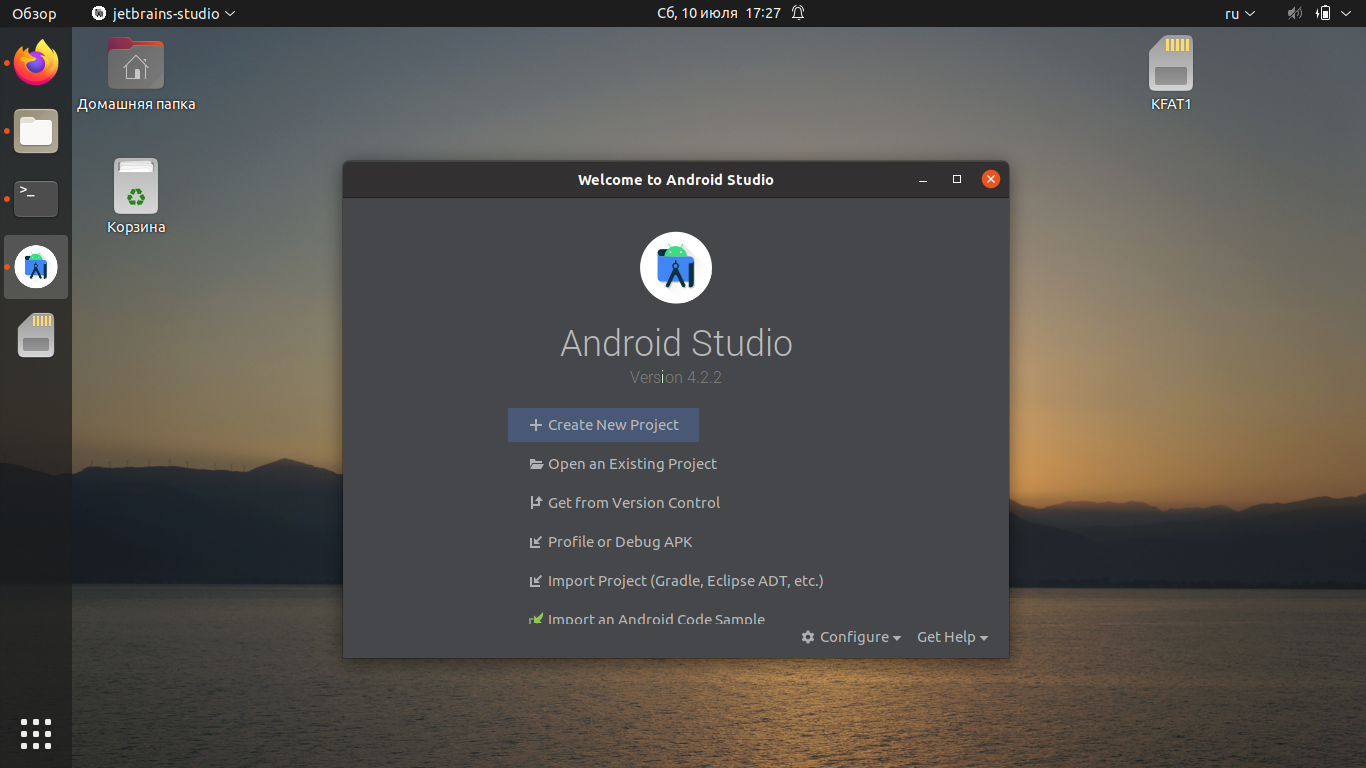
2. Start Android Studio On Linux.
Start android studio on Linux is also not similar to Windows or macOS, you should run the start script in the terminal to start it.
- Open a terminal and go to the android studio unzipped folder.
- CD into the bin folder in the android-studio folder.
- Execute $ ./studio.sh command in the terminal, then you can see the android studio startup as normal. Maybe there will have some error messages are printed in the terminal but it does not matter.
3. Specify Android SDK And JDK Path In Android Studio.
When the android studio is started, click File —> New —> New Project to create a new android project. If you want to change the default Android SDK and JDK to other folders, you can follow the below steps.
- Click File —> Other Settings —> Default Project Structure… menu item in the android studio top menu bar.
- Then you can change the android studio project SDK and JDK folder in the popup dialog window SDK Location & JDK location section. If you are a beginner, you do not need to change them at all.
4. Add Android SDK Command Tool In System PATH.
Generally, you will use android studio to run the android SDK command tool, but sometimes you may need to invoke those android SDK commands in the terminal, so please follow the below steps to add android SDK command execute path in Linux PATH system environment variable value then you can invoke them in the command line.
Источник
Установка Android Studio в Ubuntu 20.04
Android Studio — это официальная и самая популярная интегрированная среда разработки Android-приложений. Программа разрабатывается корпорацией Google и содержит все необходимые возможности. Среда основана на IntelliJ IDEA, которая написана на Java.
Среди возможностей Android Studio не только написание, сборка и тестирование программ, но и поддержка загрузки их на устройство, интеграция с облаком и многое другое. В этой статье мы рассмотрим, как выполняется установка Android Studio в Ubuntu.
Системные требования Android Studio:
Рекомендованные системные требования:
- Дистрибутив — любой 64 битный дистрибутив с установленной glibc 2.31 или выше и окружением рабочего стола Gnome, KDE или Unity DE.
- Процессор — 64-битный, с поддержкой SSSE3 и Intel VT или AMD V;
- RAM — 8 Гб или больше;
- Свободное место на диске — 8 Гб;
- Разрешение экрана — 1280 x 800;
Установка Android Studio в Ubuntu
Вы можете установить Android Studio и Android SDK несколькими способами: c помощью snap-пакета, с официального сайта, из центра приложений, а также с использованием специального инструмента: JetBrains Toolbox. Каждый из способов имеет свои преимущества, и мы рассмотрим их все.
1. Установка из snap-пакета
Для установки Android Studio с помощью snap-пакета откройте терминал и выполните команду:
sudo snap install android-studio —classic
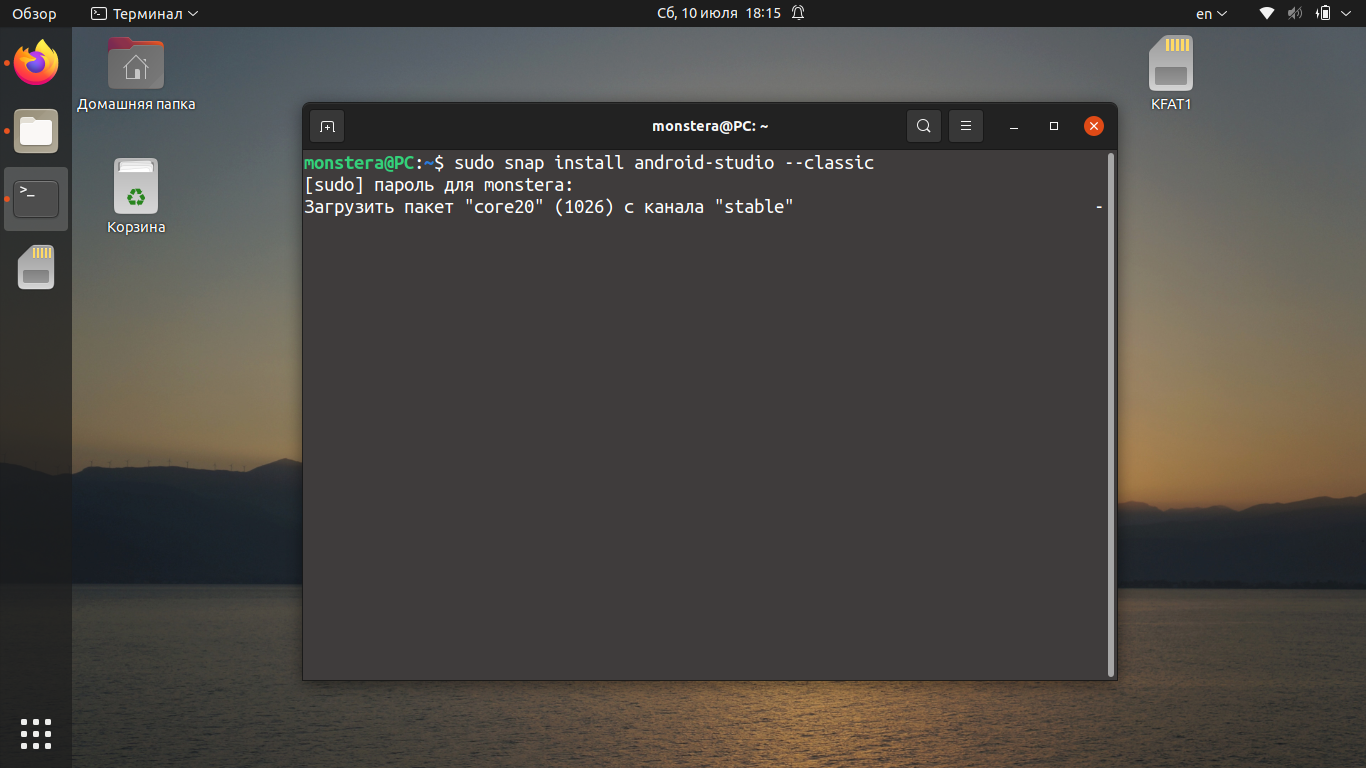
После завершения загрузки пакета программа будет доступна в главном меню.
2. Установка из центра приложений
Запустите центр приложений Ubuntu и введите в поиске название программы:
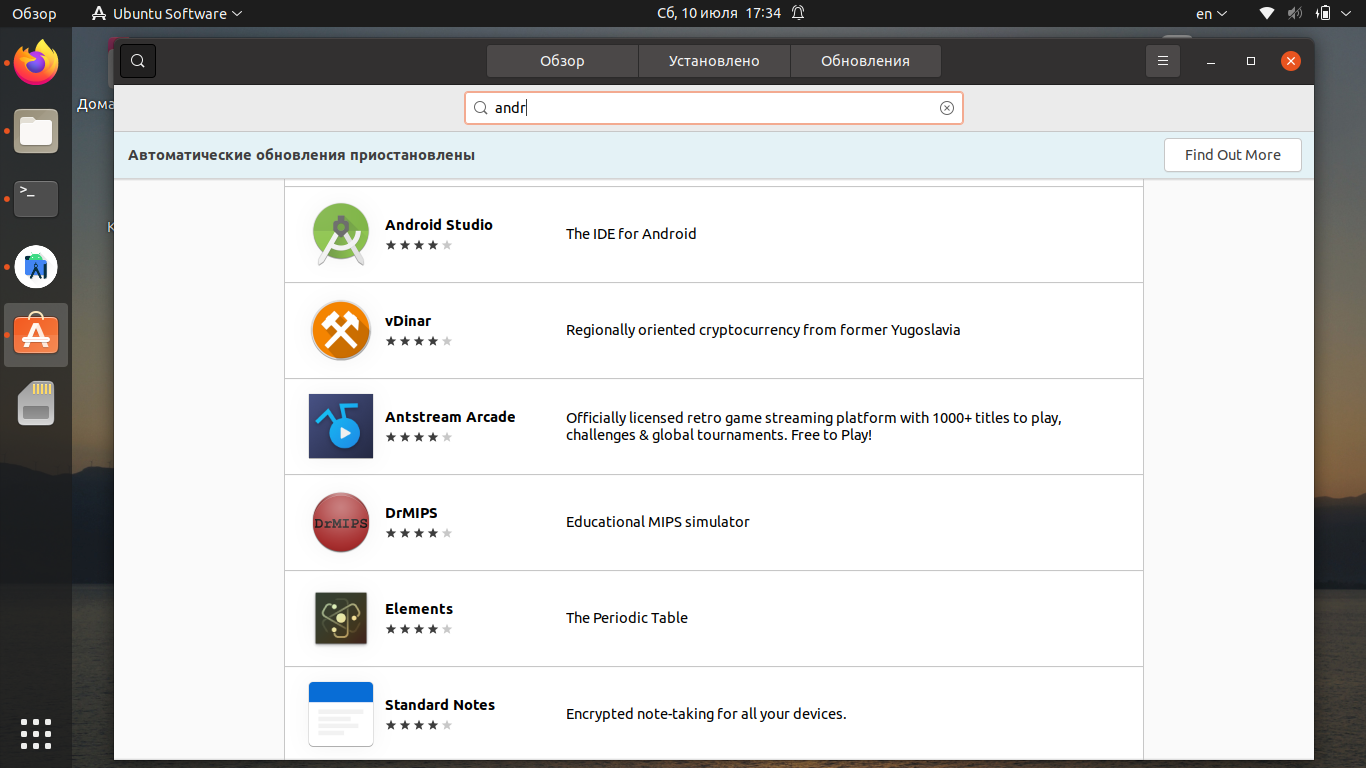
В списке выберите Android Studio и нажмите на кнопку Установить.
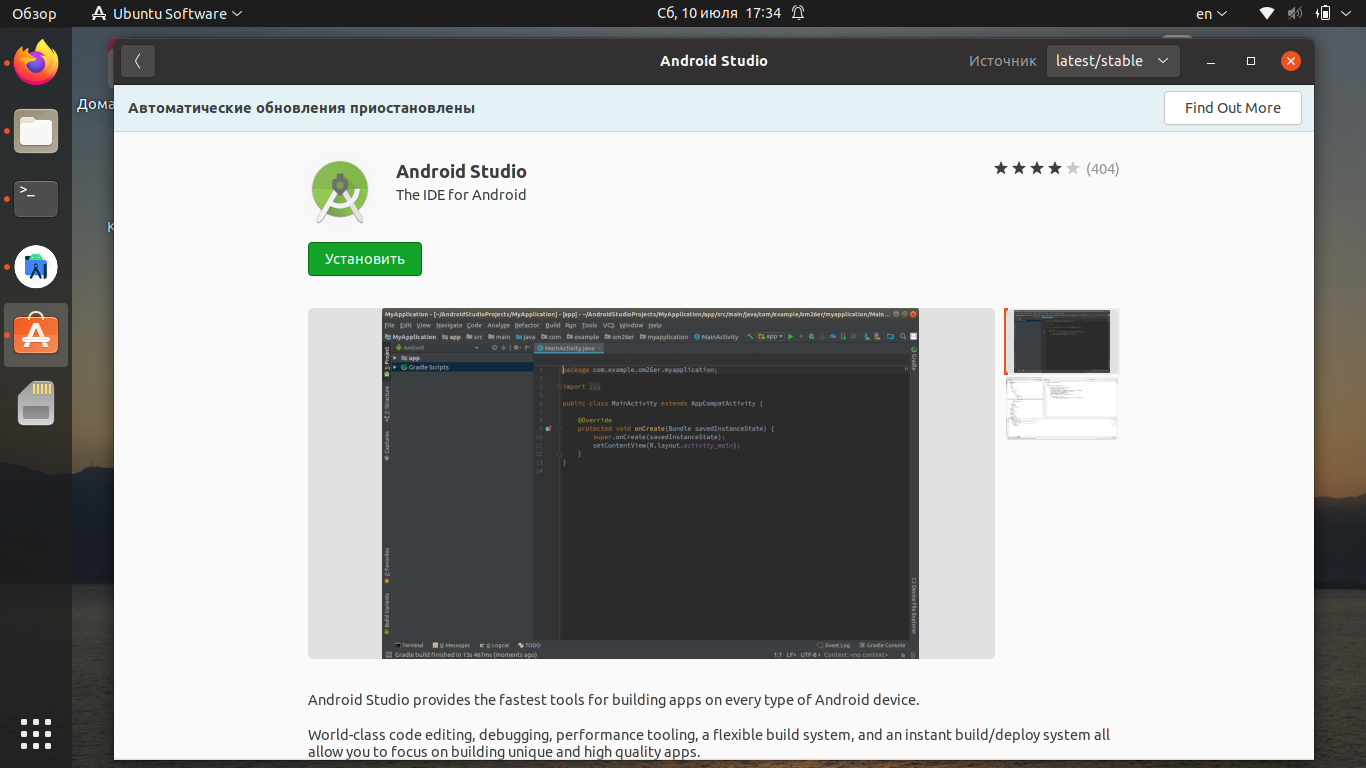
Дождитесь, пока инсталляция будет завершена.
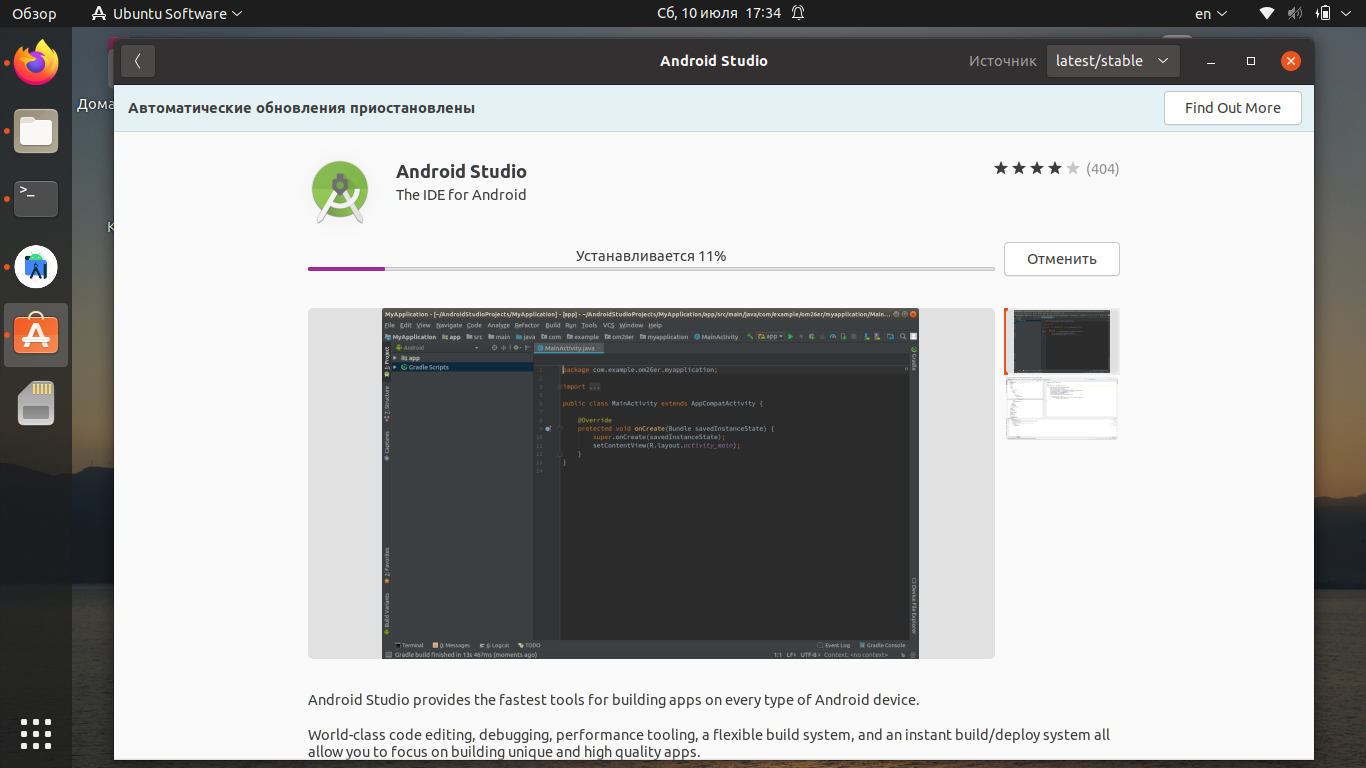
Процесс установки может занять до 30 минут (зависит от скорости вашего интернет-соединения). По окончании загрузки вы сможете запустить приложение.
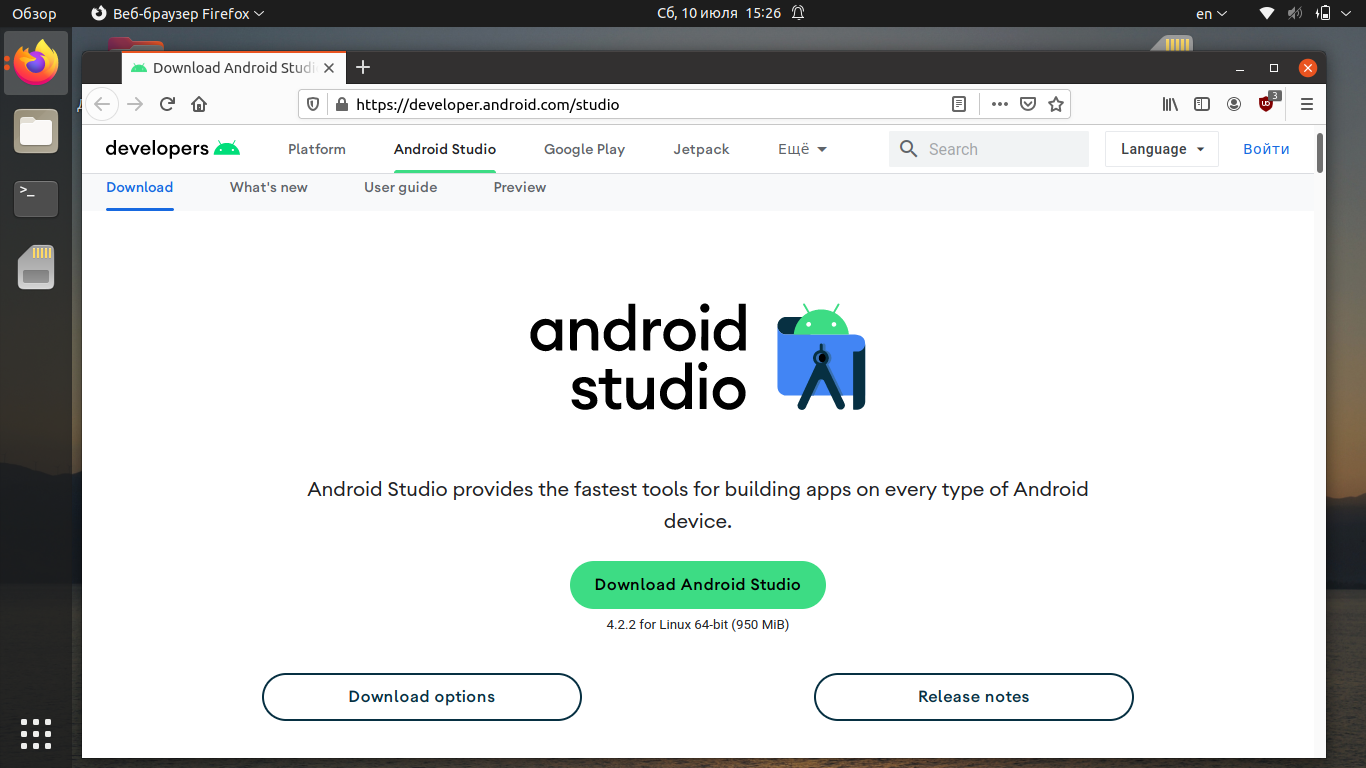
3. Установка с официального сайта
Прежде всего, вам необходимо загрузить установщик с официального сайта разработчиков. Перейдите на сайт и нажмите Download Android Studio.
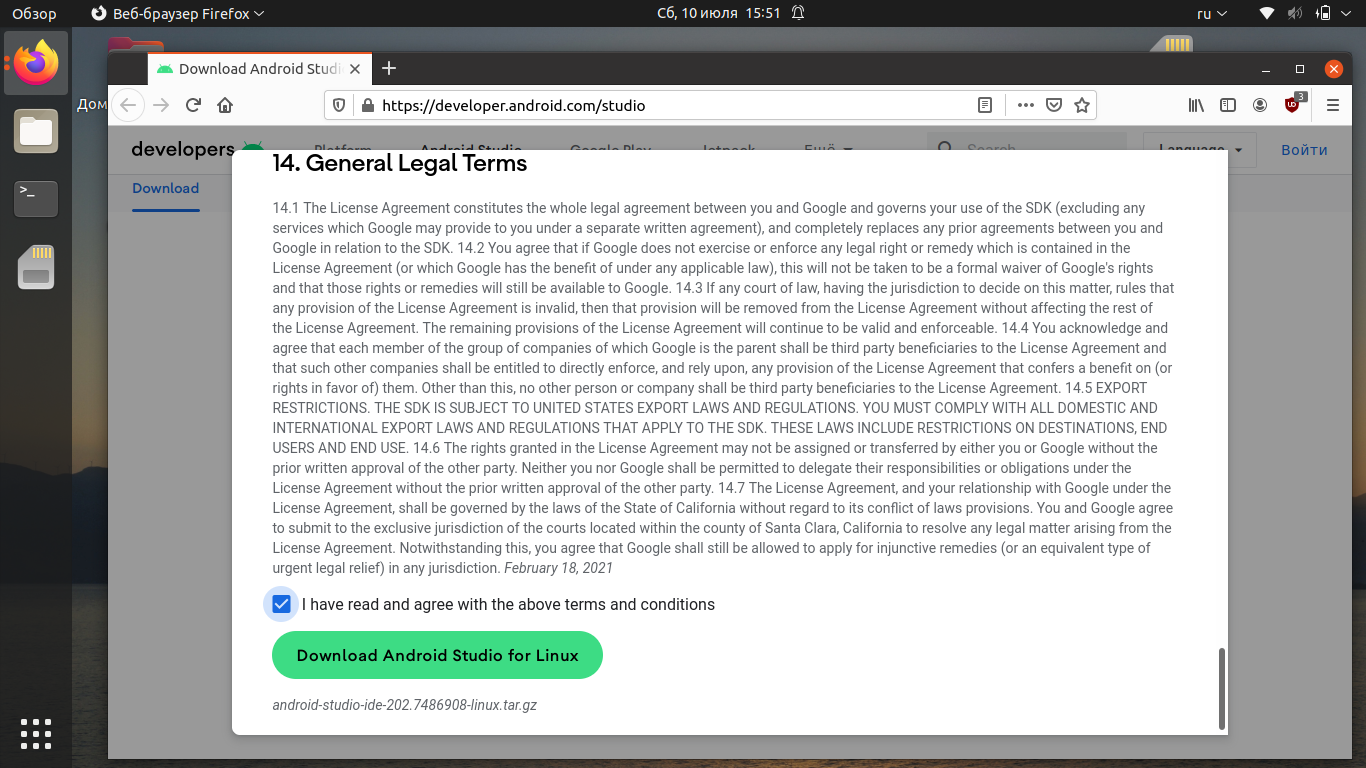
Ознакомьтесь с лицензионным соглашением, активируйте чекбокс и нажмите кнопку Download Android Studio for Linux.
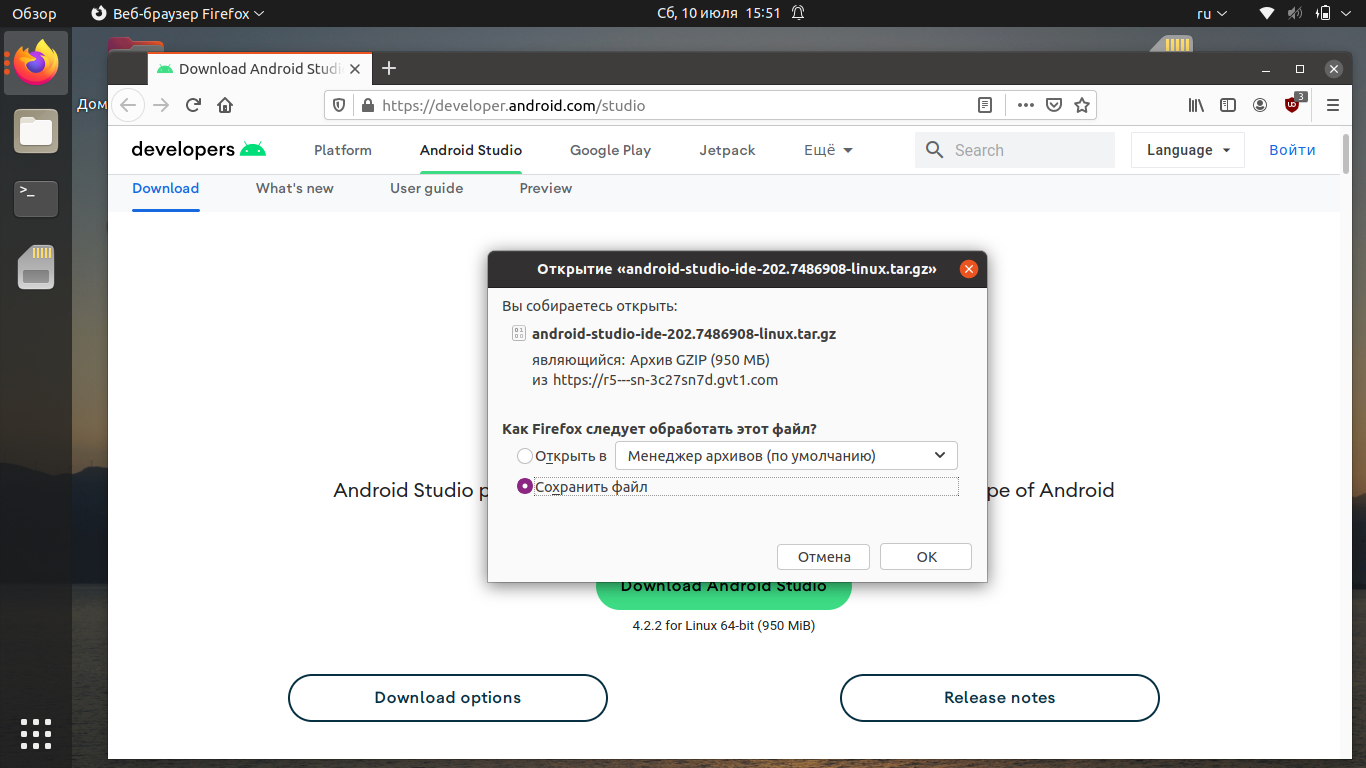
Выберите Сохранить файл и нажмите ОК.
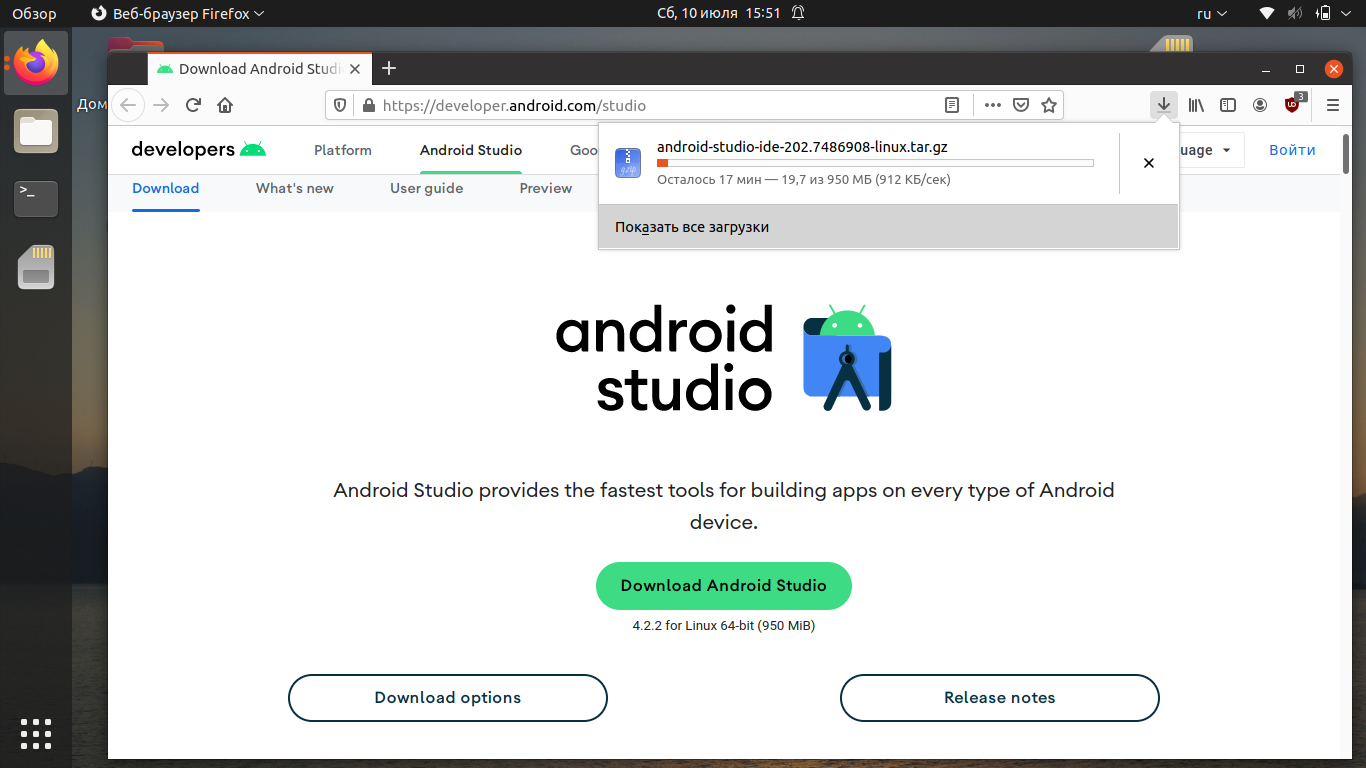
Дождитесь завершения скачивания.
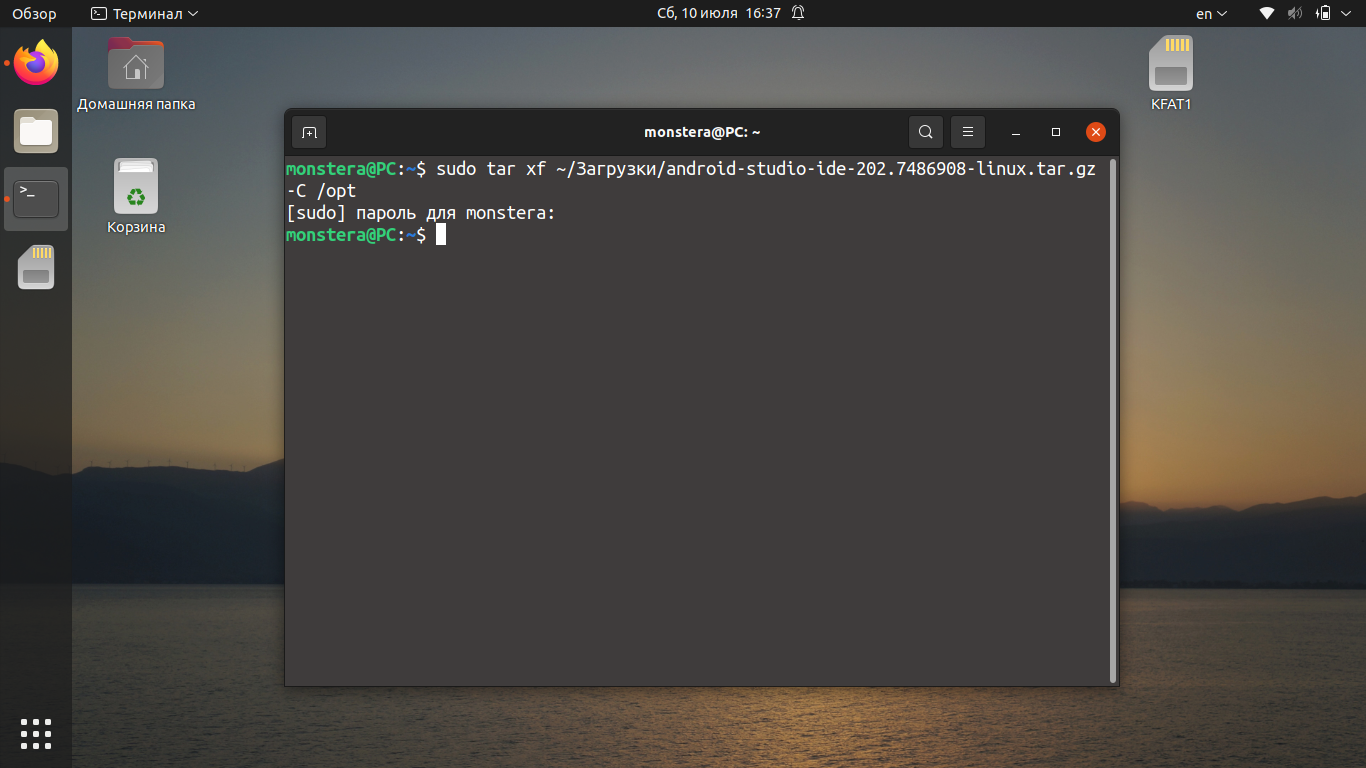
Когда файл будет загружен, перейдите в папку с загрузками и распакуйте содержимое архива в /opt. Для этого используйте команду вида (укажите скачанную вами версию приложения вместо 202.7486908):
/Загрузки/android-studio-ide-202.7486908-linux.tar.gz -C /opt
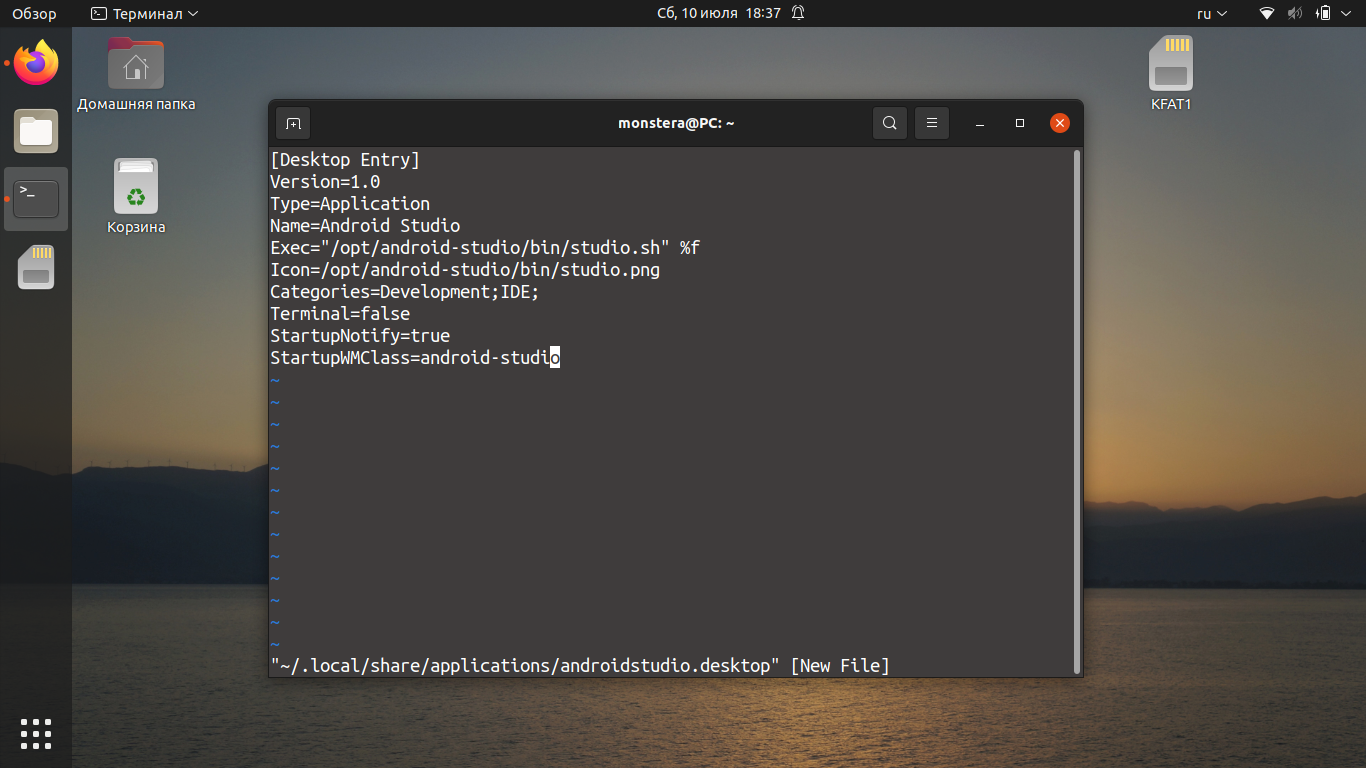
Чтобы добавить ярлык в меню приложений, создайте файл androidstudio.desktop командой:
Добавьте в файл следующий текст и сохраните его:
[Desktop Entry]
Version=1.0
Type=Application
Name=Android Studio
Exec=»/opt/android-studio/bin/studio.sh» %f
Icon=/opt/android-studio/bin/studio.png
Categories=Development;IDE;
Terminal=false
StartupNotify=true
StartupWMClass=android-studio
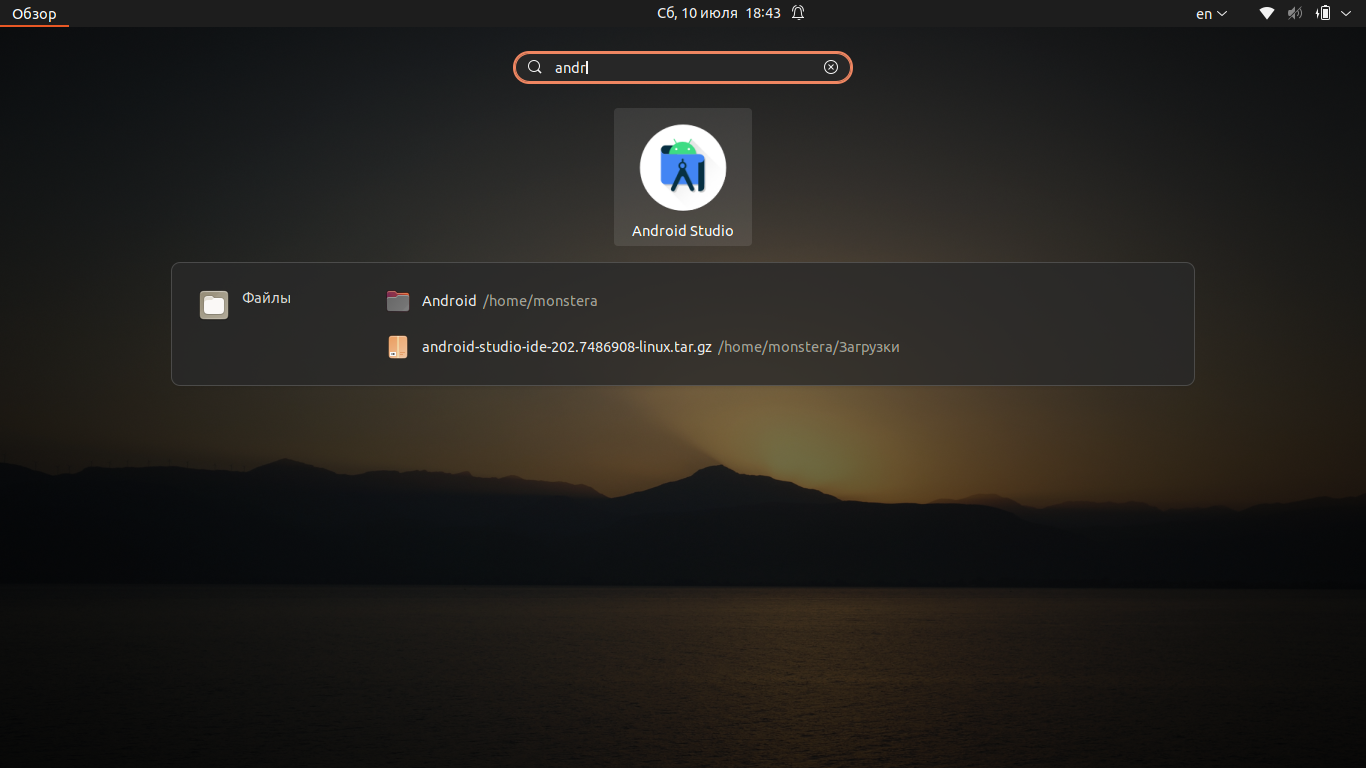
После этого установка будет завершена, и вы можете запустить среду разработки из главного меню:
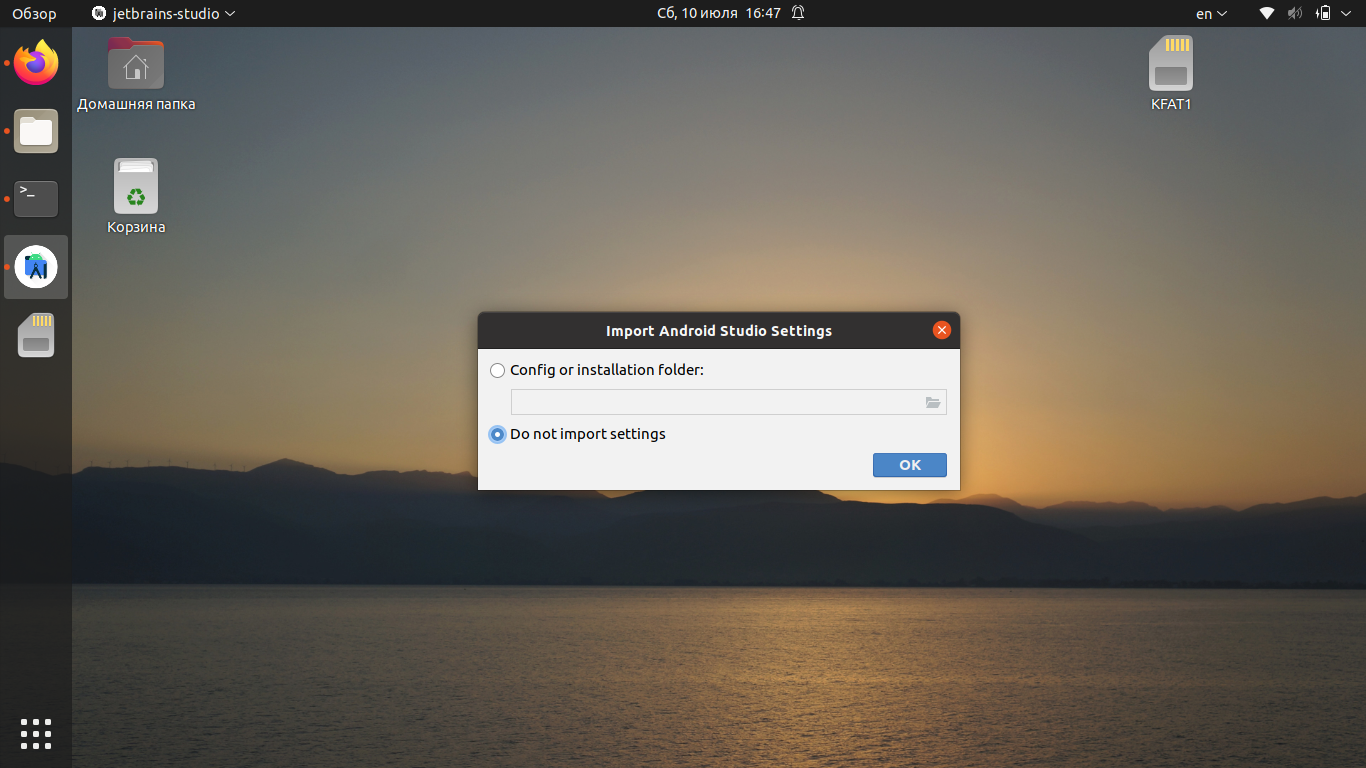
Но окончательная установка Android Studio ещё не завершена — программа должна скачать все необходимые компоненты и настройки. Если вы работали с Android Studio ранее, в следующем окне вы можете скопировать свои настройки. Если нет, — выберите Do not import settings и нажмите ОК.
Потребуется некоторое время, чтобы программа могла загрузить нужные компоненты и настроить систему.
Приложение спросит, нужно ли отправлять статистику в Google. Эти данные могут использоваться для улучшения следующих версий Android Studio. Определитесь с выбором, чтобы продолжить установку.
На следующем экране нажмите кнопку Next:
После этого вы сможете выбрать между стандартной автоматической инсталляцией и ручной. Второй способ позволяет выбрать для установки отдельные компоненты.
Выберите предпочитаемую тему оформления:
Ознакомьтесь со списком компонентов и их расположением:

Приложение отобразит уведомление о том, можете ли вы использовать эмуляторы на своём компьютере (зависит от аппаратной составляющей).
Далее начнётся загрузка, которая может занять довольно много времени, скорость зависит от вашего интернет соединения:
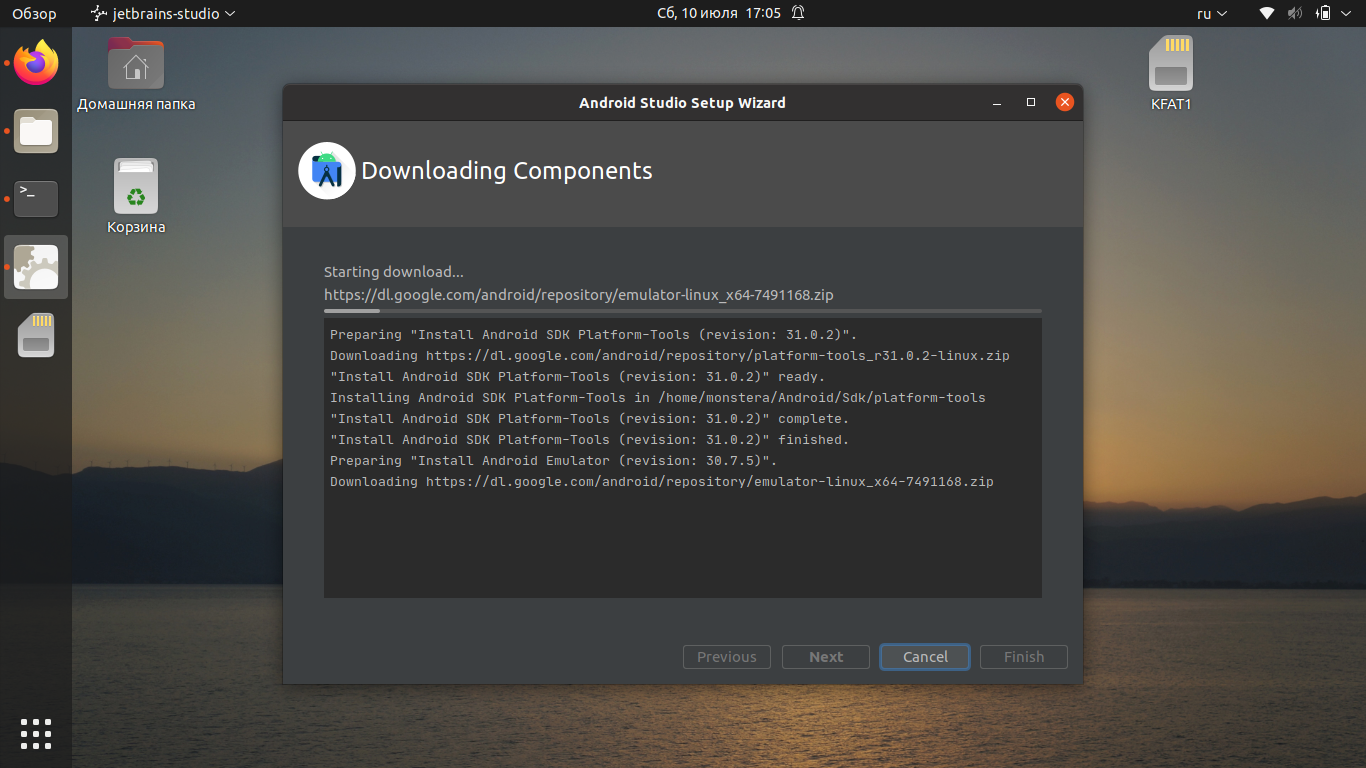
Можно нажать кнопку Show Details, чтобы наблюдать очерёдность установки компонентов:
Когда загрузка завершится, вы можете нажать Finish и перейти к созданию нового проекта.
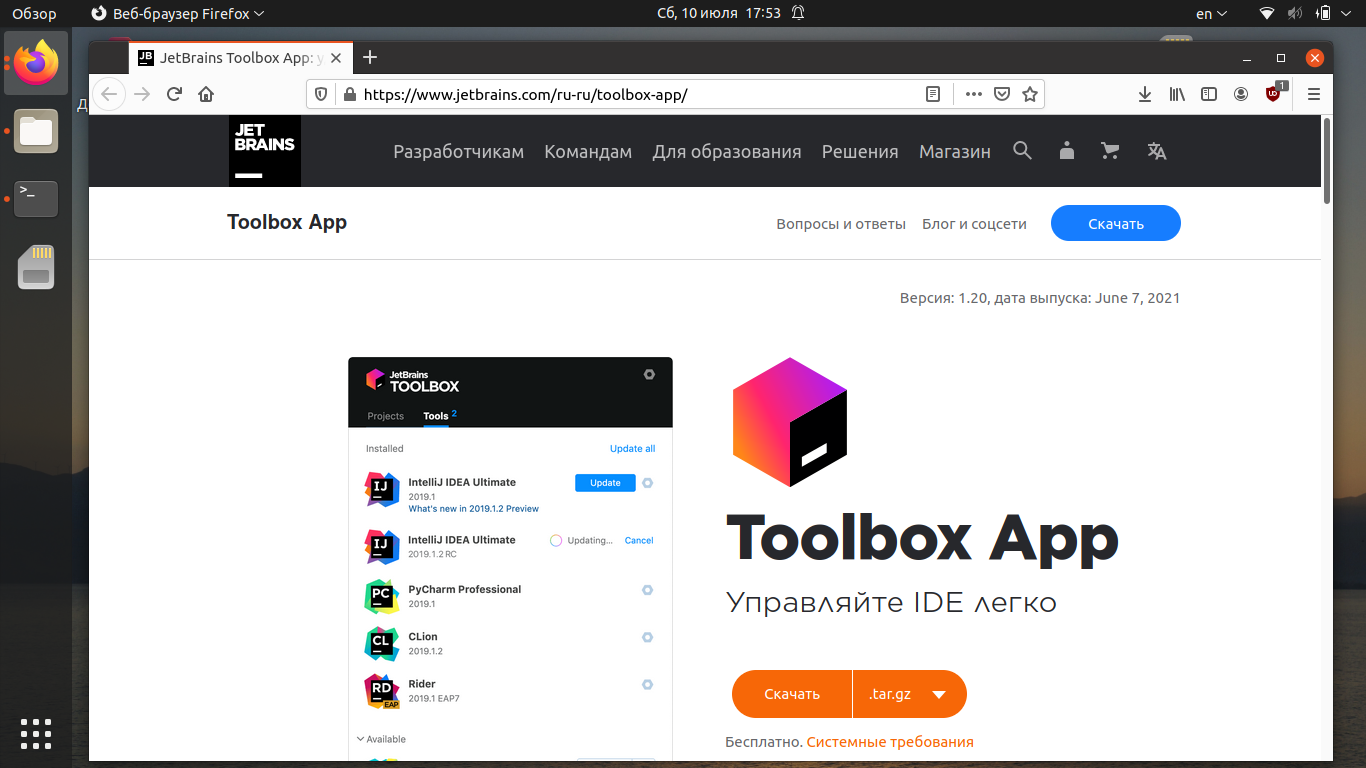
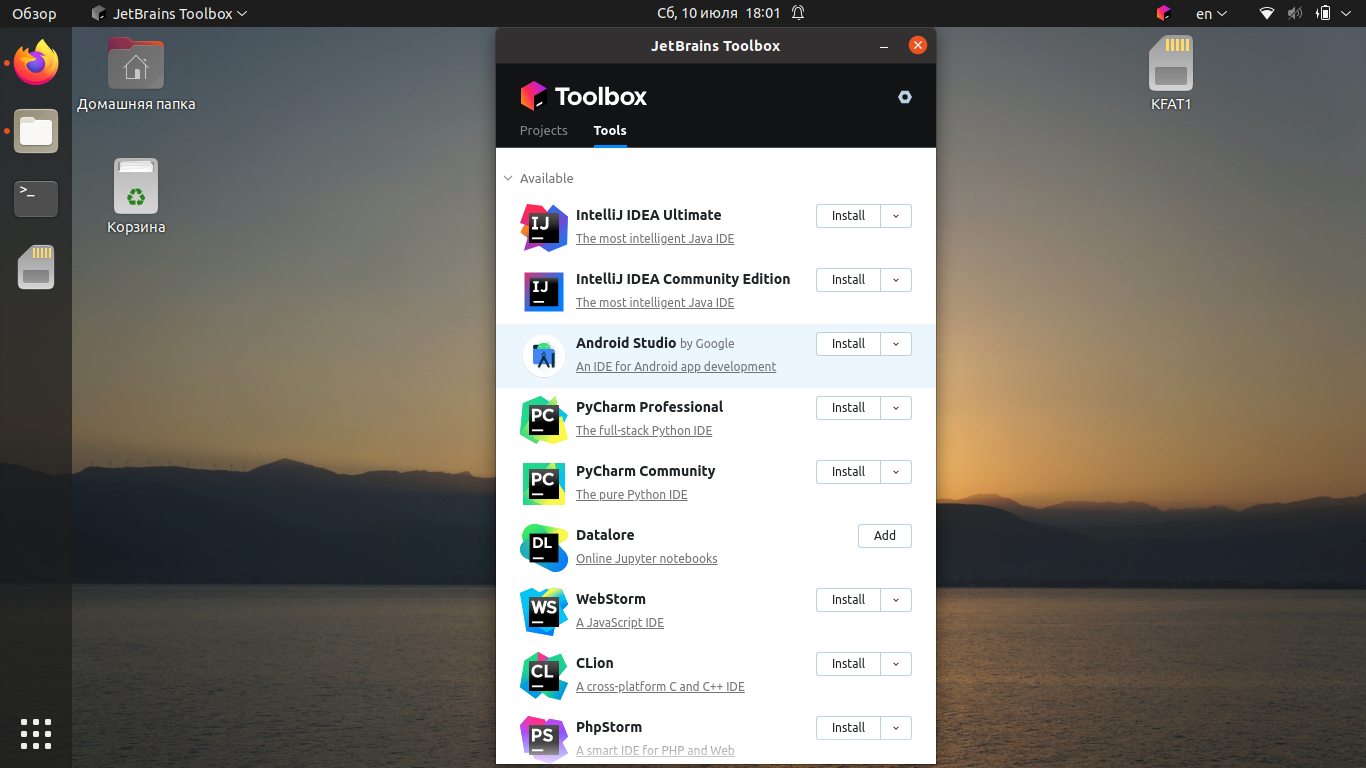
4. Установка в JetBrains Toolbox
JetBrains Toolbox — это официальный инструмент для установки и пакетного обновления Android Studio и других продуктов JetBrains. Загрузить JetBrains Toolbox можно с официального сайта разработчиков.
После этого перейдите в директорию, куда был скачан архив. Например, если это папка Загрузки, выполните команду:
Распакуйте скачанный архив. Имя файла актуально на момент написания статьи, но в будущем версия может отличаться:
tar -xzvf jetbrains-toolbox-1.20.8804.tar.gz
Перейдите в созданную директорию:
Чтобы запустить менеджер пакетов, введите команду:
После запуска Toolbox найдите Android Studio в списке и нажмите кнопку Install:
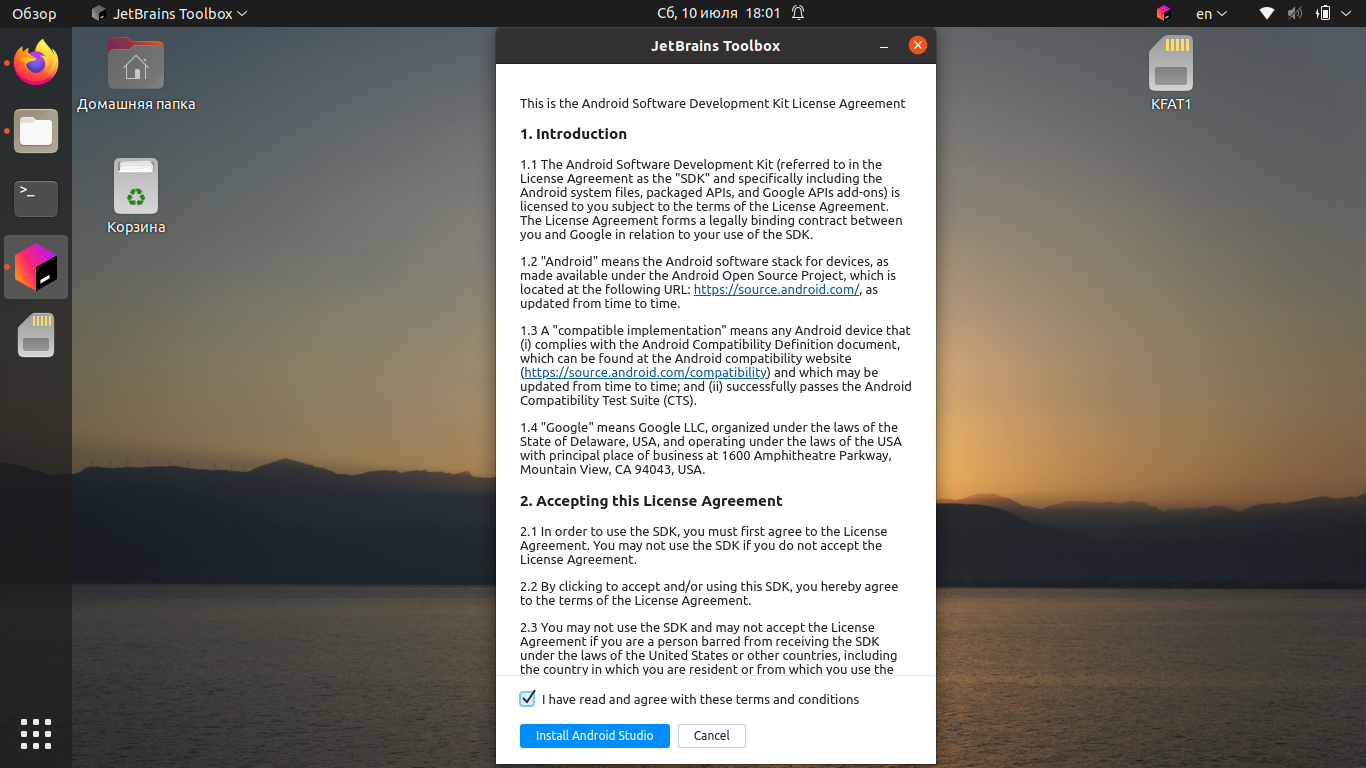
Подтвердите, что вы прочитали и принимаете лицензионное соглашение, после чего нажмите кнопку Install Android Studio.
Дождитесь, пока программа установится на ваш компьютер. После установки её можно будет запустить из главного меню Toolbox.

Как удалить Android Studio
Если вы устанавливали Android Studio с использованием snap-пакета или через центр приложений Ubuntu, её можно удалить командой:
sudo snap remove android-studio
Если же среда разработки была загружена с официального сайта, достаточно удалить распакованную папку вручную или с помощью команды в терминале:
sudo rm -Rf /opt/android-studio
Программа, установленная с помощью JetBrains Toolbox, удаляется с использованием этого инструмента. Перейдите в Toolbox, нажмите на значок шестерёнки рядом с Android Studio и выберите Delete.
Выводы
В этой статье мы рассмотрели, как выполняется установка Android Studio в Ubuntu 20.04 различными способами. Можете выбрать тот способ установки, который лучше всего подходит именно для вас. Если остались вопросы, задавайте их в комментариях.
Источник
Android Studio Ubuntu Tutorial
Android studio is a specified IDE for android development launched by Google. Before the Android Studio launch, Eclipse was the popular IDE for developing android based applications. Android Studio provides a full-fledged environment for android application development. The core programming languages for Android are Java and Kotlin. Android Studio supports both these programming languages.
This guide provides a brief tutorial about installing and using Android Studio on Ubuntu 20.04.
Install Android Studio on Ubuntu 20.04
In order to install Android Studio on Ubuntu, you have to install it through the repository. Follow the below-given steps to install the Android Studio on Ubuntu 20.04 by adding repository:
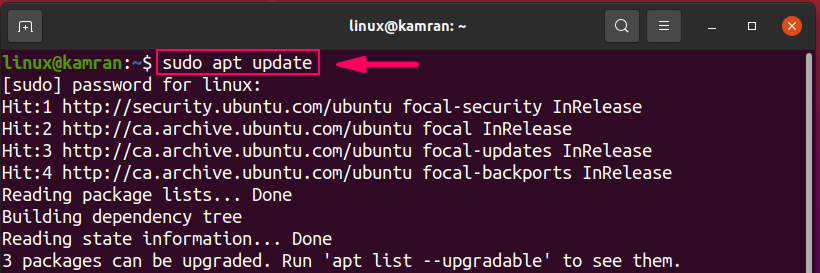
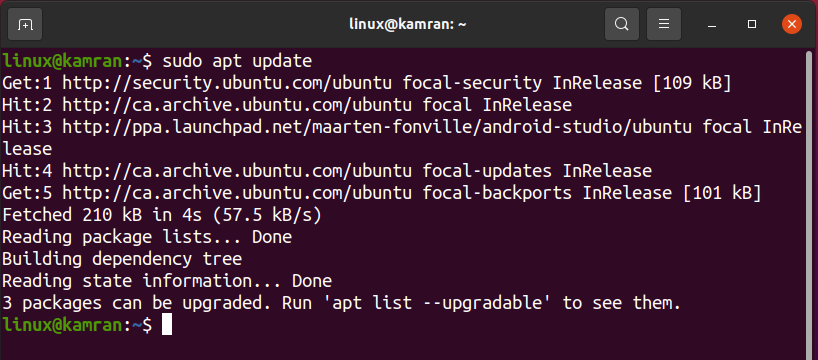
Step 1: Update apt cache
Prior to installing any new package or application, it is recommended to update the apt cache with the command:
Step 2: Install Java Development Kit
Android Studio requires Java Development Kit to be functional. We need to install the JDK, before installing Android Studio using the following command:
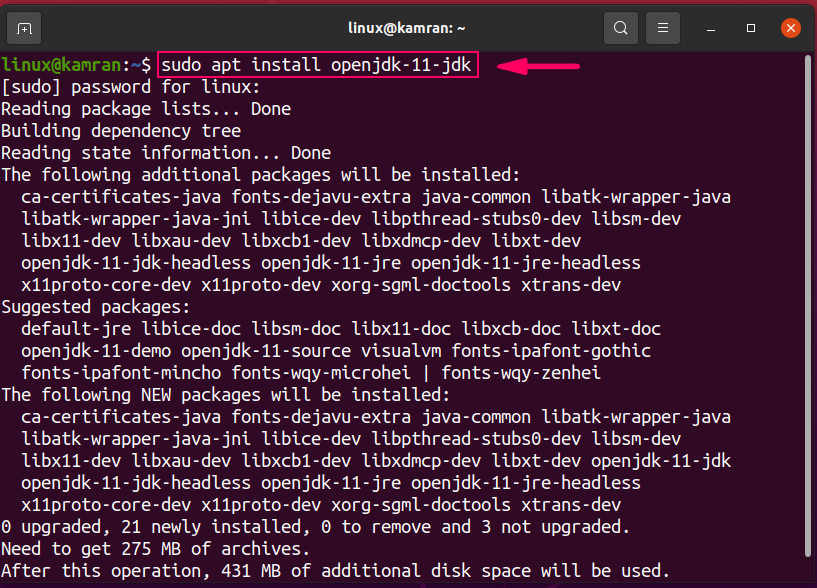
During the JDK installation, the command line prompt with ‘y/n’ option. To continue the installation, press ‘y’.
Upon JDK successful installation, run the following command to verify the JDK installation:
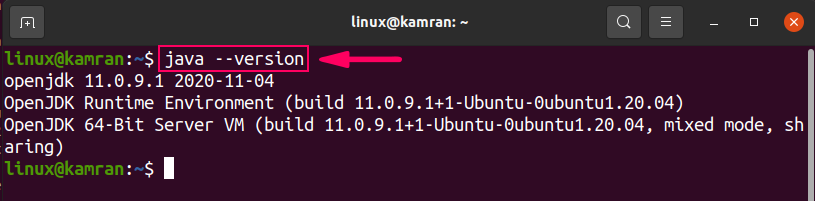
The command shows the installed version of JDK on your Ubuntu 20.04 system.
Step 3: Add a repository for Android Studio
Next, add the android studio repository using the following command:
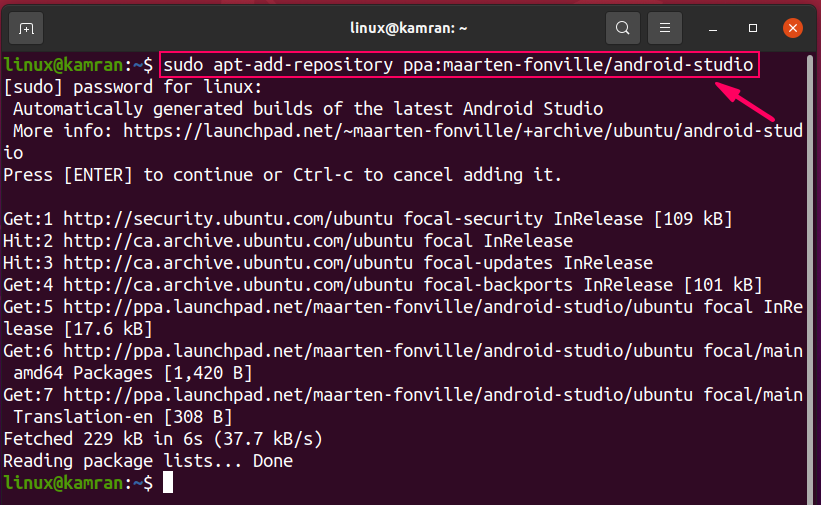
While adding the android studio repository, the command line prompt with ‘Press [Enter] to continue or Ctrl-c to cancel adding it’ options. To continue the process, press ‘Enter’.
Step 4: Update apt cache
Once the repository is added, it is the best practice to update the apt cache using the following command:
Step 5: Install Android Studio
Now everything is set up on your Ubuntu 20.04 for android studio installation. Execute the command given below to install Android Studio:
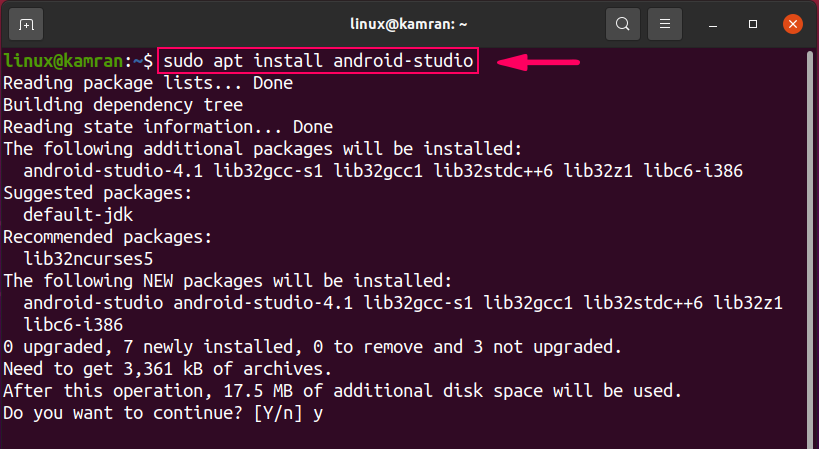
During the installation, the command line prompt with ‘y/n’ option. ’To continue the installation process, press ‘y’.
Perform Android Studio’s initial configuration
Upon the first launch, we need to perform some initial configuration.
First, launch the android studio. Go to the application menu and write ‘Android Studio’ in the search bar.

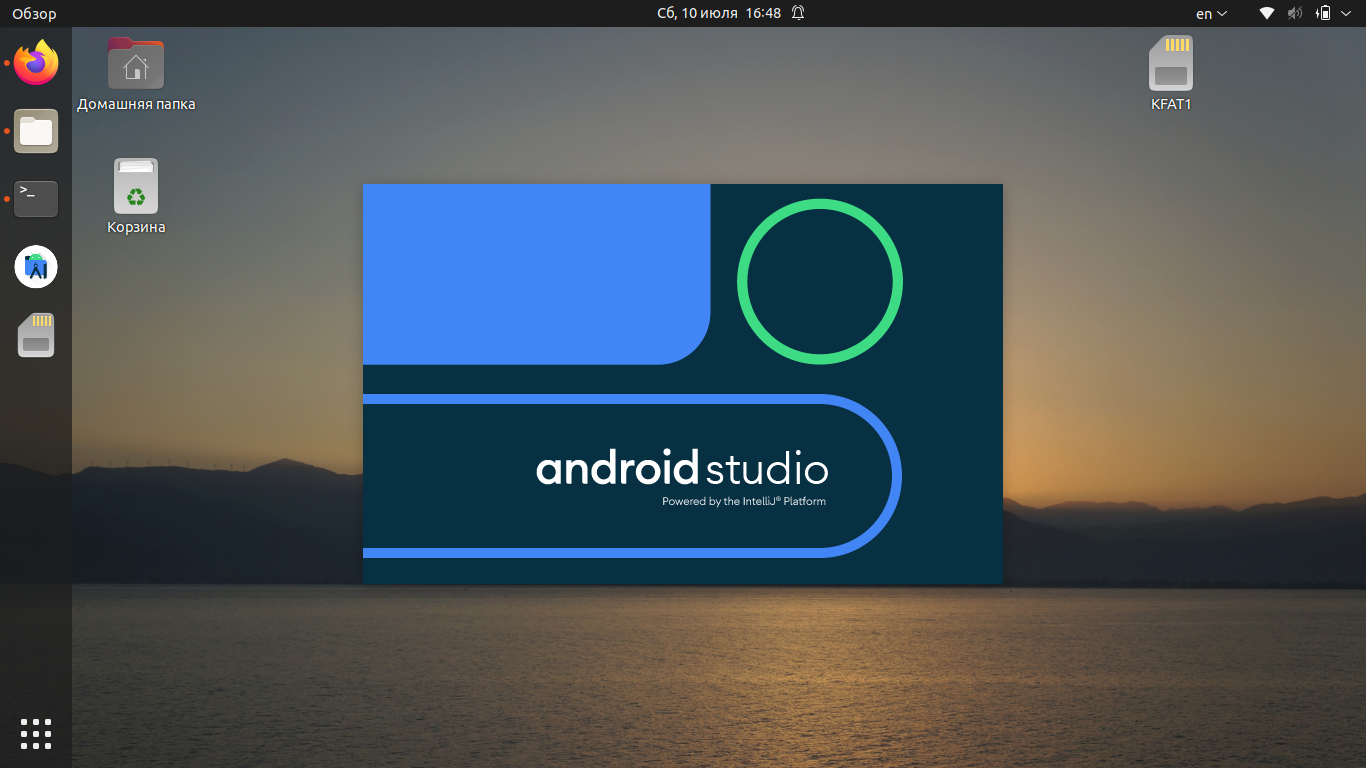
The Android Studio application will appear. Click on the application icon, and the android studio will be opened.

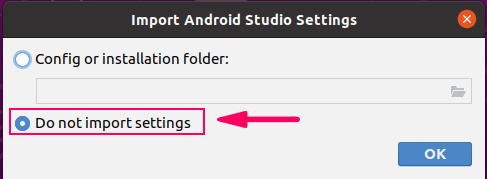
On the ‘Import Android Studio Settings’ screen, select the ‘Do not import settings’ option, and click on ‘OK’.
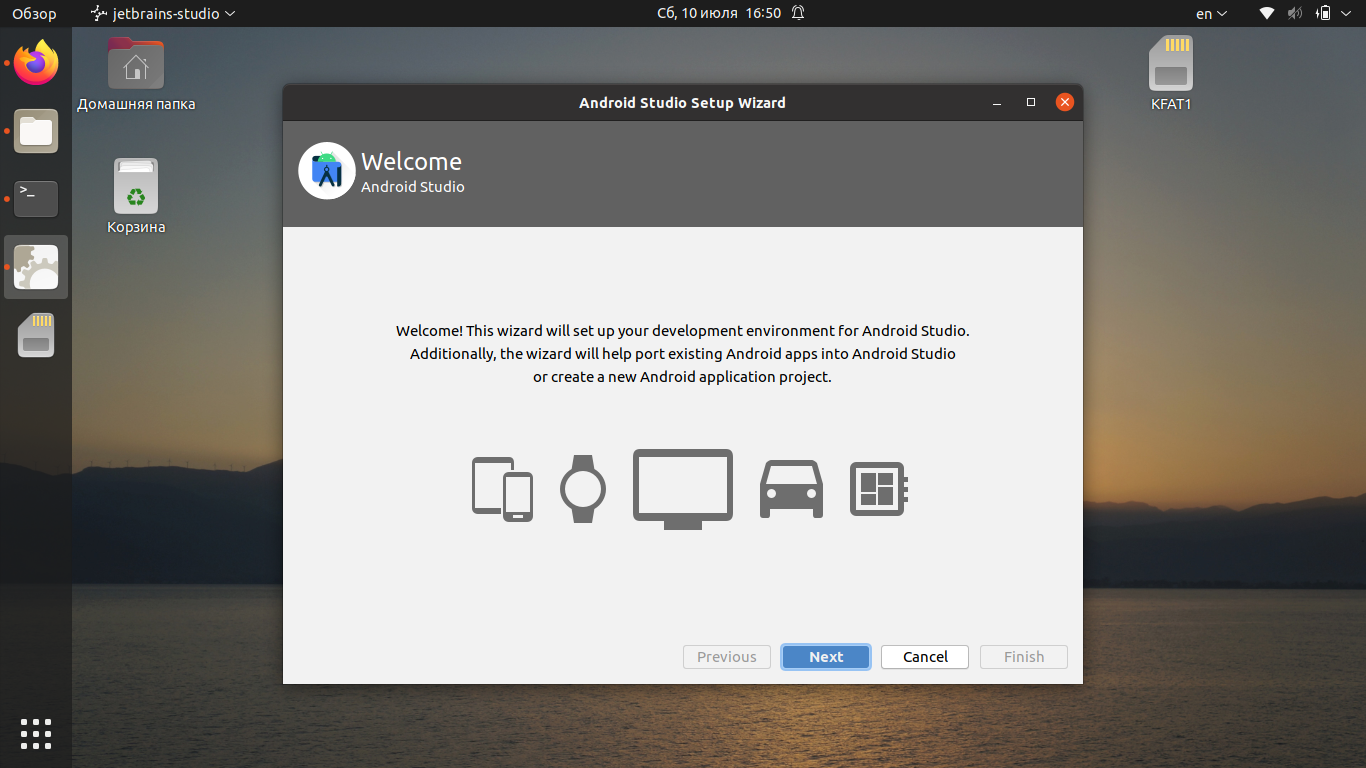
On the ‘Android Studio Setup Wizard’ screen, click on ‘Next’.

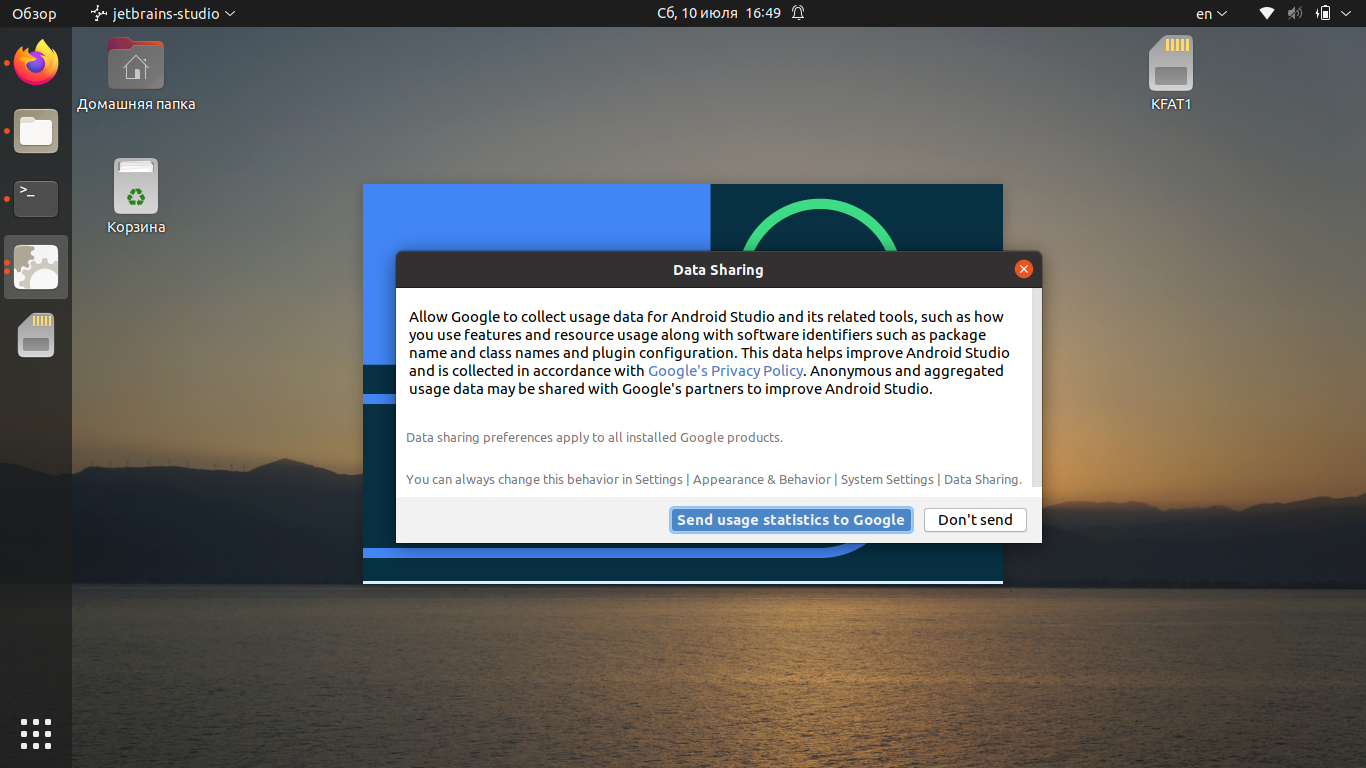
The Android Studio will ask for the ‘Data Sharing’. Select the appropriate data sharing policy as per your choice.

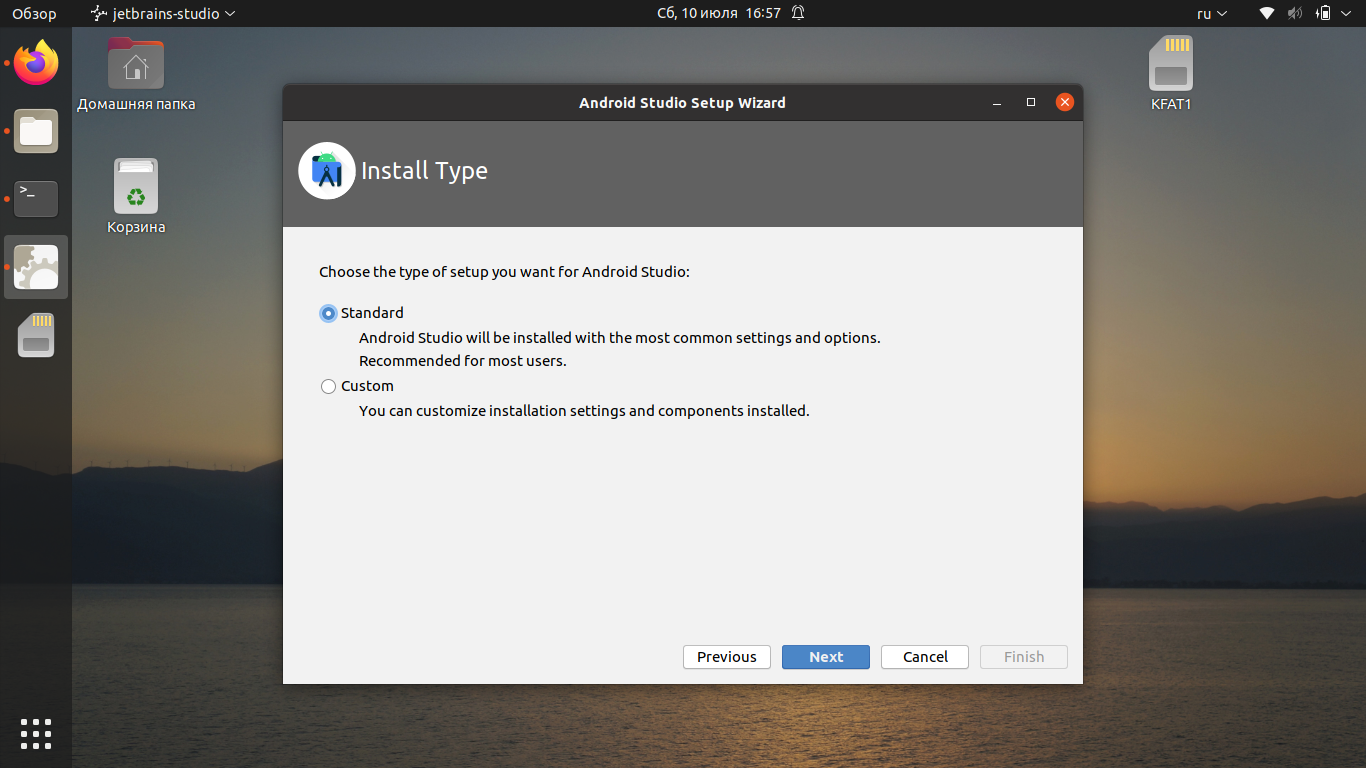
Next, choose the install type. It is suggested to choose the ‘Standard’ install Type. Therefore, select the ‘Standard’ option and click on ‘Next’.

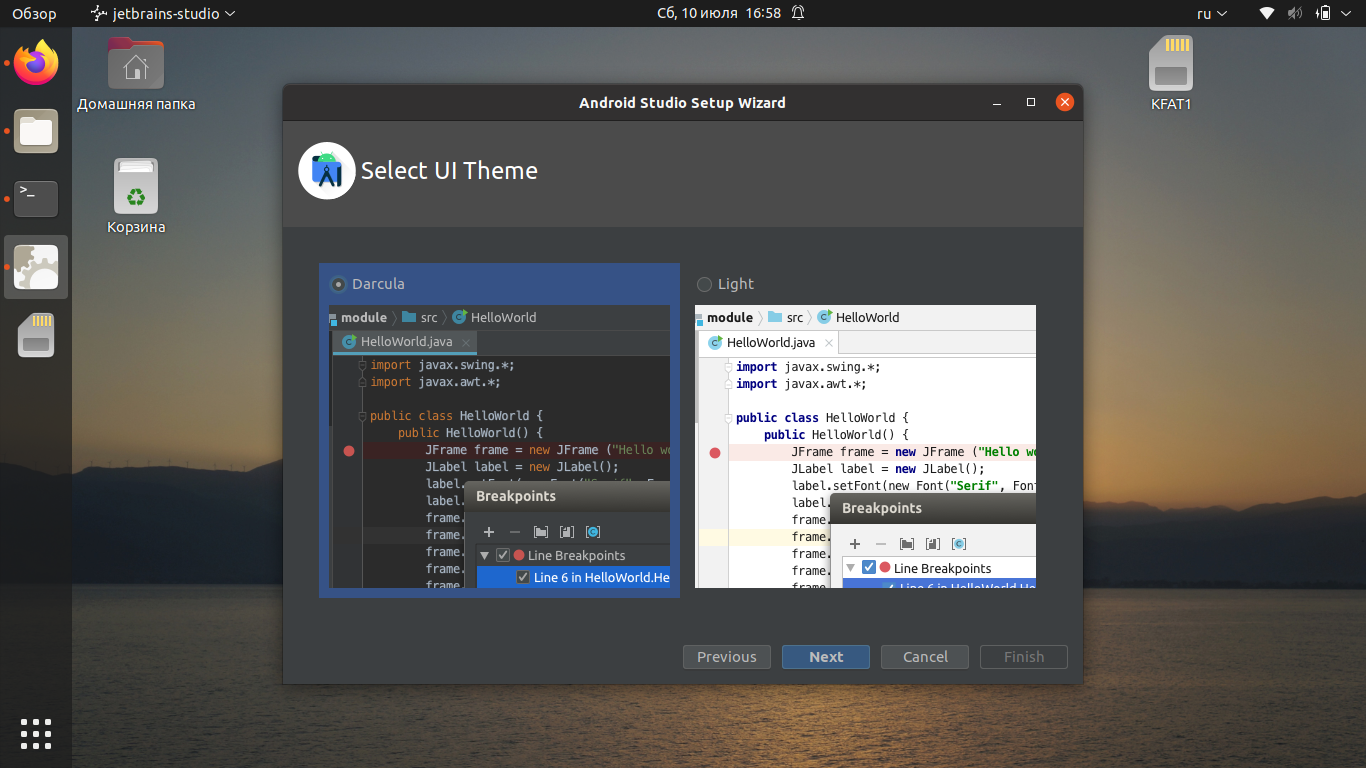
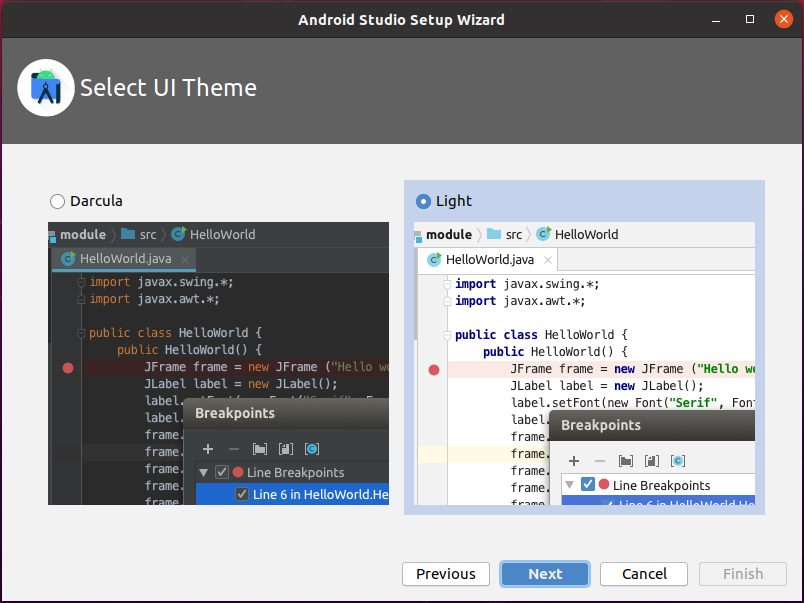
Android Studio comes up with two beautiful and attractive built-in themes. On the following screen, select the theme as per your choice and click on ‘Next’.
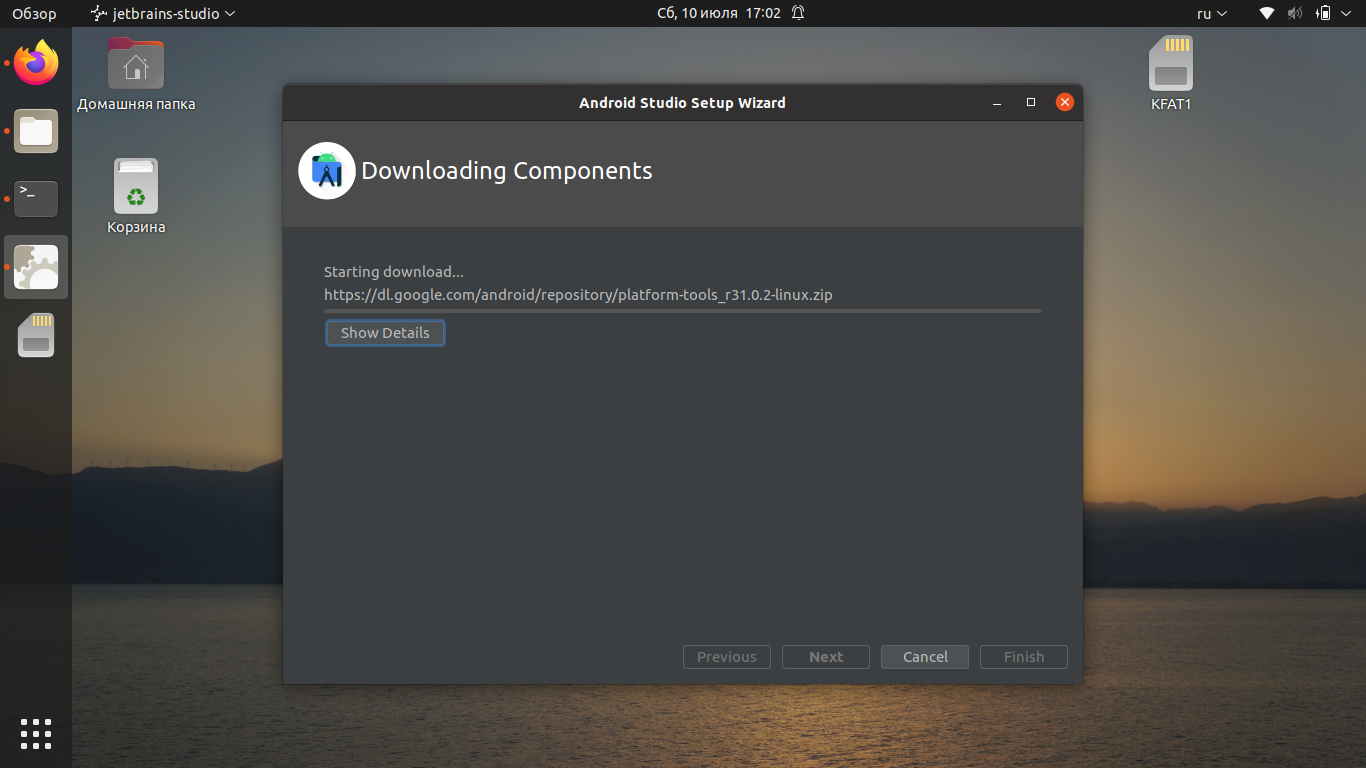
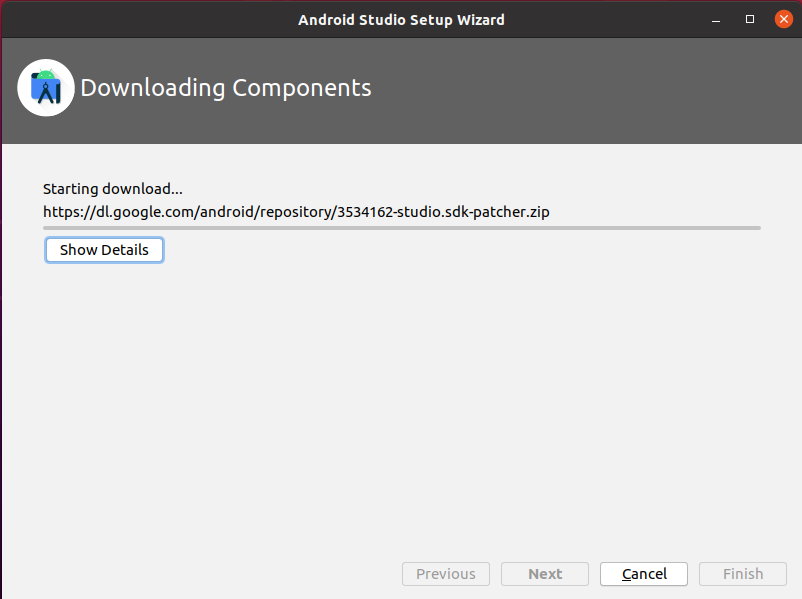
Now, the android studio needs to download some required components. To download the component, press ‘Next’.

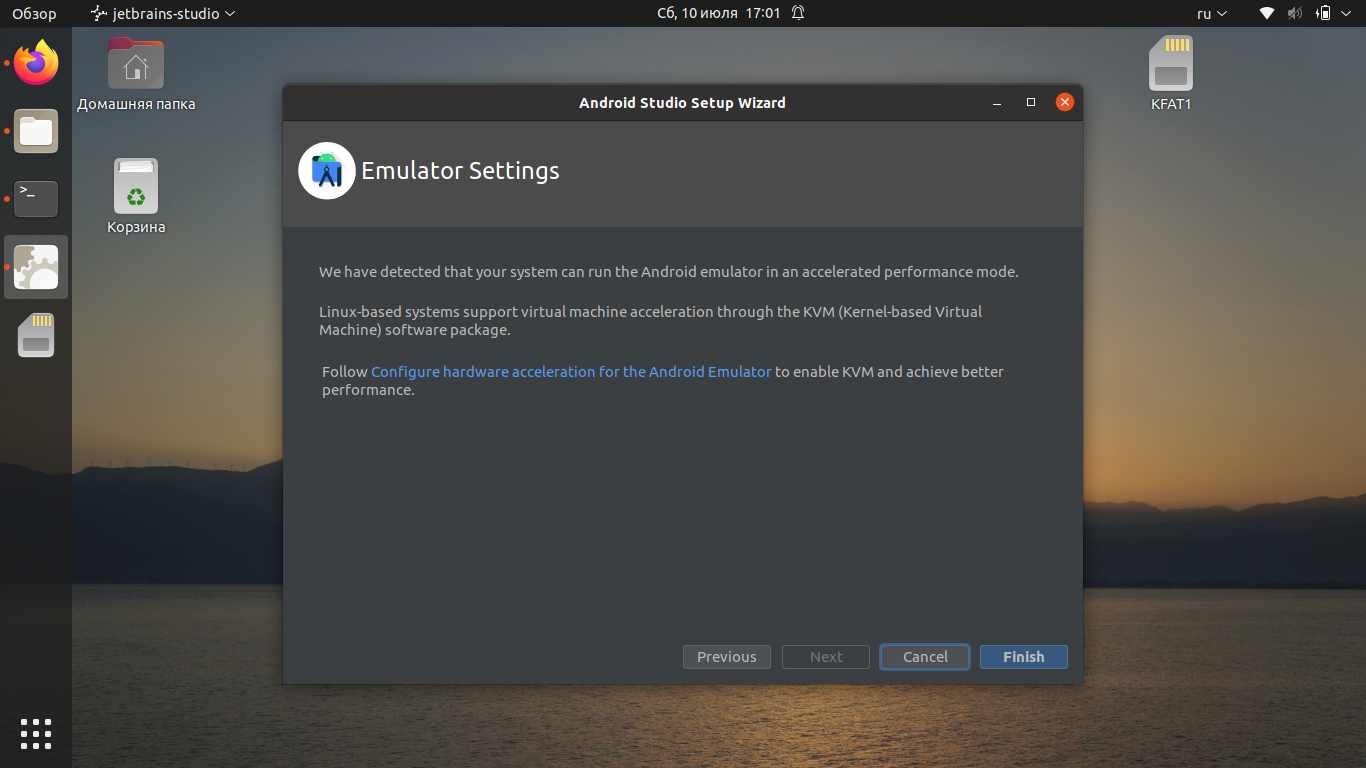
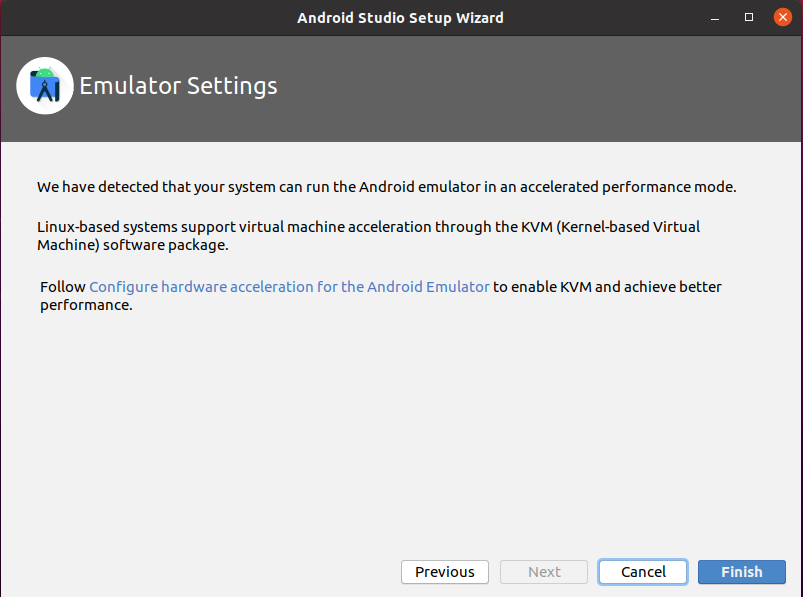
Next, the Android Studio will show some information regarding Emulator Settings. Read the information carefully and click on ‘Finish’.
The components will be downloaded successfully.
Alright! The Android Studio initial configuration is done.
Create your first Android Application
Following is the Android Studio’s Dashboard screen that appears after initial configuration.

To create the first Android application, click on the first option, “Create New Project”.
Next, from the ‘Phone and Tablet’ section, select the ‘Empty Activity’ and click on ‘Next’.

Enter the application name, choose your preferred programming language, i.e., Kotlin or Java, select minimum SDK version, and click on the “Finish” button.
I have selected API level 23 Android 6.0(Marshmallow).

Next, you will see a screen like this.

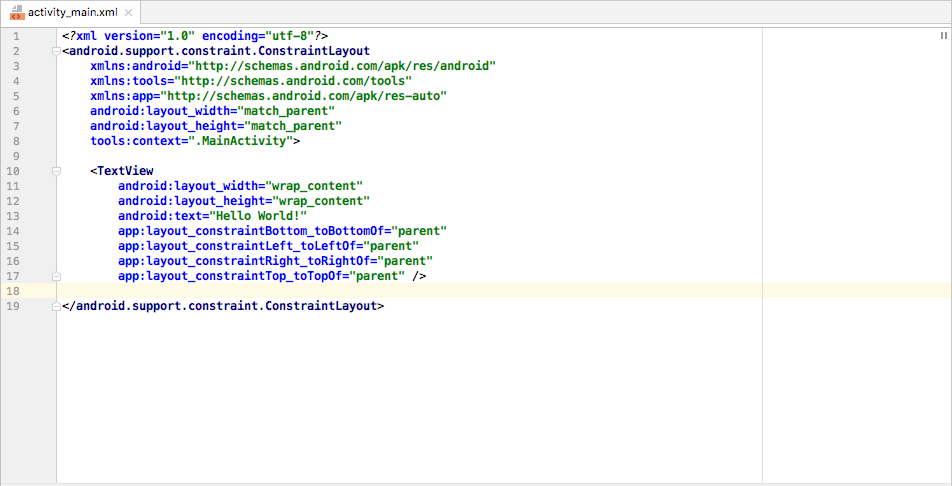
Navigate to the ‘res’ directory, expand the ‘layout’ folder, and open the ‘activity_main.xml’ file.
In the ‘activity_main.xml’ file, you will find the xml code for the activity design. The ‘Hello World’ text is already added in the xml file.
Attach your Android device to the machine and click on the green-colored “Run” button. The Android Studio will display all the available Android devices. Pick the device, and the app would be installed on the android device.
Conclusion
Android Studio has become the prime IDE for android apps development. It can be easily installed on Ubuntu 20.04 by adding the official android repository. In a few steps, you can configure the Android Studio and create your first Android application. This article is a brief tutorial of Android Studio.
About the author

Kamran Sattar Awaisi
I am a software engineer and a research scholar. I like to write article and make tutorial on various IT topics including Python, Cloud Computing, Fog Computing and Deep Learning. I love to use Linux based operating systems.
Источник


