- UltFone iOS System Repair UltFone iOS System Repair (Mac)
- A Master of iOS: iOS System Recovery under Many Scenarios
- Fix iOS/iPadOS/tvOS System Issues without Data Loss
- Downgrade from iOS beta or Upgrade to Formal Version without Losing Data
- Factory Reset iPhone/iPad/iPod without Password
- One Click to Enter or Exit Recovery Mode
- 3 Steps to Fix iOS/iPadOS/tvOS System to Normal
- Free Trial VS Pro Version
- Trusted By Famous Media and Millions of Users
- UltFone iOS System Repair FAQs
- Ulefone armor 2 восстановление кирпича
- Рекомендуем вам получение root прав в 1 клик, используя Rootkhp Pro
- Что могло превратить Android в кирпич?
- Как восстановить ulefone armor 2
- Repair System Android 83.02110.30
- How to Use UltFone Android System Repair
- Part 1: Enter/Exit Android Fastboot Mode
- 1-Click to Enter Fastboot Mode
- One Click to Exit Android Fastboot Mode
- Part 2: Enter and Exit Android Recovery Mode
- One Click to Enter Android Recovery Mode
- How to Exit Android Recovery Mode
- Part 3: Enter and Exit Android Download Mode
- How to Enter Download Mode on Android
- One Click to Exit Download Mode
- Part 4: Repair Android System
- Setp 1.Connect Device
- Step 2. Click Repair Now to Proceed
- Step 3. Select Your Device Info
- Step 4. Download Firmware Package
- Step 5. Start Android System Repair
- Step 6. Android System Repair Completed
- Part 5: One Click to Clear System Cache
UltFone iOS System Repair UltFone iOS System Repair (Mac)

A Master of iOS: iOS System Recovery under Many Scenarios
iPhone screen frozen and won’t turn on? UltFone iOS system repair software is capable of repairing 150+ iOS system problems, like stuck on Apple logo, black screen, restart loop, recovery mode, and even factory reset iPhone/iPad without password.
iPhone is Disabled
Stuck in Recovery Mode
Fix iOS/iPadOS/tvOS System Issues without Data Loss
Using iTunes restore will fix some iOS system issues but it will erase your data, while UltFone iOS System Recovery tool will repair system without data loss. And also compared with iTunes, it requires no technical knowledge, the whole process will be just a few clicks.
Downgrade from iOS beta or Upgrade to Formal Version without Losing Data

The program will list out all the available firmware versions that Apple are still signing, you can choose the suitable one to downgrade iOS. Please Note that it is unable to downgrade if Apple has stopped signing the IPSW file.
You can easily upgrade to the latest iOS version without iTunes, and no risk of bricking your phone during uprgade. Feel free to uprgade your system within a few clicks.
Factory Reset iPhone/iPad/iPod without Password
When you forgot your iPhone passcode and iPhone is disabled, this iOS sysem recovey tool empowers you to reset iPhone, iPad, iPod to factory settings without password. After resetting, you can have full access to your iDevices.

You forgot the password and iPhone is disabled
You bought a used iPhone from someone else but locked
Perform factory reset to solve system problems
Reset all settings before selling
One Click to Enter or Exit Recovery Mode
Enter Recovery Mode
Put any iOS device in recovery mode by one click, no need to press any button.
Exit Recovery Mode
iPhone stuck in recovery mode? Thanks to UltFone iOS System Repair tool, you can get any iPhone/iPad/iPod touch out of recovery mode with one click.
Troubleshoot 36+ Apple TV tvOS Problems
UltFone iOS System Reapir is the NO. 1 trusted tool to fix Apple TV system issues. You can easily fix issues like Apple TV keeping restarting/crashing, stuck on settings, loading bar, Apple logo and more.
- Apple TV won’t connect to iTunes
- Apple TV stuck on activating
- Apple TV stuck on AirPlay screen
- Apple TV stuck on home sharing screen
Fix More Apple TV Issues >
Fix 200+ iTunes Errors
iTunes won’t backup/restore/update your iPhone and error 3194, error 9 or error 4013? UltFone iOS System Repair can fix 200+ iTunes errors without deleting your data.
- 0xe80000a
- Error 3194
- Error 4013
- Error 4000
- Error 4005
- Error 3600
- Error 4014
- Error 3014
- Error 9
Fix More iTunes Errors >
Two Repair Modes to Fix iOS System
There are two repair modes to bring your iOS devices back to normal. No technical knowledge required. Standard mode will fix all common iOS issues without data loss. While Advanced mode fixes issues that is not applicable with Standard mode, but all data will be erased.
3 Steps to Fix iOS/iPadOS/tvOS System to Normal
UltFone iOS System Repair fixes not only iOS but also iPadOS, tvOS system issues as easy as 1-2-3.
Free Trial VS Pro Version
- Enter Recovery Mode
- Exit Recovery Mode
- Fix stuck on Apple logo
- Fix stuck on black/white screen
- Fix iPhone frozen
- Fix iPhone won’t turn on or charge
- Downgrade/Upgrade iOS
- Unlock iPhone whitout passcode
- .
Free TrialFree Trial
- Enter Recovery Mode
- Exit Recovery Mode
- Fix stuck on Apple logo
- Fix stuck on black/white screen
- Fix iPhone frozen
- Fix iPhone won’t turn on or charge
- Downgrade/Upgrade iOS
- Unlock iPhone whitout passcode
- .
Buy NowBuy Now
Trusted By Famous Media and Millions of Users
my phone still shows the disabled screen, I’m not sure if it’s stuck in a boot loop or not , ANYWAY. for this tool, I happened to find this software by chance, it was a surprise !! This program definitely works and I’m glad it did, take my word for it!
My iPhone X got black screen this morning and won’t turn on. I thought it was just power off but it was not. I tried this software and it works. Thanks.
Donanoe Jasonon 5.0
UltFone iOS System Repair FAQs
Yes, UltFone iOS System Repair is legit and safe to download on your Windows or Mac. It supports all iPhone/iPad/iPod touch/Apple TV in the market. When you are downloading or using this software, it won’t cause any damage to your computer or device.
You can use this software to enter recovery mode on any iOS device for 100% free. If your iPhone is stuck in recovery mode, you can use Exit Recovery Mode function to get iPhone out of recovery mode for 5 times free. The Repair Operating System and Factory Reset iPhone features are free to test. You need to upgrade to the pro version to use their entire functions.
iTunes is a great tool when we are running out an iPhone problem, the big worry is that all data in the device will be wiped out. UltFone iOS System Repair employs new technology that can solve most iOS system issues without data loss using the default standard repair mode.
When you choose “Repair Operating System” function, it uses the standard mode by default. It is the recommended mode to fix most iOS system problems without data loss. The deep repair mode and factory reset iPhone function will erase all data and contents. If your iOS problem can’t be solved using standard mode, or if you forgot iPhone passcode, you can use the deep repair to do a complete factory reset.
No. UltFone iOS System Repair does not support iCloud activation lock removal. Please use a different software UltFone Activation Unlocker to unlock iCloud locked iPhone/iPad/iPod touch without Apple ID/password.
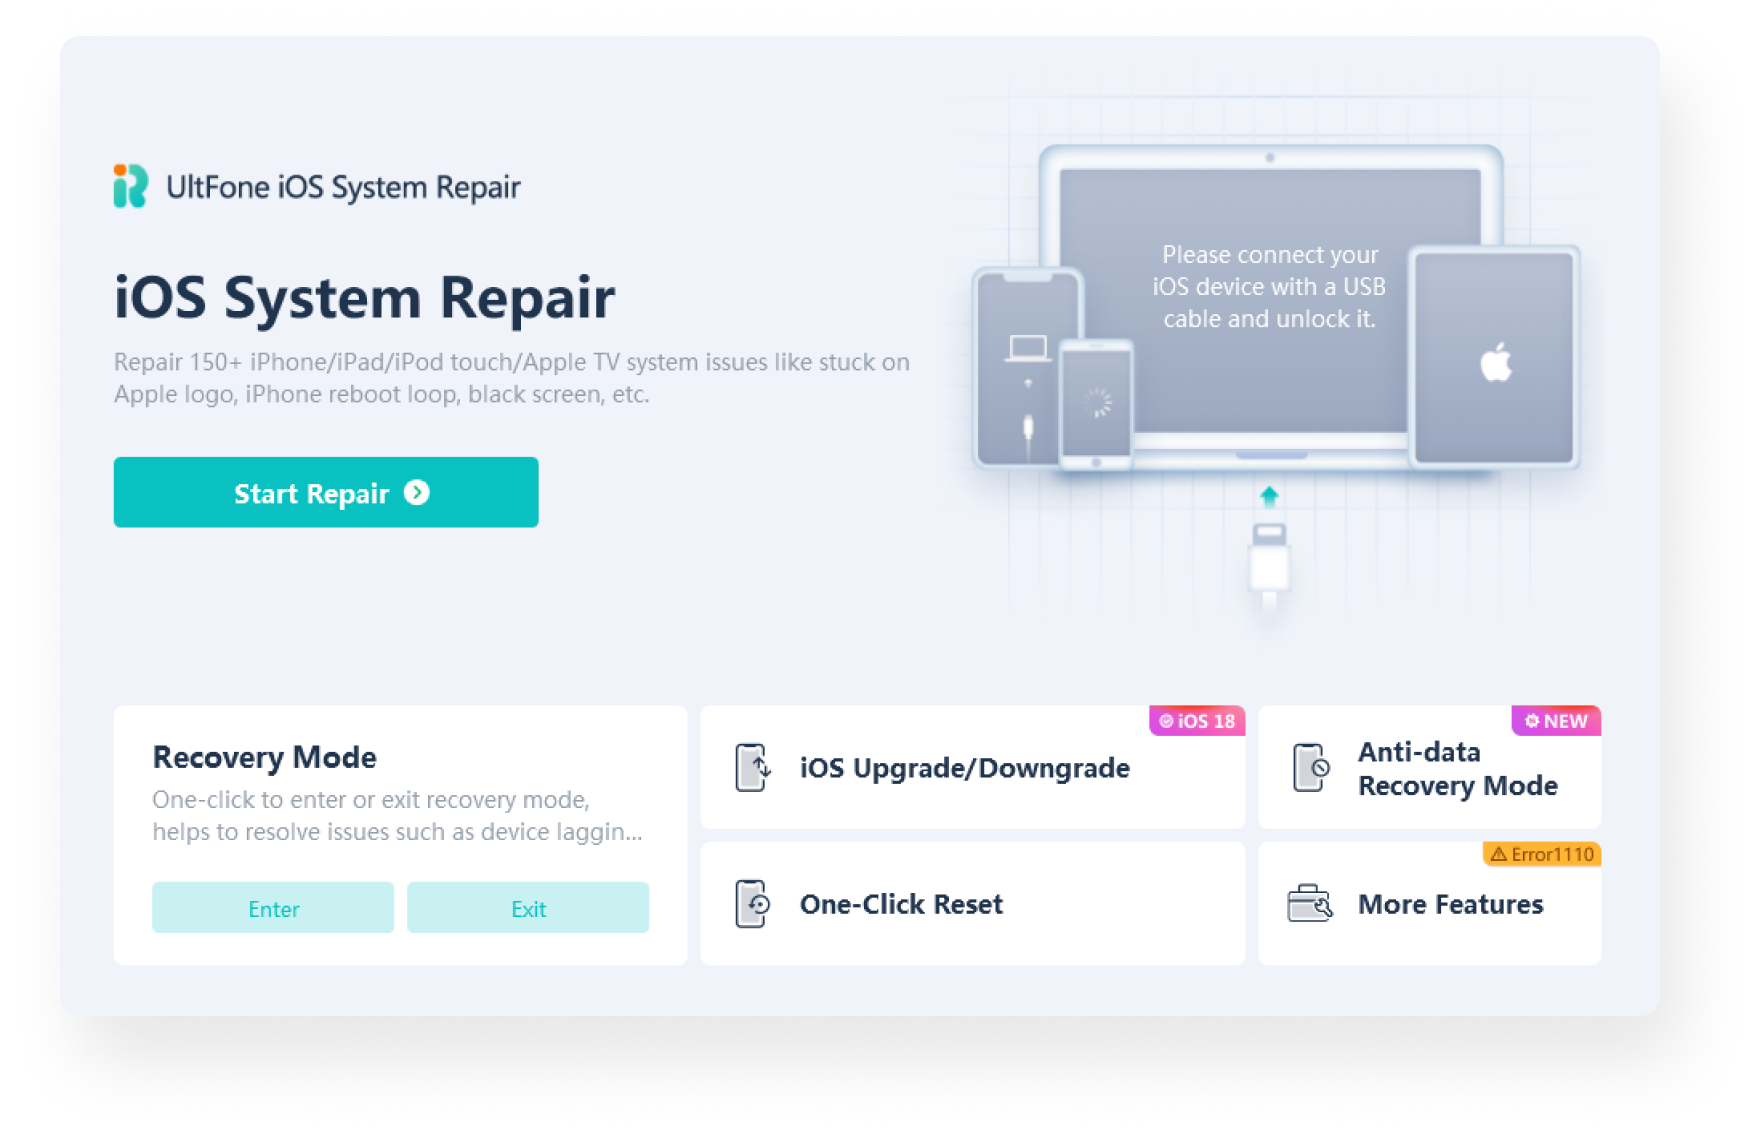
After downloading and launching UltFone iOS System Repair on computer, you can easily fix iOS problems by the steps below.
Step 1. Choose Repair Operating System function on the main screen.
Step 2. Connect your device to computer with Apple original USB cable.
Step 3. Click Fix Now.
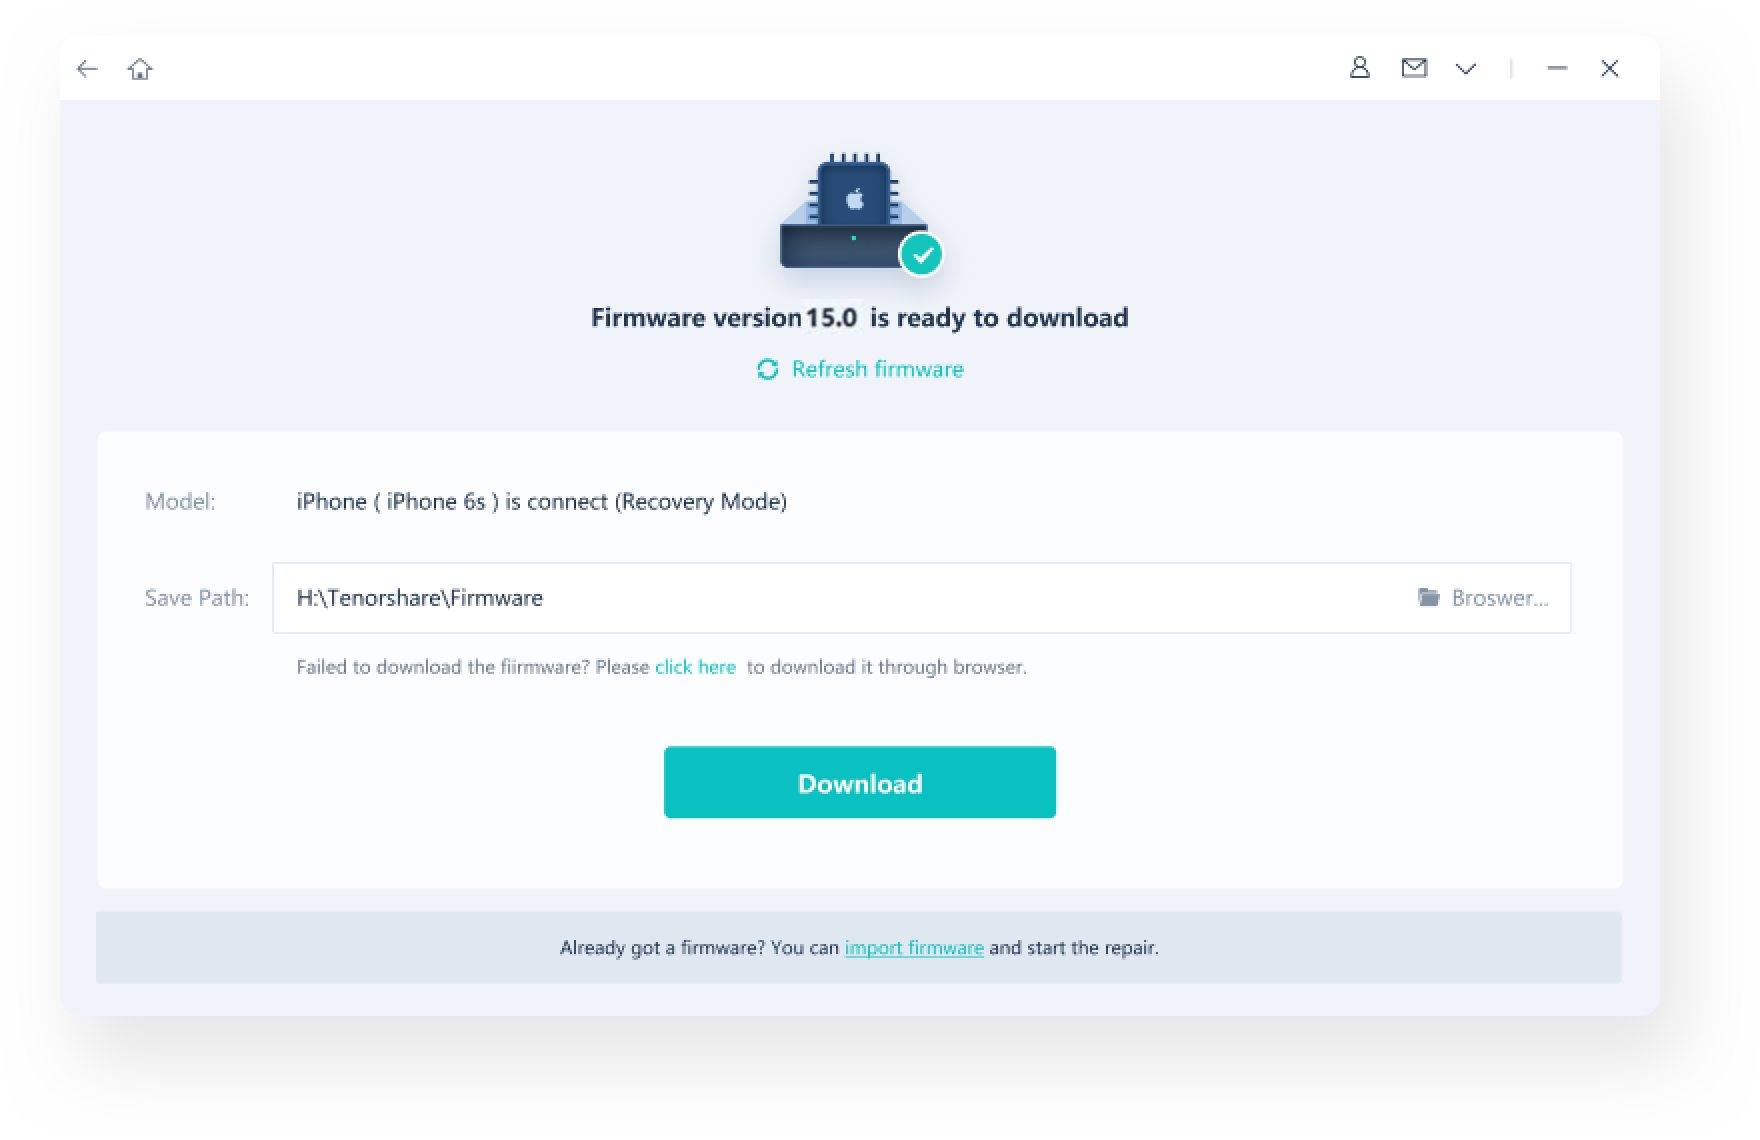
Step 4. Click Download button to download the latest iOS firmware package that is matching your device.
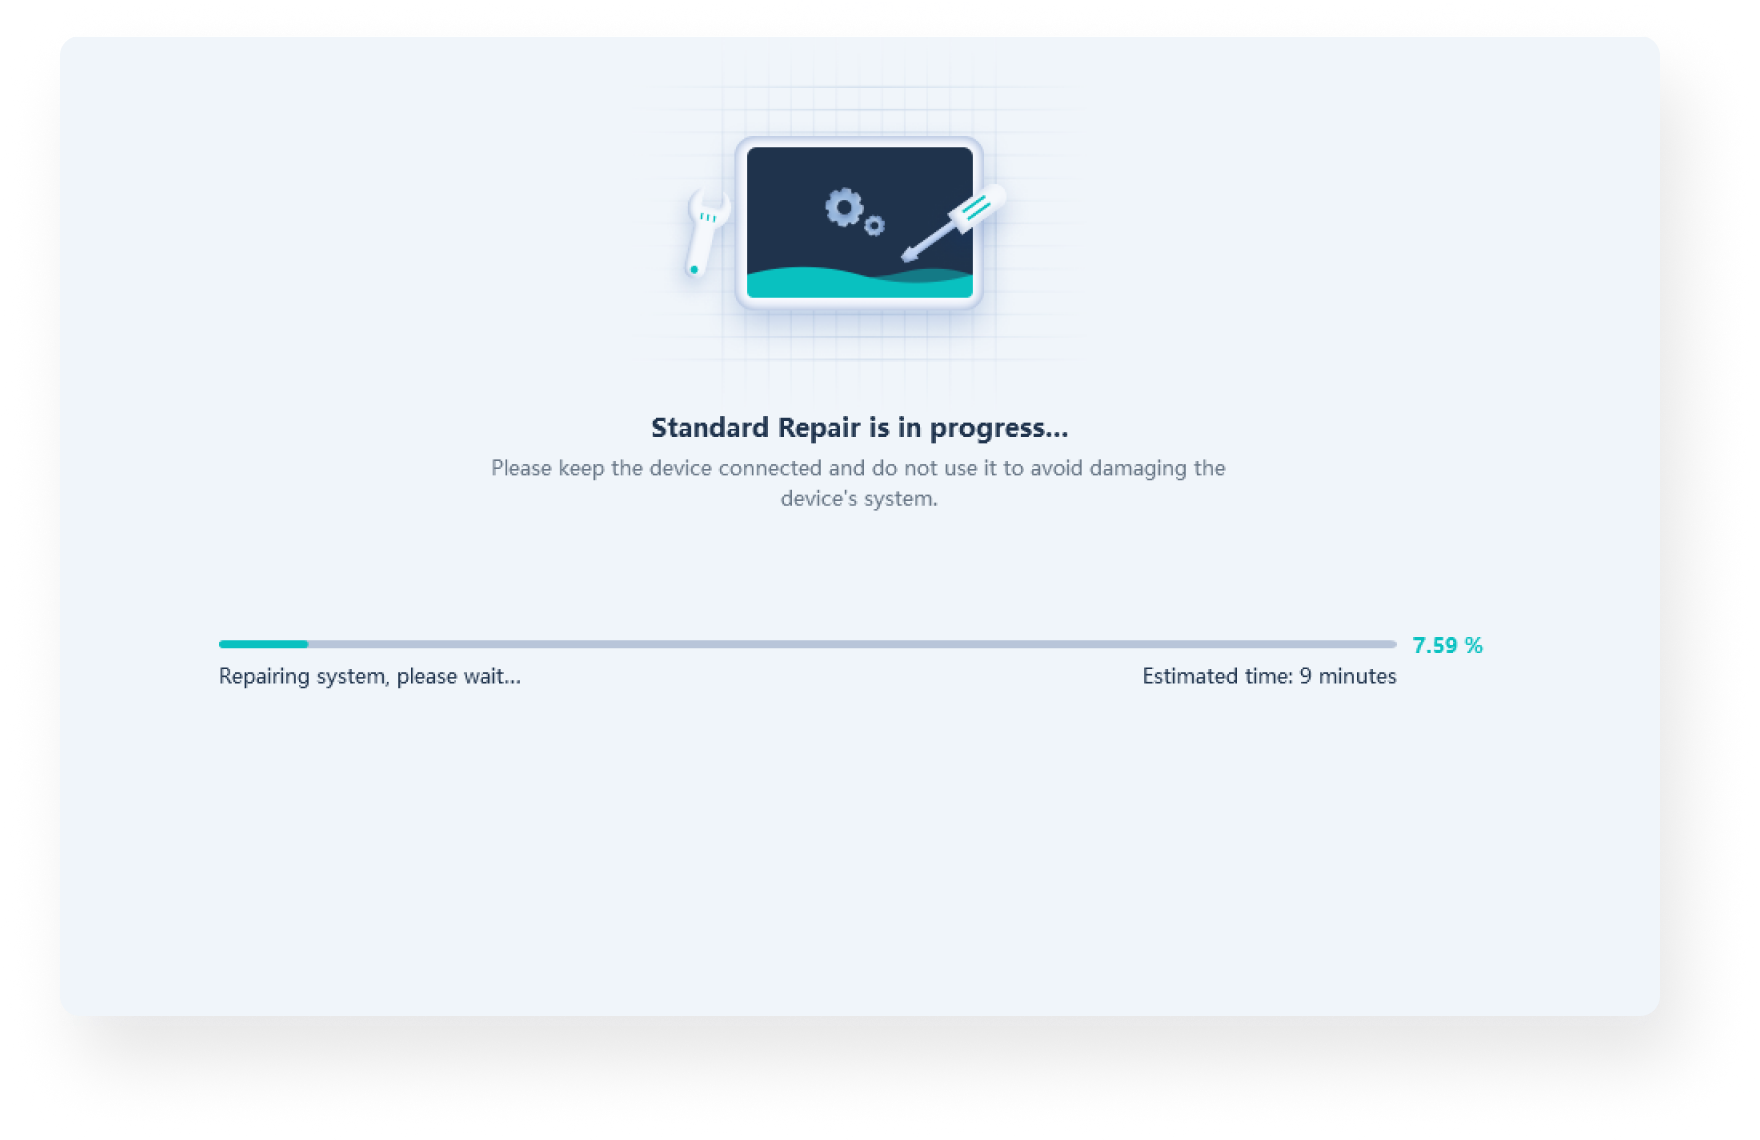
Step 4. Click Start Repair after the firmware package is downloaded to computer.
Step 5. Repair is done, and your iPhone will restart normally.
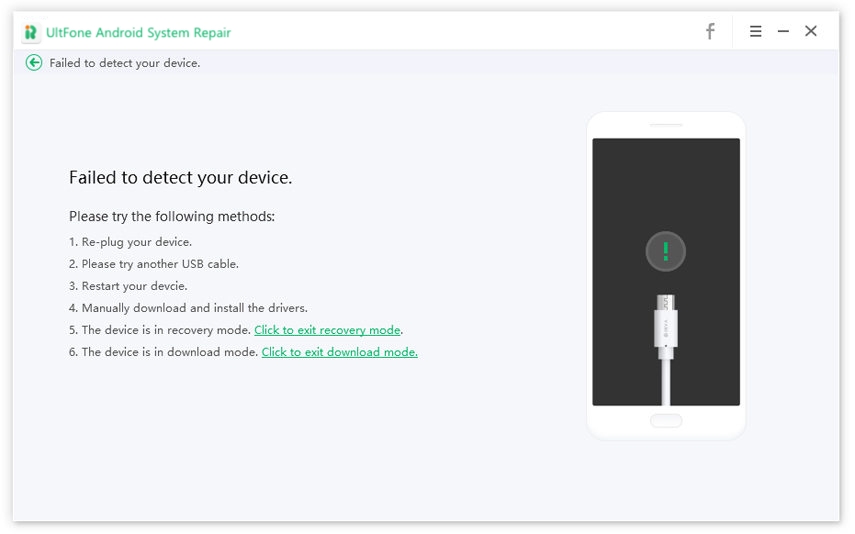
If your device won’t turn on and cannot be detected by both iTunes and UltFone iOS System Repair after connecting to computer, recovery mode or DFU mode will help our software detect your device. You can follow the instructions on the program onscreen to proceed. It won’t affect the data or settings in your device.
Источник
Ulefone armor 2 восстановление кирпича

У многих возникает паника когда телефон стал кирпичом, как восстановить Андроид кирпич? Добрый день, в этой статье поговорим о том как пройти в библиотеку как восстановить ulefone armor 2, ставший кирпичом. Без смс и помогал. Специалист сервисного центра Rose Cole расскажет как восстановить смартфон с помощью написанонного им руководства и что могло стать причиной вашей проблемы.
Рекомендуем вам получение root прав в 1 клик, используя Rootkhp Pro
Наши варианты восстановить мобильное устройство пригодятся в следующих случаях:
- Циклическая перезагрузка (bootloop).
- Если смартфон стал кирпичом, зависает на экране загрузки, не загружается операционная система Андроид.
Мы не сможем вам помочь если ваш телефон разбит на кусочки или у него нет питания.
Что могло превратить Android в кирпич?
- Вредоносные apk приложения, могут быть получены как из Google Play, так и из сторонних источников, но в Play Market шансы подцепить заразу меньше.
- Удаление важных системных файлов, необходимых для нормальной работы операционной системы Android.
- Отключение питания при прошивке или при получении root прав.
- Проблемы с Flash памятью.
- Падение с большой высоты или применение молотка, дрели или камня 🙂
Как восстановить ulefone armor 2
Варианты восстановления могут быть разные:
- Специальный софт, который сделает всё сам (почти)
- Меню восстановления на Андроид
- Кастомное Recovery (сначала его нужно установить на смартфон)
Мы расскажем как использовать первый из трёх.
Источник
Repair System Android 83.02110.30
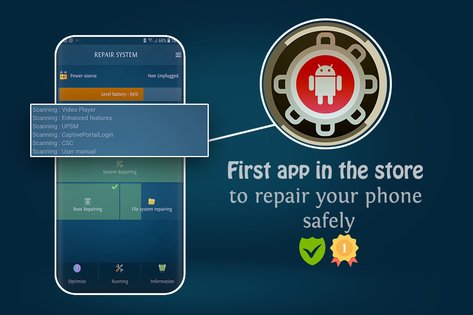


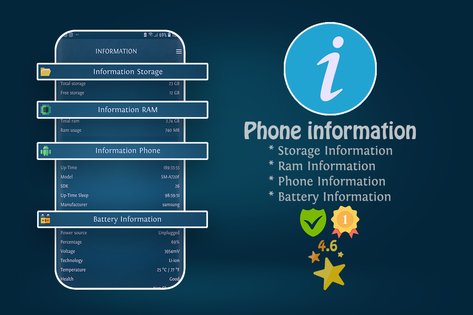


Repair System — это единственное средство ускорения и очистки мусора, которое полностью оптимизирует ваш телефон на платформе Android, позволяет получить объем памяти и ненужные файлы (кэш). Сохраняя ваше устройство в безопасности от системных ошибок и загрузки.
Возможности приложения Repair System:
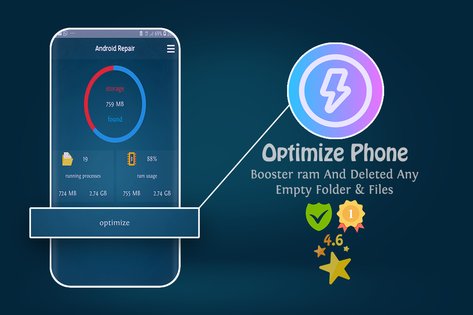
- Boost повышение телефона и памяти — лучший усилитель скорости телефона. Очистите память (ОЗУ) и оптимизируйте скорость телефона, удалив лишние фоновые задачи (направлен на ускорение работы вашего Android-устройства).
- Cleaner очиститель ненужных файлов. Освободите место и улучшите производительность, грамотно сканируя ненужные файлы.
- Процессорный кулер. Обнаружение и очистка приложений, вызывающих перегрев, а также обнаружение приложений, сильно загружающих ЦП и запускающих охлаждение.
- Умный заряд. Отображение статуса заряда в режиме реального времени, точная оценка оставшегося времени зарядки.
Другие функции оптимизации:
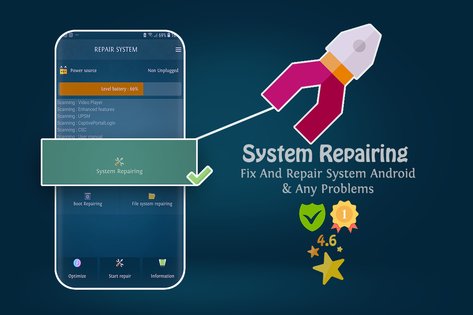
- Анализировать и исправлять любые ошибки замедленного запуска.
- Устранить замедления системы, очистить память (ОЗУ) и оптимизировать ЦП.
- Исправление и повышение ОЗУ и ЦП.
- Speed Ускорение загрузки.
- Исправить все проблемы игр.
- Анализировать и исправлять любые ошибки замедленного запуска.
- Очистить кеш и оптимизировать память.
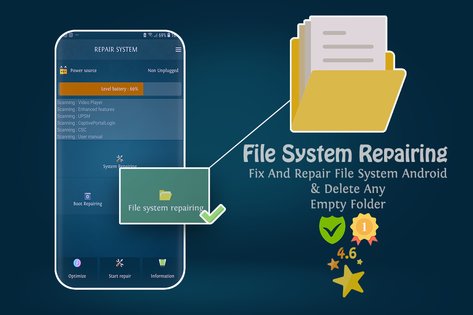
- Checks Проверка и устранение системных ошибок.
Источник
How to Use UltFone Android System Repair
Learn how to use UltFone Android System Repair to enter&exit Android recovery mode/Fastboot mode/download mode, as well as fix Android system issues like stuck on Samsung logo, black screen,etc.
UltFone Android System Repair is professionally designed for Android users to enter and exit recovery mode, fastboot mode, and download mode in the best way and free of charge. In addition, this program can solve all kinds of Android issues like Android/Samsung phone won’t turn on, Samsung black screen, apps keeps crashing on Samsung, etc.
Follow this guide to learn how to fix Android to normal.
Part 1: Enter/Exit Android Fastboot Mode
1-Click to Enter Fastboot Mode
Fastboot is a tool/protocol that can be used to reflash partitions on Android phones. It is this small tool that comes with the Android SDK (Software Developer Kit), which is an alternative to the recovery mode. Follow the steps below to boot Android into Fastboot mode.
Step 1. Launch UltFone Android System on your computer and connect your Android device to computer. Choose the feature «One-Click to Enter Fastboot Mode» on the main interface.
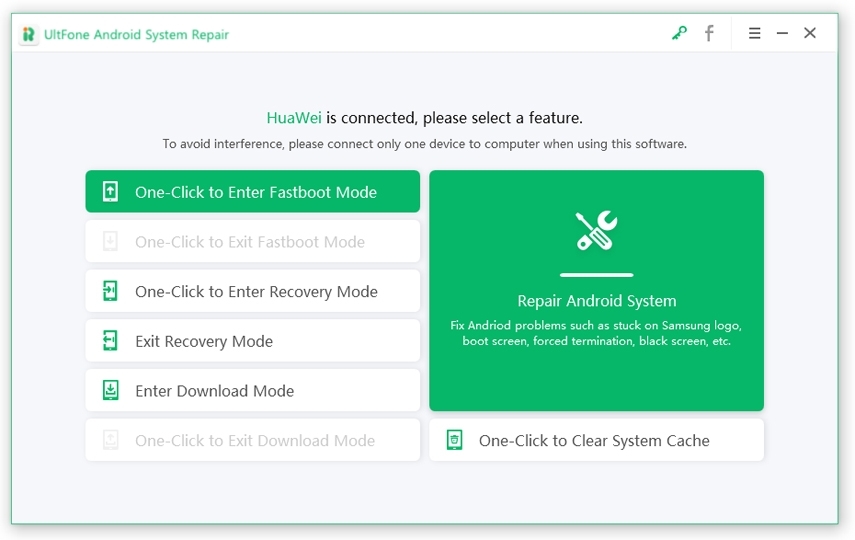
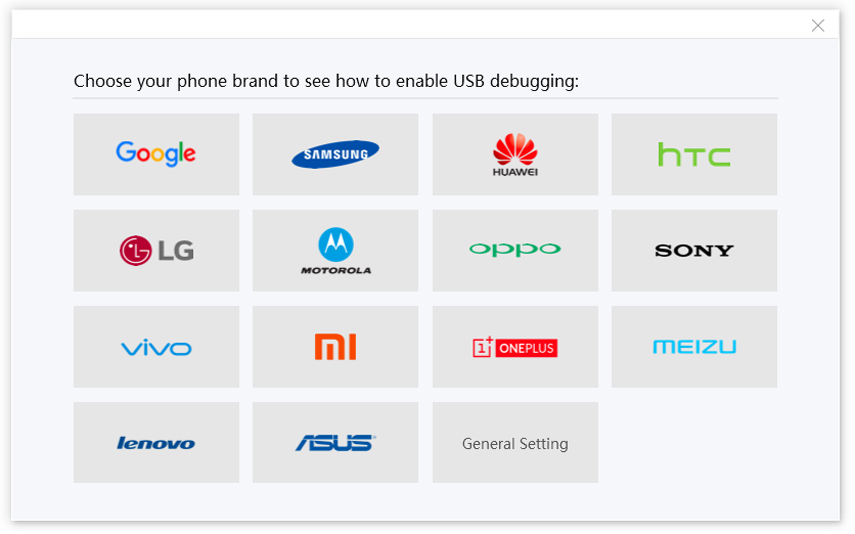
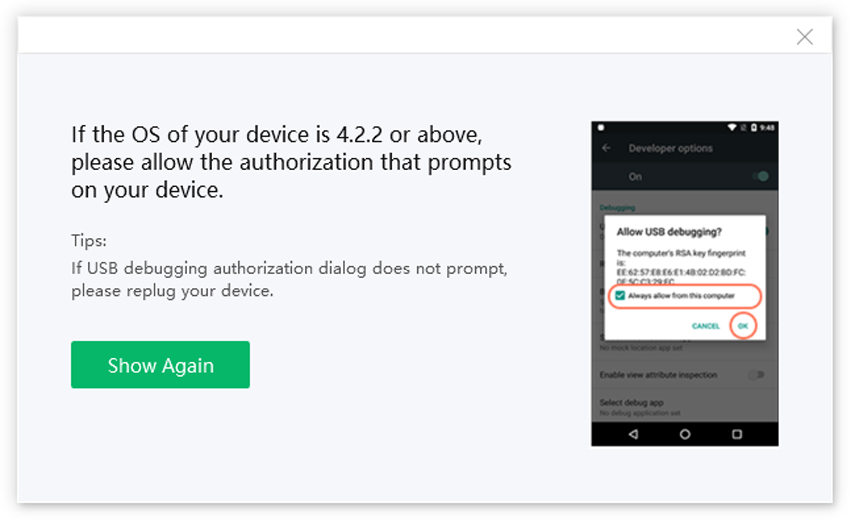
Step 2. Turn on USB debugging option on your device. If your device has not enabled this option, you can follow the onscreen instructions by selecting the the phone series or brand. This program will detect your phone brand and show the steps to enable USB debugging accordingly.
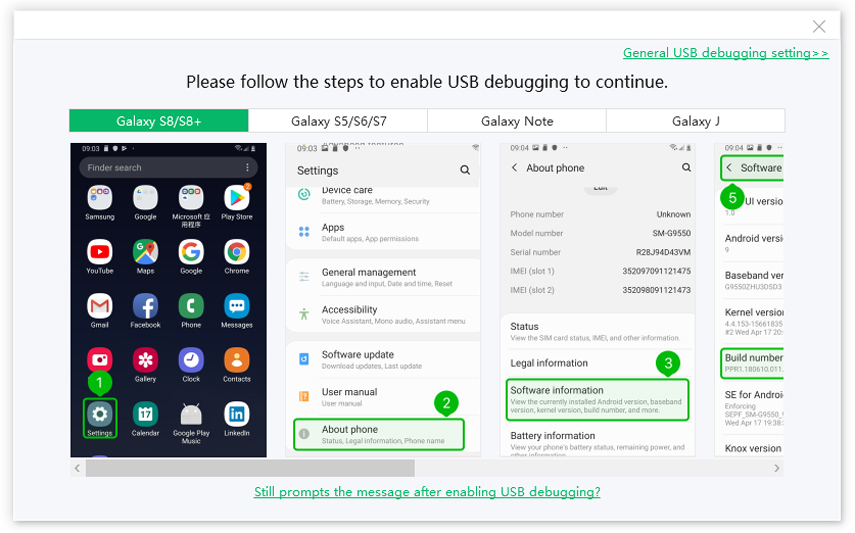
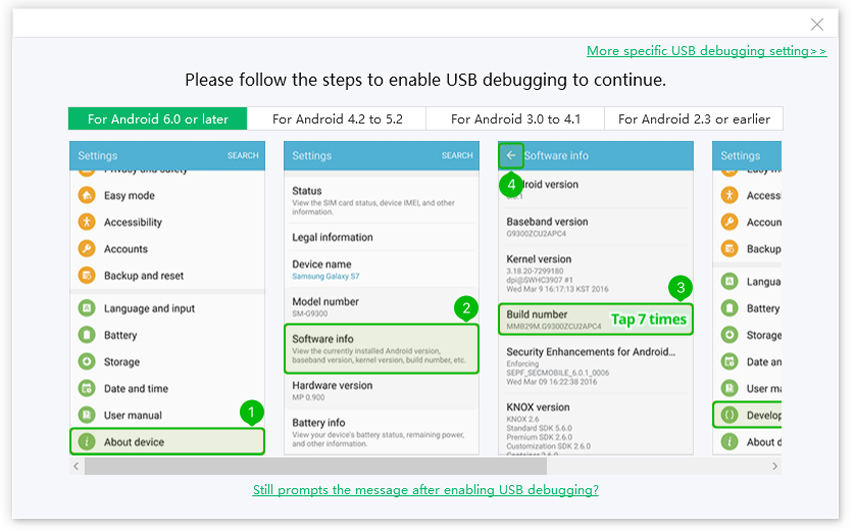
Enble USB debugging on Android 6.0 or later:
Enter «Settings» >>> Click «About Device» >>> Click «Software info» >>> Tap «Build number» for 7 times until getting a note «You are under developer mode» >>> Go back to «Settings» >>> Click «Developer options» >>> Turn on «USB debugging».
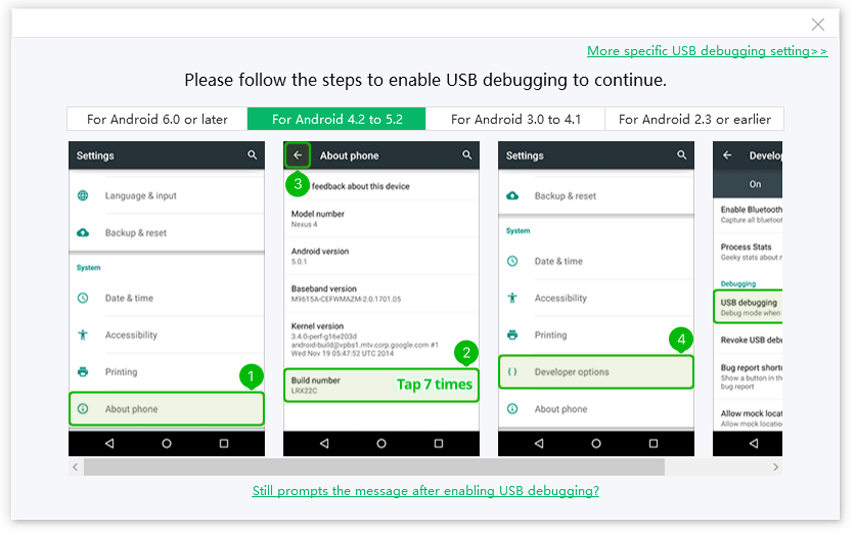
Enble USB debugging on Android 4.2 to 5.2:
Enter «Settings»>>> Click «About Device» >>> Tap «Build Number» for 7 times until getting a note «You are under developer mode» >>> Go back to «Settings»>>> Click «Developer options» >>> Turn on «USB debugging».
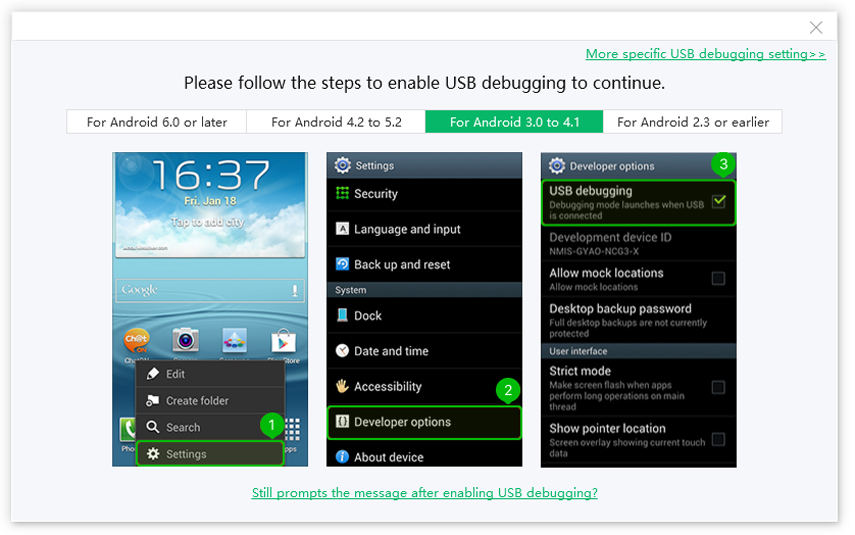
Enble USB debugging on Android 3.0 to 4.1:
Enter «Settings» >>> Click «Developer options» >>> Turn on «USB debugging».
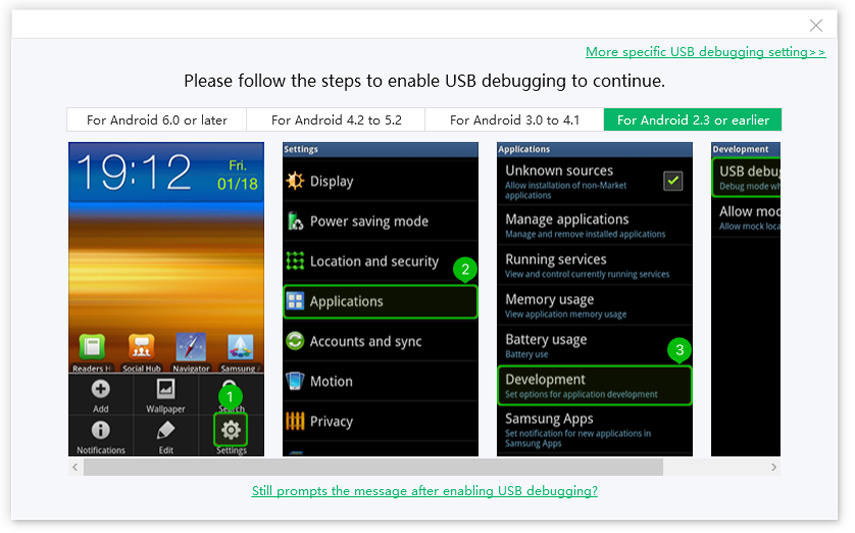
Enble USB debugging on Android 2.3 or earlier:
Enter «Settings» >>> Click «Applications» >>> Click «Development» >>> Turn on «USB debugging».
If you are not sure the Android OS, you can click «More specific USB debugging settings>>» from the top right menu, where you can choose the phone brand for continue instructions.
It is worth mentioning that the Samsung devices don’t have Fastboot mode.

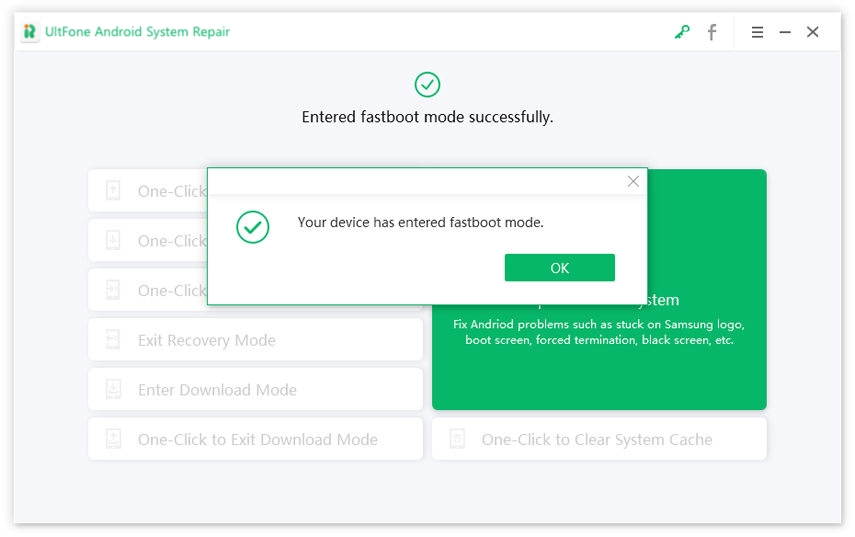
Step 3. After enabling USB debugging, your device will start entering Fastboot mode.

In a few seconds, your Android has entered into Fastboot mode successfully.
One Click to Exit Android Fastboot Mode
If your Android is stuck in Fastboot mode, follow the steps below to exit Fastboot mode.
Step 1. Launch this program on your computer, connect the Android device to computer then click «One-Click to Exit Fastboot Mode» from the main interface.

Step 2: Wait for the program to get Android out of Fastboot mode.
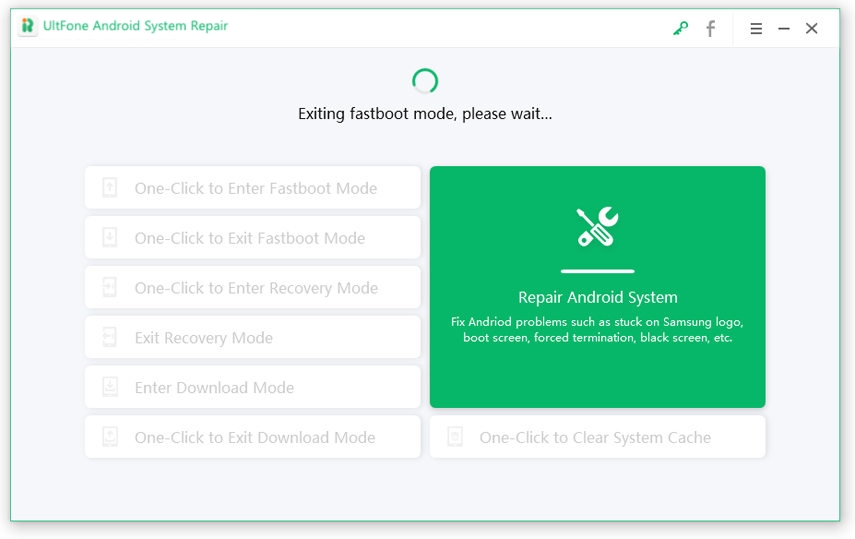
Step 3: In a short time, your Android has exited Fastboot mode successfully.

Part 2: Enter and Exit Android Recovery Mode
One Click to Enter Android Recovery Mode
You don’t need to know the different keys to press in order to access recovery mode on your device. Use UltFone Android System Repair to get into recovery mode on Android by one click on any device.
Step 1. Download and run this program, connect your device to computer via a USB cable.
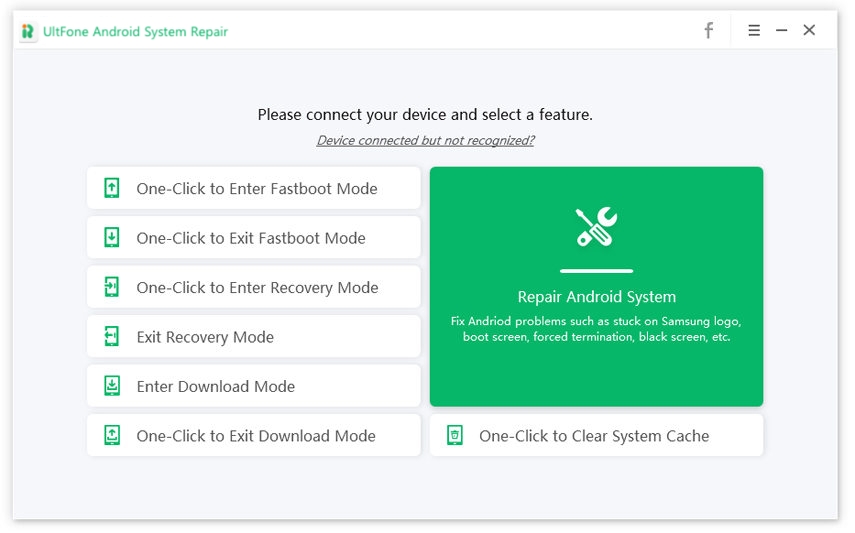
Step 2. Turn on USB debugging option on your device. This program will detect your phone brand and show the steps to enable USB debugging accordingly.
Enble USB debugging on Android 6.0 or later:
Enter «Settings» >>> Click «About Device» >>> Click «Software info» >>> Tap «Build number» for 7 times until getting a note «You are under developer mode» >>> Go back to «Settings» >>> Click «Developer options» >>> Turn on «USB debugging».
Enble USB debugging on Android 4.2 to 5.2:
Enter «Settings»>>> Click «About Device» >>> Tap «Build Number» for 7 times until getting a note «You are under developer mode» >>> Go back to «Settings»>>> Click «Developer options» >>> Turn on «USB debugging».
Enble USB debugging on Android 3.0 to 4.1:
Enter «Settings» >>> Click «Developer options» >>> Turn on «USB debugging».
Enble USB debugging on Android 2.3 or earlier:
Enter «Settings» >>> Click «Applications» >>> Click «Development» >>> Turn on «USB debugging».
If you are not sure the Android OS, you can click «More specific USB debugging settings>>» from the top right menu, where you can choose the phone brand for continue instructions.

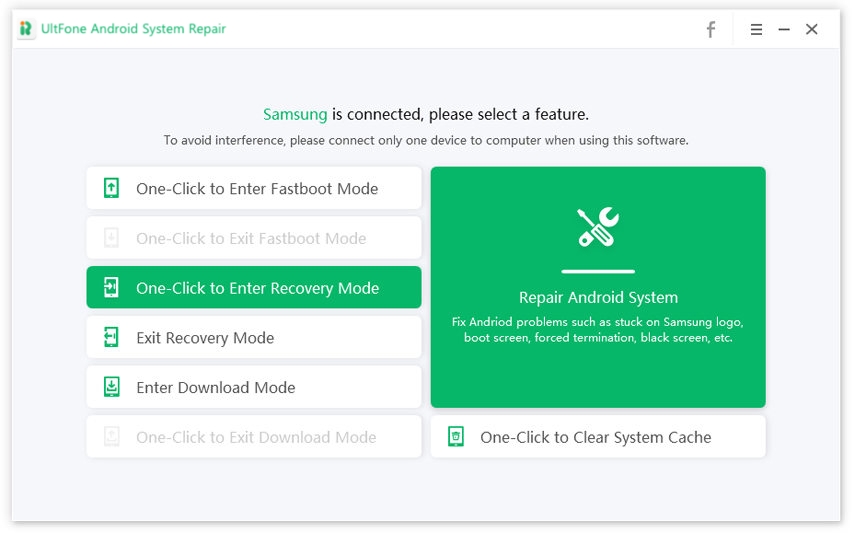
Step 3. Now, you can click «One-Click to Enter Recovery Mode» on the program to start.
Step 4. The program will start entering recovery mode.
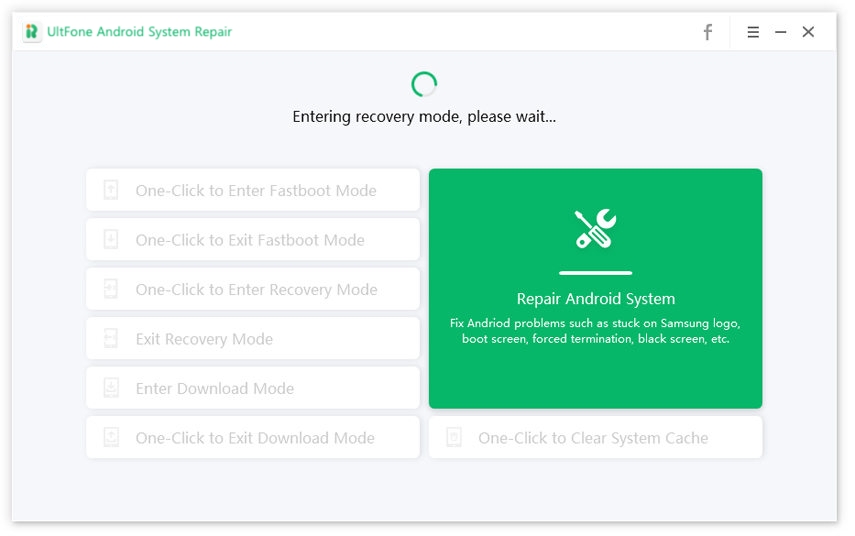
Your Android has entered into recovery mode successfully after a few seconds.

How to Exit Android Recovery Mode
If your Android is stuck in recovery mode or you are having the «No Command» error, follow the steps below to exit recovery mode.
Step 1. Launch this program and connect your device to computer via the USB cable. Choose «Exit Recovery Mode» feature from the main interface.
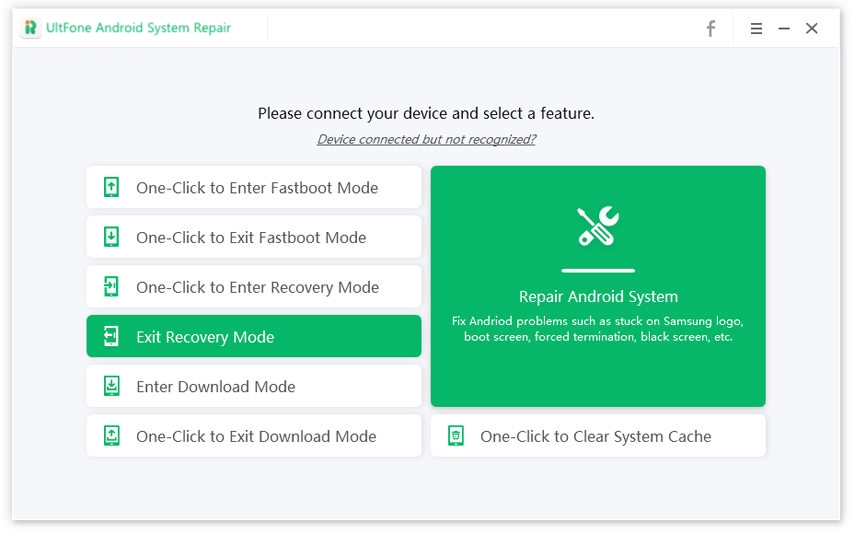
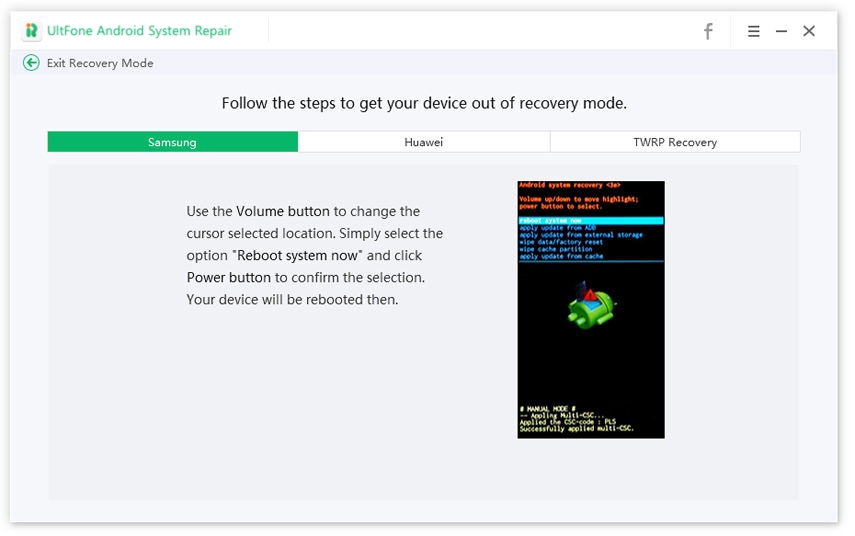
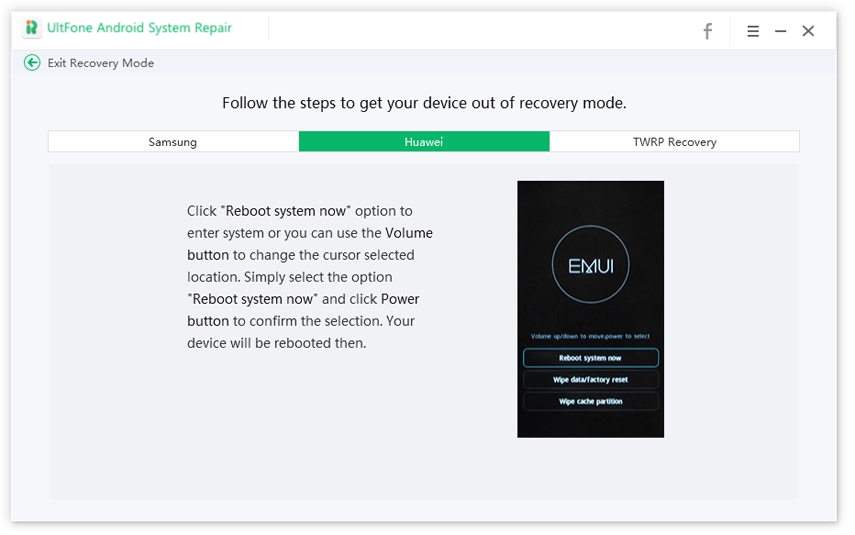
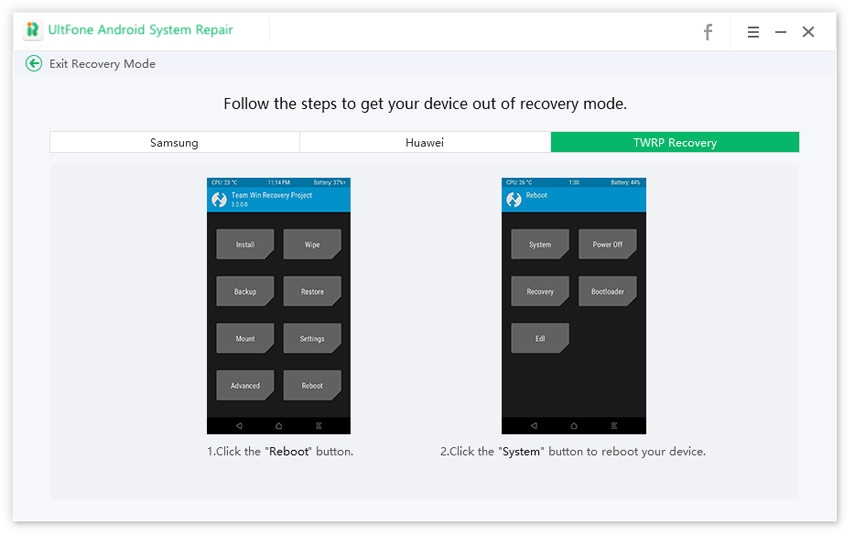
Step 2. On the next screen, choose your phone brand and follow the onscreen steps to get out of recovery mode.
Exit recovery mode on Samsung
Exit recovery mode on Huawei
Exit recovery mode on other Android devices
Part 3: Enter and Exit Android Download Mode
How to Enter Download Mode on Android
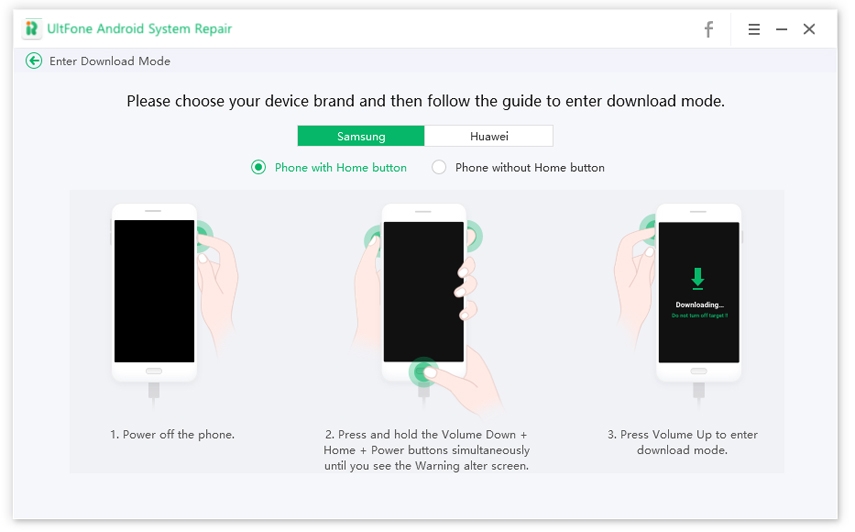
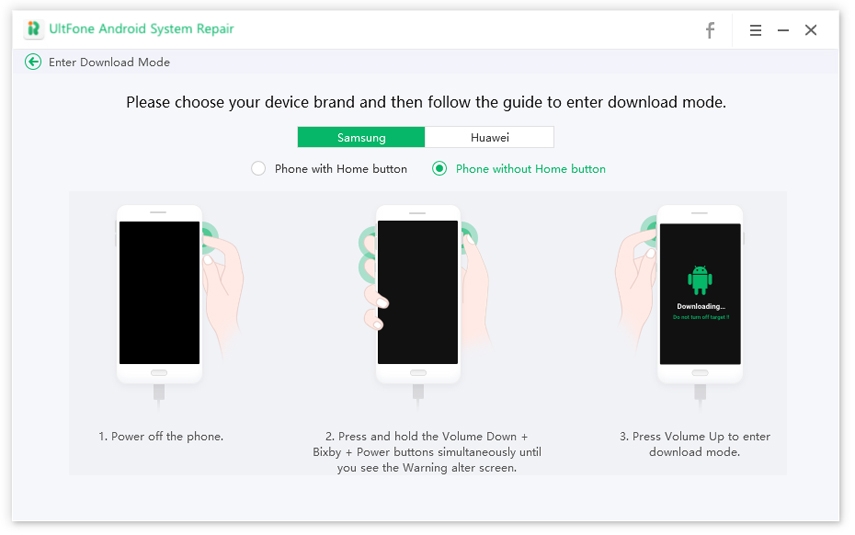
Download Mode, also known as Odin Mode, is commonly used for flashing ROM or performing the system update. Follow the steps below to enter download mode on Samsung easily.
Step 1. Launch this program and connect your device to computer via the USB cable. Choose «Enter Download Mode» feature from the main interface.
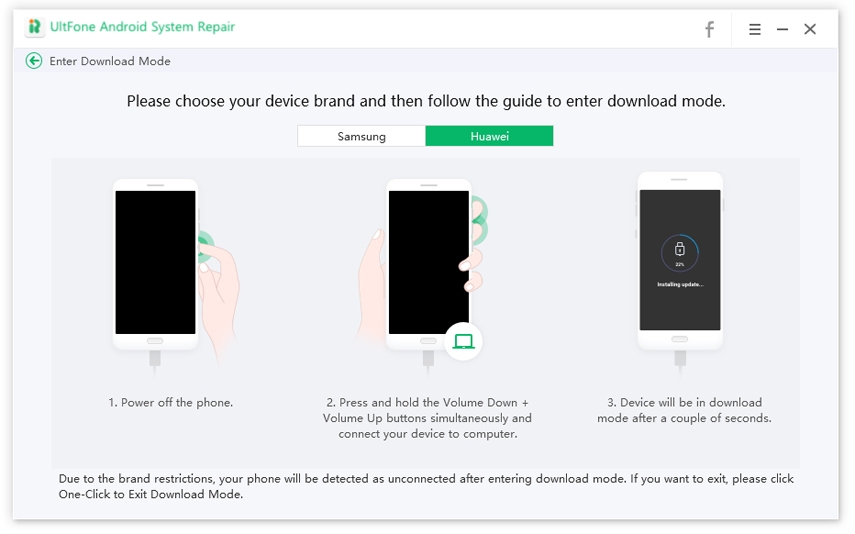
Step 2. Choose your phone brand and follow the onscreen instructions to enter the download mode.
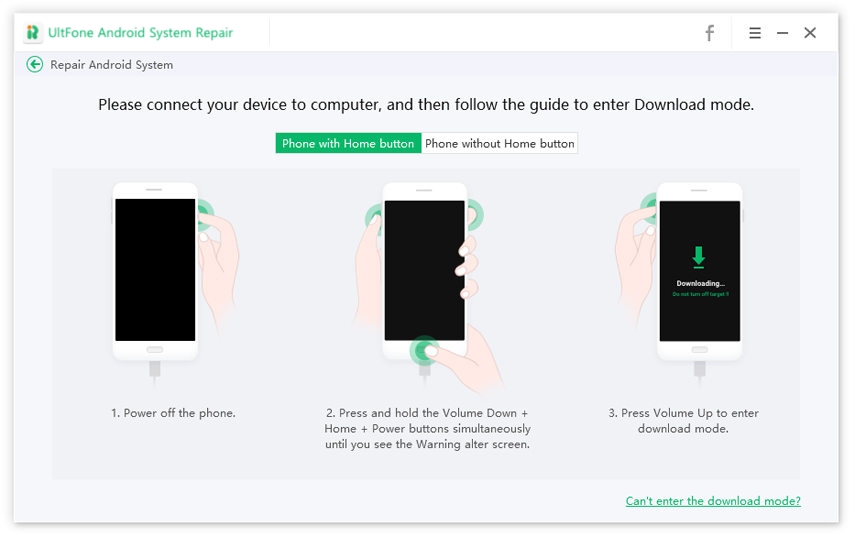
Enter download mode on Samsung with Home button
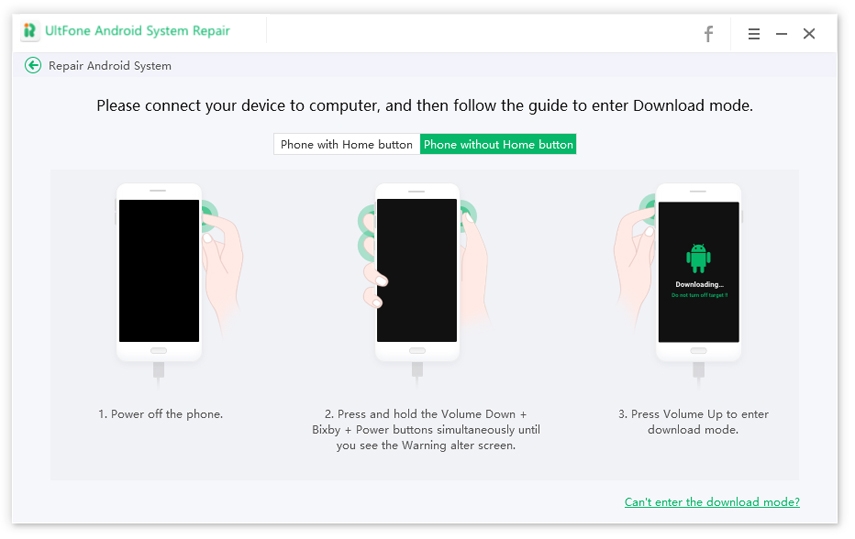
Enter download mode on Samsung without Home button
Enter download mode on Huawei
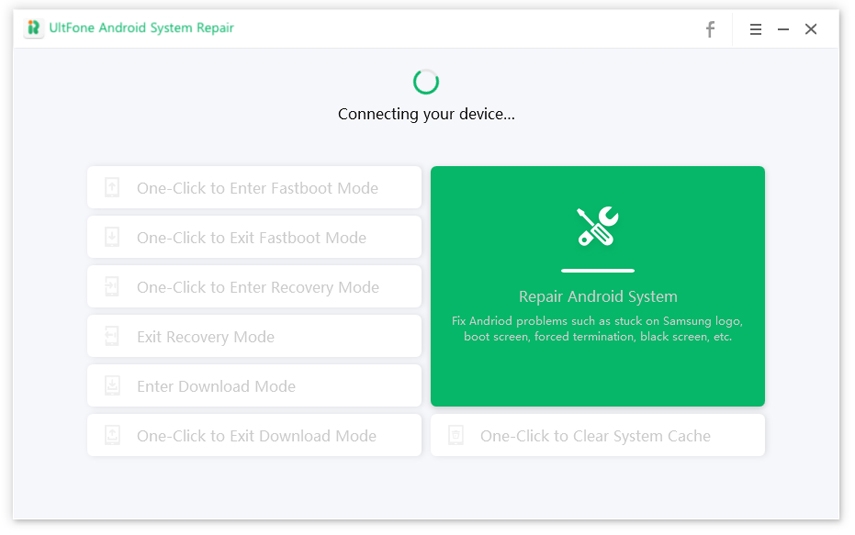
Step 3. After a few seconds, the program starts connecting your device.
Step 4. Your device is in download mode successfully.
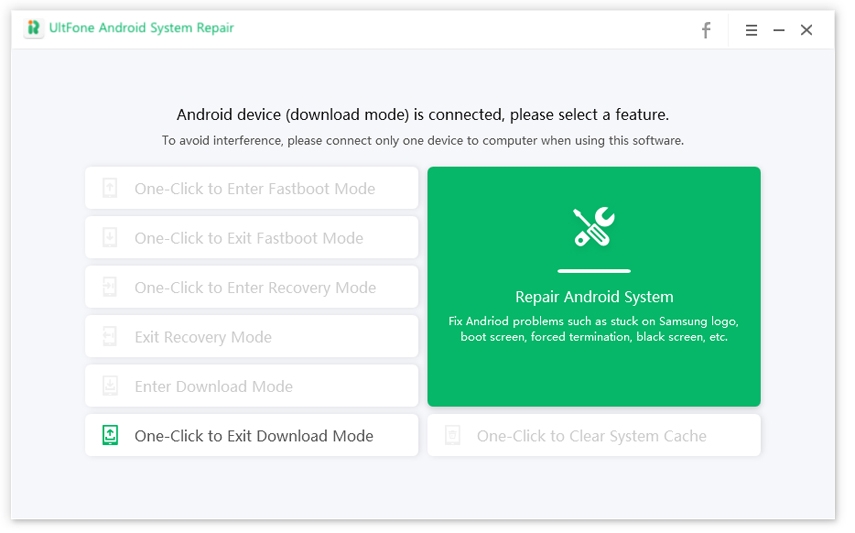
One Click to Exit Download Mode
If your Android or Samsung stuck on «Downloading… Do not turn off target» screen, you can get it out of download mode by one click with the help of UltFone Android System Repair.
Step 1. Install and open this program on your PC. Connect your device to computer and select «One-Click to Exit Download Mode» function.
Step 2. Your device is out of download mode successfully after a few seconds.

Part 4: Repair Android System
If your new Samsung S20 won’t turn on or charge after an update, you can use UltFone Android System Repair tool to solve it without losing data.This software aims to solve 50+ Android issues efffectively, including Android/Samsung phone won’t turn on, Samsung boot loop, Samsung stuck on logo, etc.
Download and install this program to a PC, and follow the easy steps below to fix Android to normal.
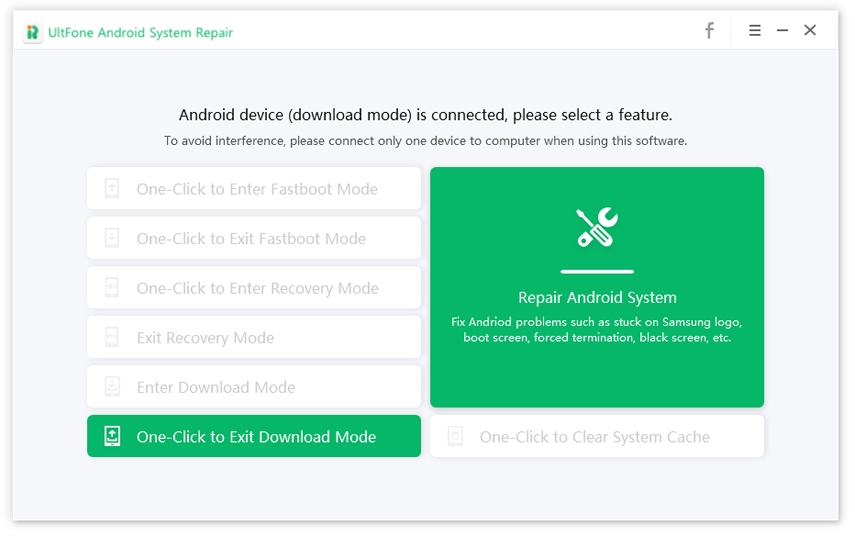
Setp 1.Connect Device
Connect your device to computer with a USB cable, and choose «Repair Android System» function from the main interface.

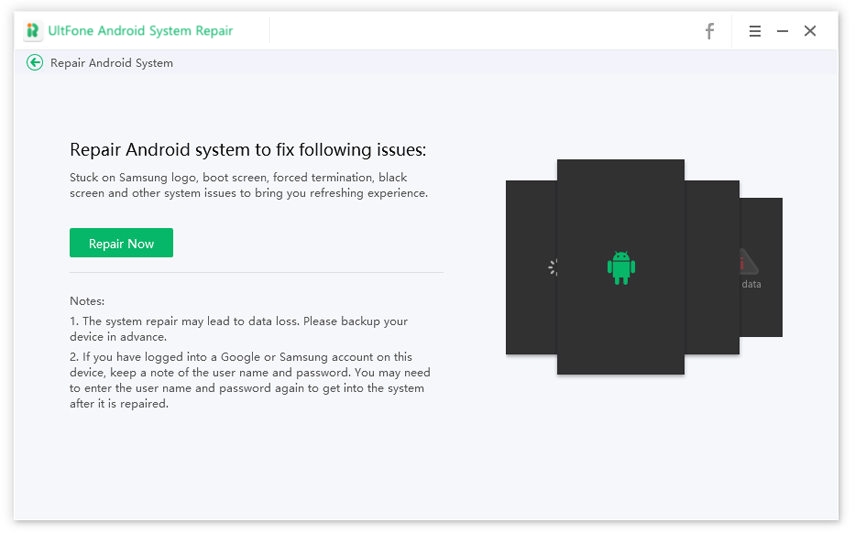
Step 2. Click Repair Now to Proceed
In the next screen, please click the «Repair Now» button to continue.
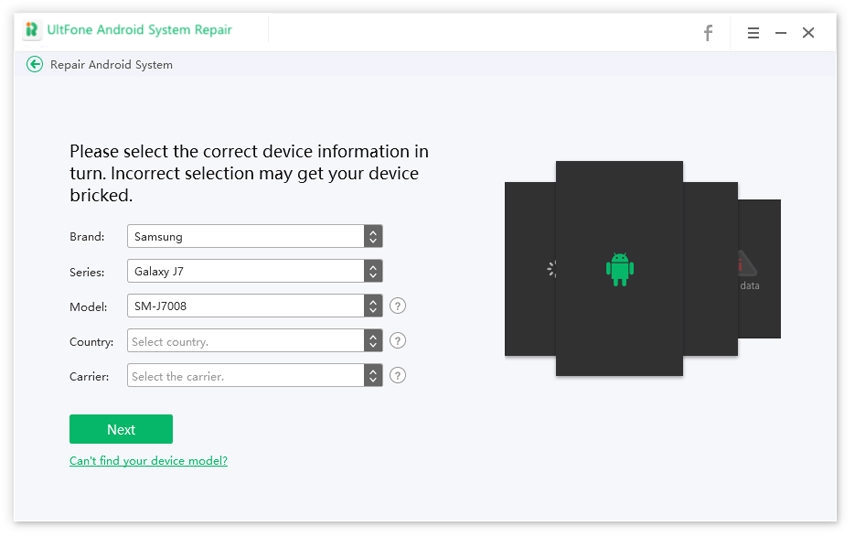
Step 3. Select Your Device Info
Before continue, please select the correct device information in turn on the screen.This is important as any wrong info may cause your device to be bricked.
Step 4. Download Firmware Package
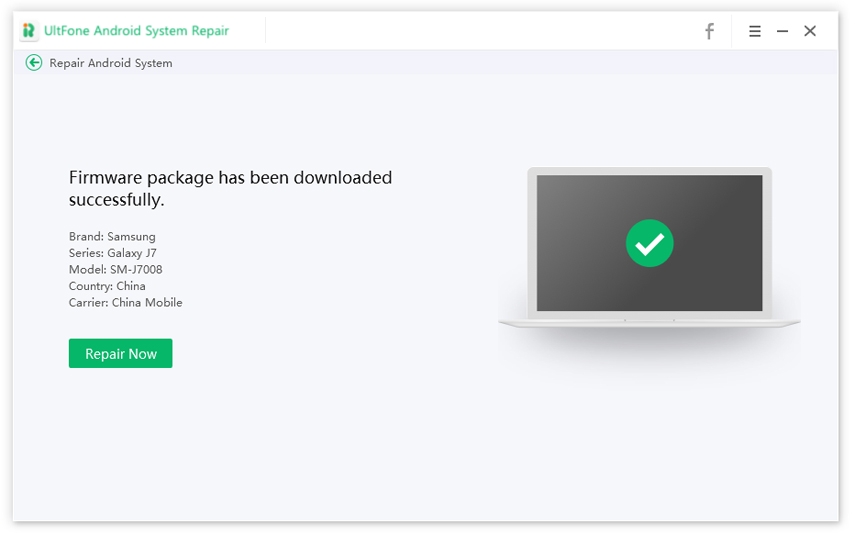
After selecting the correct device info, this program will start downloading the corresponding firmware package.
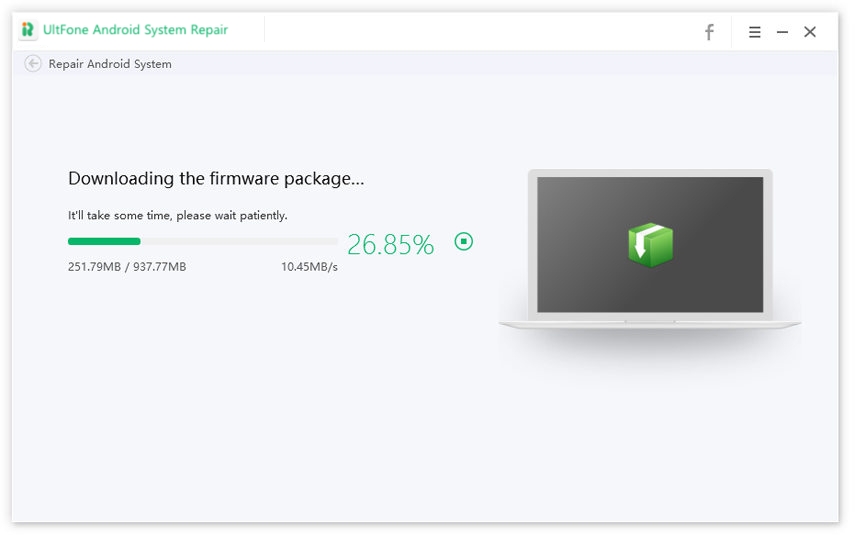
Step 5. Start Android System Repair
The firwmare package downloading takes a few minutes. You can click Repair Now button after the firmware is downloaded successfully.
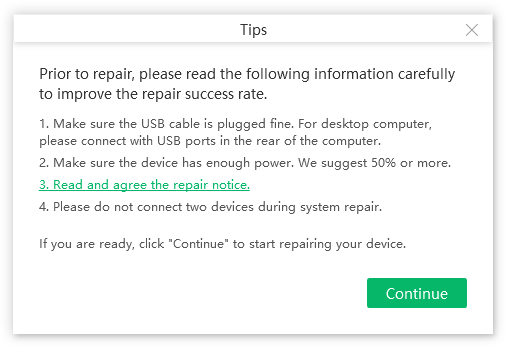
Before the system repairing start, please read the tips on the screen to ensure repair success. Click Continue button to continue.
Next, you need to put your device into download mode to launch the repair process.
Once the program detects that your device is in download mode successfully, the repairing process starts automatically.
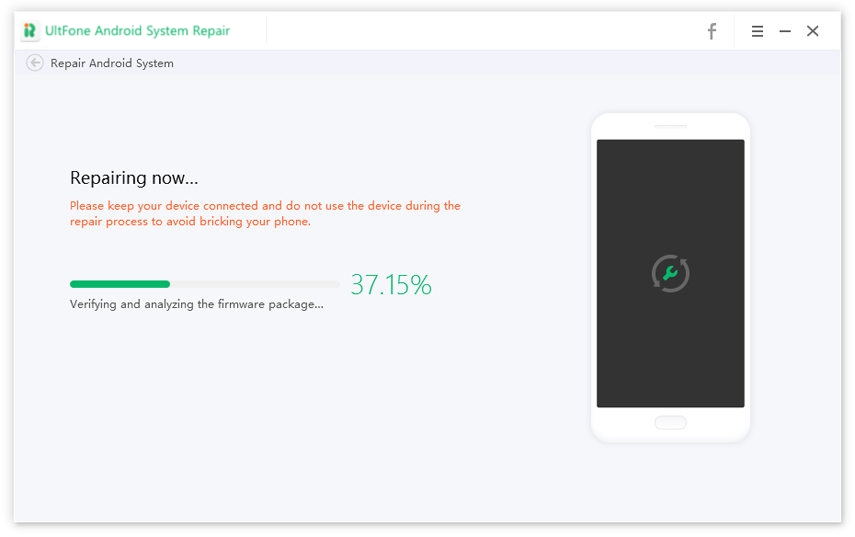
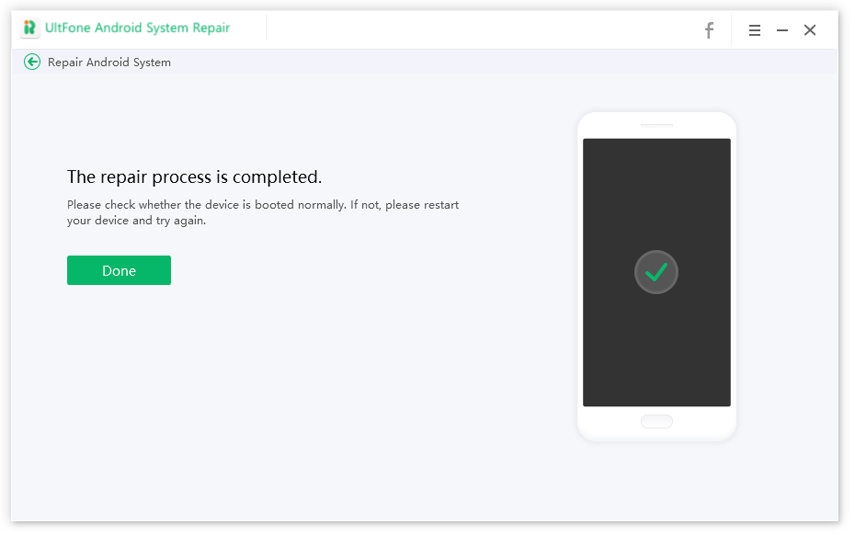
Step 6. Android System Repair Completed
The process takes 10 minutes around. Your Android device will reboot to normal after the repair process completes.
Part 5: One Click to Clear System Cache
As you may know, Android OS uses partitions to organize files and folders on your device. One of these partitions is the system cache, which can enable faster access when using apps.But cached files can become corrupted or overloaded and cause performance issues. Periodically clearing the cache on Android phone can help eliminate performance issues on the device.
Step 1.Launch this program on your computer,and connect your Android phone to computer with a USB cable.
Step 2. If your phone is not turned on USB debugging,please follow the steps to enable it. This program will detect your phone brand and show the steps to enable USB debugging accordingly.
Enble USB debugging on Android 6.0 or later:
Enter «Settings» >>> Click «About Device» >>> Click «Software info» >>> Tap «Build number» for 7 times until getting a note «You are under developer mode» >>> Go back to «Settings» >>> Click «Developer options» >>> Turn on «USB debugging».
Enble USB debugging on Android 4.2 to 5.2:
Enter «Settings»>>> Click «About Device» >>> Tap «Build Number» for 7 times until getting a note «You are under developer mode» >>> Go back to «Settings»>>> Click «Developer options» >>> Turn on «USB debugging».
Enble USB debugging on Android 3.0 to 4.1:
Enter «Settings» >>> Click «Developer options» >>> Turn on «USB debugging».
Enble USB debugging on Android 2.3 or earlier:
Enter «Settings» >>> Click «Applications» >>> Click «Development» >>> Turn on «USB debugging».
If you are not sure the Android OS, you can click «More specific USB debugging settings>>» from the top right menu, where you can choose the phone brand for continue instructions.
Step 3. Once the device is recognized, you can click «One-Click to Clear System Cache» on the interface.
![]()
Step 4. This program will start clearing system cache on Android.
![]()
Step 5. The process won’t take too long. The cached data has cleared successfully.
Источник


