- Методы лечения различных ошибок в Android Studio при разработке проекта
- How to Fix “Failed to install the following Android SDK packages as some licenses have not been accepted” Error in Android Studio?
- What are Android SDK packages?
- How To Solve Failed to install the following Android SDK packages?
- Method 1
- Method 2
- Method 3
- Method 4
- Method 5
- Android System Update Fails to Install? How to Fix It
- Android Issues & Fixes
- Why Did Your Android Fail to Install Android Pie?
- 1.В FixВ OkВ Google Model Update Download FailedВ Issue
- DroidKit – Full-Way Android Phone Toolkit
- 2.В Check Your Device Model
- 3.В Clear Storage Space
- 4.В Check Internet Connection
- 5. Clearing Data from Google Play Store App
- The Bottom Line
Методы лечения различных ошибок в Android Studio при разработке проекта
Сегодня хотел бы поделиться своим анализом и способами лечением разных ошибок при разработке своего продукта в Android Studio. Лично я, не раз сталкивался с различными проблемами и ошибками при компиляции и/или тестировании мобильного приложения. Данный процесс, всегда однообразный и в 99% случаев и всегда нужно тратить n-колличество времени на его устранение. Даже, когда ты уже сталкивался с данной проблемой, ты все равно идешь в поисковик и вспоминаешь, как же решить ту или иную ситуацию.
Я для себя завел файлик, в котором отметил самые частые ошибки — потратив на это несколько часов и перечислил самые популярные ошибки (в дальнейшем планирую просто их запомнить), чтоб сократить свое время в дальнейшем.
Итак, начну по порядку с самой распространенной проблемы и дальше буду перечислять их по мере появления:
1) Если подчеркивает красным код, где используются ресурсы: R. — попробовать (но вероятно не поможет): Build -> Clean Project.
В принципе на Build -> Clean Project можно не терять времени, а лучше всего — слева переключиться на Project, открыть каталог .idea, затем каталог libraries и из него удалить все содержимое. Затем нажать кнопку Sync Project. А затем (если все еще красное, но скорее всего уже будет все ок ) Build -> Clean Project.

2) После внезапного выключения компьютера, после перезапуска может быть во всех проектах весь код красным. Перед этим может быть ошибка: Unable to create Debug Bridge: Unable to start adb server: Unable to obtain result of ‘adb version’. Есть три решения — первое помогло, второе нет (но может быть для другого случая), а третье — не пробовал:
а) File — Invalidate Caches/Restart — Invalidate and Restart
б) Закрыть студию. В корне папки проекта удалить файл(ы) .iml и папку .idea. Вновь запустить студию и импортировать проект.
в) Нажать Ctrl-Alt-O и запустить оптимизацию импорта.
Кстати, adb сервер можно проверить на версию (и работоспособность) и затем перезапустить:
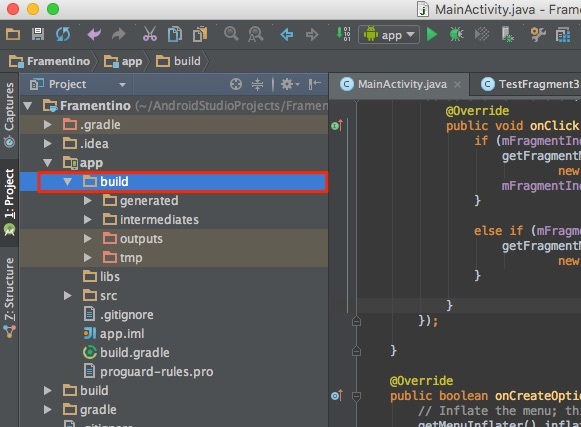
3) Если Android Studio выдает приблизительно такую ошибку: Error:Execution failed for task ‘:app:dexDebug’.
Надо слева переключиться на опцию Project, найти и удалить папку build которая лежит в папке app, т.е. по пути app/build. Затем перестроить весь проект заново: Build -> Rebuild Project.
Такое же решение если ошибка типа: «не могу удалить (создать) папку или файл» и указан путь, который в ведет в app/build. Тоже удаляем папку build и ребилдим проект.
4) В сообщении об ошибке упоминается heap — виртуальная память. А ошибка обычно вызвана ее нехваткой, т.е. невозможностью получить запрашиваемый объем. Поэтому этот запрашиваемый объем надо уменьшить, т.е. переписать дефолтное значение (обычно 2048 MB которое можно изменить в настройках), на меньшее 1024 MB.
В файле проекта gradle.properties пишем:

5) Android Studio пришет примерно такую ошибку: Plugin is too old, please update to a more recent version, or set ANDROID_DAILY_OVERRIDE environment variable to «83648b99316049d63656d7276cb19cc7e95d70a5»
Возможные причины (кроме необходимости регулярного обновления SDK):
а) Загруженный проект был скомпилирован с помощью уже несовместимого старого gradle плагина. В этом случае надо найти и подключить в своем build.gradle проекта этот более старый плагин. т.е. попробовать более старые версии, например: 1.1.3 (часто именно 1.1.x и подходит).
Найти все версии можно здесь.
б) Если в build.gradle проекта используется beta-версия плагина — это означает, что срок ее истек. Посмотреть последние релизы (продакшн и бета) можно также здесь:
6) Иногда при подключении сторонних библиотек могут дублироваться некоторые файлы (обычно связанные с лицензированием). В сообщении будет что-то содержащее слова: duplicate files. Решение — надо посмотреть в сообщении об ошибке или в документации подключенной сторонней библиотеки — какие именно файлы стали избыточными, и перечислить их в build.gradle модуля для исключения (exclude) из билда.
Это делается в директиве packagingOptions (которая, в свою очередь, находится в директиве android).
Источник
How to Fix “Failed to install the following Android SDK packages as some licenses have not been accepted” Error in Android Studio?
When you download the latest Android SDK tools version using the command line to install SDKs and you just try to build gradle then this error shows up:
You may face this error even after typing y as the answer for the question: Do you accept the license ‘android-sdk-license-c81a61d9’ [y/n]: y. So we need to look at why this error is popping up? Because of this error, we cannot compile our project. So In this article, we will talk about how to solve this error using five different methods. But before directly jumping to solutions first let’s see something about Android SDK.
What are Android SDK packages?
SDK stands for software development kit or devkit for short. The Android SDK consists of an emulator, development tools, sample projects with source code, and the required libraries to build Android applications. The Android SDK Manager, manages various Android SDK versions, tools, and various other useful packages that you can select and download, to keep your development environment up-to-date.
How To Solve Failed to install the following Android SDK packages?
Method 1
You need to accept the licenses before building. According to Android SDK docs, you can use the following command depending on the SDK manager location: Docs on –licenses option seems to be missing though. yes | sdkmanager –licenses
Windows:
Step 1: Navigate to %ANDROID_HOME%/tools/bin .
%ANDROID_HOME% is the path to SDK. By default it is located at : C:\Users\UserName\AppData\Local\android\Sdk . If you have moved SDK to another directory location then you can follow below steps :
- Search for edit the system environment variables.
- Then in the environment variables, you will see ANDROID_HOME.
- Navigate to that path in cmd
Step 2:
After successfully navigating just type below command and you are done.
GNU/Linux Distributions:
macOS:
export JAVA_HOME=/Applications/Android\ Studio.app/Contents/jre/jdk/Contents/Home
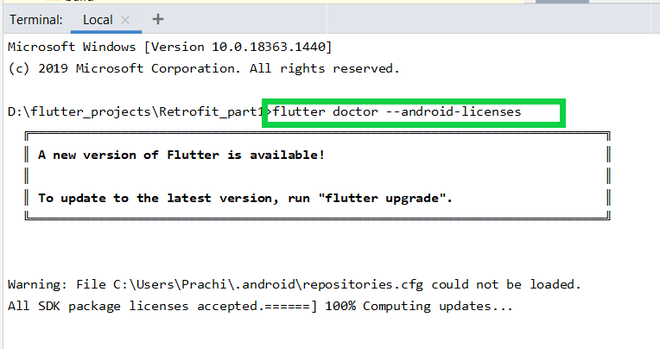
Flutter Users:
Just type flutter doctor –android-licenses in the terminal and wait for few seconds. You will see “All SDK package licenses accepted” on your screen.
Method 2
Step 1: In Android Studio go to Tools > SDK Manager.
Step 2: Go to the SDK Tools tab as shown in the below image.
Step 3: Select the Android SDK Command-line Tools (latest) and download by pressing Apply.
Method 3
in Windows OS go to your sdkmanager path then execute
You can find your sdkmanager at: \Android\tools\bin
IF you don’t know where is your SDK located, then follow these steps:
- Open Android Studio
- Navigate to Your Project > Files > Setting > Appearance and Behavior > Android SDK
Method 4
Step 1:Go to your $ANDROID_HOME/tools/bin and fire the cmd and type the below command:

Accept All licenses listed there.
Step 2:
After this just go to the licenses folder in SDK.
Check that it’s having these five files:
- android-sdk-license
- android-googletv-license
- android-sdk-preview-license
- google-gdk-license
- mips-android-sysimage-license
Step 3:
Give a retry and build again, still, Jenkins giving ‘licenses not accepted” then you have to give full permission to your ‘SDK’ directory and all its parent directories. Here is the command:
If you having sdk in /opt/ directory.
Method 5
For Windows users:
Step 1: Go to the location of your sdkmanager.bat file. By default, it is at Android\sdk\tools\bin inside the %LOCALAPPDATA% folder.
Step 2: Open a terminal window there by typing cmd into the title bar. Then go to the above path(Android\sdk\tools\bin as highlighted by the white line in the below image) and type :
Источник
Android System Update Fails to Install? How to Fix It
Don’t feel frustrating if your device fails to install Android Pie, through reading this guide, you will know the reasons why you fail to install Android Pie and the methods to fix it.
Android Issues & Fixes
Android System Issues
Android Apps Issues
Samsung Phone Issues
DroidKit – Fix All Android System Issues
Recently, Google has officially released its latest version of Android Pie, which includes many built-in features that developed a huge craze among Android users for having this version on their device.В However, besides these attractive features, there is a rising issueВ – В Android update failsВ to installВ among the Android users when they update their device to the latest version.
Obviously, people were upset about this unknown error and have no idea why this issue appears and how to address it. That’s why this guide exists. In this guide, we will give you the answers to why your device fails to update and what you need to do to fix it.
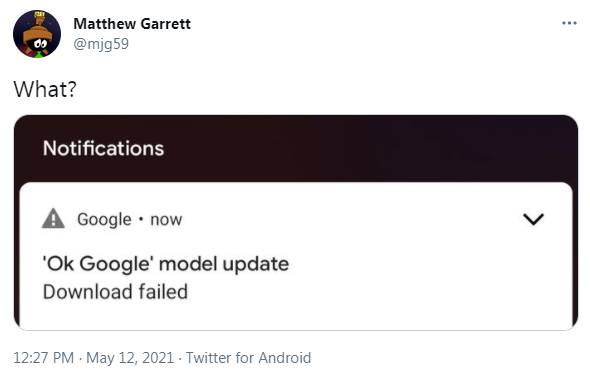
Ok Google Model UpdateВ Download Failed
Why Did Your Android Fail to Install Android Pie?
There can be many reasons for system update failure on a smartphone. Here we have listed the most common reasons as follows.
- Your device is incompatible with Android Pie.
- Insufficient storage space for the update.
- Bad internet connection.
- Google Play store updates create issues.
If you are also facing the problems mentioned aboveВ while installing a system update on your phone, how to fix the problemsВ of Android software update? NoВ worries! You can follow the solutions we prepared below to fix it.
1.В FixВ OkВ Google Model Update Download FailedВ Issue
No matter what caused the Ok Google model update download failed on your Android device, you can easily get it fixed with DroidKit – Android Phone Toolkit. As an Android troubleshooter, DroidKit helps millions of users get off the “Ok Google Model Update Download Failed” issue. Not just this problem, DroidKit is capable ofВ f ixing all Android system issues without root, especially when you ungrade the system. Check what else it can do for you below.
DroidKit – Full-Way Android Phone Toolkit
- FixВ all kinds of Android system issues after upgrading/downgrading.
- Recover lost data from your device even without Backup .
- Save data from system-crashed Samsung device easily.
- Lightning fast speed to fix all system issues at once.
Let’s check out how to get the ok google model update download failed fixed now.
Step 1. Download and run DroidKit on the computer. Plug your device into the PC with your USB cable. Choose the “Fix System Issues” function in DroidKit.
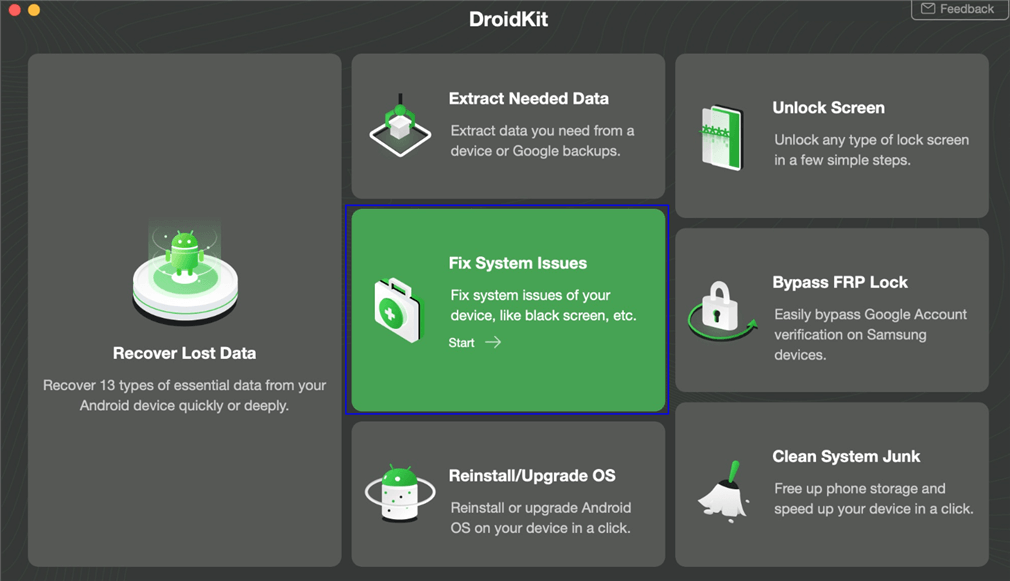
Click Fix System Issues
Step 2. Then it will lead you to the issue removal page. Tap on the Start to go on fixing. Ok, you need to know that the Fix System Issues function can only apply to Samsung devices so far.
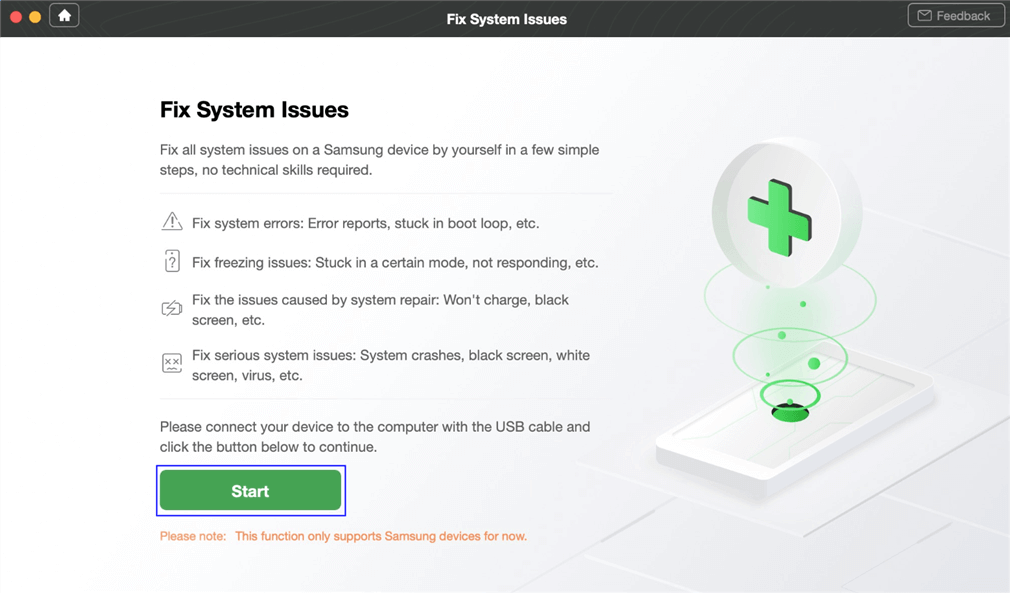
Click Start Button to Continue Fixing
Step 3. Follow the on-screen instructions, you will be asked to download the firmware and get your device into Download Mode. Then DroidKit will start your device fixing process.
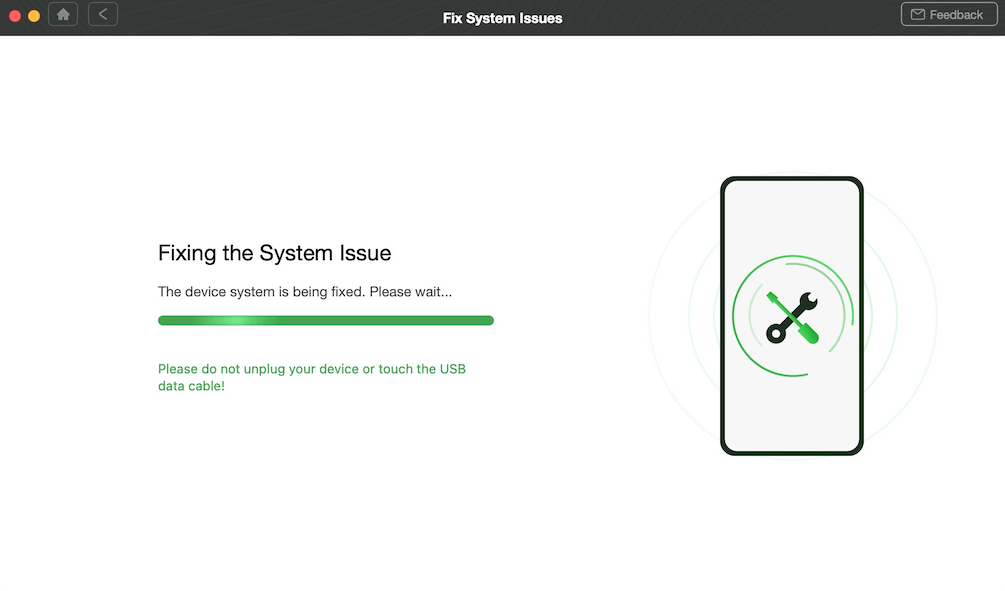
Fixing Android System Issues with DroidKit
Minutes later, when you see your device get over-started, it means your device fixing process has been completed. Restart your device to check if it is all right now.
2.В Check Your Device Model
You canВ go to check if your device is on the list that allows updating.В Only when your device is included on the list can you update it to Android Pie.
3.В Clear Storage Space
Many Android users face an Android system update failure due toВ the lack ofВ storage space. So, before the system installation process, you should make sure that you have enough storage space for the next update on your phone. If there’s not enough storage space on your device, you can regainВ it by deleting unnecessary apps and data from your phone which you do not use. With the help of a reliable fine manager, you can delete junk and redundant files.
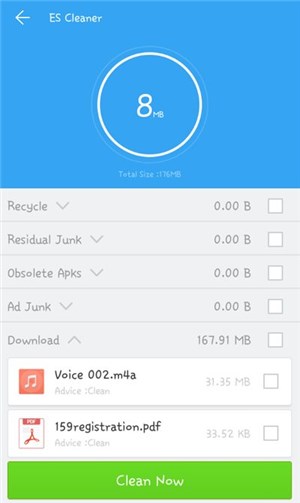
Clear Storage Space
4.В Check Internet Connection
To make sure that your system update does not get fail during the process, check your internet connection before starting the process. If you are using the Wi-Fi network for a system update, then you must have good internet speed. Otherwise, you can use your mobile network. Updating through a mobile network is a good option asВ there are various reasons that will cause you to disconnect from your Wi-Fi.
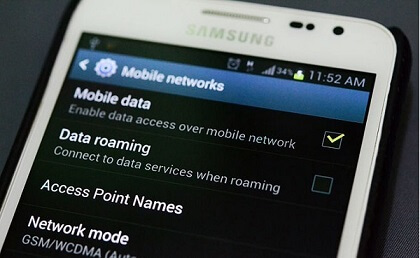
Check Internet connection
5. Clearing Data from Google Play Store App
If the problem occurs due to the Google play store updates, thenВ you canВ follow the below instructions to fix the update problem.
1. Open the “Settings” menu, and then go to the “Applications”. Now, find the Google Play store from the list.
2. Once you find the Google play store app, then tap on “Storage” and then, clear cache and data.
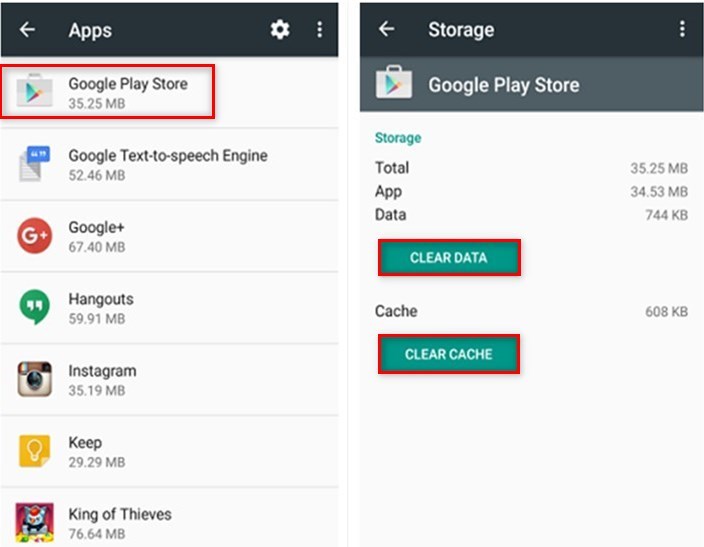
Clearing Data from Google Play Store App
3. You can even roll back to the Google Play version by installing updates. Doing this may fix your issue.
The Bottom Line
Now, you know the reasons for the error Android update fail to install.В If your System update issue is resolved with the above-mentioned solutions, then share this guide with your friends who are also facing the same update problem. This guide can be helpful for them to avoid problems during the next update installation. Download DroidKit to fix your problem now!
* 100% Clean & Safe

Member of iMobie team as well as an Apple fan, love to help more users solve various types of iOS & Android related issues.
Источник


