- Маркеры
- Примеры кода
- Введение
- Начало работы с маркерами
- Добавление маркера
- Kotlin
- Отображение дополнительной информации о маркере
- Связь данных с маркером
- Kotlin
- Как сделать маркер перетаскиваемым
- Kotlin
- Персонализация маркера
- Kotlin
- Изменение цвета маркера
- Kotlin
- Изменение прозрачности маркера
- Kotlin
- Персонализация значка маркера
- Kotlin
- Создание плоского маркера
- Kotlin
- Вращение маркера
- Kotlin
- Z-индекс для маркера
- Kotlin
- Обработка событий маркера
- События кликов по маркеру
- События перетаскивания маркера
- Markers
- Code samples
- Introduction
- Getting started with markers
- Add a marker
- Kotlin
- Display additional information about a marker
- Associate data with a marker
- Kotlin
- Make a marker draggable
- Kotlin
- Customize a marker
- Kotlin
- Customize the marker color
- Kotlin
- Customize the marker opacity
- Kotlin
- Customize the marker image
- Kotlin
- Flatten a marker
- Kotlin
- Rotate a marker
- Kotlin
- Marker z-index
- Kotlin
- Handle marker events
- Marker click events
- Marker drag events
Маркеры
Маркеры обозначают отдельные местоположения на карте. Маркеры можно настраивать, например менять их цвета или значки. Информационные окна могут содержать дополнительную информацию об отмеченных точках.
Примеры кода
Хранилище ApiDemos на сайте GitHub содержит пример, где демонстрируются различные свойства маркера:
Java
- MapWithMarker: простая карта с маркером. О том, как ее добавить, читайте в руководстве.
- MarkerDemoActivity: использование маркеров на карте, включая параметры и прослушиватели.
Kotlin
- MapWithMarker: простая карта с маркером. О том, как ее добавить, читайте в руководстве.
- MarkerDemoActivity: использование маркеров на карте, включая параметры и прослушиватели.
Введение
Маркеры указывают местоположения на карте. По умолчанию используется стандартный значок, знакомый вам по работе с Google Картами. С помощью API можно изменить цвет значка, его изображение или точку привязки. Маркеры (объекты Marker ) добавляются на карту с помощью метода GoogleMap.addMarker(markerOptions) .
Маркеры – это интерактивные элементы. По умолчанию они принимают события click и часто используются с прослушивателями событий для вывода информационных окон. Установка для свойства маркера draggable значения true позволяет пользователю изменять положение маркера на карте. Возможность перемещения маркера активируется долгим нажатием.
По умолчанию когда пользователь касается маркера, в правом нижнем углу карты отображается панель инструментов, которая предоставляет быстрый доступ к мобильному приложению «Google Карты». Ее можно отключить. Дополнительные сведения вы можете найти в руководстве по элементам управления.
Начало работы с маркерами
В этом эпизоде Maps Live рассказывается об основах добавления маркеров на карту с использованием Maps SDK for Android.
Добавление маркера
В следующем примере демонстрируется добавление маркера на карту. Маркер создается в точке с координатами -33.852,151.211 (Сидней, Австралия), а при нажатии на него появляется строка «Marker in Sydney» в информационном окне.
Kotlin
Отображение дополнительной информации о маркере
Когда пользователь касается маркера на карте, должна выводиться дополнительная информация о месте или местоположении. Дополнительные сведения вы можете найти в руководстве по информационным окнам.
Связь данных с маркером
В маркере можно сохранить объект произвольных данных, используя метод Marker.setTag() , и извлечь этот объект данных с помощью метода Marker.getTag() . В приведенном ниже примере кода показано, как с помощью тегов подсчитать количество кликов, которые получил маркер.
Kotlin
Примеры случаев, когда вам может понадобиться сохранение или получение данных через маркеры:
- Ваше приложение может обрабатывать различные типы маркеров, и вам нужно, чтобы они обрабатывались по-разному, когда пользователь нажимает на них. Для этого сохраните в маркере объект String с указанием типа.
- Вы работаете с интерфейсом к системе, в которой имеются уникальные идентификаторы записей и каждый маркер соответствует одной записи в этой системе.
- В данных маркера записан приоритет, который определяет значение параметра z-index для этого маркера.
Как сделать маркер перетаскиваемым
Чтобы маркер можно было перемещать после его добавления на карту, задайте для свойства draggable значение true . Перетаскивание маркера активируется долгим нажатием. Когда пользователь уберет палец с экрана, маркер останется в этом месте.
По умолчанию возможность перетаскивания маркеров отключена. Вы должны явно включить эту возможность с помощью метода MarkerOptions.draggable(boolean) до добавления маркера на карту или же с помощью метода Marker.setDraggable(boolean) , когда маркер уже добавлен. Вы можете прослушивать события перетаскивания для маркера.
В приведенном ниже фрагменте кода перетаскиваемый маркер устанавливается для города Перт, Австралия.
Kotlin
Персонализация маркера
В этом видеоролике рассказывается, как использовать маркеры для визуального представления различных мест на карте.
Для маркера можно задать собственное изображение, которое будет показываться вместо стандартного значка. При определении значка устанавливается ряд значений, определяющих, как он будет выглядеть.
Маркеры поддерживают настройку с использованием следующих свойств:
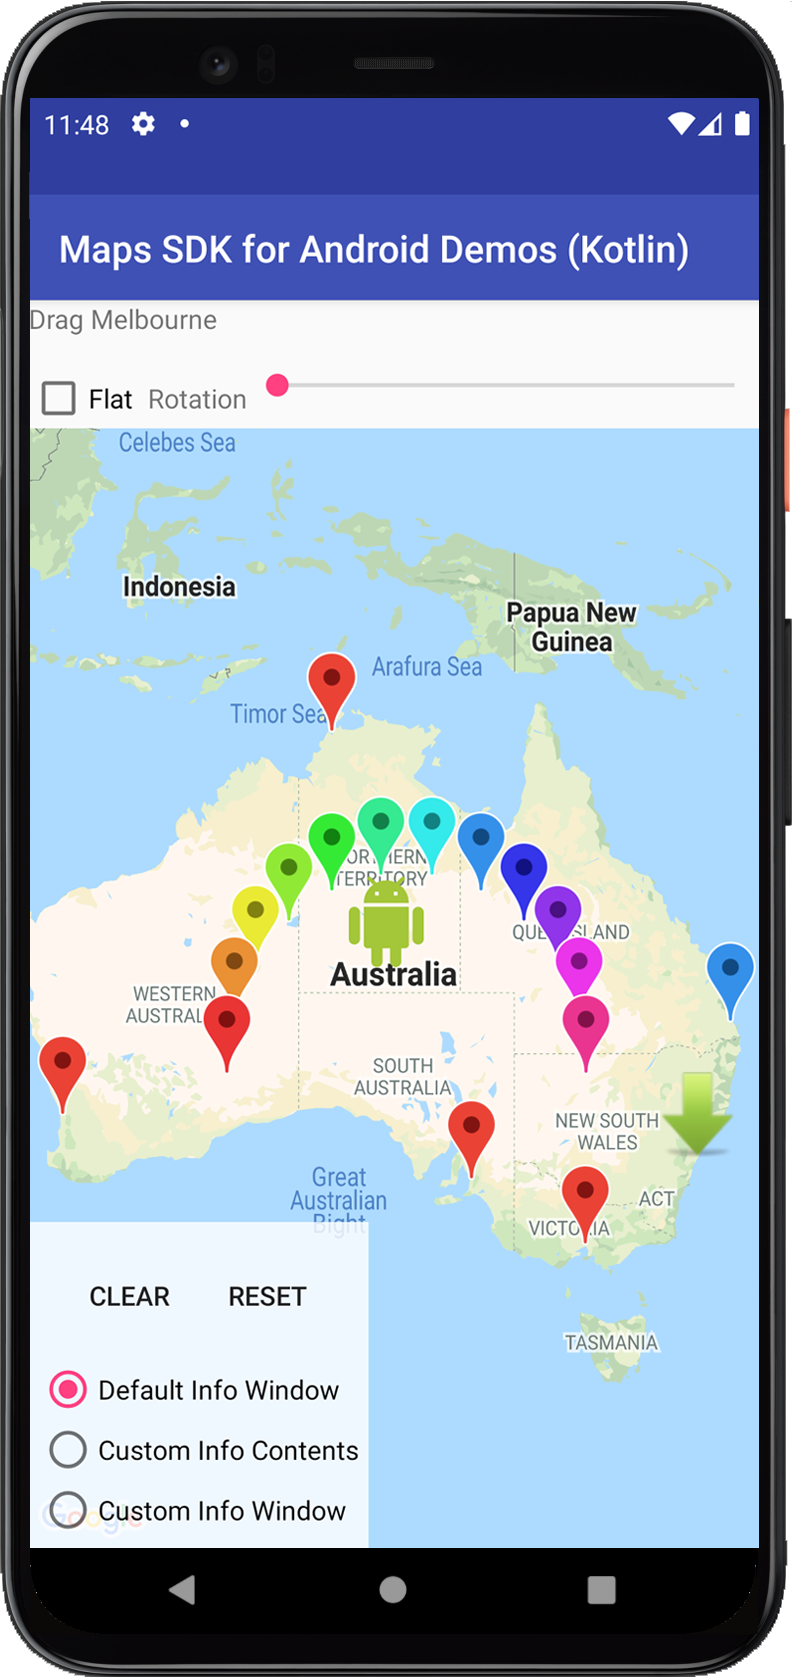
Position (Положение; обязательно) Значение параметра LatLng для положения маркера на карте. Это единственное обязательное свойство объекта Marker . Anchor (Привязка) Точка на изображении, которое будет размещено в месте, указанном параметром маркера LatLng (широта и долгота). По умолчанию устанавливается по центру в нижней части изображения. Alpha (Альфа-канал) Свойство, определяющее прозрачность маркера. Значение по умолчанию – 1.0. Title (Заголовок) Строка, которая отображается в информационном окне, когда пользователь касается маркера. Snippet (Фрагмент) Дополнительный текст, отображаемый под названием. Icon (Значок) Картинка в битовом формате, которая отображается вместо значка по умолчанию. Draggable (Перетаскиваемость) Задайте значение true , если хотите, чтобы пользователи могли перетаскивать значок. Значение по умолчанию – false . Visible (Видимость) Измените значение этого свойства на false , чтобы сделать маркер невидимым. Значение по умолчанию – true . Flat или Billboard (свойства ориентации) По умолчанию ориентация маркеров рассчитывается относительно экрана. Они не вращаются и не наклоняются при изменении ракурса. Плоские маркеры ориентированы по земной поверхности и вращаются или наклоняются вместе с камерой. Маркеры обоих типов не меняют размер при масштабировании. Если вам необходим этот эффект, используйте наложения (GroundOverlay). Rotation (Вращение) Поворот маркера по часовой стрелке в градусах. Для плоских маркеров направление по умолчанию может изменяться. По умолчанию плоский маркер направлен на север. Остальные маркеры по умолчанию расположены перпендикулярно земной поверхности и при вращении обращены в сторону камеры.
Ниже представлен код, который позволяет создать простой маркер со стандартным значком.
Kotlin
Изменение цвета маркера
Чтобы изменить цвет стандартного изображения маркера, необходимо передать объект BitmapDescriptor в метод icon(). Вы можете использовать набор предварительно установленных цветов в объекте BitmapDescriptorFactory или задать конкретный цвет маркера с помощью метода BitmapDescriptorFactory.defaultMarker(float hue) . Параметр hue (тон) должен содержать значение от 0 до 360, представляющее собой точку на цветовом круге.
Kotlin
Изменение прозрачности маркера
Для изменения прозрачности маркера можно использовать метод MarkerOptions.alpha(). Непрозрачность следует указывать как число с плавающей запятой от 0,0 до 1,0, где 0 – полная прозрачность, а 1 – полная непрозрачность.
Kotlin
Персонализация значка маркера
Значок маркера по умолчанию можно заменить любым другим изображением. Собственные значки всегда устанавливаются в виде объекта BitmapDescriptor и определяются с использованием одного из методов в классе BitmapDescriptorFactory .
fromAsset(String assetName) Создает собственный маркер, используя название битового изображения в каталоге ресурсов. fromBitmap(Bitmap image) Создает собственный маркер из битового изображения. fromFile(String fileName) Создает собственный значок, используя название битового файла, который хранится во внутренней памяти устройства. fromPath(String absolutePath) Создает собственный маркер, используя абсолютный путь к битовому файлу. fromResource(int resourceId) Создает собственный маркер, используя идентификатор ресурса битового изображения.
В приведенном ниже фрагменте показано создание маркера с пользовательским значком.
Kotlin
Создание плоского маркера
Положение значка маркера обычно рассчитывается относительно экрана. Масштабирование, повороты и наклоны камеры не влияют на его ориентацию. Однако можно сделать так, чтобы значок лежал на земной поверхности, вращался и наклонялся вместе с картой. Размер плоского маркера не меняется при приближении и отдалении.
Чтобы изменить ориентацию маркера, установите для свойства flat значение true .
Kotlin
Вращение маркера
Маркер можно вращать вокруг точки привязки с помощью метода Marker . setRotation() . Значение измеряется относительно исходного положения в градусах по часовой стрелке. Если маркер плоский, он по умолчанию ориентирован на север. Остальные маркеры по умолчанию расположены перпендикулярно земной поверхности и при вращении обращены в сторону камеры.
В приведенном ниже примере маркер поворачивается на 90°. При установке для точки привязки значения 0.5,0.5 маркер будет вращаться вокруг своего центра, а не вокруг основания.
Kotlin
Z-индекс для маркера
Параметр Z-index указывает порядок расположения маркера относительно других маркеров на карте. Маркер с высоким Z-индексом отображается поверх маркеров с меньшими значениями этого параметра. По умолчанию Z-индекс равен 0 .
Установите Z-индекс для объекта параметров маркера, вызвав метод MarkerOptions.zIndex() , как показано в следующем примере кода:
Kotlin
Получить Z-индекс можно с помощью метода Marker.getZIndex() , а изменить его – с помощью метода Marker.setZIndex() .
Маркеры всегда отображаются поверх фрагментов карты и прочих не поддерживающих маркеры наложений (наземных наложений, ломаных линий, многоугольников и других фигур). Это не зависит от Z-индекса других наложений. Фактически у маркеров свое пространство Z-индексов, отдельное от Z-индексов других наложений.
Обработка событий маркера
Maps API позволяет прослушивать события маркера и реагировать на них. Для этого необходимо назначить объекту GoogleMap , к которому относятся маркеры, соответствующий прослушиватель. Если для одного из маркеров карты возникает событие, соответствующий объект Marker , передаваемый в виде параметра, выполняет обратный вызов прослушивателя. Чтобы сопоставить этот объект Marker с вашей собственной ссылкой на Marker , используйте метод equals() , а не оператор == .
Можно прослушивать следующие события:
События кликов по маркеру
Чтобы отслеживать события кликов по маркеру, используйте прослушиватель OnMarkerClickListener . Чтобы добавить его на карту, вызовите GoogleMap.setOnMarkerClickListener(OnMarkerClickListener) . Когда пользователь нажимает на маркер, выполняется вызов onMarkerClick(Marker) , а маркер передается в виде аргумента. Этот метод возвращает логическое значение, указывающее, было ли событие принято (т. е. нужно ли подавлять поведение по умолчанию). Если возвращается значение false , поведение по умолчанию выполняется параллельно с персонализированным. Поведение по умолчанию для события клика по маркеру – отображение его информационного окна (если оно доступно) и перемещение камеры таким образом, чтобы маркер находился в центре карты.
Влияние Z-индекса на события кликов:
- Когда пользователь нажимает на кластер маркеров, событие клика назначается маркеру с наивысшим Z-индексом.
- В большинстве случаев каждый клик запускает одно событие. Другими словами, клик не передается маркерам или иным наложениям с более низкими значениями Z-индекса.
- Нажатие на кластер маркеров вызывает последующий цикл кликов внутри кластера. Каждый маркер выбирается по очереди. Порядок в цикле имеет приоритет прежде всего по Z-индексу, и только затем – по расстоянию до точки нажатия.
- Если пользователь нажимает на карту за пределами кластера, API пересчитывает кластер и переопределяет состояние цикла кликов, запуская его с начала.
- Событие клика переходит от кластера маркеров на другие фигуры и наложения, прежде чем цикл начнется снова.
- Фактически маркеры располагаются в группе значений Z-индекса, которая отделена от других наложений и фигур (ломаных линий, многоугольников, кругов, наземных наложений), какими бы ни были значения Z-индекса этих объектов. Если несколько маркеров, наложений или фигур перекрывают друг друга, то клики сначала циклически распределяются по кластеру маркеров, а затем применяются для других доступных для нажатия наложений или фигур в зависимости от значений их Z-индекса.
События перетаскивания маркера
Чтобы отслеживать события перетаскивания маркера, используйте прослушиватель OnMarkerDragListener . Чтобы добавить его на карту, вызовите GoogleMap.setOnMarkerDragListener . Функция перетаскивания активируется долгим нажатием на маркер. Когда пользователь уберет палец с экрана, маркер останется в этом месте. В начале перетаскивания вызывается метод onMarkerDragStart(Marker) , во время перетаскивания – onMarkerDrag(Marker) (он вызывается непрерывно), а по окончании – onMarkerDragEnd(Marker) . Положение маркера можно в любое время запросить с помощью метода Marker.getPosition() .
Except as otherwise noted, the content of this page is licensed under the Creative Commons Attribution 4.0 License, and code samples are licensed under the Apache 2.0 License. For details, see the Google Developers Site Policies. Java is a registered trademark of Oracle and/or its affiliates.
Источник
Markers
Markers indicate single locations on the map. You can customize your markers by changing the default color, or replacing the marker icon with a custom image. Info windows can provide additional context to a marker.
Code samples
The ApiDemos repository on GitHub includes a sample that demonstrates various marker features:
Java
- MapWithMarker: A simple map with a marker. See the tutorial on adding a map with a marker.
- MarkerDemoActivity: Using markers on a map, including options and listeners
Kotlin
- MapWithMarker: A simple map with a marker. See the tutorial on adding a map with a marker-kt.
- MarkerDemoActivity: Using markers on a map, including options and listeners
Introduction
Markers identify locations on the map. The default marker uses a standard icon, common to the Google Maps look and feel. It’s possible to change the icon’s color, image or anchor point via the API. Markers are objects of type Marker , and are added to the map with the GoogleMap.addMarker(markerOptions) method.
Markers are designed to be interactive. They receive click events by default, and are often used with event listeners to bring up info windows. Setting a marker’s draggable property to true allows the user to change the position of the marker. Use a long press to activate the ability to move the marker.
By default, when a user taps a marker, the map toolbar appears at the bottom right of the map, giving the user quick access to the Google Maps mobile app. You can disable the toolbar. For more information, see the guide to controls.
Getting started with markers
This episode of Maps Live covers the basics of adding markers to your map using the Maps SDK for Android.
Add a marker
The following example demonstrates how to add a marker to a map. The marker is created at coordinates -33.852,151.211 (Sydney, Australia), and displays the string ‘Marker in Sydney’ in an info window when clicked.
Kotlin
Display additional information about a marker
A common requirement is to show additional information about a place or location when the user taps a marker on the map. See the guide to info windows.
Associate data with a marker
You can store an arbitrary data object with a marker using Marker.setTag() , and retrieve the data object using Marker.getTag() . The sample below shows how you can count the number of times a marker has been clicked using tags:
Kotlin
Here are some examples of scenarios when it’s useful to store and retrieve data with markers:
- Your app may cater for different types of markers, and you want to treat them differently when the user clicks them. To accomplish this, you can store a String with the marker indicating the type.
- You may be interfacing with a system that has unique record identifiers, where the markers represent specific records in that system.
- Marker data may indicate a priority to be used when deciding the z-index of a marker.
Make a marker draggable
You can reposition a marker once its been added to the map so long as its draggable property is set to true . Long press the marker to enable dragging. When you take your finger off the screen, the marker will remain in that position.
Markers are not draggable by default. You must explicitly set the marker to be draggable either with MarkerOptions.draggable(boolean) prior to adding it to the map, or Marker.setDraggable(boolean) once it has been added to the map. You can listen for drag events on the marker, as described in Marker drag events.
The below snippet adds a draggable marker at Perth, Australia.
Kotlin
Customize a marker
This video shows ways of using markers to visualize locations on a map.
Markers may define a custom image to show in place of the default icon. Defining an icon involves setting a number of properties that affect the visual behavior of the marker.
Markers support customization through the following properties:
Position (Required) The LatLng value for the marker’s position on the map. This is the only required property for a Marker object. Anchor The point on the image that will be placed at the LatLng position of the marker. This defaults to the middle of the bottom of the image. Alpha Sets the opacity of the marker. Defaults to 1.0. Title A string that’s displayed in the info window when the user taps the marker. Snippet Additional text that’s displayed below the title. Icon A bitmap that’s displayed in place of the default marker image. Draggable Set to true if you want to allow the user to move the marker. Defaults to false . Visible Set to false to make the marker invisible. Defaults to true . Flat or Billboard orientation By default, markers are oriented against the screen, and will not rotate or tilt with the camera. Flat markers are oriented against the surface of the earth, and will rotate and tilt with the camera. Both types of markers do not change size based on zoom. Use GroundOverlays if you desire this effect. Rotation The orientation of the marker, specified in degrees clockwise. The default position changes if the marker is flat. The default position for a flat marker is north aligned. When the marker is not flat, the default position is pointing up and the rotation is such that the marker is always facing the camera.
The below snippet creates a simple marker, with the default icon.
Kotlin
Customize the marker color
It’s possible to customize the color of the default marker image by passing a BitmapDescriptor object to the icon() method. You can use a set of predefined colors in the BitmapDescriptorFactory object, or set a custom marker color with the BitmapDescriptorFactory.defaultMarker(float hue) method. The hue is a value between 0 and 360, representing points on a color wheel.
Kotlin
Customize the marker opacity
You can control the opacity of a marker with the MarkerOptions.alpha() method. Alpha should be specified as a float between 0.0 and 1.0, where 0 is fully transparent and 1 is fully opaque.
Kotlin
Customize the marker image
You can replace the default marker image with a custom marker image, often called an icon. Custom icons are always set as a BitmapDescriptor , and defined using one of the methods in the BitmapDescriptorFactory class.
fromAsset(String assetName) Creates a custom marker using the name of a Bitmap image in the assets directory. fromBitmap(Bitmap image) Creates a custom marker from a Bitmap image. fromFile(String fileName) Creates a custom icon using the name of a Bitmap image file located in the internal storage. fromPath(String absolutePath) Creates a custom marker from an absolute file path of a Bitmap image. fromResource(int resourceId) Creates a custom marker using the resource ID of a Bitmap image.
The below snippet creates a marker with a custom icon.
Kotlin
Flatten a marker
Marker icons are normally drawn with respect to the screen; rotating, tilting or zooming the map will not change the orientation of the marker. You can set the orientation of a marker to be flat against the earth. Markers that are oriented in this way will rotate when the map is rotated, and change perspective when the map is tilted. Flat markers will retain their size when the map is zoomed in or out.
To change the orientation of the marker, set the marker’s flat property to true .
Kotlin
Rotate a marker
You can rotate a marker around its anchor point with the Marker . setRotation() method. The rotation is measured in degrees clockwise from the default position. When the marker is flat on the map, the default position is North. When the marker is not flat, the default position is pointing up and the rotation is such that the marker is always facing the camera.
The below example rotates the marker 90°. Setting the anchor point to 0.5,0.5 causes the marker to be rotated around its center, instead of its base.
Kotlin
Marker z-index
The z-index specifies the stack order of this marker, relative to other markers on the map. A marker with a high z-index is drawn on top of markers with lower z-indexes. The default z-index value is 0 .
Set the z-index on the marker’s options object by calling MarkerOptions.zIndex() , as shown in the following code snippet:
Kotlin
You can access the marker’s z-index by calling Marker.getZIndex() , and you can change it by calling Marker.setZIndex() .
Markers are always drawn above tile layers and other non-marker overlays (ground overlays, polylines, polygons, and other shapes) regardless of the z-index of the other overlays. Markers are effectively considered to be in a separate z-index group compared to other overlays.
Handle marker events
The Maps API allows you to listen and respond to marker events. To listen to these events, you must set the corresponding listener on the GoogleMap object to which the markers belong. When the event occurs on one of the markers on the map, the listener’s callback will be invoked with the corresponding Marker object passed through as a parameter. To compare this Marker object with your own reference to a Marker object, you must use equals() and not == .
You can listen to the following events:
Marker click events
You can use an OnMarkerClickListener to listen for click events on the marker. To set this listener on the map, call GoogleMap.setOnMarkerClickListener(OnMarkerClickListener) . When a user clicks on a marker, onMarkerClick(Marker) will be called and the marker will be passed through as an argument. This method returns a boolean that indicates whether you have consumed the event (i.e., you want to suppress the default behavior). If it returns false , then the default behavior will occur in addition to your custom behavior. The default behavior for a marker click event is to show its info window (if available) and move the camera such that the marker is centered on the map.
Effect of z-index on click events:
- When a user clicks on a cluster of markers, the click event is triggered for the marker with the highest z-index.
- At most one event is triggered per click. In other words, the click is not passed down to the markers or other overlays with lower z-index values.
- Clicking on a cluster of markers causes subsequent clicks to cycle through the cluster, selecting each in turn. The order of the cycle first prioritises z-index, then proximity to the click point.
- If the user clicks outside the proximity of the cluster, the API recalculates the cluster and resets the state of the click cycle so that it starts from the beginning.
- The click event falls through marker clusters to other shapes and overlays before restarting the cycle.
- Markers are effectively considered to be in a separate z-index group compared to other overlays or shapes (polylines, polygons, circles, and/or ground overlays), regardless of the z-index of the other overlays. If multiple markers, overlays or shapes are overlaid on top of each other, the click event is cycled through the cluster of markers first, then triggered for other clickable overlays or shapes, based on their z-index values.
Marker drag events
You can use an OnMarkerDragListener to listen for drag events on a marker. To set this listener on the map, call GoogleMap.setOnMarkerDragListener . To drag a marker, a user must long press on the marker. When the user takes their finger off the screen, the marker will stay in that position. When a marker is dragged, onMarkerDragStart(Marker) is called initially. While the marker is being dragged, onMarkerDrag(Marker) is called constantly. At the end of the drag onMarkerDragEnd(Marker) is called. You can get the position of the marker at any time by calling Marker.getPosition() .
Except as otherwise noted, the content of this page is licensed under the Creative Commons Attribution 4.0 License, and code samples are licensed under the Apache 2.0 License. For details, see the Google Developers Site Policies. Java is a registered trademark of Oracle and/or its affiliates.
Источник


