- How to upgrade to macOS Monterey
- Check compatibility
- Make a backup
- Download macOS Monterey
- Install macOS Monterey
- Stay up to date
- Revive or restore a Mac with Apple silicon using Apple Configurator 2
- What does a revive do to your Mac?
- What does a restore do to your Mac?
- Before you begin
- How the revive and restore processes work
- Step 1: Connect the Mac computers
- Step 2: Prepare the Mac you want to revive or restore
- Step 3: Revive the firmware and install the latest recoveryOS
- Step 4: Restore the firmware, erase all data and reinstall the latest version of recoveryOS and macOS
- Question: Q: Upgrading Mac mini mid 2010 ?
- All replies
- Китайские умельцы добавили памяти в Mac Mini на M1 — вместо 8 ГБ ОЗУ и 256 ГБ SSD припаяли 16 ГБ и 1 ТБ
How to upgrade to macOS Monterey
Learn how to download and install macOS Monterey, the latest version of the Mac operating system.
With macOS Monterey, you can connect, share, and create like never before. Say hello to exciting new FaceTime updates. Explore a redesigned and streamlined Safari. Discover and invent powerful new ways to work using Shortcuts. Stay in the moment with Focus. And so much more.
Check compatibility
macOS Monterey is compatible with the following computers. If your Mac isn’t compatible, you might be able to install an old version of macOS instead.
MacBook introduced in 2016 or later
MacBook Air introduced in 2015 or later
MacBook Pro introduced in 2015 or later
Mac mini introduced in 2014 or later
iMac introduced in late 2015 or later
iMac Pro introduced in 2017 or later
Mac Pro introduced in 2013 or later
View the complete list of compatible computers.
If upgrading from macOS Sierra or later, your Mac needs 26GB of available storage to upgrade. If upgrading from an earlier release, your Mac needs up to 44GB of available storage.
Make a backup
Before installing any upgrade, it’s a good idea to back up your Mac. Time Machine makes it simple, and other backup methods are also available.
Download macOS Monterey
If you’re using macOS Mojave or later, you can get macOS Monterey via Software Update: Choose Apple menu > System Preferences, then click Software Update.
Or use this link to open the macOS Monterey page on the App Store: Get macOS Monterey. Then click the Get button or iCloud download button.
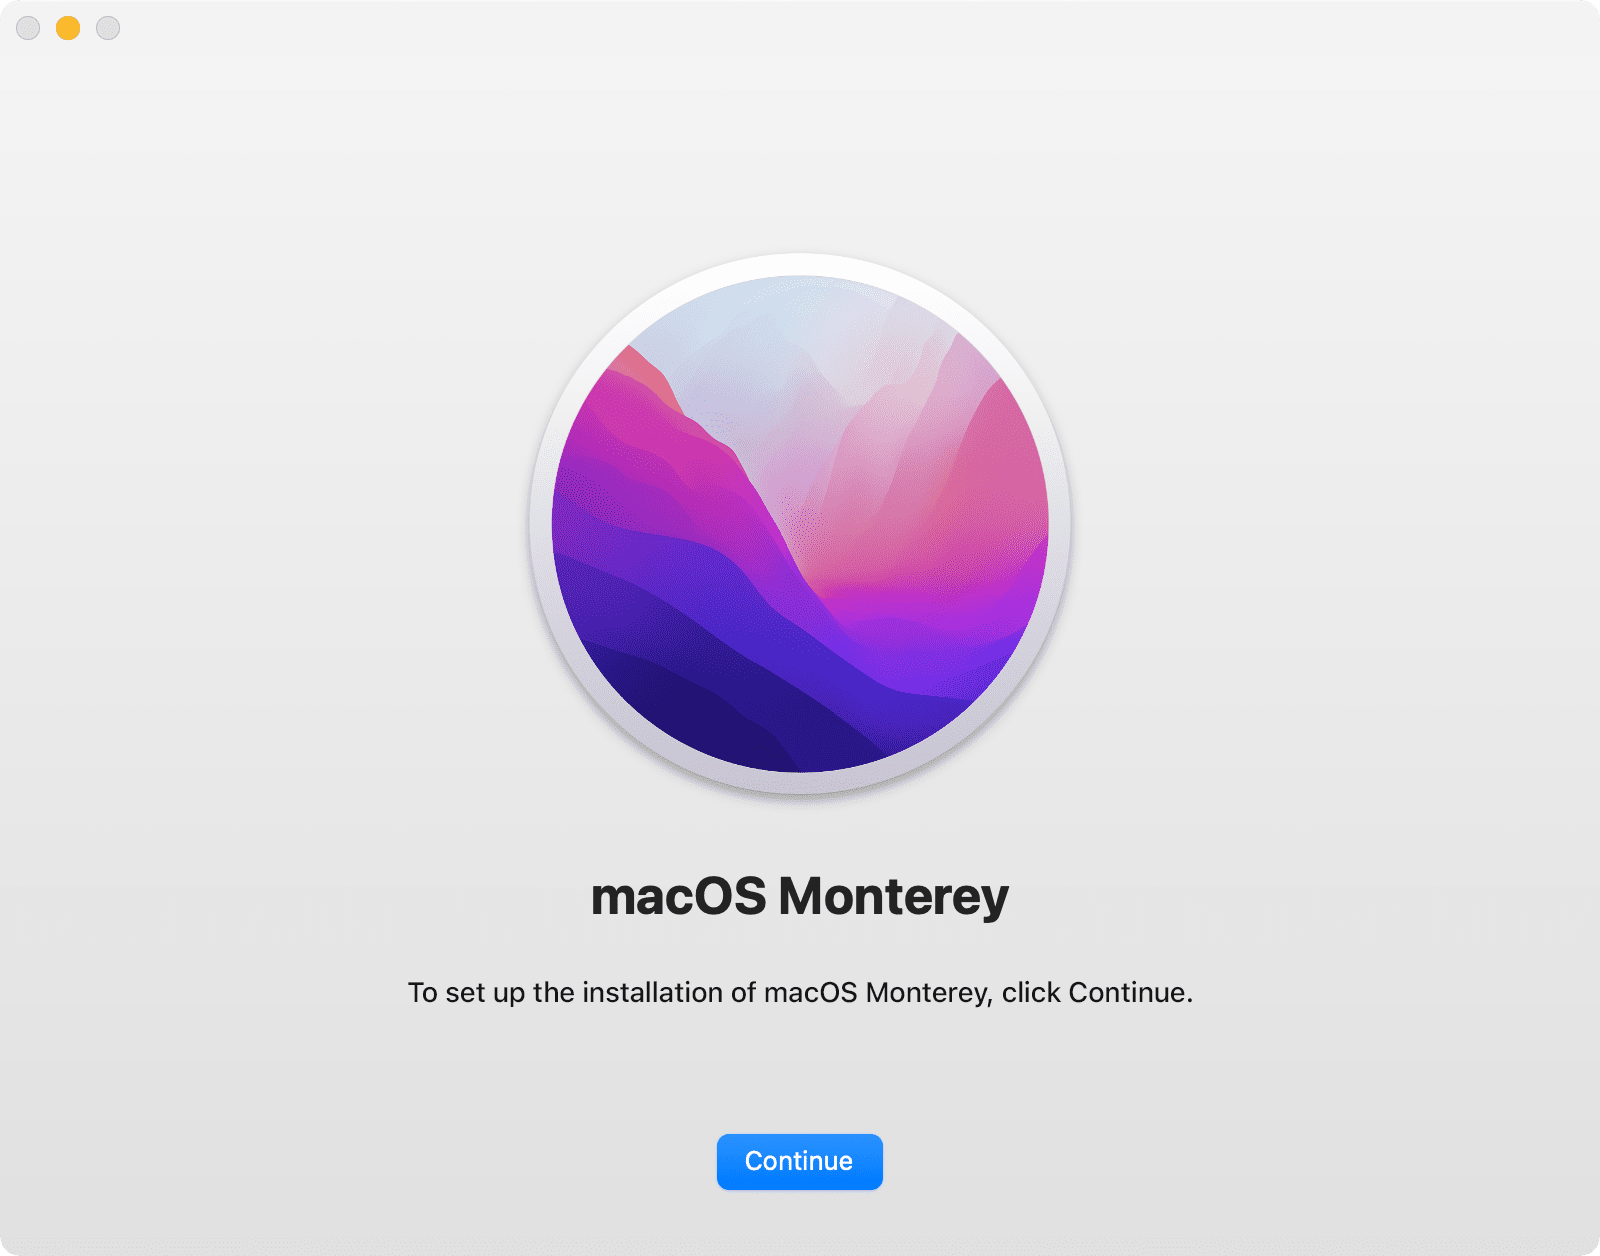
Install macOS Monterey
After downloading, the installer opens automatically. Click Continue and follow the onscreen instructions.
Please allow installation to complete without putting your Mac to sleep or closing its lid. Your Mac might restart and show a progress bar or blank screen several times. It might be easier to begin in the evening so that installation can complete overnight.
Stay up to date
After installing macOS Monterey, you will be notified when updates to macOS Monterey are available. To check for updates, choose Apple menu > System Preferences, then click Software Update.
Источник
Revive or restore a Mac with Apple silicon using Apple Configurator 2
In very rare circumstances, such as a power failure during a macOS update or upgrade, a Mac may become unresponsive and so the firmware must be revived or restored.
Important: First try reviving the computer. If that fails or if you can’t start the Mac from the startup volume or the recoveryOS, you must restore the firmware and erase the internal flash storage.
What does a revive do to your Mac?
A revive updates the firmware and updates recoveryOS to the latest version. A revive is designed to not make any changes to the startup volume, the user’s data volume, or any other volumes. User data may be retained if recoverable.
What does a restore do to your Mac?
A restore updates the firmware, updates recoveryOS to the latest version, and erases and installs the latest version of macOS on your internal storage. When this process is complete, any data on any internal volumes is unrecoverable.
You must restore the firmware and erase the internal flash storage if:
Reviving the firmware is unsuccessful
You can’t start the Mac from the startup volume or the recoveryOS
Before you begin
These revive and restore instructions cover the following Mac computers with Apple silicon:
MacBook Pro (16-inch, 2021)
MacBook Pro (14-inch, 2021)
iMac (24-inch, M1, 2021)
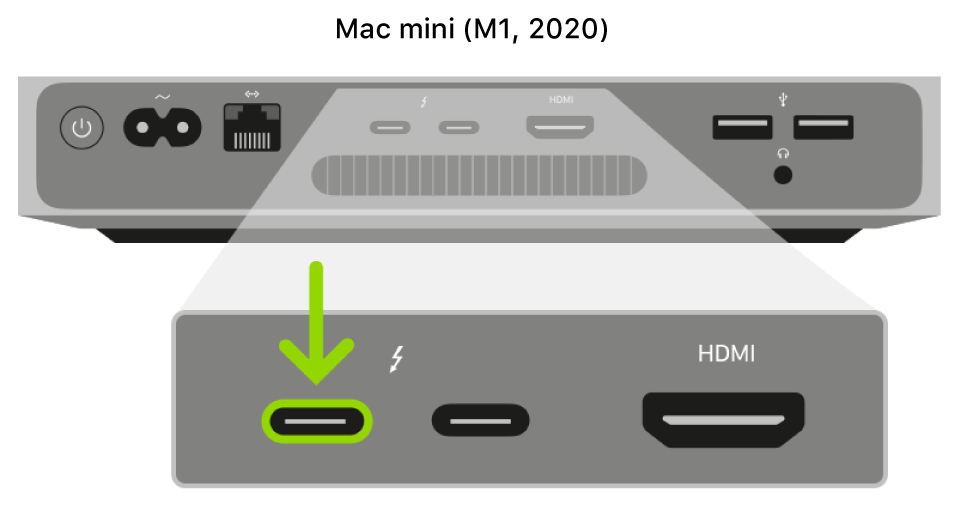
Mac mini (M1, 2020)
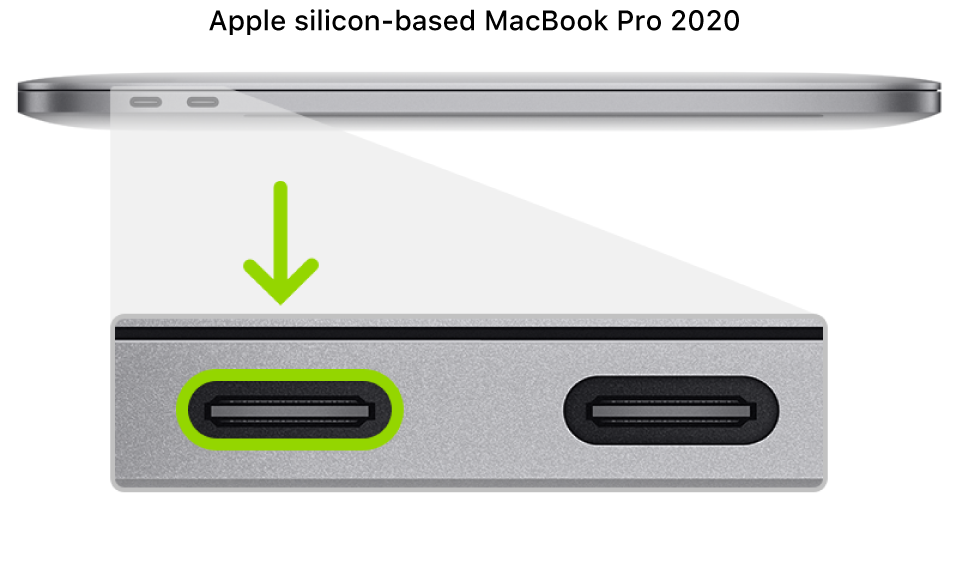
MacBook Pro (13-inch, M1, 2020)
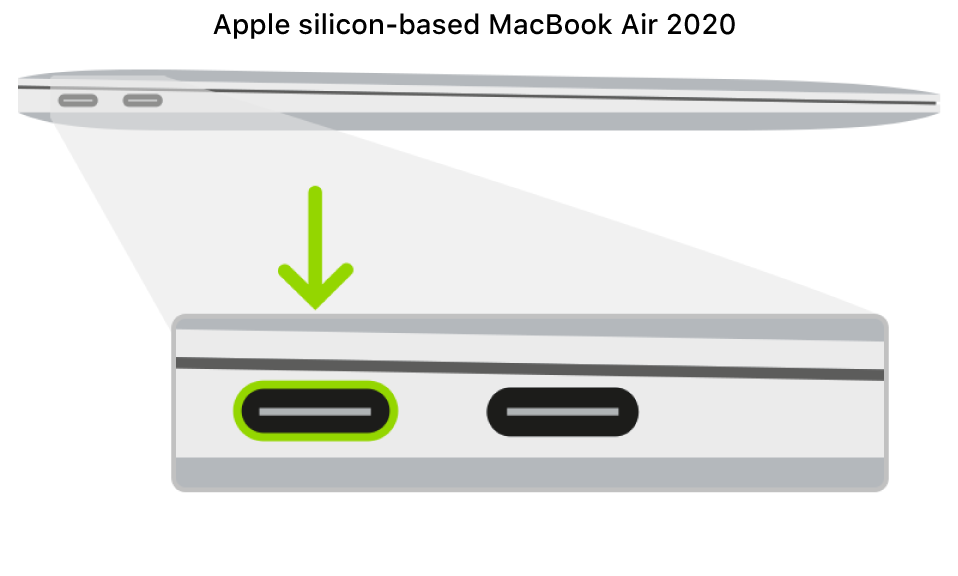
MacBook Air (M1, 2020)
Make sure you have:
The latest version of Apple Configurator 2 installed on a Mac running macOS 10.15.6 or later
You may need to configure your web proxy or firewall ports to allow all network traffic from Apple devices to Apple’s network 17.0.0.0/8. For more information on the ports used by Apple products, see the Apple Support article Use Apple products on enterprise networks. For more information on whether your network uses a web proxy or firewall, consult your router manual or your internet provider.
A supported USB-C to USB-C charge cable, such as the one sold by Apple (may not be available in all countries or regions) or a supported USB-A to USB-C cable
The USB-C cable must support both power and data. Thunderbolt 3 cables aren’t supported.
How the revive and restore processes work
The revive and restore processes involve the following steps:
Step 1. Plug the Mac computers together with a supported USB-C cable, locate Apple Configurator 2 in the Applications folder or in Launchpad, then launch Apple Configurator 2 on the first Mac.
Step 2. Restart the second Mac using a special key sequence. The key sequence varies according to the type of Mac you want to revive or restore.
Step 3. Use Apple Configurator 2 to revive the Mac.
Step 4. If a revive is unsuccessful, you can use Apple Configurator 2 to restore the Mac.
Step 1: Connect the Mac computers
Make sure your first Mac is plugged into a power source and started.
Plug in the USB-C cable (along with any adapters needed) and connect the two Mac computers.

Launch Apple Configurator 2  .
.
Step 2: Prepare the Mac you want to revive or restore
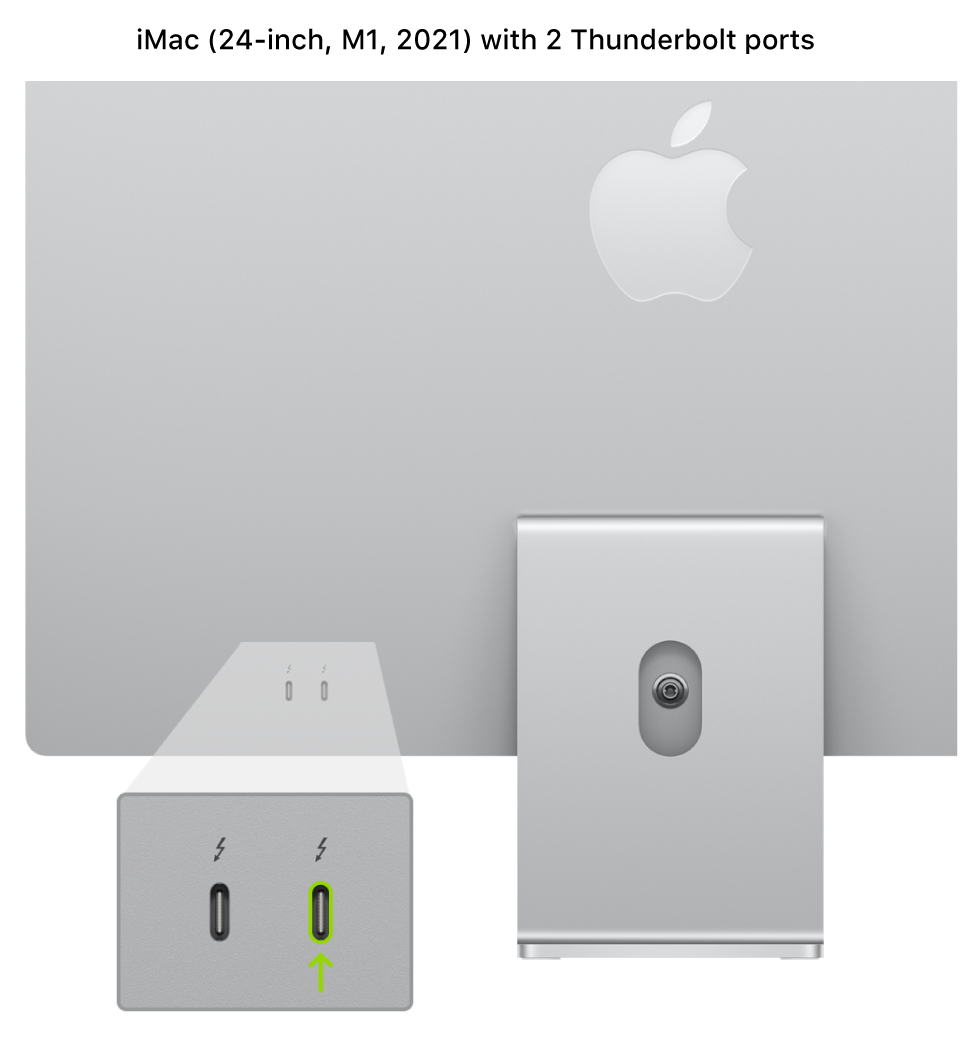
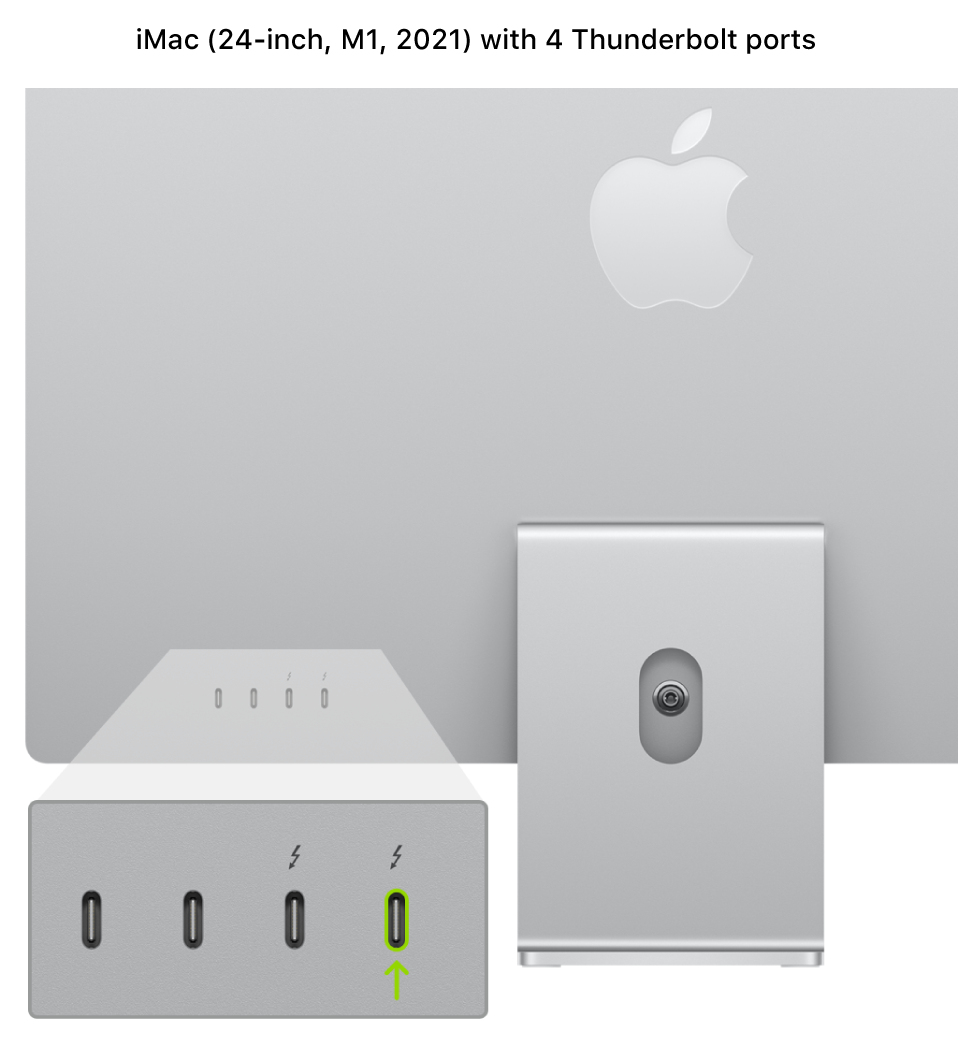
If reviving or restoring an iMac (24-inch, M1, 2021)
1. Disconnect the iMac from power.
2. Plug the USB-C cable into the Thunderbolt port closest to the stand.
3. While holding down the power button, connect the iMac to power and continue to hold the power button for about 3 seconds.
Note: You won’t see any screen activity from the iMac you want to revive or restore.
If reviving or restoring a Mac mini
1. Connect a monitor to your Mac mini (so you can see when the process is complete).
2. Disconnect the Mac mini from power for at least 10 seconds.
3. Press and hold the power button.
4. Reconnect power while still holding the power button.
5. Release the power button.
The status indicator light should turn amber, and a DFU icon should appear in Apple Configurator 2 on the Mac mini .
Note: You won’t see any screen activity from the Mac mini you are trying to revive or restore.
If reviving or restoring an Apple notebook computer
1. Press the power button.
2. While holding down the power button, at the same time press all three of the following keys for about 10 seconds:
The right Shift key
The left Option key
The left Control key
3. After 10 seconds, immediately release the three keys but continue to hold down the power button until a DFU icon appears in Apple Configurator 2 on the first Mac.
Note: You won’t see any screen activity from the MacBook Air or MacBook Pro you’re trying to revive or restore. If the MacBook Pro uses a MagSafe connector, you won’t see the LED charging light.
Step 3: Revive the firmware and install the latest recoveryOS
In the Apple Configurator 2 window on the first Mac, select the DFU icon of the Mac whose chip firmware you want to revive and whose recoveryOS you want updated to the latest version.
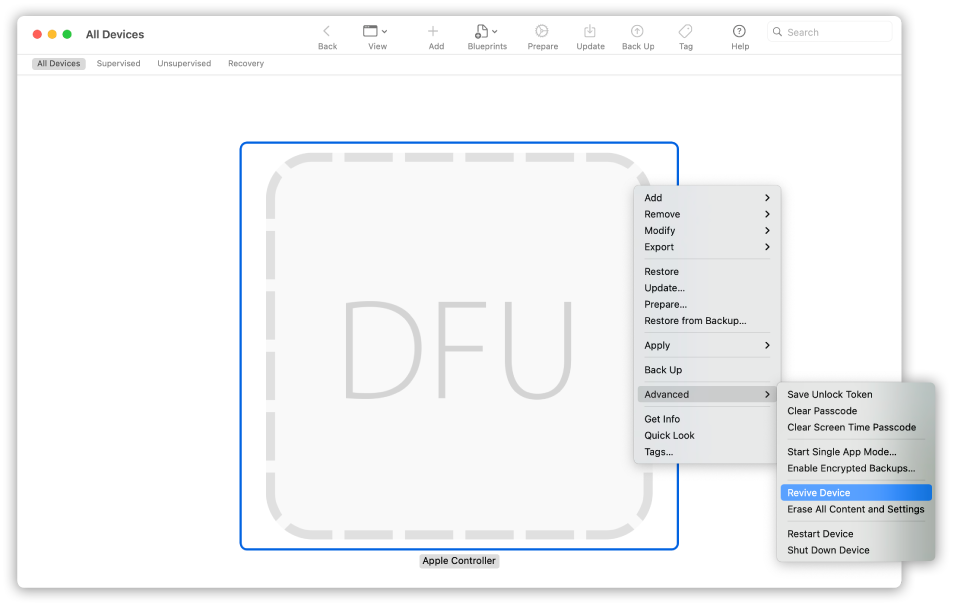
Do one of the following:
Choose Actions > Advanced > Revive Device, then click Revive.
Control-click the selected DFU icon, then choose Advanced > Revive Device, then click Revive.
Note: If you lose power to either Mac during this process, begin the revive process again.
Wait for the process to complete. During this process, an Apple logo will appear and disappear on the second Mac.
After the process successfully completes, your Mac will reboot.
Note: If the revive was unsuccessful, proceed to Step 4 below.
Quit Apple Configurator 2 on the first Mac, then unplug any cables and adapters.
Step 4: Restore the firmware, erase all data and reinstall the latest version of recoveryOS and macOS
In the Apple Configurator 2 window on the first Mac, select the DFU icon of the Mac to be restored.
Do one of the following:
Choose Actions > Restore, then click Restore.
Control-click the selected DFU icon, then choose Actions > Restore, then click Restore.
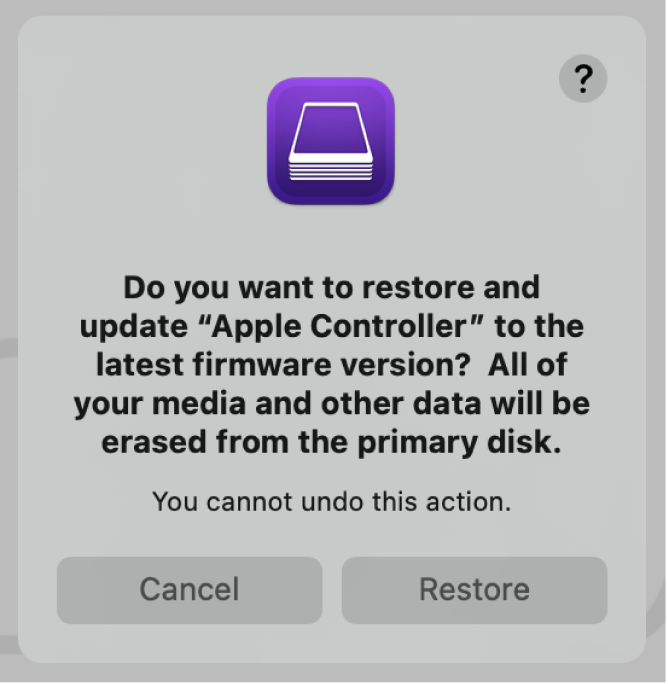 The restore confirmation dialog.
Note: If you lose power to either Mac during this process, begin the restore process again.
Wait for the process to complete. During this process, an Apple logo will appear and disappear on the second Mac.
After the process completes, your Mac will restart.
If the process was successful, you’re presented with the macOS Setup Assistant on the second Mac. If the macOS Setup Assistant doesn’t appear, repeat the restore process.
Quit Apple Configurator 2 on the first Mac, then unplug any cables and adapters.
Источник
Question: Q: Upgrading Mac mini mid 2010 ?
I currently have a Mac mini mid 2010 version running 2gb of ram but looking into upgrading to the maximum 8gb.
Will this help my Mac mini cope with running the latest version of OSX ? I am currently using an old version Lion OS X and it runs smoothly with no issues but when I update to the newest software it is such a pain to use !! Slow and unbareable at times so I keep going back to the factory OS.
Would upgrading the ram solve this problem ? I Actually thought about buying a new machine but I really don’t have the money at the moment but I need to be able to run the latest software for graphic design (photoshop) and Xcode for development which require the latest version of OS , But before I jump into upgrading id like to know its actually a solution to this problem before spending money on ram , Is my processor also the problem ?
Posted on Jan 16, 2017 2:45 PM
All replies
Loading page content
Page content loaded
You can install the latest Sierra:
But you really should upgrade the RAM, too.
Jan 16, 2017 4:18 PM
I have already installed this before but it runs so so slow ?! Would upgrading the ram solve this problem ? Or is it a processor problem
Jan 16, 2017 4:46 PM
2GB is way too small for just about any version of OS X after Snow Leopard.
PhotoShop is very memory intensive, it will always benefit from more RAM.
But assuming your CPU is a Core 2 Duo, as mentioned here
then it is not a very powerful CPU these days.
RAM would be the least expensive upgrade option. Next would be to replace the internal hard disk with an SSD, which will help a lot with the newer operating system versions.
are well respected Mac RAM vendors
MacSales.com will offer you some good choices for SSD disk replacements.
Or save the money, and limp along until you can afford a new Mac. I have take both routes. I’ve got a 2011 Macbook Pro that I added RAM and replaced the disk with an SSD. I used that configuration for a few years, and then just last month I got a new Macbook Pro. I also added RAM and an SSD to a 2009 27″ iMac with an i7 quad-core CPU. The iMac is still being used all day long at work and runs fantastic.
If the Mac mini had a alternate use in your home, such as a backup server, media server, etc. then I would add RAM, leave the disk alone, add external storage, and use it for that purpose (I use a Mac mini as a backup server in my home). Then I would get a new Mac for the PhotoShop and XCode work. I realize that is going to cost a lot of money, but I do not see a lot of life for the Core 2 Duo CPU.
NOTE: I am closer to retirement, so my financial situation gives me more flexibility and you should not based you decision just on what I would do.
Источник
Китайские умельцы добавили памяти в Mac Mini на M1 — вместо 8 ГБ ОЗУ и 256 ГБ SSD припаяли 16 ГБ и 1 ТБ
 Чипы ОЗУ в новом Mac Mini расположены максимально близко к системе на кристалле (SoC) Apple М1.
В начале апреля 2021 года пользователь Twitter по ником DuanRui рассказал, что китайские умельцы проапгрейдили память Mac Mini на M1 в минимальной комплектации. Вместо 8 ГБ ОЗУ они припаяли два модуля на 16 ГБ и расширили внутренний накопитель до 1 ТБ, штатный был на 256 ГБ.
Максимальный объем ОЗУ для чипа M1 составляет 16 ГБ памяти LPDDR4X-4266.

Китайские ремонтники смогли без проблем снять два штатных банка памяти и заменить их на два новых по 8 ГБ.

Чипы внутреннего накопителя умельцы также поменяли на две новые микросхемы флэш-памяти NAND по 512 ГБ.
Китайские специалисты пояснили, что после апгрейда Mac Mini на M1 заработал штатно и никаких модификаций прошивки для него им делать не потребовалось. Единственный минус — потеря гарантии производителя на устройство.
10 ноября 2020 года Apple представила MacBook Air, MacBook Pro 13 и Mac mini на новых ARM-процессорах M1.
В конце декабря 2020 года эксперты проанализировали внутренности чипа Apple M1 и сравнили их с системой на кристалле A14 Bionic.
Источник


