Usb uvc camera android
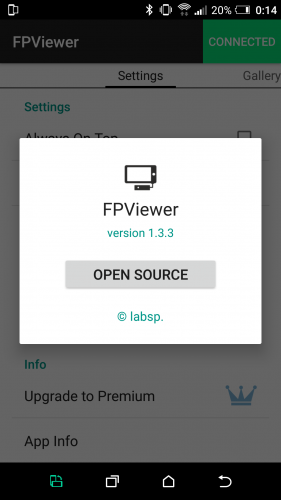
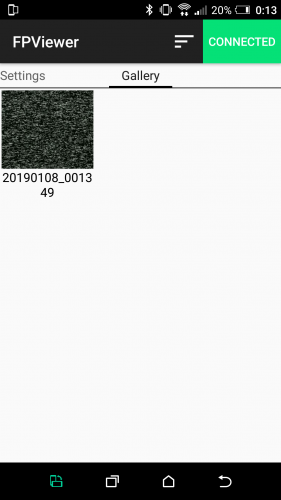
FPViewer (Easycap & UVC Player)
версия: 1.3.3
Последнее обновление программы в шапке: 07.01.2019
Краткое описание:
Вывод изображения на экран Android устройства с подключенной камеры или FPV-приемника (UVC-камеры).
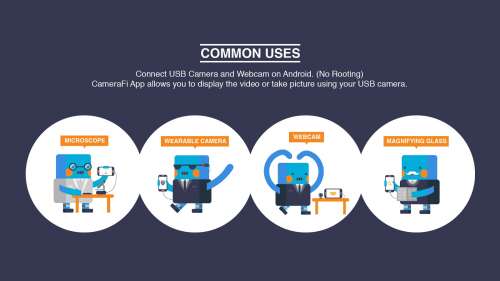
FPViewer — это приложение для отображения аналогового видео с помощью устройства захвата видео UVC (Easycap и т.п.), подключенного с помощью кабеля OTG к устройству Android (root-доступ не требуется).
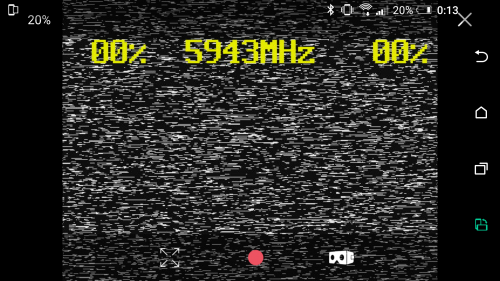
Кроме того, FPViewer предлагает оптимизированную функцию, позволяющую использовать устройства Android в качестве монитора FPV.
Возможности:
Отображение аналогового видео с помощью устройства захвата видео Easycap на устройстве Android.
Поддерживается только версия Easycap для UTV007, HTV600, HTV800 и не поддерживается аудиовход.
Работа в качестве FPV монитора для приемников FPV (5.8 ГГц)
Работает с приемниками Eachine ROTG01 / ROTG02, ATX03, R051 и т.п.
Отображение аналогового видео с помощью устройства захвата видео (UVC) на устройстве Android.
(Функция аналогична Easycap).
Кроме того, если USB-камера имеет тип UVC, вы можете использовать камеру с этим приложением (поддерживается только разрешение 640×480).
Запись видео
Сохранение отображаемого видео в формате MP4. (Android 4.3 или выше)
Разделение изображения для работы с очками VR
Поддержка режима Side by Side (VR), так что вы можете использовать Android-устройство в качестве очков FPV.
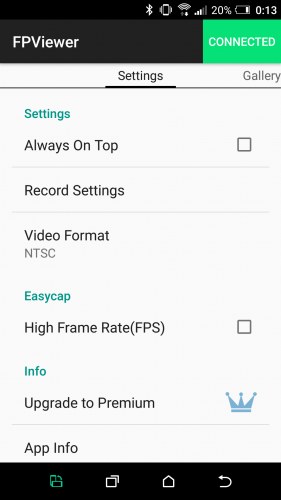
Always on Top
Возможно установить видеоокно на передний план. При этом экран просмотра никогда не исчезнет, даже если вы получите телефонный звонок или текстовое уведомление.
Требуется Android: 4.1 и выше
Русский интерфейс: Нет
Скачать: версия: 1.3.3 FPViewer-v1.3.3-NoAd-v0.1.apk ( 1.35 МБ ) FPViewer_v1.3.3.apk ( 1.35 МБ )
Источник
Usb uvc camera android
CameraFi — USB Camera / Webcam
версия: 2.21.1.0817
Последнее обновление программы в шапке: 23.08.2018
Краткое описание:
Захват фото и видео с внешней USB камеры.
Описание:
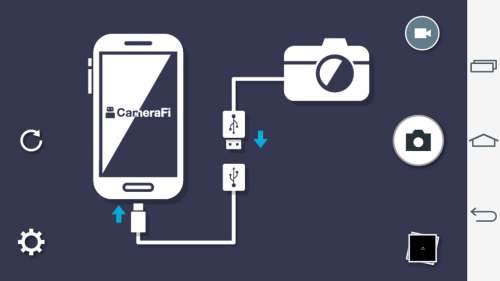
Приложение для отображения и записи видео и захвата фото с USB камеры, подключенной к устройству
Тестовая версия, функции могут быть добавлены и удалены без уведомления.
*Характеристики:
Формат видео:
— SD (640×480), HD (1280×720), Full HD (1920×1080) и т.д.
— Возможна установка разрешения дисплея, поддерживаемого камерой.
Запись видео (пока без звука).
Захват фото.
Отображение статуса подключенной камеры.
Возможность выбора камеры для многокамерной конфигурации.
Встроенный проводник.
Проверка обновлений.
*Ограничения:
По камерам ограничений нет. Обязательна поддержка USB-OTG устройством.
Список протестированных камер и устройств: http://vaultmicro.blog…ed-android-device.html
Отображение на фото логотипа компании.
Требуется Android: 4.1+
Русский интерфейс: Есть, начиная с версии 2.11.4.0525.
версия: 2.19.10.0208 CameraFi — USB Camera / Webcam (Пост Djek-Energetik #71626466)
версия: 2.18.1.1026 CameraFi — USB Camera / Webcam (Пост sserratty #67683236)
версия: 2.16.13.0419 CameraFi — USB Camera / Webcam (Пост aleha81 #60533553)
версия: 2.16.12.0417 CameraFi — USB Camera / Webcam (Пост aleha81 #60533553)
версия: 2.16.10.0405 CameraFi — USB Camera / Webcam (Пост aleha81 #60236812)
версия: 2.16.1.0313 CameraFi — USB Camera / Webcam (Пост aleha81 #59394267)
версия: 2.15.5.0105 + Premium CameraFi — USB Camera / Webcam (Пост aleha81 #56810567)
версия: 2.15.1.1102 CameraFi — USB Camera / Webcam (Пост aleha81 #56810567)
версия: 2.13.8.1027 CameraFi — USB Camera / Webcam (Пост aleha81 #54533446)
версия: 2.12.8.0722 CameraFi — USB Camera / Webcam (Пост aleha81 #51556916)
версия: 2.11.4.0525 + Rus + Full CameraFi — USB Camera / Webcam (Пост aleha81 #49951960)
версия: 2.10.13.0415 CameraFi — USB Camera / Webcam (Пост aleha81 #48974242)
версия: 2.9.2.0120 CameraFi — USB Camera / Webcam (Пост aleha81 #46413074)
версия: 2.8.1.1229 CameraFi — USB Camera / Webcam (Пост aleha81 #45735792)
версия: 2.7.9.1130 CameraFi — USB Camera / Webcam (Пост aleha81 #44958760)
версия: 2.6.4.1110 CameraFi — USB Camera / Webcam (Пост aleha81 #44403141)
версия: 2.5.4.1020 CameraFi — USB Camera / Webcam (Пост aleha81 #44027131)
версия: 2.4.8.1005 CameraFi — USB Camera / Webcam (Пост aleha81 #43512292)
версия: 2.3.5.0907 CameraFi — USB Camera / Webcam (Пост aleha81 #42799293)
версия: 2.2.2.0811 CameraFi — USB Camera / Webcam (Пост aleha81 #42178884)
версия: 2.1.4.0727 CameraFi — USB Camera / Webcam (Пост aleha81 #41844826)
версия: 2.0.1.0716 CameraFi — USB Camera / Webcam (Пост aleha81 #41552117)
версия: 1.4.2.0610 CameraFi — USB Camera / Webcam (Пост aleha81 #40778014)
версия: 1.3.10.0528 CameraFi — USB Camera / Webcam (Пост aleha81 #40445626)
версия: 1.2.2.0312 CameraFi_1.2.2.0312.apk ( 2.54 МБ )
Сообщение отредактировал $iLence — 23.08.18, 11:37
Производитель — Модель — Расшифровка модели — версия андроид
Acer — Iconia One7 — B1-730HD — 4.3
ASUS — Nexus7 — Nexus7 — 4.1.2
ASUS — Nexus7 — Nexus7 — 4.4.2
HTC — Htc One(m8) — One_M8 — 5.0.1
HTC — Nexus9 — Nexus9 — 5.0.1
LG — G Pro 2 — LG-F350L — 4.4.2
LG — G2 — LG-F320L — 4.4.2
LG — G2 — LG-F320S — 4.4.2
LG — G3 — LG-D855 — 4.4.2
LG — G3 — LG-F400L — 4.4.2
LG — G3 — LG-F400S — 4.4.2
LG — G3 — LG-F400S — 5.0
LG — Nexus5 — Nexus5 — 4.4.2
LG — Optimus G Pro — LG-F240L — 4.4.2
Motorola — Moto E — —
Motorola — Nexus6 — Nexus6 — 5.0.1
Pantech — Vega Iron — IM-A870L — 4.4.2
Pantech — Vega Iron2 — IM-A910K — 4.1.2
Pantech — Vega Iron2 — IM-A910K — 4.4.2
Pantech — Vega No6 — IM-A860L — 4.4.2
Pantech — Vega No6 — IM-A860S — 4.1.2
Pantech — Vega Popup Note — IM-A920S — 4.4.2
Pantech — Vega R3 — IM-A850L — 4.1.2
Pantech — Vega R3 — IM-A850S — 4.1.2
Pantech — Vega Secret Note — IM-890L — 4.4.2
Pantech — Vega Secret Note — IM-890S — 4.4.2
Pantech — Vega Secret Up — IM-A900L — 4.4.2
Pantech — Vega Secret Up — IM-A900S — 4.4.2
Samsung — Galaxy Alpha — SM-G850L — 4.4.4
Samsung — Galaxy Mega — SHV-E310L — 4.4.2
Samsung — Galaxy Note 1 — SHV-E160L — 4.1.2
Samsung — Galaxy Note 10.1 — SHV-E230L — 4.4.4
Samsung — Galaxy Note 2 — SHV-E250L — 4.4.2
Samsung — Galaxy Note 3 — SM-N900L — 4.4.2
Samsung — Galaxy Note 3 — SM-N900S — 4.4.2
Samsung — Galaxy Note 3 Neo — SM-N750L — 4.3
Samsung — Galaxy Note 4 — SM-N910L — 4.4.4
Samsung — Galaxy Note Edge — SM-N915L — 4.4.4
Samsung — Galaxy S3 — SHV-E210K — 4.1.2
Samsung — Galaxy S3 — SHV-E210L — 4.3
Samsung — Galaxy S4 — GT-I9405 — 4.4.4
Samsung — Galaxy S4 — SHV-E300L — 4.4.2
Samsung — Galaxy S5 — SM-G900L — 4.4.2
Samsung — Galaxy S5 — SM-G900L — 5.0
Samsung — Galaxy Tab S 10.5 — SM-T805 — 4.4.2
Samsung — Nexus10 — Nexus10 —
Sony — Xperia Tablet — SGP312 — 4.3
TECLAST — X89 DUAL — X89 DUAL — 4.4.4
ECWOX Superscope C001 — Microscope
ECWOX Superscope K39 — Microscope
General Tool Product #57-4574-6 — Microscope
Logitech BCC950 ConferenceCam — Webcam
Logitech HD Pro Webcam C270 — Webcam
Logitech HD Pro Webcam C920 — Webcam
Logitech HD Webcam C615 — Webcam
Logitech webcam C930e — Webcam
Microsoft LifeCam Studio — Webcam
Samsung SPC-A30M — Webcam
SJ-4000 — Actioncam
USB Electronic Eyepiece — Telescope
Проверена работа:*
A4Tech PK-810G VID_0ac8_&PID_3420 + HTC Desire 600 dual sim_htc_europe с прошивкой A4.2.1
Bravis MS-235 VID_18EC&PID_3399 + LG G2_D802 с прошивкой A5.0.2
Canyon CNR-WCAM820HD VID_0AC8&PID_3420 + Samsung Galaxy S4_GT-I9500 с прошивкой A5.0.1
Defender G-lens 2597 HD720p VID_0bda_&PID_58bb + HTC Desire 600 dual sim_htc_europe с прошивкой A4.2.1
HD Endoscope Camera VID_090C&PID_F37D + ASUS ZenFone 2 Laser_ZE500KG с прошивкой A5.0.2
HD Endoscope Camera VID_090C&PID_F37D + LG G2_D802 с прошивкой A5.0.2
HD Endoscope Camera VID_090C&PID_F37D + Samsung galaxy S6 Duos_SM-G920F с прошивкой A5.1.1
HD Endoscope Camera VID_090C&PID_F37D + Xiaomi Redmi Note 2_hermes с прошивкой A5.1.1
Lenovo EasyCamera VID_05E3&PID_0510 + Samsung Galaxy Note 3 SM-N900
Logitech Webcam C210 VID_046d_&PID_0819 + HTC Desire 600 dual sim_htc_europe с прошивкой A4.2.1
Logitech HD Webcam C270 VID_046D&PID_0825 + ASUS ZenFone 2 Laser_ZE500KG с прошивкой A5.0.2
Logitech HD Webcam C270 VID_046D&PID_0825 + LG G2_D802 с прошивкой A5.0.2
Logitech HD Webcam C270 VID_046D&PID_0825 + Samsung galaxy S6 Duos_SM-G920F с прошивкой A5.1.1
Logitech HD Webcam C270 VID_046D&PID_0825 + Xiaomi Redmi Note 2_hermes с прошивкой A5.1.1
USB2.0 PC CAMERA VID_1908&PID_2311 + Samsung Galaxy Note 3 SM-N900
USB2.0 PC CAMERA VID_1908&PID_2311 + Xiaomi Redmi 4X
*Список актуален и для программ, находящихся в шапке под спойлером «Программы с похожим функционалом»
За тесты, спасибо: aleha81, msenergy, totalstudio, yaguana67, VasAlex, petronick
Источник
Usb uvc camera android
Still under development.
This is a Android Studio Project. It connects to a usb camera from your Android Device. (OTG cabel or OTG Hub needed) (It works with Micro Usb and Usb Type C devices)
This Project was built to perform an Isochronous Video Stream from all Android Devices (Above 4.0.4 Ice Cream Sandwich)(Mediathek Devices too).
The app connects to USB Cameras via variable, different input values for the camera driver creation. In most cases you won’t need to set up your own camera driver, because other apps may do this for you automatically, but for some Android devices it could help to watch videos from Usb Cameras.
- LibUsb Support Added: LibUsb raises the performance of the standard Usb Device Driver.
(Some OTG cabels doesn’t work —> I’ll found one which is an extern powered more Port USB-C OTG cable and doesn’t work . ) (An non working OTG cable doesn’t show the right interfaces and endpoints of you camera: —> When you click on ‘List Up The Camera’ Button)
Since Android 9 Google made a mistake granting the Usb Permissions for Usb Cameras, so this app may not works on Android 9 + Devices —> https://issuetracker.google.com/issues/145082934
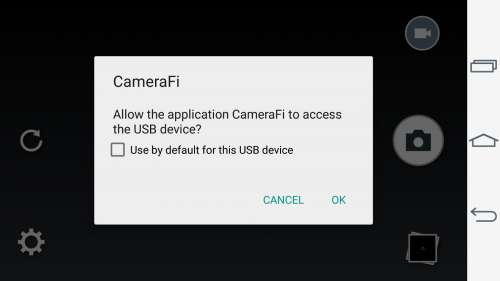
Explaination: Before you start with entering the Camera values, your Android device have to detect the Camera: So you click the Button and then the Button . The app will ask you for granting the permissions.

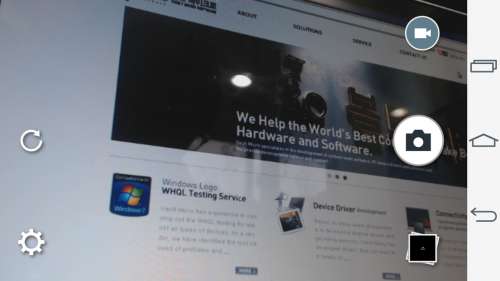
In the Picture above a camera was found and the Permissions to the Camera are granted. If no Camera is detected, you can nott use this app. (except of the WebRTC function). Next you have read out the camera Interfaces, to see if your camera is UVC complient. So you click the Button: :

Here you can see a sucessful return of an UVC compliant camera. The first Interface is always the ControlInterface and the second is always the Stream Interface. This Controlinterface (1st) has only 1 Endpoint. The StreamInterface could have more than one Endpoints (depends on the supported resolution of the camera). Here the Endpoint of the StreamInterface has a maxPacketSize of 3072 bytes (You need such a value later). (It could be, that your camera has an audio output, or Sd-Card output too, than see more than 2 Interfaces for your device). If those two Buttons work correctly, you can start to set up the UVC values: Click the Button to start the camera setup. You have two pissibilies: The and the Method. The method is in beta stadium for now, so if this button fails, you choose the method next time! The automatic method should find working camera values for its own, but this values may not be optimal for video transmission. To choose the right values for your own, you click on the Button.
Manual Method Explained: First you choose you Maximal Packet Size: You Camera may supports more Values for the MaxPacketSize, so you can test out each of them, which works best. If your phone uses a Mediathek Chipset you may choose the smallest value, but normaly you choose the highest value! Click on and proceed to the Packets Per Request selection: The Values you select builds the size of the Stream. This means if you select higher Values (such as 32 or more ..) you stream gets bigger, but there may could result error from your device or the camera because of a too large amount of data. For the start you select 1 for this Value. (This would be definitly to less, but you can raise it later) .. Next Sceen shows the ActiveUrbs (actice Usb Request Blocks) —> This is also a value which represents the size of the camera stream. One Block of the activeUrbs is exactly the maxPacketSize x packetsPerRequest. You can select 1 for the start (You will have to raise it later ..) Then the Setup Method will ask you for the Camera Format, which your camera supports. If there is only one format, you click on , if there were more, you select one (does not matter which one) (eventually MJpeg if present) and click on . Next you have to select you Camera Resolution, which you camera supports with the Format (perhaps your camera supports other resolutions, with the other Format . ). Select something . and click on Then you have to select the Frame Interval, which your camera supports. You can click on a Value (maybe the lowest on displayed on the screen, because it is better for the setup. You can save your Entries now: Click on to save this values (you do not need to run the method again, if you have finished the setup and found some working values . If you click on in the next screen —> an automatic name will be taken from the camera to save the file. You can also enter a unique name or enter the value, which is displayed on the bottom, to choose an existing file.

The picture shows the output of the sucessful setup: Now you want to know, if your Camera works with your selected Values. So you start the comunication with your camera by clicking on the Button and then you select the first entry
![]()
If you output is the same like on the Picture above, you have sucessfuly initialized your camera with your selected values. If you do not get a sucessful output of this Button (Video Probe-Commit Control) you can not use the app with your phone / camera. If this output fails, you may contact the developer or try to run the manual Uvc setup method again. If you were sucessful, then you can proceed with reading out the camera frames (first only over the Text View, because your frames may be corrupted or too short or .. To receive some data from your camera, your press the Button again and then on and then on . You then should receive the first frame data from your camera.

The first data which was received on the picture above, were 39950 byte in this case. This means that the camera communicats with the android device and trys to submit the frame data. But the data received above is much to less for a frame Image of a sample size of 640 x 480. So tbe Values «ActiveUrbs» and «PacketsPerRequest» should be raised to get a better output: in my case to 16 Packets and 16 Urbs. If you were not able to get the frame data from your camera, then re-run the manual setup method and change same values. (lower the maxPacketSize, raise activeUrbs, raise packetsPerRequest). To raise the vales for (packetsPerRequest and activeUrbs) you can re-run the setup method or you click on the Button There you should only change the values for these two values (packetsPerRequest and activeUrbs). If you re-run the manual method, you can keep your values by clicking on done, or type in new values to change em.

Here you see, that the frame now gots larger —> 614400 —> this is exact the size of imageWidth x ImageHight x 2 —> 640 x 480 x 2. So in the shown case, the correct setting was found and now the camera setup is finished! Sometimes cameras compresses the frames they send to the devices, so in some cases you have to receive frames with a nearly same size too each other (use the 2nd method from the testrun menu —> «Frames for 5 seconds») When all frames are identically (or nearly) and also all methods above were sucessful, you have sucessfuly finish the setup. You will sure have to spend more time to figure out the right values, but if you have found them, save them and later you can easy restore them any time. If you want to delete some savefiles you will have to manually do this with a file explorer (but only this one you do not need any more) To the Button «Frames for 5 secound»: Have a look at your frames: If they are all identically and big enougth, than you can proceed to start the camera stream with the button from the main screen. Otherwise you have to edit some values for your camera: Perhaps -PacketsPerRequest- or -ActiveUrbs-, or something else. Click the —> Button to start the transmission. If everything works, you can watch the video of your camera.
Descripton of the Camera Values:
Alt-Setting: The Alt-Setting is a camera specific setting which defines which interface of your camera shall be used for the isochronous data transfer.
Maximal-Packet-Size: Each Alt-Setting has its own Maximal-Packet-Size. The Maximal-Packet-Size is byte Number which defines how many bytes each Packet of the iso transfer maximal contains.
Format-Index: Your Camera can support different Format Indexs. This could be MJPEG, or uncompressed (YUV) or .
Videoformat: This is a helper value, which has to be set to your selected Format-Index. You have to enter YUV, or MJPEG, or .
Frame-Index: Each Format-Index of your camera can have different Frame Indexs. This is a number which represents the camera resolution (1920×1020, or 640×480)
Image-Width, Image-Hight: This are helper values, which have to be set to your selected Frame-Index. For Example: Image-Width = 640 and Image-Hight = 480
Frame-Interval: The Frame-Interval is a number which defines, on how much nano secounds each new frame will be sent from the camera to your device.For example: 666666 means each 0,066 Secounds a frame is sent. 666666 = 15 frames per secound.333333 are 30 Frames per secound
Packets-Per-Request: This is a value wich defines how many Packet will be sent from your camera to your device in one cycle of the transfer.
Active-Urbs: And this value defines have many cycles are running paralell to each other in the data steam between camera and Android device.
Источник


