- Android — Notifications
- Create and Send Notifications
- Step 1 — Create Notification Builder
- Step 2 — Setting Notification Properties
- Step 3 — Attach Actions
- Step 4 — Issue the notification
- The NotificationCompat.Builder Class
- Example
- Big View Notification
- Полный список
- Отображение
- Обновление
- Несколько уведомлений
- Удаление
- Обработка нажатия
Android — Notifications
A notification is a message you can display to the user outside of your application’s normal UI. When you tell the system to issue a notification, it first appears as an icon in the notification area. To see the details of the notification, the user opens the notification drawer. Both the notification area and the notification drawer are system-controlled areas that the user can view at any time.
Android Toast class provides a handy way to show users alerts but problem is that these alerts are not persistent which means alert flashes on the screen for a few seconds and then disappears.
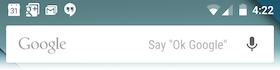
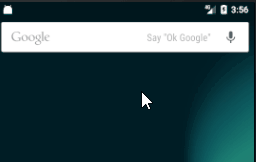
To see the details of the notification, you will have to select the icon which will display notification drawer having detail about the notification. While working with emulator with virtual device, you will have to click and drag down the status bar to expand it which will give you detail as follows. This will be just 64 dp tall and called normal view.
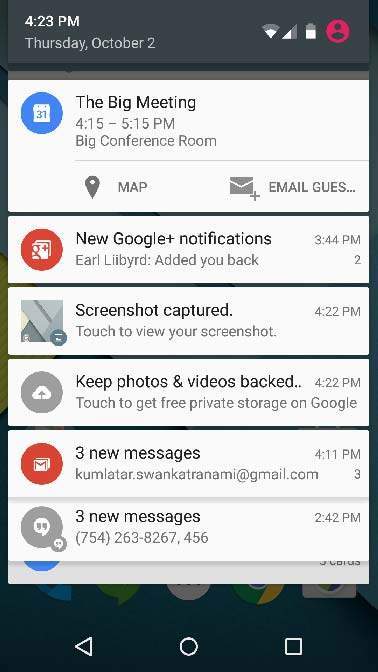
Above expanded form can have a Big View which will have additional detail about the notification. You can add upto six additional lines in the notification. The following screen shot shows such notification.
Create and Send Notifications
You have simple way to create a notification. Follow the following steps in your application to create a notification −
Step 1 — Create Notification Builder
As a first step is to create a notification builder using NotificationCompat.Builder.build(). You will use Notification Builder to set various Notification properties like its small and large icons, title, priority etc.
Step 2 — Setting Notification Properties
Once you have Builder object, you can set its Notification properties using Builder object as per your requirement. But this is mandatory to set at least following −
A small icon, set by setSmallIcon()
A title, set by setContentTitle()
Detail text, set by setContentText()
You have plenty of optional properties which you can set for your notification. To learn more about them, see the reference documentation for NotificationCompat.Builder.
Step 3 — Attach Actions
This is an optional part and required if you want to attach an action with the notification. An action allows users to go directly from the notification to an Activity in your application, where they can look at one or more events or do further work.
The action is defined by a PendingIntent containing an Intent that starts an Activity in your application. To associate the PendingIntent with a gesture, call the appropriate method of NotificationCompat.Builder. For example, if you want to start Activity when the user clicks the notification text in the notification drawer, you add the PendingIntent by calling setContentIntent().
A PendingIntent object helps you to perform an action on your applications behalf, often at a later time, without caring of whether or not your application is running.
We take help of stack builder object which will contain an artificial back stack for the started Activity. This ensures that navigating backward from the Activity leads out of your application to the Home screen.
Step 4 — Issue the notification
Finally, you pass the Notification object to the system by calling NotificationManager.notify() to send your notification. Make sure you call NotificationCompat.Builder.build() method on builder object before notifying it. This method combines all of the options that have been set and return a new Notification object.
The NotificationCompat.Builder Class
The NotificationCompat.Builder class allows easier control over all the flags, as well as help constructing the typical notification layouts. Following are few important and most frequently used methods available as a part of NotificationCompat.Builder class.
| Sr.No. | Constants & Description | |||||||||||||||
|---|---|---|---|---|---|---|---|---|---|---|---|---|---|---|---|---|
| 1 |
| Step | Description |
|---|---|
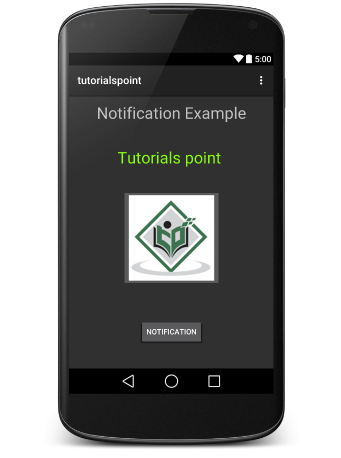
| 1 | You will use Android studio IDE to create an Android application and name it as tutorialspoint under a package com.example.notificationdemo. |
| 2 | Modify src/MainActivity.java file and add the code to notify(«»), if user click on the button,it will call android notification service. |
| 3 | Create a new Java file src/NotificationView.java, which will be used to display new layout as a part of new activity which will be started when user will click any of the notifications |
| 4 | Modify layout XML file res/layout/activity_main.xml to add Notification button in relative layout. |
| 5 | Create a new layout XML file res/layout/notification.xml. This will be used as layout file for new activity which will start when user will click any of the notifications. |
| 6 | No need to change default string constants. Android studio takes care of default string constants |
| 7 | Run the application to launch Android emulator and verify the result of the changes done in the application. |
Following is the content of the modified main activity file src/com.example.notificationdemo/MainActivity.java. This file can include each of the fundamental lifecycle methods.
Following will be the content of res/layout/notification.xml file −
Following is the content of the modified main activity file src/com.example.notificationdemo/NotificationView.java.
Following will be the content of res/layout/activity_main.xml file −
Following will be the content of res/values/strings.xml to define two new constants −
Following is the default content of AndroidManifest.xml −
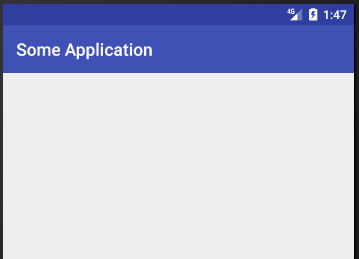
Let’s try to run your tutorialspoint application. I assume you had created your AVD while doing environment set-up. To run the APP from Android Studio, open one of your project’s activity files and click Run  icon from the toolbar. Android Studio installs the app on your AVD and starts it and if everything is fine with your setup and application, it will display following Emulator window −
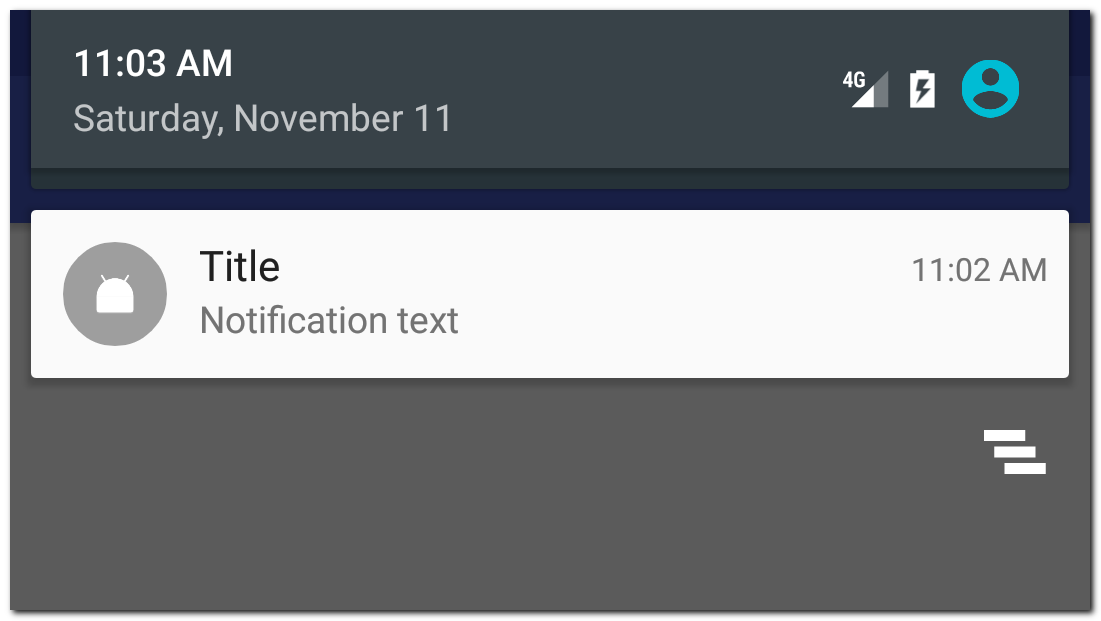
Now click button, you will see at the top a message «New Message Alert!» will display momentarily and after that you will have following screen having a small icon at the top left corner.
Now lets expand the view, long click on the small icon, after a second it will display date information and this is the time when you should drag status bar down without releasing mouse. You will see status bar will expand and you will get following screen −
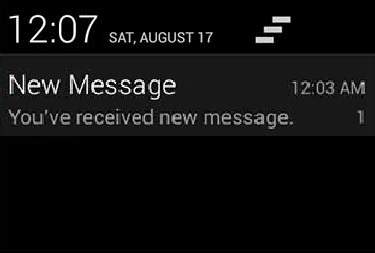
Big View Notification
The following code snippet demonstrates how to alter the notification created in the previous snippet to use the Inbox big view style. I’m going to update displayNotification() modification method to show this functionality −
Now if you will try to run your application then you will find following result in expanded form of the view −
Источник
Полный список
Notifications — это уведомления, которые пользователь видит в верхней части экрана, когда ему приходит новое письмо, сообщение, обновление и т.п. В ближайшие несколько уроков мы подробно разберем, какие возможности предоставлены разработчикам для показа уведомлений.
В этом уроке рассмотрим основы — отображение/обновление/удаление уведомления и обработка нажатия на него.
Отображение
Код создания простого уведомления выглядит так:
Используем билдер, в котором указываем иконку, заголовок и текст для уведомления. Методом build получаем готовое уведомление.
Далее используем NotificationManager и его метод notify, чтобы показать созданное уведомление. Кроме notification, требуется передать id. Это необходимо, чтобы в дальнейшем мы могли использовать этот id для обновления или удаления уведомления.
Конструктор new NotificationCompat.Builder(Context) будет помечен как Deprecated, если вы используете библиотеку appCompat версии 26 и выше. Так получилось потому, что в Android API 26 появился новый конструктор и рекомендуется использовать его. Пока не обращайте внимание на это. В одном из следующих уроков мы рассмотрим использование правильного конструктора.
Запустив этот код, мы увидим уведомление
Оно отображает иконку и два текста, которые мы указывали в билдере. Нажатие на него ни к чему не приведет, т.к. мы не реализовали обработчик нажатия. Мы это сделаем чуть позже.
Обновление
Мы отобразили уведомление и теперь хотим его обновить. Для этого нужно просто снова показать уведомление методом notify и использовать при этом тот же id.
Это будет выглядеть так:
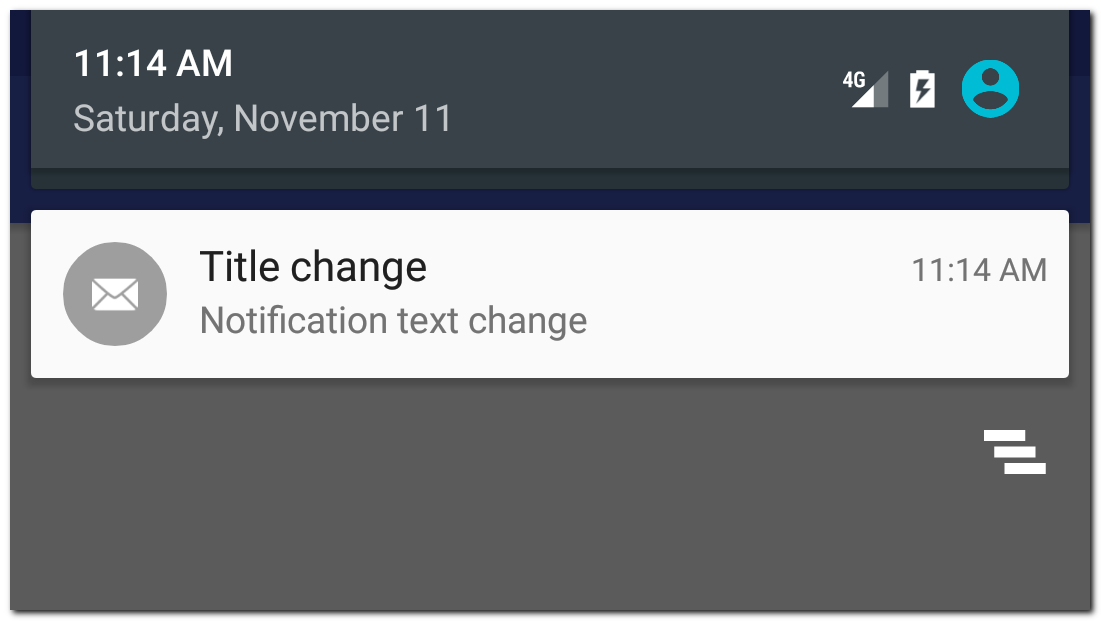
Код полностью аналогичен коду, что мы использовали при отображении уведомления. Только в билдере используем другие тексты и иконку. Самое главное, что в методе notify мы снова используем NotificationManager по этому id найдет уведомление, которое мы отобразили чуть раньше и заменит его новым
Несколько уведомлений
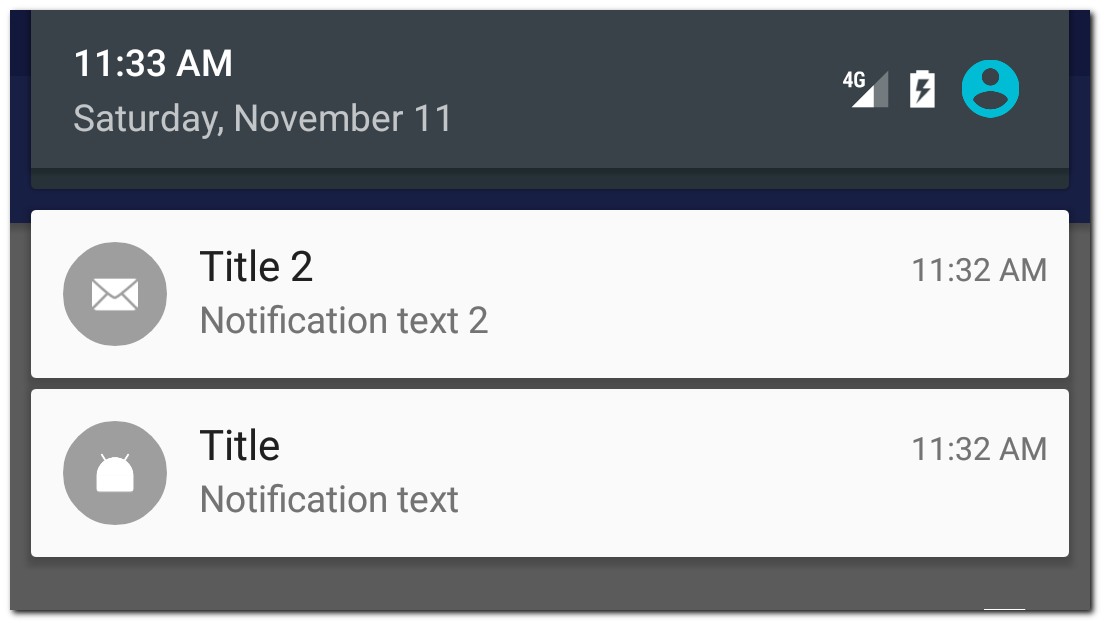
Чтобы показать новое уведомление, а не обновить уже существующее, надо использовать другой id в методе notify.
Мы использовали разные id в методе notify и получили два разных уведомления
Удаление
Чтобы удалить уведомление, используем NotificationManager и его метод cancel с указанием id уведомления.
Либо методом cancelAll можем удалить все уведомления сразу
При удалении уведомления нет необходимости проверять, отображается оно или нет. Если уведомления по каким-то причинам уже нет, то просто ничего не произойдет.
Обработка нажатия
Чтобы выполнить какое-либо действие по нажатию на уведомление, необходимо использовать PendingIntent. PendingIntent — это контейнер для Intent. Этот контейнер может быть использован для последующего запуска вложенного в него Intent.
Мы будем создавать Intent для запуска, например, Activity, упаковывать этот Intent в PendingIntent и передавать PeningIntent в уведомление. По нажатию на уведомление, система достанет из него PedningIntent и использует вложенный в него Intent, чтобы запустить Activity.
Давайте посмотрим, как это выглядит на практике:
Создаем Intent для запуска Activity и упаковываем его в PedningIntent.
Подробно о PedningIntent и его параметрах вы можете почитать в Уроке 119. Там я подробно рассмотрел различные кейсы на примерах с уведомлением и вызовом BroadcastReceiver.
Созданный PendingIntent нам надо будет передать в билдер уведомления. Полный код создания уведомления будет выглядеть так:
Передаем PendingIntent в метод setContentIntent билдера уведомления.
По нажатию на уведомление откроется MainActivity
Обратите внимание, что уведомление не удаляется автоматически после нажатия на него. Чтобы исправить это, можно в билдере уведомления использовать включить параметр autoCancel
Уведомление, созданное с этим флагом будет закрываться после нажатия на него.
Билдер уведомления имеет еще несколько методов, которые могут быть полезны.
setNumber — позволяет добавить число в уведомление

setContentInfo — добавит текст справа
В старых версиях это выглядит так
![]()
В последних версиях он переехал в верхнюю часть уведомления
![]()
setColor — добавит фоновый цвет к иконке

setWhen — можно указать свое время для уведомления (время when). По умолчанию when = времени создания уведомления
setShowWhen — показывать ли время в уведомлении
setUsesChronometer — вместо статичного времени в уведомлении будет отображаться счетчик (00:00), показывающий сколько прошло от времени when. Может быть полезно для уведомления секундомера или звонка.
setOngoing — такое уведомление пользователь не сможет закрыть или смахнуть. Оно будет отображаться поверх обычных уведомлений.
setVibrate, setSound, setLights — настройки вибры, звука и LED индикатора устройства
setPriority — возможность установить приоритет. Доступные значения от -2 (NotificationCompat.PRIORITY_MIN) до 2 (NotificationCompat.PRIORITY_MAX). Поведение может отличаться на разных версиях Android, но общий смысл одинаков — чем выше приоритет, тем выше вероятность того, что пользователь увидит ваше уведомление.
setTimeoutAfter — возможность установить таймаут (в мсек), после которого уведомление само удалится. Добавлен в API 26.
setLargeIcon — возможность задать свою картинку в качестве иконки уведомления.
Иконка из setSmallIcon будет видна в статусбаре, когда панель уведомлений не раскрыта.
А само уведомление будет выглядеть так:

setProgress — возможность отобразить прогрессбар в уведомлении
У метода три параметра:
max — максимальное значение прогрессбара. Укажите 0, если надо скрыть прогрессбар.
progress — текущее значение прогрессбара. Может быть от 0 до max.
indeterminate — если true, то будет показан «бесконечный» прогрессбар
Сначала отображаем бесконечный прогрессбар и текст Preparing. Т.е. делаем вид, что идет подготовка к выполнению операции.
Затем в отдельном потоке имитируем выполнение операции. Каждые 300 мсек увеличиваем значение progress и обновляем уведомление, чтобы прогрессбар показал текущий прогресс. А также в тексте показываем значение прогресса и максимума.
После выполнения операции скрываем прогрессбар и показываем текст Completed.
Повторюсь, очень рекомендую прочесть и понять Урок 119. В нем я подробно рассматриваю, почему PendingIntent последнего уведомления заменяет PendingIntent предыдущих уведомлений, и как этого можно избежать, используя, например, requestCode.
Присоединяйтесь к нам в Telegram:
— в канале StartAndroid публикуются ссылки на новые статьи с сайта startandroid.ru и интересные материалы с хабра, medium.com и т.п.
— в чатах решаем возникающие вопросы и проблемы по различным темам: Android, Kotlin, RxJava, Dagger, Тестирование
— ну и если просто хочется поговорить с коллегами по разработке, то есть чат Флудильня
— новый чат Performance для обсуждения проблем производительности и для ваших пожеланий по содержанию курса по этой теме
Источник


