- Русские Блоги
- Некоторые небольшие методы в разработке под Android
- 1. Проверьте температуру процессора.
- Два, связанные методы отладки мастера запуска
- 1. В отладочной версии пропускается программа мастера загрузки.
- 2. программа мастера перезагрузки отладки
- 3. Отладка журнала мастера загрузки
- 4. Как в коде пропустить мастер загрузки
- В-третьих, проверьте время запуска приложения
- 1. Используйте команду adb для записи журнала.
- 2. Узнайте, как запустить несколько приложений из холодного состояния.
- В-четвертых, метод определения версии user и userdebug.
- В-пятых, измените путь хранения снимков экрана по умолчанию.
- 6. Проанализировать метод дампа ядра.
- 1. Добавьте все файлы системного дампа в один файл.
- 2. Используйте соответствующую версию vmlinux для анализа файла дампа.
- 3. Отладка после успешного анализа
- 7. SPRD по умолчанию включает Ylog и метод включения dumpsys.
- 8. Как определить, проверяет ли его обезьяна
- Девять, способ изменения режима журнала MTK
- Десять, платформа MTK только открыть метод мобильного журнала
- 11. Платформа SPRD только открывает метод журнала Android
- 12. Энергопотребление платформы SPRD Меры предосторожности при ведении журнала
- 13. Получить название пакета Top Activity
- 14. Измените приветственное сообщение мастера запуска Google.
- 15. Измените секунды отображения времени в строке состояния.
- 16. Оценка многопользовательского метода
- Интеллектуальная рекомендация
- Многослойная презентацияViewController Jap
- Распечатать список с конца до головы
- Типы данных и переменные
- Python Daily Practice (4) -идиомы заполняют музыку
- Методы лечения различных ошибок в Android Studio при разработке проекта
- ADB Shell Commands
- In this document
- Issuing Shell Commands
- Using activity manager (am)
- Specification for arguments
- Using package manager (pm)
- Taking a device screenshot
- Recording a device screen
- Other shell commands
Русские Блоги
Некоторые небольшие методы в разработке под Android
Непрерывное обучение с вами, вот и программист Android
Эта статья в основном вводит Android Некоторые моменты в разработке, прочитав эту статью, вы получите следующее:
1. Проверьте температуру процессора.
Два, связанные методы отладки мастера запуска
В-третьих, проверьте время запуска приложения
В-четвертых, метод определения пользователя, версия userdebug
В-пятых, измените путь хранения снимков экрана по умолчанию.
6. Проанализировать метод дампа ядра.
7. SPRD по умолчанию включает Ylog и метод включения dumpsys.
8. Как определить, проверяет ли его обезьяна
Девять, способ изменения режима журнала MTK
10. Платформа MTK открывает только метод мобильного журнала.
11. Платформа SPRD только открывает метод журнала Android
12. Энергопотребление платформы SPRD Меры предосторожности при ведении журнала
13. Получить название пакета Top Activity
14. Измените приветственное сообщение мастера запуска Google.
15. Измените секунды отображения времени в строке состояния.
16. Оценка многопользовательского метода
1. Проверьте температуру процессора.
1. Используйте ADB для просмотра температуры процессора (отладочная версия)
Просмотрите команду CPU следующим образом:
2. Просмотрите соответствующую классификационную информацию о содержимом, возвращаемом ЦП.

Метод команды просмотра температуры процессора
Температура процессора, если смотреть отсюда, содержит три цифры после десятичной точки, а десятичная точка опущена.Этот метод подходит для платформы MTK.
3. Проверить температуру процессора в журнале MTK
Ключевые слова для поиска в журнале ядра T_AP Проверьте температуру процессора.

Найдите T_AP в журнале ядра, чтобы просмотреть температуру процессора
Два, связанные методы отладки мастера запуска
1. В отладочной версии пропускается программа мастера загрузки.
1. Нажмите четыре ярлыка.
Непрерывно касайтесь четырех углов экрана (верхний левый -> верхний правый -> нижний правый -> нижний левый), чтобы пропустить мастер загрузки.
2. Команда adb отключить мастер загрузки
2. программа мастера перезагрузки отладки
Пропустив мастер загрузки и вы захотите перезапустить мастер загрузки, вы можете попробовать следующую команду.
1. Сбросьте установленное значение после завершения работы мастера загрузки.
Команда выглядит следующим образом:
2. Сделайте мастер загрузки доступным и запустите
После мастера загрузки будет установлен мастер загрузки apk недоступен.
На этом этапе мы должны установить мастер загрузки на enble положение дел.
3. Отладка журнала мастера загрузки
Откройте отладку мастера загрузки Log Способ такой:
4. Как в коде пропустить мастер загрузки
Метод пропуска мастера загрузки в коде следующий:
В-третьих, проверьте время запуска приложения
1. Используйте команду adb для записи журнала.
adb logcat | findstr Displayed
Или прямо возьмите журнал adb и выполните поиск по ключевым словам Displayed

Статистика времени холодного старта приложения

Отображение ключевого слова для поиска в журнале adb
2. Узнайте, как запустить несколько приложений из холодного состояния.
Методика 10-кратной проверки холодного запуска Chrome выглядит следующим образом:
adb shell am start -S -R10 -W com.android.chrome/com.google.android.apps.chrome.Main
Результаты теста следующие:
В-четвертых, метод определения версии user и userdebug.
Проверьте Build.java и обнаружите, что это методы для скрытия внешнего apk, и могут использоваться только приложения, подписанные системной платформой.
В-пятых, измените путь хранения снимков экрана по умолчанию.
6. Проанализировать метод дампа ядра.
1. Добавьте все файлы системного дампа в один файл.
Сначала нам нужно записать журнал dumpsys, а затем добавить все файлы systemcore * в один файл.

Добавить все файлы sysdump в один файл
2. Используйте соответствующую версию vmlinux для анализа файла дампа.
Используйте команду crash_arm, чтобы проанализировать файл дампа
32-битная система используется следующим образом:
./crash_arm vmlinux all -m phys_base=0x80000000
Для 64-битных систем используйте следующие команды:
./crash_arm64 vmlinux all -m phys_offset=0x80000000
3. Отладка после успешного анализа
Метод анализа журнала после успешного анализа дампа
log > log.txt

Используйте команду log для чтения журнала в указанный файл
7. SPRD по умолчанию включает Ylog и метод включения dumpsys.
Изменить device\sprd\xxxx\common\rootdir\root\init.common.rc
в on post-fs-data Добавьте следующий контент:
8. Как определить, проверяет ли его обезьяна
Девять, способ изменения режима журнала MTK
Измените значения атрибутов, настроенные по следующему пути alps\device\mediatek\common\mtklog
воля false Изменить на true Вы можете открыть соответствующий журнал
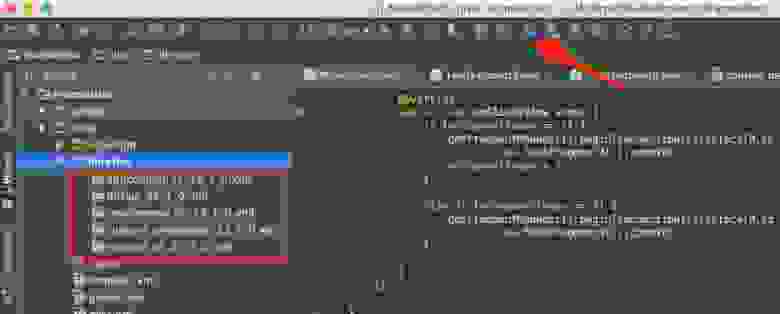
Десять, платформа MTK только открыть метод мобильного журнала
Введите пароль *#*#3646633#*#* ,войти MTK Logger Интерфейс, откройте правый верхний угол Logger Setting , Закрыть вручную, кроме Moblie Log За пределами выключателя.
Пожалуйста, смотрите рисунок ниже, чтобы узнать о способе закрытия:

mtk platform open Mobile log справочное изображение
11. Платформа SPRD только открывает метод журнала Android
Введите пароль *#*#83781#*#* ,войти SPRD Logger Интерфейс, откройте правый верхний угол Settings , Нажмите Custom scene , Закрыть кроме Android log Для других переключателей, пожалуйста, посмотрите рисунок ниже, чтобы узнать, как их выключить.

Справочная диаграмма открытого журнала Android на платформе СПРД
12. Энергопотребление платформы SPRD Меры предосторожности при ведении журнала
Только открыть Android Log ( Ссылка одиннадцать, платформа SPRD только открыть метод журнала Android )
включить PowerGuru log с участием wakelock log ;
Используйте следующую команду для сброса battery history
После завершения теста используйте следующую команду, чтобы захватить bugreport
в заключение andorid log с участием bugreport.zip Предоставьте их все.
13. Получить название пакета Top Activity
Метод получения Activity Top выглядит следующим образом:
14. Измените приветственное сообщение мастера запуска Google.
Неправильный язык приветствия мастера запуска на бенгальском языке, и заказчик попросил удалить метод языка приветствия в интерфейсе мастера запуска.
15. Измените секунды отображения времени в строке состояния.
Платформа Spreadtrum изменяет строку состояния, второй метод отображения времени выглядит следующим образом
Войдите в настройки-система-интерфейс интерфейс тюнер-строка состояния-время-отображение часов, минут и секунд.
16. Оценка многопользовательского метода
Методика оценки нескольких пользователей заключается в следующем:
Дружественная рекомендация
На этом статья закончена. Если что-то не так, мы будем рады вашим предложениям и исправлениям. В то же время с нетерпением жду вашего внимания, спасибо за чтение, спасибо!

Поделитесь им с Moments, чтобы вы могли быстро их найти, когда будете использовать!
Интеллектуальная рекомендация
Многослойная презентацияViewController Jap
. Недавно, проект использует многоэтажные прыжки [A presentViewController: B animated: YES] [B presentViewController: C animated: YES] . Проблема в том, где: как это идет прямо к? Я не нашел ме.
Распечатать список с конца до головы
В случае, когда таблица цепи не может изменять дисплей, данные хранения стека могут рассматриваться с рекурсивным методом. Разрешить модификацию структуры ссылки.
Типы данных и переменные
тип данных Компьютерная программа может обрабатывать различные значения. Однако компьютеры могут обрабатывать гораздо больше, чем числовые значения. Они также могут обрабатывать различные данные, таки.

Python Daily Practice (4) -идиомы заполняют музыку
оглавление 1. Одно место 2. Случайное расположение 3. Добавьте баллы для оценки 4. Получение файла 5. Установите уровень сложности. 6. Срок завершения 7. Выберите заполнение пропусков. 1. Одно место Н.
Источник
Методы лечения различных ошибок в Android Studio при разработке проекта
Сегодня хотел бы поделиться своим анализом и способами лечением разных ошибок при разработке своего продукта в Android Studio. Лично я, не раз сталкивался с различными проблемами и ошибками при компиляции и/или тестировании мобильного приложения. Данный процесс, всегда однообразный и в 99% случаев и всегда нужно тратить n-колличество времени на его устранение. Даже, когда ты уже сталкивался с данной проблемой, ты все равно идешь в поисковик и вспоминаешь, как же решить ту или иную ситуацию.
Я для себя завел файлик, в котором отметил самые частые ошибки — потратив на это несколько часов и перечислил самые популярные ошибки (в дальнейшем планирую просто их запомнить), чтоб сократить свое время в дальнейшем.
Итак, начну по порядку с самой распространенной проблемы и дальше буду перечислять их по мере появления:
1) Если подчеркивает красным код, где используются ресурсы: R. — попробовать (но вероятно не поможет): Build -> Clean Project.
В принципе на Build -> Clean Project можно не терять времени, а лучше всего — слева переключиться на Project, открыть каталог .idea, затем каталог libraries и из него удалить все содержимое. Затем нажать кнопку Sync Project. А затем (если все еще красное, но скорее всего уже будет все ок ) Build -> Clean Project.
2) После внезапного выключения компьютера, после перезапуска может быть во всех проектах весь код красным. Перед этим может быть ошибка: Unable to create Debug Bridge: Unable to start adb server: Unable to obtain result of ‘adb version’. Есть три решения — первое помогло, второе нет (но может быть для другого случая), а третье — не пробовал:
а) File — Invalidate Caches/Restart — Invalidate and Restart
б) Закрыть студию. В корне папки проекта удалить файл(ы) .iml и папку .idea. Вновь запустить студию и импортировать проект.
в) Нажать Ctrl-Alt-O и запустить оптимизацию импорта.
Кстати, adb сервер можно проверить на версию (и работоспособность) и затем перезапустить:
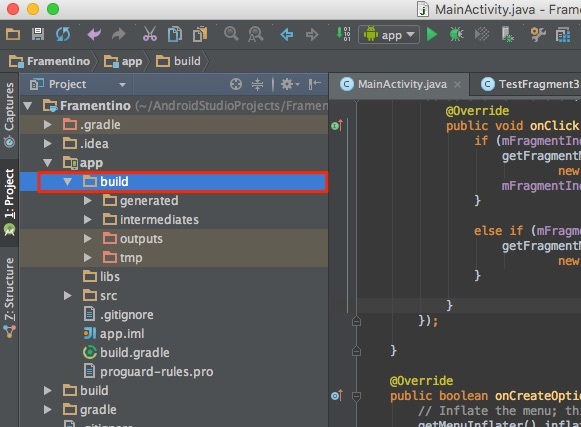
3) Если Android Studio выдает приблизительно такую ошибку: Error:Execution failed for task ‘:app:dexDebug’.
Надо слева переключиться на опцию Project, найти и удалить папку build которая лежит в папке app, т.е. по пути app/build. Затем перестроить весь проект заново: Build -> Rebuild Project.
Такое же решение если ошибка типа: «не могу удалить (создать) папку или файл» и указан путь, который в ведет в app/build. Тоже удаляем папку build и ребилдим проект.
4) В сообщении об ошибке упоминается heap — виртуальная память. А ошибка обычно вызвана ее нехваткой, т.е. невозможностью получить запрашиваемый объем. Поэтому этот запрашиваемый объем надо уменьшить, т.е. переписать дефолтное значение (обычно 2048 MB которое можно изменить в настройках), на меньшее 1024 MB.
В файле проекта gradle.properties пишем:

5) Android Studio пришет примерно такую ошибку: Plugin is too old, please update to a more recent version, or set ANDROID_DAILY_OVERRIDE environment variable to «83648b99316049d63656d7276cb19cc7e95d70a5»
Возможные причины (кроме необходимости регулярного обновления SDK):
а) Загруженный проект был скомпилирован с помощью уже несовместимого старого gradle плагина. В этом случае надо найти и подключить в своем build.gradle проекта этот более старый плагин. т.е. попробовать более старые версии, например: 1.1.3 (часто именно 1.1.x и подходит).
Найти все версии можно здесь.
б) Если в build.gradle проекта используется beta-версия плагина — это означает, что срок ее истек. Посмотреть последние релизы (продакшн и бета) можно также здесь:
6) Иногда при подключении сторонних библиотек могут дублироваться некоторые файлы (обычно связанные с лицензированием). В сообщении будет что-то содержащее слова: duplicate files. Решение — надо посмотреть в сообщении об ошибке или в документации подключенной сторонней библиотеки — какие именно файлы стали избыточными, и перечислить их в build.gradle модуля для исключения (exclude) из билда.
Это делается в директиве packagingOptions (которая, в свою очередь, находится в директиве android).
Источник
ADB Shell Commands
In this document
The Android Debug Bridge (adb) provides a Unix shell that you can use to run a variety of commands on an emulator or connected device. The command binaries are stored in the file system of the emulator or device, at /system/bin/.
Issuing Shell Commands
You can use the shell command to issue commands, with or without entering the adb remote shell on the emulator/device. To issue a single command without entering a remote shell, use the shell command like this:
Or enter a remote shell on an emulator/device like this:
When you are ready to exit the remote shell, press CTRL+D or type exit .
Using activity manager (am)
Within an adb shell, you can issue commands with the activity manager ( am ) tool to perform various system actions, such as start an activity, force-stop a process, broadcast an intent, modify the device screen properties, and more. While in a shell, the syntax is:
You can also issue an activity manager command directly from adb without entering a remote shell. For example:
Table 2. Available activity manager commands
| Command | Description | |||||||||||||||||||||||||||||||||||||||||||||||||||||||||||||
|---|---|---|---|---|---|---|---|---|---|---|---|---|---|---|---|---|---|---|---|---|---|---|---|---|---|---|---|---|---|---|---|---|---|---|---|---|---|---|---|---|---|---|---|---|---|---|---|---|---|---|---|---|---|---|---|---|---|---|---|---|---|---|
| start [options] | Start an Activity specified by . Options are:
| |||||||||||||||||||||||||||||||||||||||||||||||||||||||||||||
| startservice [options] | Start the Service specified by . Options are:
| |||||||||||||||||||||||||||||||||||||||||||||||||||||||||||||
| force-stop | Force stop everything associated with (the app’s package name). | |||||||||||||||||||||||||||||||||||||||||||||||||||||||||||||
| kill [options] | Kill all processes associated with (the app’s package name). This command kills only processes that are safe to kill and that will not impact the user experience. Options are:
| |||||||||||||||||||||||||||||||||||||||||||||||||||||||||||||
| kill-all | Kill all background processes. | |||||||||||||||||||||||||||||||||||||||||||||||||||||||||||||
| broadcast [options] | Issue a broadcast intent. Options are:
| |||||||||||||||||||||||||||||||||||||||||||||||||||||||||||||
| instrument [options] | Start monitoring with an Instrumentation instance. Typically the target is the form / . Options are:
| |||||||||||||||||||||||||||||||||||||||||||||||||||||||||||||
| profile start | Start profiler on , write results to . | |||||||||||||||||||||||||||||||||||||||||||||||||||||||||||||
| profile stop | Stop profiler on . | |||||||||||||||||||||||||||||||||||||||||||||||||||||||||||||
| dumpheap [options] | Dump the heap of Options are:
| |||||||||||||||||||||||||||||||||||||||||||||||||||||||||||||
| set-debug-app [options] | Set application Options are:
| |||||||||||||||||||||||||||||||||||||||||||||||||||||||||||||
| clear-debug-app | Clear the package previous set for debugging with set-debug-app . | |||||||||||||||||||||||||||||||||||||||||||||||||||||||||||||
| monitor [options] | Start monitoring for crashes or ANRs. Options are:
| |||||||||||||||||||||||||||||||||||||||||||||||||||||||||||||
| screen-compat [on|off] | Control screen compatibility mode of | |||||||||||||||||||||||||||||||||||||||||||||||||||||||||||||
| display-size [reset| ] | Override emulator/device display size. This command is helpful for testing your app across different screen sizes by mimicking a small screen resolution using a device with a large screen, and vice versa. Example: | |||||||||||||||||||||||||||||||||||||||||||||||||||||||||||||
| display-density | Override emulator/device display density. This command is helpful for testing your app across different screen densities on high-density screen environment using a low density screen, and vice versa. Example: | |||||||||||||||||||||||||||||||||||||||||||||||||||||||||||||
| to-uri | Print the given intent specification as a URI. See the Specification for arguments. | |||||||||||||||||||||||||||||||||||||||||||||||||||||||||||||
| to-intent-uri | Print the given intent specification as an intent: URI. Specification for argumentsFor activity manager commands that take a argument, you can specify the intent with the following options: -a Specify the intent action, such as «android.intent.action.VIEW». You can declare this only once. -d Specify the intent data URI, such as «content://contacts/people/1». You can declare this only once. -t Specify the intent MIME type, such as «image/png». You can declare this only once. -c Specify an intent category, such as «android.intent.category.APP_CONTACTS». -n Specify the component name with package name prefix to create an explicit intent, such as «com.example.app/.ExampleActivity». -f Add flags to the intent, as supported by setFlags() . —esn Add a null extra. This option is not supported for URI intents. -e|—es Add string data as a key-value pair. —ez Add boolean data as a key-value pair. —ei Add integer data as a key-value pair. —el Add long data as a key-value pair. —ef Add float data as a key-value pair. —eu Add URI data as a key-value pair. —ecn Add a component name, which is converted and passed as a ComponentName object. —eia [, Add an array of integers. —ela [, Add an array of longs. —efa [, Add an array of floats. —grant-read-uri-permission Include the flag FLAG_GRANT_READ_URI_PERMISSION . —grant-write-uri-permission Include the flag FLAG_GRANT_WRITE_URI_PERMISSION . —debug-log-resolution Include the flag FLAG_DEBUG_LOG_RESOLUTION . —exclude-stopped-packages Include the flag FLAG_EXCLUDE_STOPPED_PACKAGES . —include-stopped-packages Include the flag FLAG_INCLUDE_STOPPED_PACKAGES . —activity-brought-to-front Include the flag FLAG_ACTIVITY_BROUGHT_TO_FRONT . —activity-clear-top Include the flag FLAG_ACTIVITY_CLEAR_TOP . —activity-clear-when-task-reset Include the flag FLAG_ACTIVITY_CLEAR_WHEN_TASK_RESET . —activity-exclude-from-recents Include the flag FLAG_ACTIVITY_EXCLUDE_FROM_RECENTS . —activity-launched-from-history Include the flag FLAG_ACTIVITY_LAUNCHED_FROM_HISTORY . —activity-multiple-task Include the flag FLAG_ACTIVITY_MULTIPLE_TASK . —activity-no-animation Include the flag FLAG_ACTIVITY_NO_ANIMATION . —activity-no-history Include the flag FLAG_ACTIVITY_NO_HISTORY . —activity-no-user-action Include the flag FLAG_ACTIVITY_NO_USER_ACTION . —activity-previous-is-top Include the flag FLAG_ACTIVITY_PREVIOUS_IS_TOP . —activity-reorder-to-front Include the flag FLAG_ACTIVITY_REORDER_TO_FRONT . —activity-reset-task-if-needed Include the flag FLAG_ACTIVITY_RESET_TASK_IF_NEEDED . —activity-single-top Include the flag FLAG_ACTIVITY_SINGLE_TOP . —activity-clear-task Include the flag FLAG_ACTIVITY_CLEAR_TASK . —activity-task-on-home Include the flag FLAG_ACTIVITY_TASK_ON_HOME . —receiver-registered-only Include the flag FLAG_RECEIVER_REGISTERED_ONLY . —receiver-replace-pending Include the flag FLAG_RECEIVER_REPLACE_PENDING . —selector Requires the use of -d and -t options to set the intent data and type. You can directly specify a URI, package name, and component name when not qualified by one of the above options. When an argument is unqualified, the tool assumes the argument is a URI if it contains a «:» (colon); it assumes the argument is a component name if it contains a «/» (forward-slash); otherwise it assumes the argument is a package name. Using package manager (pm)Within an adb shell, you can issue commands with the package manager ( pm ) tool to perform actions and queries on application packages installed on the device. While in a shell, the syntax is: You can also issue a package manager command directly from adb without entering a remote shell. For example: Table 3. Available package manager commands.
Taking a device screenshotThe screencap command is a shell utility for taking a screenshot of a device display. While in a shell, the syntax is: To use the screencap from the command line, type the following: Here’s an example screenshot session, using the adb shell to capture the screenshot and the pull command to download the file from the device: Recording a device screenThe screenrecord command is a shell utility for recording the display of devices running Android 4.4 (API level 19) and higher. The utility records screen activity to an MPEG-4 file. Note: Audio is not recorded with the video file. A developer can use this file to create promotional or training videos. While in a shell, the syntax is: To use screenrecord from the command line, type the following: Stop the screen recording by pressing Ctrl-C, otherwise the recording stops automatically at three minutes or the time limit set by —time-limit . To begin recording your device screen, run the screenrecord command to record the video. Then, run the pull command to download the video from the device to the host computer. Here’s an example recording session: The screenrecord utility can record at any supported resolution and bit rate you request, while retaining the aspect ratio of the device display. The utility records at the native display resolution and orientation by default, with a maximum length of three minutes. There are some known limitations of the screenrecord utility that you should be aware of when using it:
Table 4. screenrecord options
Other shell commandsFor a list of all the available shell programs, use the following command: Help is available for most of the commands. Table 5 lists some of the more common adb shell commands. Table 5. Some other adb shell commands Источник  Когда к мобильному устройству присоединены наушники  ОС Google Android развивается, и по всему видимому |

