- Урок 23. Android Data Binding. Использование с include, ViewStub и RecyclerView.
- include
- ViewStub
- RecyclerView
- Android Data Binding: That Thing
- When layouts other s
- Making ListView Scrolling Smooth
- The key to a smoothly scrolling ListView is to keep the application’s main thread (the UI thread) free from heavy…
- How to Include *.so Library in Android Studio?
- Including the .so files in the Android Studio Project
- Method #1: Creating the JniLibs folder
- Method #2: Modification of the build.gradle file
- Method #3: Putting files within ABI Folder
- Method #4: Cleaning and Adding to “armeabi”
- Method #5: Using the ABI Filters
- Android 11 storage FAQ
- Does Scoped Storage allow apps to access files with file paths, using File API, for example?
- How does the performance of file path access compare to Media Store APIs?
- My app needs broad access to shared storage. Is Storage Access Framework the only option available?
- What categories of apps should request the MANAGE_EXTERNAL_STORAGE permission?
- Does using Storage Access Framework require Google Play policy approval?
- Are there any further restrictions to using Storage Access Framework in Android 11 as compared to Android 10?
- How can apps test out Scoped Storage changes?
- Are apps in scoped storage limited to writing files into their app-specific data directories?
- What is the guidance around using the Media Store DATA column since it’s been deprecated?
- For apps that have opted out of Scoped Storage, when will they have to be compatible with Scoped Storage?
- What is the recommended way to migrate data that we currently store outside of Scoped Storage?
- Are there any exceptions for Android/obb directories given that some package installers, like app stores, need access to it?
Урок 23. Android Data Binding. Использование с include, ViewStub и RecyclerView.
В этом уроке рассмотрим примеры использование Android Data Binding с include, ViewStub и RecyclerView
Полный список уроков курса:
include
Предполагается, что вы знакомы с тегом include, я не буду подробно о нем рассказывать.
С помощью include можно использовать layout файл внутри другого layout файла. При этом мы можем использовать биндинг без каких-либо дополнительных усилий.
Рассмотрим простой пример.
Основной layout файл main_activity.xml
В include мы указываем, что здесь надо использовать layout из файла employee_details, и передаем переменную, которая этому вложенному layout понадобится.
Файл employee_details.xml выглядит, как обычный layout файл с биндингом.
Он получит переменную employee из внешнего layout и сможет использовать ее значения.
ViewStub
Предполагается, что вы знакомы с механизмом ViewStub, я не буду о нем подробно рассказывать.
ViewStub — это механизм для ленивого создания View. Т.е. если у вас в layout есть View, которые отображаются в исключительных случаях, то нет смысла создавать их при каждом отображении экрана. В этом случае лучше использовать ViewStub, который сможет создать эти View при необходимости.
Я не буду подробно объяснять работу этого механизма, чтобы не перегружать урок. Покажу только, как с ним использовать биндинг.
Рассмотрим пример. У нас есть экран, на котором мы отображаем employee.name.
А вот адрес нам надо отображать крайне редко (по нажатию на какую-то кнопку или если он не пустой). И мы решаем, что будем использовать ViewStub. В его параметре layout указываем имя layout файла (employee_address), который должен будет отображаться, когда мы попросим об этом ViewStub.
Layout файл employee_address.xml — это обычный layout файл с биндингом:
Первые три строки понятны: создаем Employee, получаем биндинг и передаем Employee в биндинг. Этот код сработает для основного layout, и employee.name будет отображен на экране.
Но layout, указанный в ViewStub, мы будем создавать позже (если вообще будем). И после того, как мы его создадим, нам надо будет создать для него отдельный биндинг и передать в этот биндинг данные (Employee).
Используем OnInflateListener, который сработает при создании layout в ViewStub. В onInflate мы получим View, созданный из employee_address.xml. Для этого View методом DataBindingUtil.bind создаем биндинг и передаем туда Employee. Таким образом адрес попадет в TextView.
Обработчик готов. Но сработает он только тогда, когда мы надумаем создать layout из ViewStub. А сделать это можно так:
Проверяем, что из этого ViewStub еще не создавался layout, и запускаем процесс создания.
binding.employeeAddressStub возвращает нам не сам ViewStub, а обертку над ним. Это сделано потому, что ViewStub будет заменен созданным layout и его больше не будет в иерархии View. Соответственно, к нему нельзя будет обратиться. А обертка продолжит жить.
RecyclerView
Рассмотрим пример, как использовать биндинг для элементов списка RecylerView
layout элемента списка выглядит так
Будем выводить только имя работника
Обычно холдеры, которые мы пишем, в свой конструктор ожидают получить View. Но в случае использования биндингом, нам нужен будет объект EmployeeItemBinding — биндинг класс для layout элемента списка.
Методом getRoot мы получим View из этого биндинга и передадим его в конструктор суперкласса.
В метод bind мы будем получать Employee и нам останется только передать его в биндинг, который за нас раскидает значения по View. Метод executePendingBindings используется, чтобы биндинг не откладывался, а выполнился как можно быстрее. Это критично в случае с RecyclerView.
В onCreateViewHolder получаем LayoutInflater. Затем методом DataBindingUtil.inflate создаем биндинг, который будет содержать в себе View, созданный из R.layout.employee_item. Этот биндинг передаем в конструктор холдера.
В onBindViewHolder получаем employee из items и передаем его в bind метод холдера, тем самым запуская биндинг, который заполнит View данными из employee.
Присоединяйтесь к нам в Telegram:
— в канале StartAndroid публикуются ссылки на новые статьи с сайта startandroid.ru и интересные материалы с хабра, medium.com и т.п.
— в чатах решаем возникающие вопросы и проблемы по различным темам: Android, Kotlin, RxJava, Dagger, Тестирование
— ну и если просто хочется поговорить с коллегами по разработке, то есть чат Флудильня
— новый чат Performance для обсуждения проблем производительности и для ваших пожеланий по содержанию курса по этой теме
Источник
Android Data Binding: That Thing
When layouts other s
In the last article you saw how easy it is to avoid using findViewById with Android Studio 1.5 and higher. This is essentially the View Holder pattern as described here:
Making ListView Scrolling Smooth
The key to a smoothly scrolling ListView is to keep the application’s main thread (the UI thread) free from heavy…
I showed how to use Android Studio to generate a class that acts as a View Holder for a single layout file, but what about included layouts? What about merged included layouts?
It turns out that those are also supported, but each layout file generates a different class. Here is an example:
You would access the two different TextViews this way:
The pattern for included files follows the same pattern as for Views: the ID of the tag is used as its field name in the class. The included layout has generated its own class with its own fields for the Views in its layout. Any IDs that are shared between different layout can be easily distinguished by the developer. For example, if you include the same layout twice:
The two “world” TextViews can be accessed easily:
Remember to give the include tag an ID or no public field will be given to it. Also, remember to use the outer for layouts that you want to have fields generated. This triggers the preprocessing step that allows it to associate the Views with the fields and generate a class.
Источник
How to Include *.so Library in Android Studio?
The SO file stands for Shared Library. You compile all C++ code into the.SO file when you write it in C or C++. The SO file is a shared object library that may be dynamically loaded during Android runtime. Library files are larger, often ranging from 2MB to 10MB in size. As a result, the app becomes bloated. Another thing to keep in mind is that several.SO files need to be included in the APK to support several architectures such as armeabi and x86. .so files are the ABI Files, ABI stands for Application Binary Interface. The ABI specifies how your app’s machine code should communicate with the OS during execution. The NDK is a software development kit. As a result, files are compared to these definitions.
Including the .so files in the Android Studio Project
So what if you want to include some .so files in your Android App or Android Project, well there are several ways to do that, but we will be finding out the perfect ones that can help you get the library included in no time! Keep on reading this article!
Method #1: Creating the JniLibs folder
Create a folder called “jniLibs” in your app, along with the directories that contain your *.so. The “jniLibs” folder should be established alongside your “Java” and “Assets” directories.
Method #2: Modification of the build.gradle file
It is feasible to avoid creating a new folder and maintain your *.so files in the libs folder! In that case, just place your *.so files in the libs folder (following the same architecture as Solution 1: libs/armeabi/.so, for example) and update your app’s build.gradle file to include the jniLibs source directory.
Method #3: Putting files within ABI Folder
Put your .so files in the libs folder as shown in the folder to add them
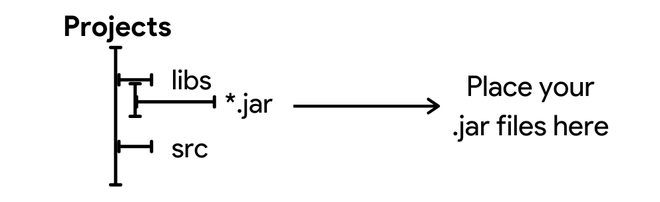
Figure 1. Understanding the Structure of the .jar & so file
Then add this code to your project
Method #4: Cleaning and Adding to “armeabi”
Method #5: Using the ABI Filters
If you’re using Android Studio 4.1.2, and have tried to specify the NDK
Источник
Android 11 storage FAQ

First introduced in Android 10, scoped storage is designed to protect app and user data and reduce file clutter. Since then, you’ve provided a lot of valuable feedback, which has helped us evolve the feature — thank you. Android 11 includes several notable enhancements that are based on your feedback. For example, we’ve enabled direct file path access to media files to improve compatibility of existing code and libraries. We understand that many apps, especially complex ones like Viber, require thoughtful planning to adopt scoped storage in order to continue supporting existing users, ensure adherence to current storage best practices, and maintain backward compatibility. Based on conversations with developers and lively discussions on public forums, we’ve prepared an FAQ to help you better understand various capabilities, behavior changes, and restrictions in scoped storage.
Does Scoped Storage allow apps to access files with file paths, using File API, for example?
- We recognize that some apps rely on code or libraries that access media file paths directly. Therefore on Android 11, apps with the read external storage permission are able to access files with file paths in the scoped storage environment. On Android 10 devices, this is not available to apps in the scoped storage environment unless they have opted-out by setting the android:requestLegacyExternalStorage manifest attribute. To ensure continuity across Android versions, if your app targets Android 10 or above, you should also opt-out. See scoped storage best practices for details.
How does the performance of file path access compare to Media Store APIs?
- The performance really depends on the exact use case. For sequential reads like in the case of playback of videos, file path access offers comparable performance to Media Store. However for random reads and writes, using file path can be up to twice as slow. For the fastest and most consistent read and writes we recommend Media Store APIs.
My app needs broad access to shared storage. Is Storage Access Framework the only option available?
- Storage Access Framework (SAF) is indeed one option that allows the user to grant access to directories and files. However, note that there are access restrictions to certain directories, such as the root and Android/data directories. While the majority of apps that need storage access can use best practices such as SAF or Media Store API, there could be cases where apps need broad access to shared storage or can’t do so efficiently with these best practices. For these cases, we have added the MANAGE_EXTERNAL_STORAGE permission to give access to all files on external storage, except the Android/data and Android/obb directories. To learn more about related Google Play guidelines, read the updated policy from the Policy Help Center.
What categories of apps should request the MANAGE_EXTERNAL_STORAGE permission?
- The MANAGE_EXTERNAL_STORAGE permission is intended for apps that have a core use case that requires broad access of files on a device, but cannot do so efficiently using scoped storage best practices. While it isn’t practical to enumerate all possible use cases, some use cases include file managers, backup and restore, anti-virus apps or productivity file editing apps.
Does using Storage Access Framework require Google Play policy approval?
- The Storage Access Framework has been in the platform since Android 4.4. Accessing files via Storage Access Framework gives users better control because the user is involved in picking files and it doesn’t require any user permissions. There’s no Google Play policy related to its usage.
Are there any further restrictions to using Storage Access Framework in Android 11 as compared to Android 10?
- Apps that target Android 11 (API level 30) and use Storage Access Framework will no longer be able to grant access to directories, such as the root directory of the SD card and the Download directory. Regardless of target SDK, Storage Access Framework on Android 11 cannot be used to gain access to Android/data and Android/obb directories. Learn more about these restrictions and ways to test the behaviors.
How can apps test out Scoped Storage changes?
- Apps can test out scoped storage behavior related to direct file path access or Media Store APIs via these compatibility flags. There’s also another compatibility flag to test the restrictions to access certain paths with Storage Access Framework.
Are apps in scoped storage limited to writing files into their app-specific data directories?
- In scoped storage, apps can contribute media files to Media Store collections. Media Store will put the files into well organized folders like DCIM, Movies, Download, and so on based on file type. For all such files, apps can also continue to have access via File APIs as well. The OS maintains a system to attribute an app to each media store file, so apps can read/write files that they originally contributed to the Media Store without needing storage permissions.
What is the guidance around using the Media Store DATA column since it’s been deprecated?
- On Android 10, apps in the scoped storage environment cannot access files using the file path. To be consistent with this design, we deprecated the DATA column then. Based on your feedback on the needs to work with existing native code or libraries, Android 11 now supports file path access for apps in scoped storage. Accordingly, the DATA column could actually be useful for some scenarios. For inserts and updates into the Media Store, apps in Scoped Storage should use DISPLAY_NAME and RELATIVE_PATH columns. They can no longer use the DATA column for this. When reading Media Store entries for files that exist on disk, the DATA column will have a valid file path, which can be used with the File API or NDK file libraries. Apps should however be prepared to handle any file I/O errors from these operations and should not assume the file is always available.
For apps that have opted out of Scoped Storage, when will they have to be compatible with Scoped Storage?
- On devices running Android 11 or higher, apps will be put into Scoped Storage as soon as they target Android 11 or higher.
What is the recommended way to migrate data that we currently store outside of Scoped Storage?
- preserveLegacyExternalStorage flag allows an app to retain legacy storage access on upgrades even while targeting Android 11. However beware that on new installs on Android 11, this flag has no effect. Please make code changes to adapt to Scoped Storage before targeting Android 11. Learn more about data migration best practices.
Are there any exceptions for Android/obb directories given that some package installers, like app stores, need access to it?
- Apps that hold the REQUEST_INSTALL_PACKAGES permission can access other apps’ Android/obb directories.
We hope you find this FAQ useful in planning your adoption of scoped storage. Please visit our best practice documentation for more information.
Источник


