- Логирование в Android приложениях
- Пытаемся навести порядок
- Android LogCat And Logging Best Practice
- 1. Android Log Methods.
- 2. Android Log Methods Example.
- Android Debug Log
- Android Debug Log Overview
- Accessing the Debug Log from Visual Studio
- Accessing from the Command Line
- Writing to the Debug Log
- Interesting Messages
- HyperLog: Android Remote Logger Library for Debugging.
- hypertrack/hyperlog-android
- hyperlog-android — A utility logger library for storing a logs into database and push them to remote server for…
- Introducing HyperLog
- Download
- Initialize and Usage
- Push Logs to the Server
Логирование в Android приложениях
Уверен, что всем разработчикам приложений на платформе Android знаком класс Log, позволяющий логировать различные события. По различным причинам, формат записи логов для каждого проекта может отличаться достаточно сильно — начиная от «AAA», «111111» и «I was here» до более-менее внятных — «Opening HTTP connection to habrahabr.ru». Под катом вы найдете пример функции, которая поможет навести порядок в логах.
Данный топик не претендует на оригинальность и универсальность. И поэтому, если в вашем проекте уже существует некий стандарт логирования событий, то смело проходите мимо — топик скорее ориентирован на начинающих разработчиков.
Как правило, ценность логов начинаешь понимать только когда заказчик матерясь отсылает лог на почту и просит засабмитить фикс через 5 минут. И если лог состоит из сообщений невнятного характера, то как минимум, разбр данного лога займет куда больше времени, чем хотелось бы.
Пытаемся навести порядок
Логи существуют для того, чтобы разработчик мог понять что, где и когда произошло. Найти ответ на вопрос «когда произошло» достаточно просто — в логах Андройд записывает время события. Нахождение ответа на вопрос «что произошло» так же не вызывает больших трудностей, если сообщение в лог было написано со смыслом, например: «Opening file. ». Вопрос «где произошло» оказывается наиболее сложным. Если проект большой, то придеться потратить время на нахождение нужного места кода, даже, если лог был написан со смыслом.
Если событие логируется с указанием Throwable (чаще Exception), например, метод public static int d (String tag, String msg, Throwable tr) , то в консоле сообщений будет выведен стек, который поможет быстро идентифицировать место логирования. Но использование данного метода без особой необходимости до безобразия перегрузит лог ненужной информацией.
Если же логируется просто текст, то при логировании можно явно указывать место вызова. Например:
Однако, писать такое каждый раз — дело утомительное и неблагодарное.
Ниже приведен пример класса Log , который делает это автоматически.
Использование класса очень простое:
Результатом логирования данным способом будут примерно следующие строки:
Примечание:
По понятным причинам, данный способ мало пригоден для приложений «пропущенных» через обфускатор.
В общем-то все.
Прошу прощения, если эта статья показалась слишком тривиальной для хабра.
Источник
Android LogCat And Logging Best Practice
android.util.Log is the log class that provides the log function. It provides the below methods to log data into the LogCat console.
1. Android Log Methods.
- Log.v(): Print verbose level log data. The verbose level is the lowest log level, if you print so much this kind of log data, it is not meaningful.
- Log.d(): Print debug level log data. Debug level is one step higher than verbose level. Debug log data is usually useful in android application development and testing.
- Log.i(): Print info level log data. Info level is one step higher than debug level. Info log data is used to collect user actions and behaviors.
- Log.w(): Print warn level log data. Warn level is one step higher than info level. When you see this kind of log data, it means your code exists potential risks, you need to check your code carefully.
- Log.e(): Print error level log data. Error level is the highest level. It is always used in java code catch block to log exception or error information. This kind of log data can help you to find out the root cause of app crashes.
2. Android Log Methods Example.
If you can not watch the above video, you can see it on the youtube URL https://youtu.be/ciBUMesUfVo
- This example is very simple. When you click the button, it will print above 5 kinds of log data in the LogCat console.
- When you input the search keyword LogActivity in the LogCat panel, the app log data will be filtered out. For each line of log data, there are the log time, class name, and log message.
- You can also filter out the log data by it’s type, verbose, info, debug, warn, or error. This can make log data search more easily and accurately, you can see the below demo video.
If you can not watch the above video, you can see it on the youtube URL https://youtu.be/zyUvmTF_Mzw
- Click the Settings icon in the LogCat panel, you can configure which column to be displayed for each line of the log.
- The columns include Show date and time, Show process and thread IDs(PID-TID), Show package name, Show tag, you can see it in the below picture.
Источник
Android Debug Log
One very common trick developers use to debug their applications is to make calls to Console.WriteLine . However, on a mobile platform like Android there is no console. Android devices provides a log that you can use while writing apps. This is sometimes referred to as logcat due to the command that you type to retrieve it. Use the Debug Log tool to view the logged data.
Android Debug Log Overview
The Debug Log tool provides a way to view log output while debugging an app through Visual Studio. The debug log supports the following devices:
- Physical Android phones, tablets, and wearables.
- An Android Virtual device running on the Android Emulator.
The Debug Log tool does not work with Xamarin Live Player.
The Debug Log does not display log messages that are generated while the app is running standalone on the device (i.e., while it is disconnected from Visual Studio).
Accessing the Debug Log from Visual Studio
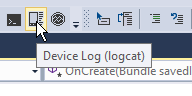
To open the Device Log tool, click Device Log (logcat) icon on the toolbar:
Alternately, launch the Device Log tool from one of the following menu selections:
- View > Other Windows > Device Log
- Tools > Android > Device Log
The following screenshot illustrates the various parts of the Debug Tool window:

Device Selector – Selects which physical device or running emulator to monitor.
Log Entries – A table of log messages from logcat.
Clear Log Entries – Clears all current log entries from the table.
Play/Pause – Toggles between updating or pausing the display of new log entries.
Stop – Halts the display of new log entries.
Search Box – Enter search strings in this box to filter for a subset of log entries.
When the Debug Log tool window is displayed, use the device pull-down menu to choose the Android device to monitor:

After the device is selected, the Device Log tool automatically adds log entries from a running app – these log entries are shown in the table of log entries. Switching between devices stops and starts device logging. Note that an Android project must be loaded before any devices will appear in the device selector. If the device does not appear in the device selector, verify that it is available in the Visual Studio device drop-down menu next to the Start button.
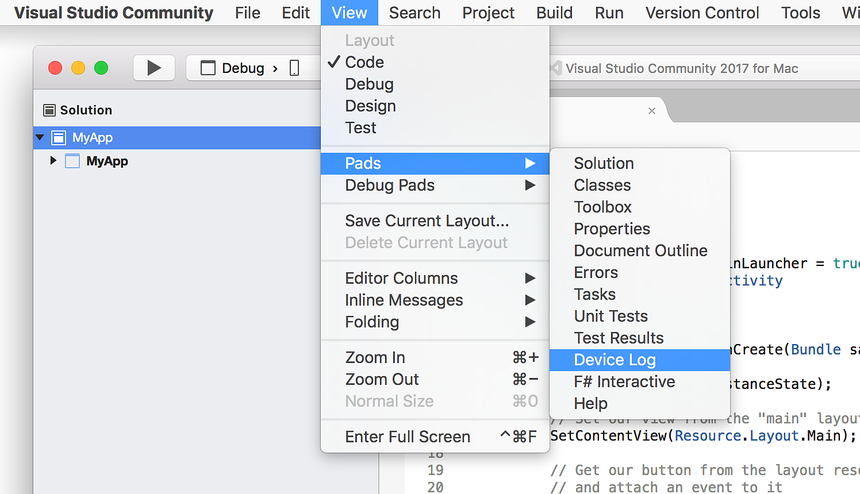
To open the Device Log, click View > Pads > Device Log:
The following screenshot illustrates the various parts of the Debug Tool window:
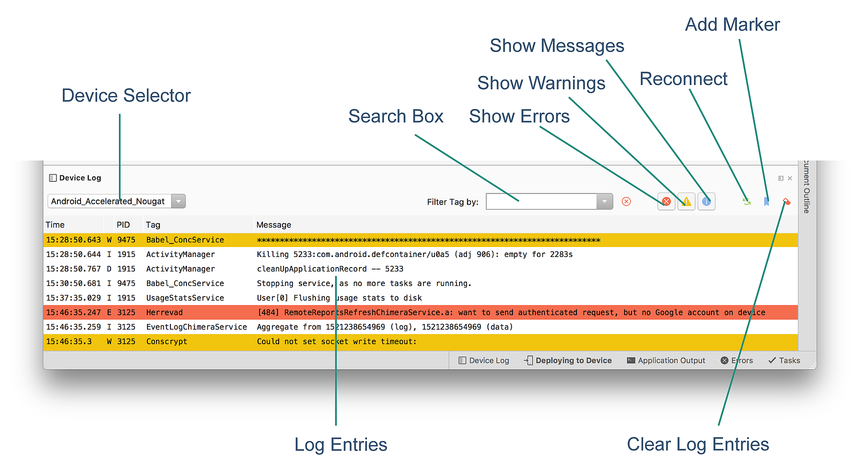
Device Selector – Selects which physical device or running emulator to monitor.
Log Entries – A table of log messages from logcat.
Clear Log Entries – Clears all current log entries from the table.
Search Box – Enter search strings in this box to filter for a subset of log entries.
Show Messages – Toggles the display of informational messages.
Show Warnings – Toggles the display of warning messages (warning messages are shown in yellow).
Show Errors – Toggles the display of error messages (warning messages are shown in red).
Reconnect – Reconnects to the device and refreshes the log entry display.
Add Marker – Inserts a marker message (such as — Marker N — ) after the latest log entry, where N is a counter that starts from 1 and increments by 1 as new markers are added.
When the Debug Log tool window is displayed, use the device pull-down menu to choose the Android device to monitor:
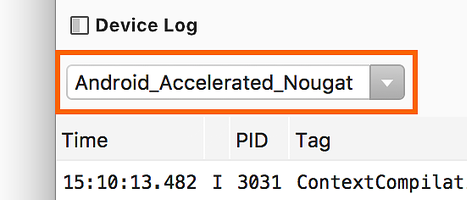
After the device is selected, the Device Log tool automatically adds log entries from a running app – these log entries are shown in the table of log entries. Switching between devices stops and starts device logging. Note that an Android project must be loaded before any devices will appear in the device selector. If the device does not appear in the device selector, verify that it is available in the Visual Studio device drop-down menu next to the Start button.
Accessing from the Command Line
Another option is to view the debug log via the command line. Open a command prompt window and navigate to the Android SDK platform-tools folder (typically, the SDK platform-tools folder is located at C:\Program Files (x86)\Android\android-sdk\platform-tools).
If only a single device (physical device or emulator) is attached, the log can be viewed by entering the following command:
Another option is to view the debug log via the command line. Open a Terminal window and navigate to the Android SDK platform-tools folder (typically, the SDK platform-tools folder is located at /Users/username/Library/Developer/Xamarin/android-sdk-macosx/platform-tools).
If only a single device (physical device or emulator) is attached, the log can be viewed by entering the following command:
If more than one device is attached, the device must be explicitly identified. For example adb -d logcat displays the log of the only physical device connected, while adb -e logcat shows the log of the only emulator running.
More commands can be found by entering adb and reading the help messages.
Writing to the Debug Log
Messages can be written to the Debug Log by using the methods of the Android.Util.Log class. For example:
This produces output similar to the following:
It is also possible to use Console.WriteLine to write to the Debug Log – these messages appear in logcat with a slightly different output format (this technique is particularly useful when debugging Xamarin.Forms apps on Android):
This produces output similar to the following in logcat:
Interesting Messages
When reading the log (and especially when providing log snippets to others), perusing the log file in its entirety is often too cumbersome. To make it easier to navigate through log messages, start by looking for a log entry that resembles the following:
In particular, look for a line matching the regular expression that also contains the name of the application package:
This is the line which corresponds to the start of an activity, and most (but not all) of the following messages should relate to the application.
Notice that every message contains the process identifier (pid) of the process generating the message. In the above ActivityManager message, process 12944 generated the message. To determine which process is the process of the application being debugged, look for the mono.MonoRuntimeProvider message:
This message comes from the process that was started. All subsequent messages that contain this pid come from the same process.
Источник
HyperLog: Android Remote Logger Library for Debugging.
Dec 19, 2017 · 4 min read
HyperLog A utility logger library for Android on top of standard Android Log class for debugging purpose.
hypertrack/hyperlog-android
hyperlog-android — A utility logger library for storing a logs into database and push them to remote server for…
It’s not easy to debug live mobile apps or library, or create every possible enviro n ment in which your end users use your app, given the variety of Android devices and variety of Android versions. It’s very difficult to replicate every possible configuration and reproduce every single bug that could possibly occur when millions of users use your app. During mobile app development, we often find that logcat (for debugging) in Android Studio gets clear when an app reinstalls. However, this isn’t a good approach as you are going to be get lots of log statement in your logcat and logcat doesn’t maintain a history. Logging across multiple testing devices is hard.
Mobile developers are mostly familiar with tools such as Google Analytics or Fabric.io but they are analytics or crashlytics systems, but not fully fledged logging solutions. Remote logging can be used to debug issues in both development and production. It makes debugging a much simpler and smoother process.
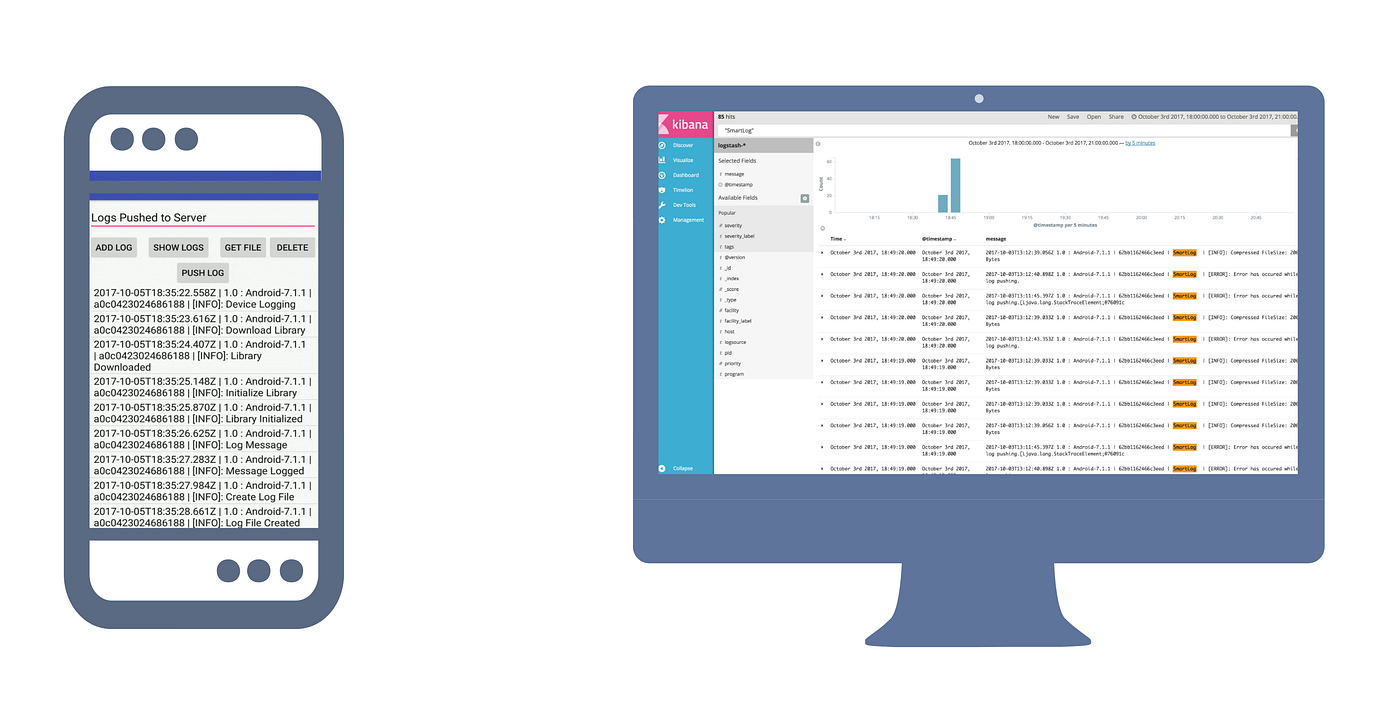
At HyperTrack, logs are the medium through which HyperTrack SDK speaks with us. It gives us end-to-end visibility. It helps us to debug issues while developer/user, who is using the HyperTrack SDK, sits on the other side of the world. HyperTrack SDK pushes log to the HyperTrack server, and the HyperTrack server uses ELK stack to process the logs and visualize them on Kibana. We have discussed our logging approach in more detail in an earlier blog.
There are many Logger libraries available for developers, e.g., Android-Logger and Timber. But these libraries print logs message on logcat in Android Studio that doesn’t help to get the behaviour of app in production, which means that these logs message aren’t accessible to the developers. Remote logging is the solution that helps to debug the problem. Remote logging the right set of information could provide valuable information that would be difficult to gather otherwise, and could help unveil unexpected behaviours and bugs. Remote Logging increases accountability and gives you confidence. When someone has experienced a use-case that you haven’t thought of, saying “ We will investigate” is not great accountability. Saying “ We have the logs and we know the exact line of code where the error occurred” is accountability.
Introducing HyperLog
HyperLog is a utility logger library for Android on top of standard Android Log class for debugging purpose. This is a simple library that will allow Android apps or library to store log message into the database so that developer can pull the logs from the database into the file or push the logs to your server for debugging from the database as a file. The Demo App will help you see the library in action.

Download
The library is available on mavenCentral() and jcenter(). In your app level build.gradle, add the following code snippet and run the gradle-sync. You can alternatively follow the steps as highlighted here.
Once this is done, you can start recording logs message and smartly push them to your server for debugging.
Initialize and Usage
Inside `onCreate` of Application class or Launcher Activity initialize the library.
Push Logs to the Server
Developers can push logs to their server whenever they want. They can achieve this by multiple ways such as by pushing an FCM Notification to their app and when notification received then call HyperLog.pushLogs or by creating a scheduled job and when job scheduled then call HyperLog.pushLogs that will push a text file or gzip compressed file to your remote-server.
Set the API Endpoint URL HyperLog.setURL before calling HyperLog.pushLogs method otherwise exception will be thrown.
Have issues or feature requests? Use issues tracker. We’d love to see your pull requests, so send them in! Have questions, suggestions? Join the discussion on slack.
Источник


