Общение между компьютером и Android-устройством через Processing
Есть определённая категория людей, которая хотела бы писать программы, но боится серьёзных языков программирования. К ним можно отнести детей, гуманитариев, любителей мастерить, людей старшего поколения и т.д. Кто-то пробует использовать «детские» языки типа Scratch или другие упрощённые конструкторы.
На мой взгляд, хорошим вариантом для изучения может стать Processing, который не так часто упоминается на Хабре.
Processing — это простенькая среда разработки с языком Java с ограниченным числом классов. Здесь есть переменные, циклы, объекты. В первую очередь Processing расчитан на работу с графикой, анимацией, вычислениями. То, что так нравится детям. Всё наглядно и красиво.
Если у пользователя появится желание перейти на новый уровень и начать использовать полноценный язык Java, то все наработки не пропадут даром. Большая часть кода не потребует переработки и можно свободно копировать больше участки кода.
Processing постоянно развивается и доросла до третьей версии. У неё есть своё активное сообщество, которое делится своим исходным кодом.
Процесс установки простой — скачиваем и распаковываем архив. Запускаем исполняемый файл и мы готовы создавать программу.
Файл, в котором пишется и сохраняется исходный код, называется скетчем. Для создания полноценного окна достаточно написать одну строчку!

Конечно, от такого приложения толку мало и придётся писать код чуть посложнее. У стандартной программы обычно присутствуют два метода: setup() и draw(). Усложним пример.
Мы создали окно размером 480х120 пикселей. Если поместить курсор мыши в область окна и двигать им, то будут рисоваться белые круги, накладываясь друг на друга. Нажмите и держите левую или правую кнопку и продолжайте двигать мышь внутри окна. Теперь цвет круга сменится на чёрный.
Здесь могут оживиться ардуинщинки, увидев знакомый синтаксис. Ничего удивительного, Arduino IDE построена на основе Processing (как и другая программа для работы с микрокомпьютерами Wiring). Только вместо функции draw() они используют loop(). Но смысл остаётся прежним — в setup() происходит инициализация, в draw()/loop() крутится бесконечный цикл для обновления данных.
Это была разминка. Давайте перейдем к более сложным вещам. По умолчанию программа работает в режиме Java. Но Processing поддерживает и другие режимы, в частности, Android. В верхнем правом углу нажмите на выпадающий список и выберите команду Add Mode. .
В диалоговом окне выберите вариант Android Mode и нажмите кнопку Install.
На предыдущих скриншотах показаны уже установленные компоненты, у вас будет немного по-другому.
После загрузки необходимых файлов, вы сможете создавать полноценные приложения для Android (не забывайте переключаться в данный режим).
При желании вы можете использовать полноценный Android SDK, но такой подход будет выглядеть немного странным. Если вы знаете SDK, то почему не используете Android Studio? Поэтому мы будем использовать встроенные возможности Processing. Попробуем.
Присоединяем телефон к компьютеру через USB и запускаем программу. Можно также запустить через эмулятор (меню Sketch | Run in Emulator). Так он выглядит на компьютере.
По возможности используйте реальный телефон. Но если у вас iPhone, потерялся USB-кабель, не распознаётся телефон и 1000 других причин, то используйте эмулятор. Помните, на эмуляторе не все вещи можно выполнить. Но побаловаться вполне можно.
Если и этот квест вы прошли успешно, то приступаем к сложному этапу — подружить компьютер с телефоном. Мы напишем программу, которая будет передавать показания акселерометра телефона на компьютер, в свою очередь компьютер будет передавать статус нажатой кнопки мыши.
Для решения этой задачи нам понадобятся библиотеки: Ketai и oscP5.
Библиотека Ketai позволяет работать с датчиками, камерой, сетью и многое другое.
Библиотека oscP5 позволяет передавать сообщения между устройствами.
Устанавливаются они за пару щелчков. Открываем меню Sketch | Import Library | Add Library. и находим нужные библиотеки. Используйте фильтр для быстрого поиска.
Выбираем нужную библиотеку и нажимаем кнопку iInstall. Остальное программа сделает сама.
Для обмена сообщениями компьютер и телефон должны использовать общую Wi-Fi сеть. Далее следует узнать IP-адрес компьютера. В Windows это можно сделать через команду ipconfig .
Запомним адрес и впишем его в скетч для Android-режима.
Так как наш телефон будет передавать данные через интернет, то необходим включить разрешение на его использование. Идём в меню Android | Sketch Permissions и ставим флажок у пункта Internet.
Запускаем приложение на телефоне (не забудьте включить Wi-Fi). На телефоне мы увидим данные от акслелерометра, датчика расстояния, текст сообщения и два ip-адреса: свой и удалённого компьютера. Запоминаем адрес телефона и вбиваем его в скетч в режиме Java.
Запускаем скетч на компьютере. Телефон положите на стол. Наблюдайте за происходящим.
Нажимаем на кнопку мыши. Текст должен поменять на mousePressed: true.
Посмотрите на телефон. Там надпись синхронно сменится на mousePressed: 1.
Отпускайте и нажимайте кнопку мыши, чтобы увидеть, что оба устройства видят друг друга и передают информацию о себе. Аналогично вы можете вращать телефон в руках и видеть на своем мониторе изменения показаний датчика акселерометра.
Это ещё не всё! Положите телефон на стол и прикройте его ладонью. Сработает датчик приближения и окно десктопного приложения внезапно изменит свой цвет.
Уберите ладонь, информация снова проявится.
Текст «hello» также был получен с телефона. Вы можете поменять его в коде для телефона и перезапустить скетч, чтобы увидеть изменения.
В скетче для телефона я закомментировал код, позволяющий получить список всех датчиков. Можете убрать комментарий и посмотреть список в консоли.
Я не стану объяснять каждую строчку кода. Если кого-то заинтересует данная тема, то в любом случае придётся изучать документацию. В двух словах тут не опишешь.
Если бы вам пришлось писать подобный функционал в Android Studio и IDEA, то пришлось бы сначала изучить множество сопутствующих технологий и создавать сложные проекты с большим количеством кода. В Processing многие детали скрыты от разработчика. Конечно, сложных бизнес-приложений на нём не напишешь. Но напоминаю, что Processing предназначена в первую очередь, чтобы «поиграться» с графикой. И это вполне может стать первой ступенькой в мир программирования для ребёнка. Кроме того, Processing умеет общаться с платами Arduino через последовательный порт.
Таким образом, вы охватываете сразу три устройства: компьютер, телефон и плату микрокомпьютера. Умный дом в вашем распоряжении, нужно только проявить фантазию. Единственная проблема — мало ресурсов на русском языке. Самостоятельно разобраться будет сложновато, и не все родители смогут помочь. В этом случае следует поискать наставника или записаться на подходящие курсы.
На русском языке выпускалась пара книг для базового уровня, которые рассматривают работу на компьютере. Для работы с Android есть бесплатная — электронная книга на GitBook (на английском). Возможно, если будет время, буду пополнять свой вариант.
Источник
Processing for Android
Developing with Android Studio
Use Android Studio for advanced Android development with Processing’s core library.
General steps
Android Studio is the tool recommended by Google for Android development. If you’ve already have experience on how to develop Android applications using Android Studio (separately from Processing), and want to make use of the Processing core library in your Android Studio projects, this tutorial can be useful.
All our core code is bundled inside the processing-core.zip, which is inside the AndroidMode folder. You just need to copy this file as processing-core.jar and add it as a dependency to your project. Step by step procedure for Android Studio is as follows:
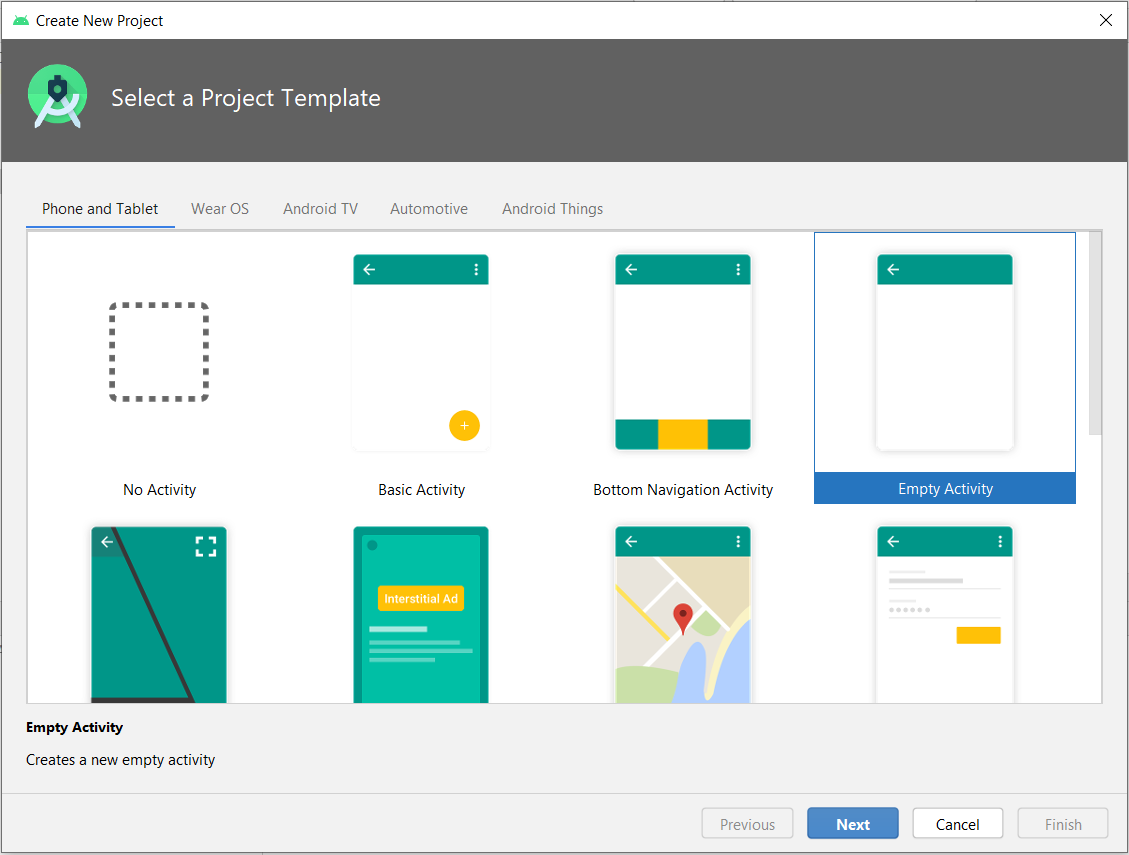
1. Create an Android project if you haven’t already created one. Start with selecting an Empty Activity:
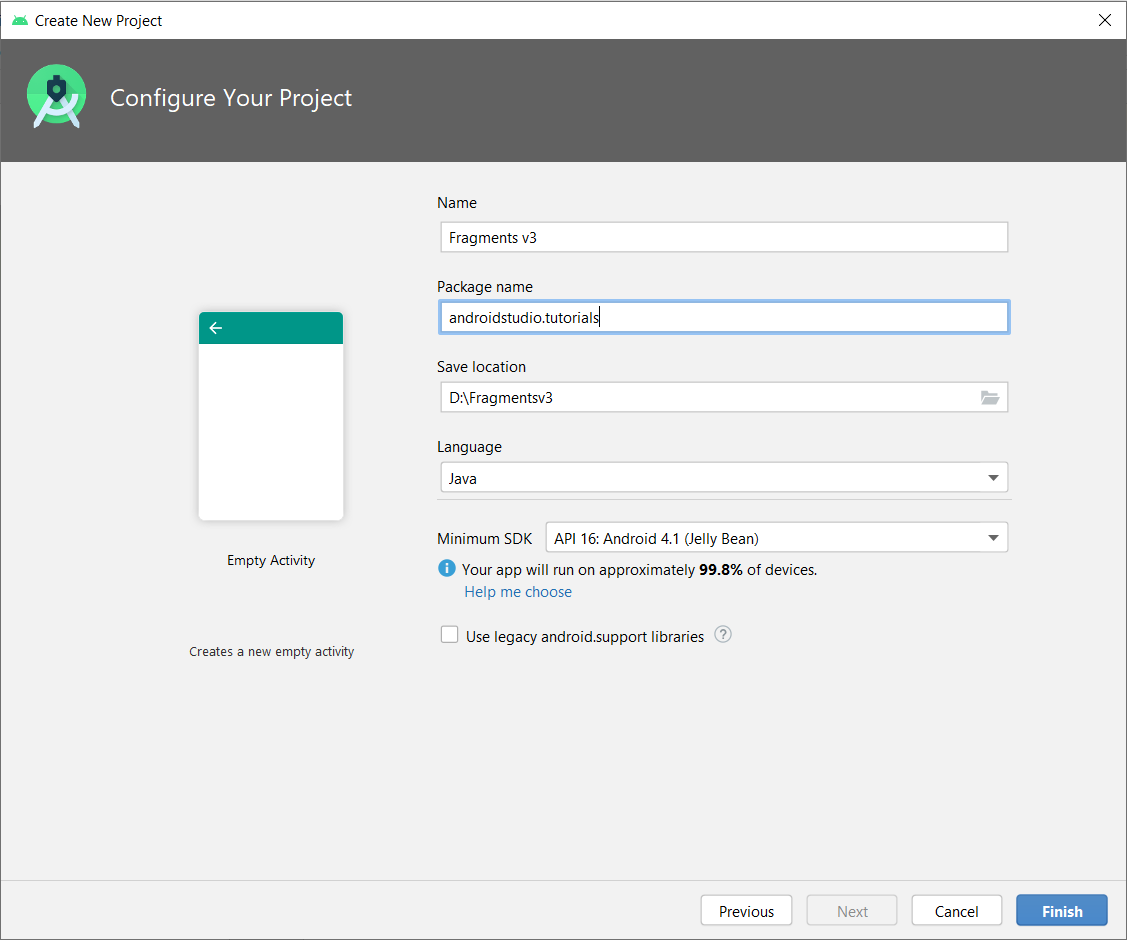
2. Enter project name, package name and minimum SDK version. Keep the ‘Use legacy android.support libraries’ option unchecked as the latest android processing core is migrated to androidx. After that click on ‘Finish’ button:
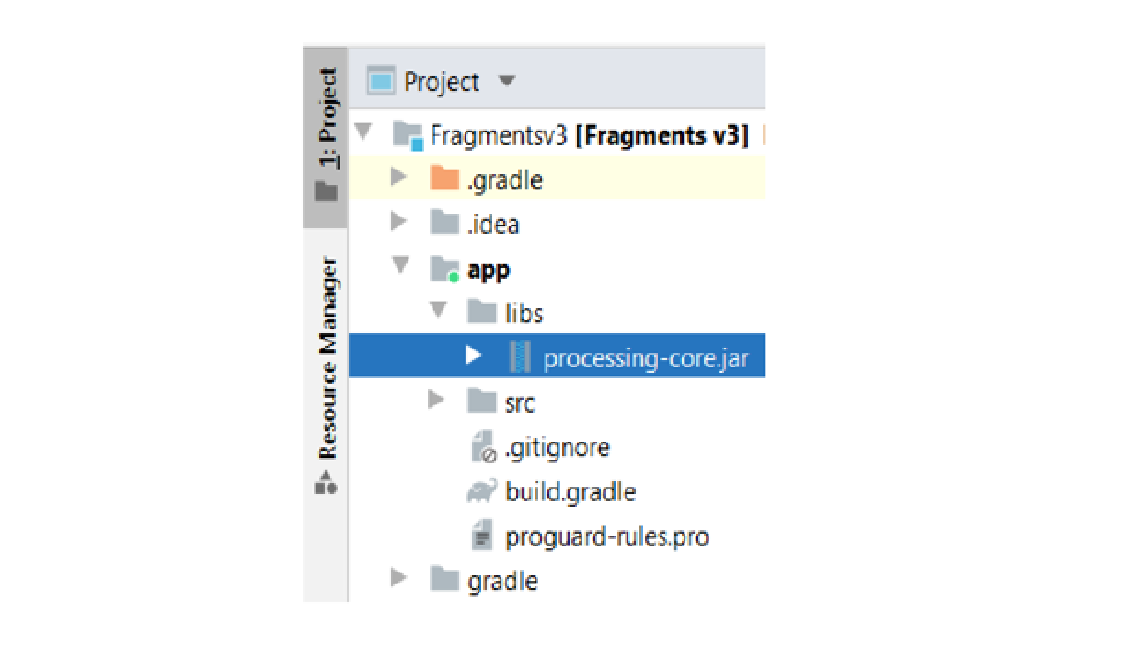
3. Copy processing-core.zip (located in the AndroidMode folder in Processing) to /app/libs, rename it to processing-core.jar:
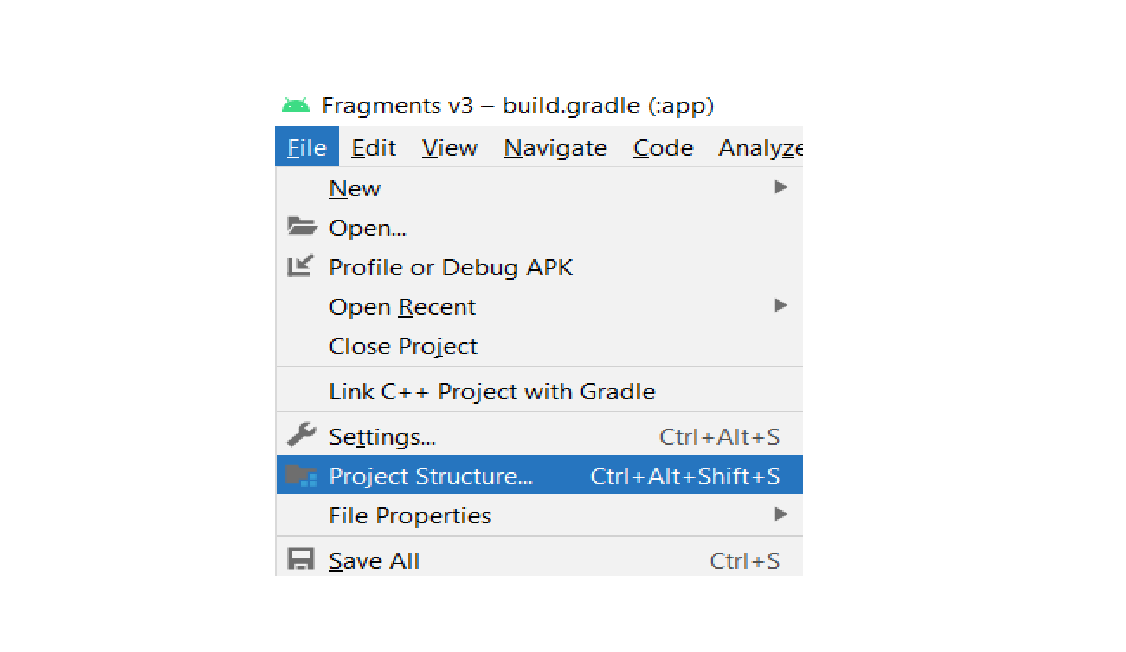
4. To add it as a jar dependency, Click on File -> Project Structure. A dialog box will appear:
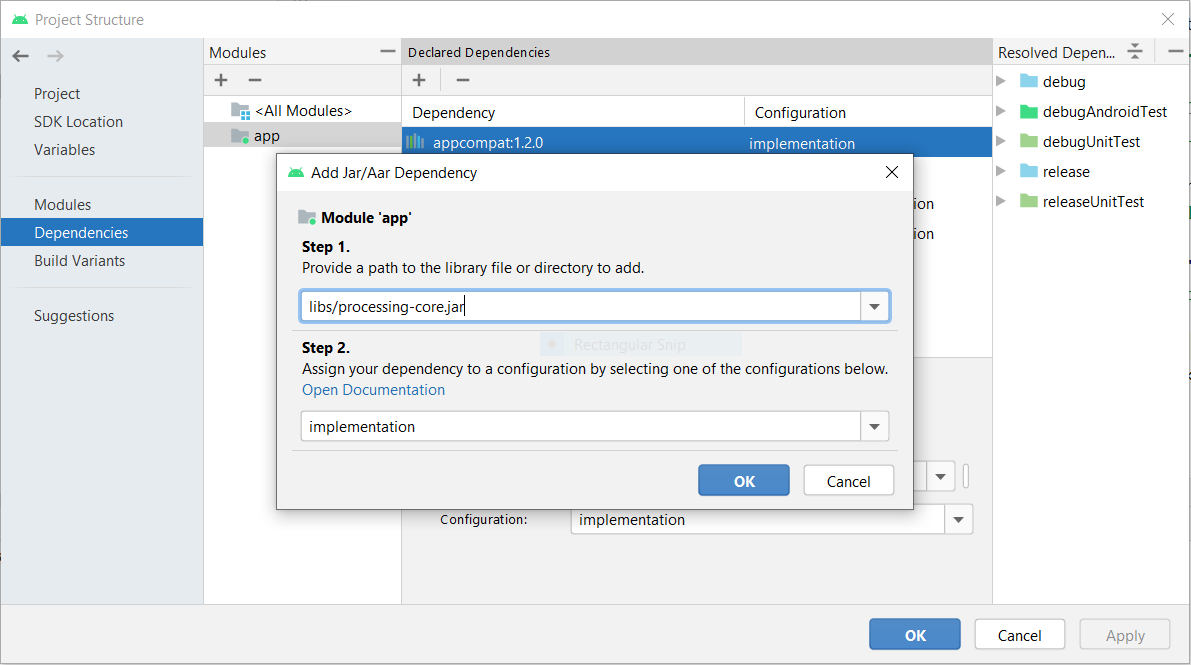
5. Select ‘dependencies’ in the left most panel and then click on ‘app’ in modules panel. Click on plus button under Declared Dependencies and then click on Jar Dependency. Another dialog box will appear:
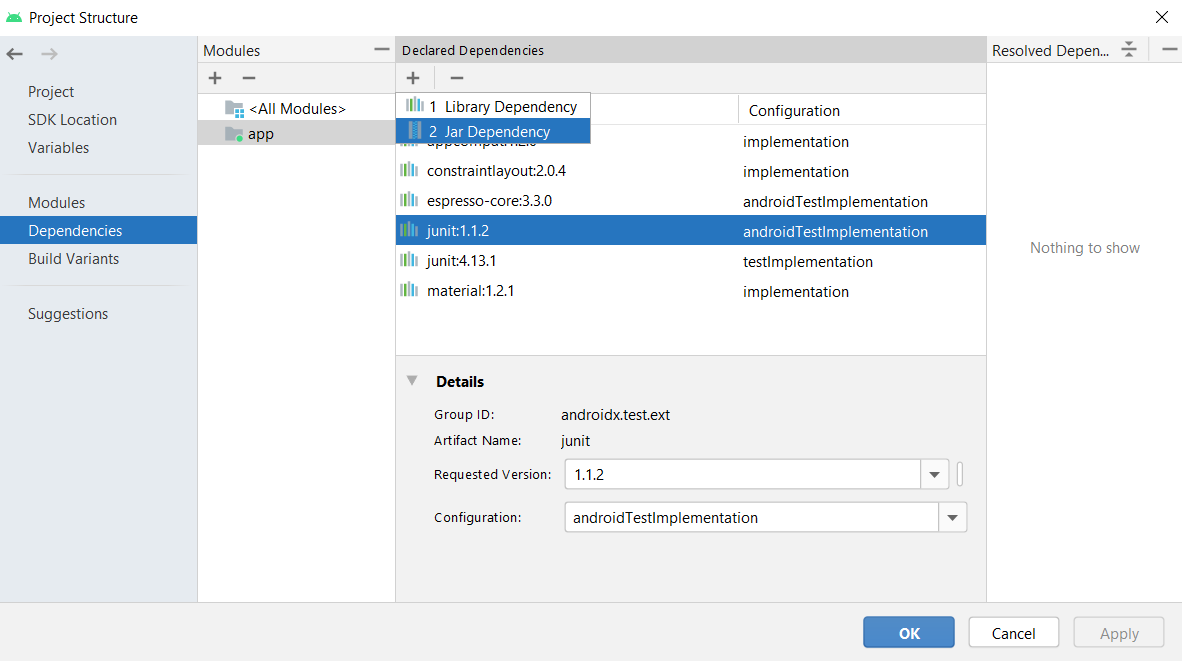
6. In the add jar dialog enter path as ‘libs/processing-core.jar’ and in Step 2, enter scope as ‘implementation’. Click on ‘OK’, ‘Apply’ and then again ‘OK’:
7. Then, write your sketch code by extending PApplet, for example:
8. Initialize the sketch in the main activity:
9. Finally, create a simple layout for the main activity:
The complete Android Studio project is available here.
Using Bintray packages
The processing-core library is also available as a package on Bintray. This package can be easily imported into a Gradle project using the following dependency snippet:
Источник
Processing for Android
AR in Processing
How to create Augmented Reality apps using Processing for Android.
ARCore
Google offers a framework to create Augmented Reality (AR) apps for Android, called ARCore. Phone-based AR experiences typically involve drawing digital 3D content on top of the physical world, as seen from the perspective of the phone’s camera, in such a way that the digital contents convincingly appear to be part of the real-world environment. Doing this requires applying complex algorithms in real-time to recognize objects in the physical environment, such as walls, pieces of furniture, even people, and determining the pose (position and orientation) of the phone relative to the world over time. Fortunately for us, ARCore handles all of these calculations automatically, and provides an API to access the real-world features and attach digital contents to them from our code. While it is possible to access ARCore directly from Processing, the Android mode includes an AR library that makes it easier to use ARCore in our Processing sketches and apply Processing’s drawing API to create AR content.
AR is a rapidly growing field, thanks to frameworks such as ARCore on Android (and ARKit on iOS) and to the fast pace of technical improvement of smartphones. The integration of real-world environments with digital contents is opening many new possibilities for phone-mediated experiences in the physical world. The AR experiments from Google and the Awesome ARKit list of AR apps for iOS are good resources to find projects making creative use of AR.
Requirements
In order to ensure a good AR experience, Google certifies devices to be supported by ARCore. The official list of supported devices is available here. The devices in that list should work with Processing as well to create AR projects.
Getting started
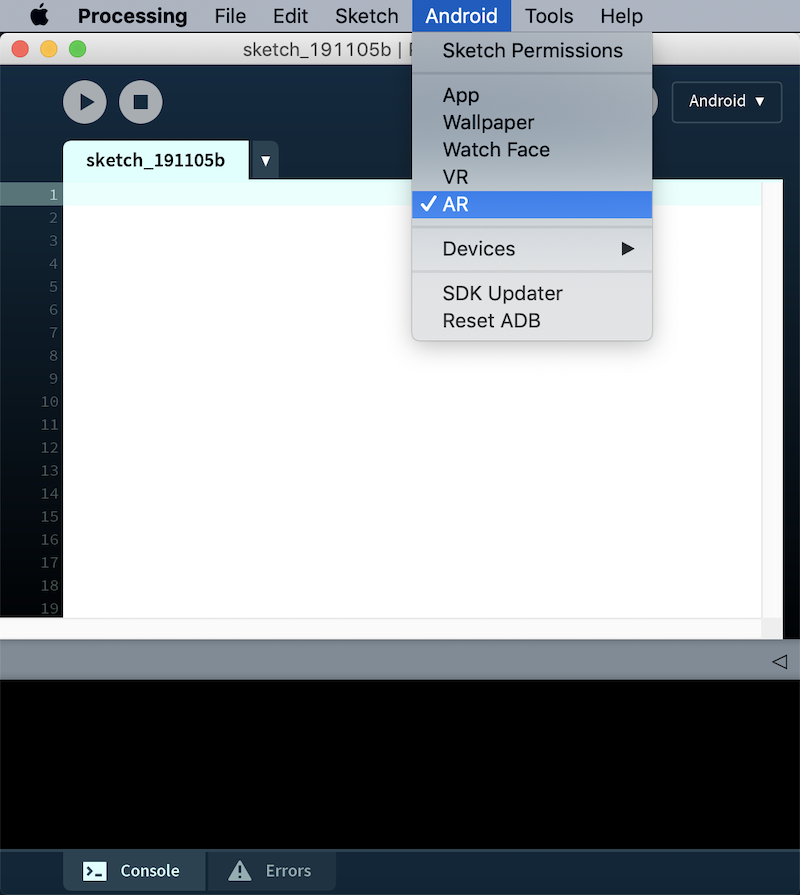
You need to select the AR option in the Android menu to make sure that your sketch is built as an AR app:
While in VR you can make pretty much turn any 3D Processing sketch into VR simply by importing the VR library and using the VR renderer, using AR requires a few more steps. First of all, we need to add an ARTracker to our sketch, and call its start() function to get AR tracking going. The other two classes in the AR library are ARTrackble and ARAnchor, they represent a surface that can be tracked in real-world space (such as a table or a wall), and a point in space that remains fixed relative to a given trackable surface. These concepts will hopefully become clearer as we go through the tutorial. For the time being, a basic skeleton for an AR sketch in Processing could look like the following code, where we just launch tracking and print to the console the trackable objects detected in each frame:
Drawing trackables
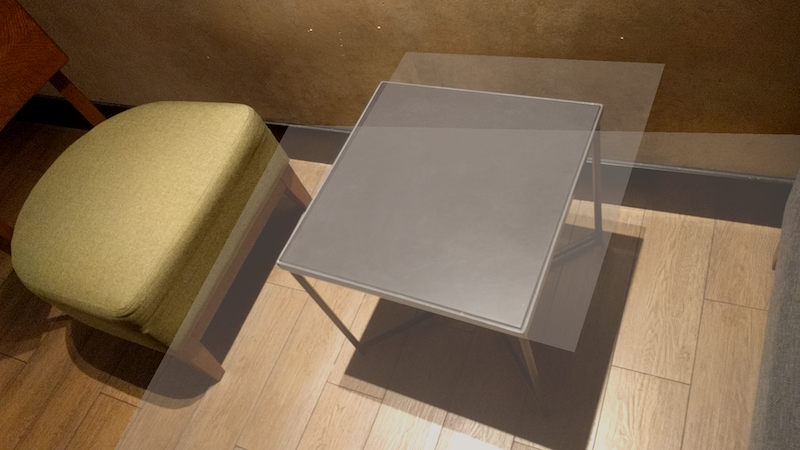
Trackable objects in Processing are limited to plane surfaces, even though the underlying trackable in ARCore can represent other kind of features in physical space, such as cloud points. Each trackable object contains basic information about the physical entity it represents, including size and current status (whether is being tracked, paused, or stopped). In order to draw a trackable plane, we first need to apply the transformation that turns Processing’s world coordinates into the trackable system, in this way, it is easy to represent points relative to the trackable plane that spans X and Z axis irrespective of its orientation with respect to Processing’s coordinate system. We can retrieve the size of the trackable along each axis with the lengthX() and lengthZ() functions, and call the transform() function before making any drawing:
The sketch above should draw all the trackable planes being detected by the phone as we move around:
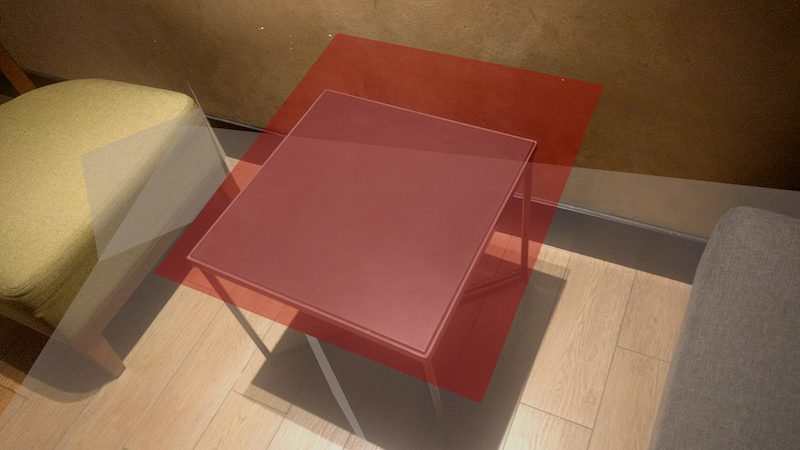
It is easy to test if a trackable is being selected by the user using the touchscreen, all we need to is to call the isSelected(x, y) with the (x, y) coordinates of the touch point:
Adding the code above to our previous sketch should result in the following interaction when touching a plane in the camera image:
Using anchors
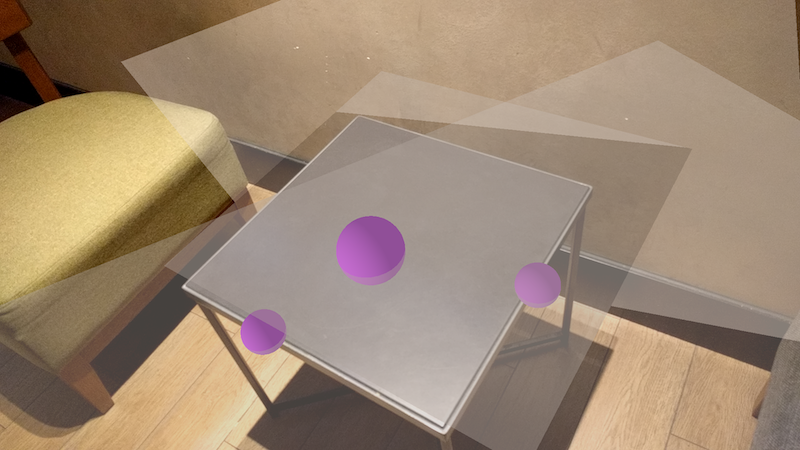
Once we have trackable surfaces in our AR scene, we can attach anchors to them. Anchors in ARCore are essentially positions in space that are fixed relative to the trackable they are attached to, and allow us to make virtual objects appear to stay in place in the scene. Anchor objects in Processing are created with the relative coordinates they will have relative to their parent trackable. Extending our code above, we could add new anchors exactly when a trackable is detected for the first time. That event can be handled by adding the trackableEvent() function to our code, which will receive the trackable being detected as an argument. We need to keep track of all the anchors in our scene manually, for example by storing them in a list, and removing them when they are no longer being tracked. The following code does all of that:
In the code above, we create a new anchor at the point (0, 0, 0) relative to the trackable being detected, but only if is a horizontal surface (i.e.: a floor), which we can detect by calling isFloorPlane() . A similar function, isWallPlane() , allows us to know if the trackable is a vertical plane (i.e.: a wall). It is important to notice the dimensions of the objects in AR are rather small in comparison with a typical 3D sketch (for example, the radius of the spheres being drawn at the anchor positions is only 0.05).
It is also important that we dispose an anchor once is no longer tracked with the line if (anchor.isStopped()) anchor.dispose(); to make sure we don’t waste resources with anchors that are no longer active (anchors that are simply paused should not be disposed as they can be tracked again later, but those stopped are not going to be restarted). We should also remove the disposed anchors from our array list, we can do that in our sketch, or use the utility function clearAnchors provided in the ARTracker class. The result of our latest code should be the following:
Hitting trackables
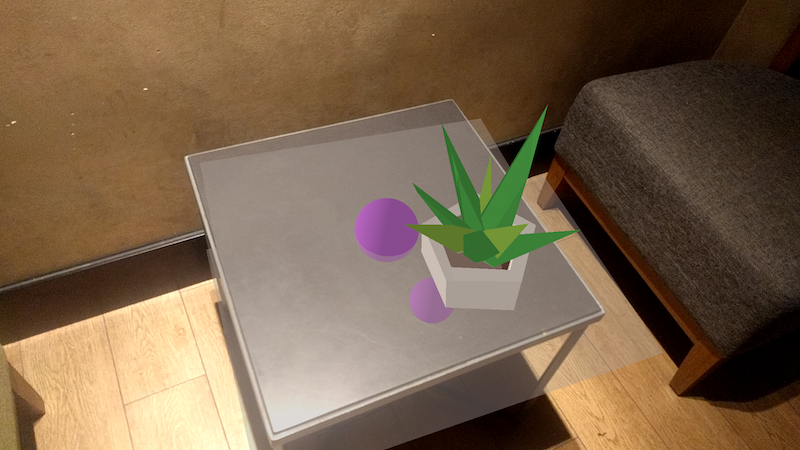
A typical interaction in AR is to move around an object along a trackable plane, for example to find its best placement interactively. The AR library in Processing offers functionality that makes implementing such interaction very easy. The ARTracker class has a get() function that takes an (x, y) touch position, and returns the trackable hit by that touch point. We can then create a new anchor for that hit trackable, and the anchor will be placed exactly at the position on the trackable that’s at the intersection with the touch pointer. As the pointer moves around, we need to keep disposing the anchor at the previous position and creating another one at the new position. This is done with the following code (to be added to last version of our sketch):
Here we are using an OBJ model loaded from the sketch’s data folder to draw at the placement of the hit anchor. If all is correct in the code, the output would look similar to the following:
The complete sketch code is available here.
Источник


