- Root Checker | How to Check Root after Rooting with KingoRoot?
- First, How to Root Your Android Phone with KingoRoot
- Step 1: Free Download KingoRoot APK
- Step 2: Install KingoRoot APK on Your Android Device
- Step 3: Launch «Kingo ROOT» and Start Rooting
- Step 4: Root Succeeded/Failed and Check Root
- How to Check Root with Root Checker After Rooting
- Step 1: Check your Android Version and Download Root Checker
- Step 2: Install this app to your device and launch the app
- Step 3: Open the app and press «Verify Root».
- KingoRoot on Windows
- KingoRoot for Android
- Как проверить наличие рут-прав на Android
- Как узнать, получилось ли установить режим Superuser
- Способ 1: Root Checker
- Способ 2: Terminal Emulator for Android
- Рут-права установлены, но не отображаются в системе
- Причина 1: Отсутствует менеджер разрешений
- Причина 2: Суперпользователь не разрешен в системе
- Причина 3: Некорректно установлен бинарный файл superuser
- How to Check if Your Android Phone is Rooted
- What is Rooting?
- Check through Settings
- Use the Root Checker App
- Use the Terminal Emulator
- Advantages of a Rooted Android Phone
- More Control
- More Customization Options
- Frequently Asked Questions
- Can I unroot an Android device?
- Can I see if my phone is rooted without an app?
- Don’t Go too Crazy over Root Access
Root Checker | How to Check Root after Rooting with KingoRoot?
Due to various of reasons, Android users want to gain root access of the Android mobiles. Rooting gives you full access and control of the Android system. After rooting, you can uninstall the pre-installed apps, block ads, greatly save battery life and so on. Your mobile phone is not rooted by default, you may have downloaded the root tool to help you to root your phone.
You may want to check if your Android mobile is rooted or not. you can first root your device with KingoRoot and check root with Root Checker. How to Check Root with if your Android Cellphone is rooted or not.
First, How to Root Your Android Phone with KingoRoot
Step 1: Free Download KingoRoot APK

Root APK will be automatically started. If Chrome warns you about this root download, click «OK» to proceed.
Step 2: Install KingoRoot APK on Your Android Device
If you reveive the install block message, just head to Settings > Security > Unknown sources > Allow.
Step 3: Launch «Kingo ROOT» and Start Rooting
Just click «One Click Root» to start rooting your smartphones
Step 4: Root Succeeded/Failed and Check Root
How to Check Root with Root Checker After Rooting
Step 1: Check your Android Version and Download Root Checker
Root Checker may only support Android Version 4.0 and above.
Step 2: Install this app to your device and launch the app
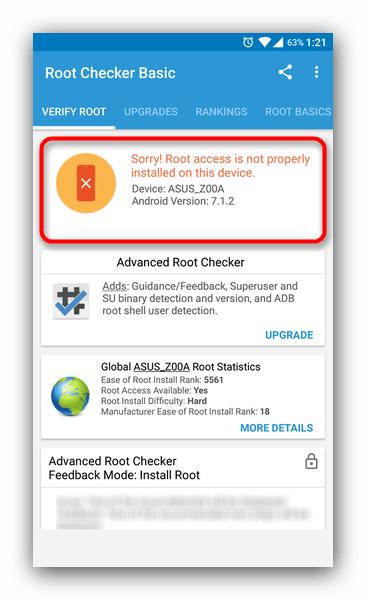
Step 3: Open the app and press «Verify Root».
You will get the results:
- «Congratulations, you have root access on your phone!»
- «Your device has no root permissions or you device is not properly rooted.»
More to say: If you fail to root your device for the first time, you may try again with KingoRoot due to some technical reasons.
KingoRoot on Windows
KingoRoot Android on Windows has the highest success rate. It supports almost any Android device and version.

KingoRoot for Android
KingoRoot for Android is the most convenient and powerful apk root tool. Root any Android device and version without connecting to PC.
Источник
Как проверить наличие рут-прав на Android
Как узнать, получилось ли установить режим Superuser
Способов активировать «режим админа» в Android существует немало, однако эффективность того или иного из них зависит от самого устройства и его прошивки – кому-то достаточно приложения вроде KingROOT, а кому-то придется разблокировать загрузчик и установить модифицированное рекавери. Собственно вариантов проверки, сработал ли тот или иной метод, существует несколько.
Способ 1: Root Checker
Небольшое приложение, единственное предназначение которого – проверка устройства на предмет наличия рут-доступа.
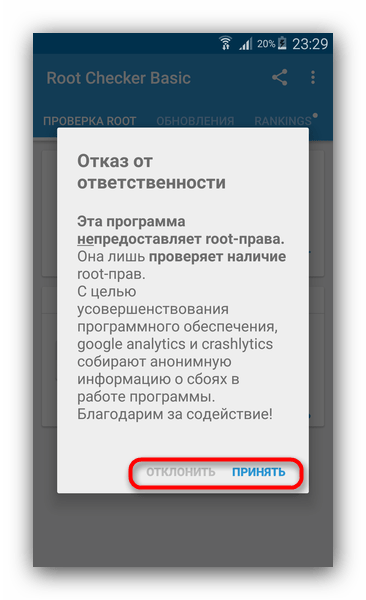
- Откройте приложение. Первым делом появится окно с уведомлением, предупреждающим о сборе анонимной статистики. Если согласны, жмите «Принять», если нет – «Отклонить».
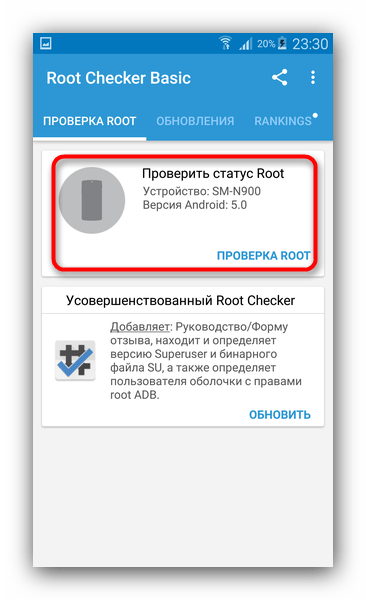
После вводной инструкции (она на английском и не слишком полезна) получите доступ к главному окну. В нем следует нажать на «Проверка Root».
В процессе проверки приложение попросит соответствующий доступ – возникнет окошко разрешения. 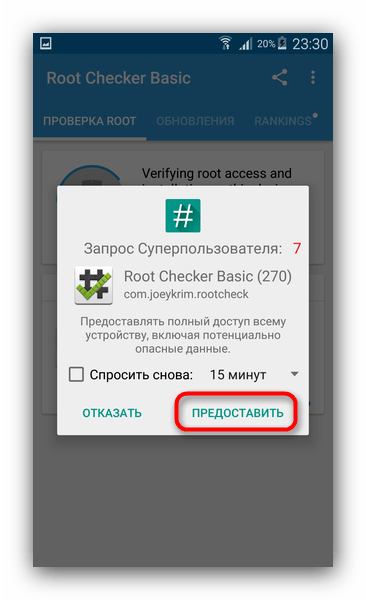
Естественно, доступ необходимо разрешить.
Если такого окна не появилось – это первый признак проблемы!
Если вы уверены, что получили рут-доступ, но приложение говорит о его отсутствии – читайте пункт о неполадках в конце статьи.
Проверка с помощью Root Checker – один из самых простых методов. Однако и он не без недостатков — в бесплатном варианте приложения присутствует реклама, а также надоедливые предложения купить Pro-версию.
Способ 2: Terminal Emulator for Android
Поскольку Андроид представляет собой систему, основанную на Linux-ядре, есть возможность установить на устройство под управлением этой ОС эмулятор терминала для привычной пользователям Линукс-консоли, в которой можно проверить наличие рут-привилегий.
- Открываем приложение. Появится окно командной строки и клавиатура.
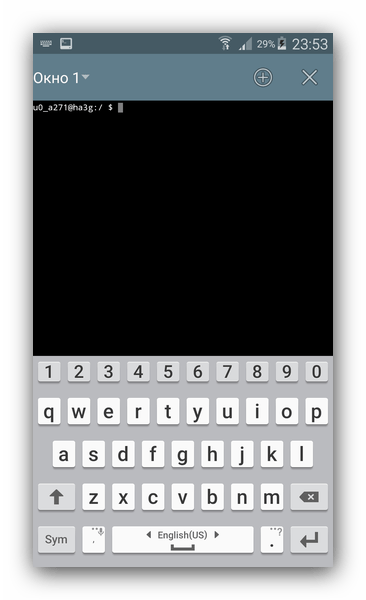
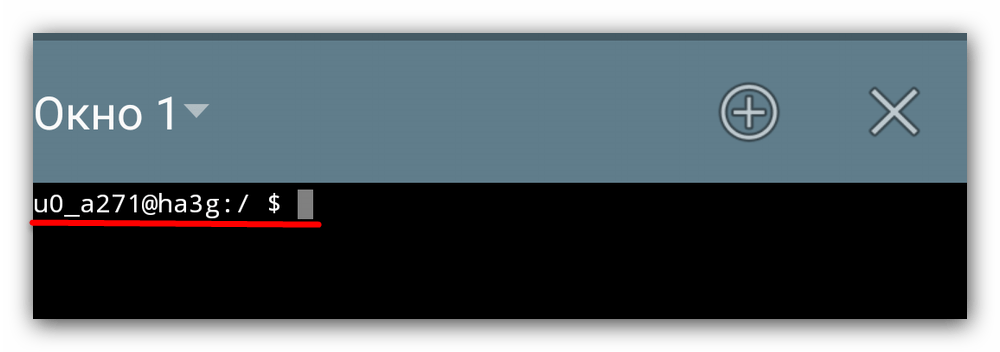
Обратите внимание на вид первой строки – имя пользователя (состоит из имени учетной записи, разделителя и идентификатора устройства) и символ «$».
Единственный недостаток этого способа — он чуть сложнее предыдущего, однако и с ним справятся даже начинающие пользователи.
Рут-права установлены, но не отображаются в системе
Причин такого варианта развития событий может быть несколько. Рассмотрим их по порядку.
Причина 1: Отсутствует менеджер разрешений
Таковым является приложение, например, SuperSU. Как правило, при получении рут-прав оно устанавливается автоматически, поскольку без него само наличие прав суперпользователя бессмысленно – приложения, требующие root-доступ, не умеют его получать сами по себе. Если среди установленных программ не нашлось нужного, скачайте его и установите. Мы возьмем за пример уже упомянутый СуперСу, вы можете выбрать любой его аналог.
Причина 2: Суперпользователь не разрешен в системе
Иногда после установки менеджера разрешений требуется вручную включить рут-права для всей системы. Это делается так.
- Заходим в СуперСу и тапаем по пункту «Настройки».
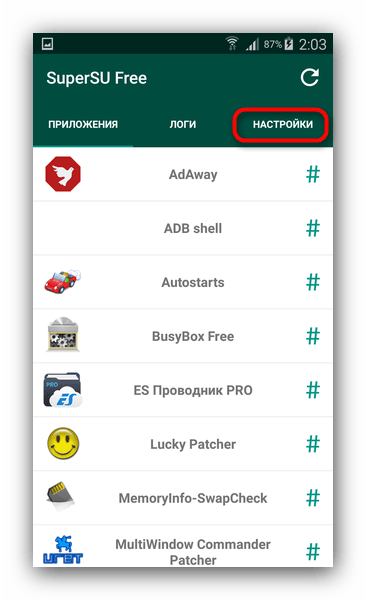
В настройках смотрим, проставлена ли галочка напротив «Разрешить суперпользователя». Если нет – то проставляем.
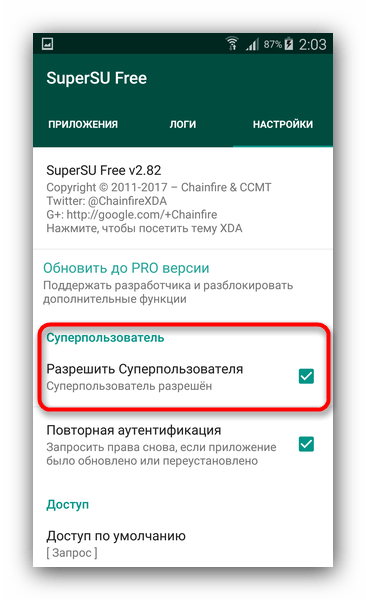
После этих манипуляций все должно встать на место, но все-таки рекомендуем вам повторно проверить систему одним из описанных в первой части статьи способов.
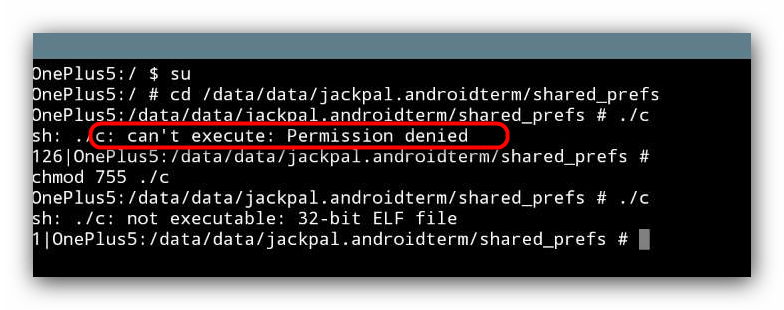
Причина 3: Некорректно установлен бинарный файл superuser
Скорее всего, произошел сбой во время процесса прошивки исполняемого файла, который отвечает за наличие прав суперпользователя, из-за чего появился такой себе «фантомный» рут. Кроме этого, возможны и другие ошибки. Если вы столкнулись с таким на девайсе под управлением Android 6.0 и выше (для Samsung – 5.1 и выше), вам поможет сброс до заводских настроек.
В случае если ваше устройство работает на версии Андроид ниже 6.0 (для Самсунг, соответственно, ниже 5.1) можно попробовать получить рут заново. Крайний случай – перепрошивка.
Большинству пользователей права суперпользователя не требуются: они рассчитаны, в первую очередь, на разработчиков и энтузиастов, оттого и имеются некоторые сложности с их получением. Кроме того, с каждой новой версией ОС от Google получить такие привилегии становится все сложнее, и, следовательно, выше вероятность сбоев.
Помимо этой статьи, на сайте еще 12470 инструкций.
Добавьте сайт Lumpics.ru в закладки (CTRL+D) и мы точно еще пригодимся вам.
Отблагодарите автора, поделитесь статьей в социальных сетях.
Источник
How to Check if Your Android Phone is Rooted
A lot of people want to root Android smartphones so that they can install various third-party apps or overcome certain system limitations, usually put in place by hardware manufacturers and carriers.
While some phones may come rooted, the majority of them do not. There are a few simple and free ways to check if you have a rooted phone. In this article you’ll find three methods, two of them foolproof, and one that may be situational, depending on the model of your phone.
What is Rooting?
Not to be confused with jailbreaking (on iOS devices), is a method of unlocking an Android device in order to grant the user privileged control, or root access. It’s a lot like having administrator privileges on a Windows or Linux-based OS.
Check through Settings
Note that this method may not work on all Android phones.
- Go to ‘Settings.’

- Locate and tap ‘About Phone.’
- Go to ‘Status.’
- Check the ‘Device Status.’


Most new smartphones should have an Official device status. Official means that the software has not been tampered with and the device is not rooted.
Seeing a Custom tag under device status usually means that your phone is rooted.
The device status tab may be different from one model to another. Therefore, if you do see an Official tag it’s usually best to check the manufacturer’s website and see if the phone comes rooted or not.
Use the Root Checker App
The Root Checker app is a third-party app that you can download for free off Google Play, or pay for a fancier Pro version. Whichever version you choose, you should be able to determine the root access status on your phone.
- Go to Play Store.
- Tap on the search bar.
- Type “root checker.”
- Tap on the simple result (free) or the root checker pro if you want to pay for the app.
- Tap install and then accept to download and install the app.
- Go to Settings.
- Select Apps.
- Locate and open Root Checker.
- Tap on the “Get Started” button.
- Tap on “Verify Root” once the app has determined the model of your phone.

It should only take a few moments for the app to determine the root access status of your phone. Once it knows, a message will be displayed, clearly stating if you have or don’t have root access.
Use the Terminal Emulator
The Terminal Emulator app has been designed to give users a complete Linux terminal emulator on Android devices.
It’s a good way to practice using commands, or to make full use of various commands enabled on rooted phones.

- Go to Play Store.
- Tap the search bar and type “Terminal Emulator”
- Tap Install and Agree.
- Go to Settings and find the Terminal Emulator app.
- Tap the icon to open the app.
- In the terminal window type “su” and then tap either Search or Enter.
The “su” is the super-user command line. If your phone is rooted, you should be able to see the $ turn into an # in the command line. If not, or if you receive an error with “command not found”, it means that your phone is not rooted.
Note that neither the Terminal Emulator nor the Root Checker apps can root an Android device. There are other third-party apps that let you do that.
Advantages of a Rooted Android Phone
There are some dangers involved with rooting an Android phone. Mostly because when users start to poke and prod through various functions of the phone, it’s possible to cause a complete system malfunction or in other words, you could brick your phone if you don’t know what you’re doing.
This usually happens when users try to squeeze too much performance out of their phones, pushing the components past their limitations, or when installing new firmware that may not be fully supported.
That said, there are some considerable benefits too when it comes to having a rooted phone. If you don’t mess with the essential system processes, there’s a lot you can do to customize and improve the performance of the phone from other areas.
More Control
Imagine a rooted Android phone as a desktop PC. You can pretty much configure a desktop however you want, as long as all the components are compatible. Rooting can even give you access to overclocking or underclocking the phone’s CPU and GPU components. You can beef up the performance or tone it down so that your phone will age slower.
More advantages include full application control. This means being able to backup, restore, remove, and add everything you want, including editing applications in batches.
You can also remove certain unwanted and unnecessary system processes that come pre-installed. These are commonly referred to as bloatware. These types of processes are similar to Windows system processes and pre-installed apps that eat up a large chunk of resources without offering anything of value to the user.
More Customization Options
One of the coolest things about having a rooted phone is the level of customization you can get regarding everything from themes to animations and everything else in between, including icons.
Most smartphones come with limited personalization options. For example, you can’t change your loading screen animations on unrooted phones.
Frequently Asked Questions
Can I unroot an Android device?
Absolutely! If you need to perform a system update you’ll need to unroot your device first. Fortunately, it isn’t too difficult. If you want to unroot your device, check out this article.
Can I see if my phone is rooted without an app?
Yes. You can go through the settings as shown above, or you can search the app drawer for a rooting app. These apps are necessary to root the phone in the first place.
Open the app drawer on the Android device and use the search bar to look for ‘SuperSu’ ‘Dr. Fone’ or another rooting app.
Don’t Go too Crazy over Root Access
While it is cool to have a rooted smartphone on which you can theoretically do whatever you want, compared to regular users, it’s best to exercise caution or at least inform yourself of what you should and shouldn’t change.
If you have some tips on how to improve performance by taking advantage of root access, please leave a comment in the comments section below, and don’t forget to specify which model Android smartphone those tips are for.
Источник


