- How to create widgets in android
- tashariko/widget_sample
- widget_sample — tutorial to how to create a widget
- Introduction to widgets
- App Widgets | Android Developers
- App Widgets are miniature application views that can be embedded in other applications (such as the Home screen) and…
- Create a widget of 1*1 dimension
- Add the click listener
- PendingIntent | Android Developers
- By giving a PendingIntent to another application, you are granting it the right to perform the operation you have…
- Adding multiple widgets for your app
- Update the Data/UI for widget
- Handling adapters for widget
- Android (Home screen) Widgets — Tutorial
- 1. Prerequisites
- 2. Android Widgets
- 2.1. Overview about AppWidgets
- 2.2. Home screen widgets
- 2.3. Steps to create a Widget
- 2.4. Widget size
- 3. Creating the Broadcast receiver for the widget
- 3.1. Create and configure widget
- 3.2. Available views and layouts
- 3.3. AppWidgetProvider
- 3.4. Receiver and asynchronous processing
- 4. Widget updates
- 5. Exercise: widget with fixed update interval
- 5.1. Target
- 5.2. Create project and widget implementation
- 5.3. Validate
- 6. Collection View Widgets
- 7. Enabling a app widget for the lock Screen
- 8. Exercise: Update widget via a service
How to create widgets in android

Aug 26, 2017 · 12 min read
This article will guide you through the complete process of widget creation. We will do this in steps:
- Introduction to widgets
- Create a widget of 1*1 dimension: we will add the basic files to the project that is needed to create a widget.
- Add the click listener: we will see here that how the click listener works and how it is different from the normal click listener.
- Adding multiple widgets for your app: We will see how to different widgets to the widget provider.
- Update the Data/UI for widget: We will detect the size of the widget and then accordingly change the data/UI for the widget.
- Handling adapters for widget: We will see how to add Gridview/Listview/Stackview on the widget.
I have created a sample project to guide you through this tutorial for creating the widget. you can take the pull from here.
tashariko/widget_sample
widget_sample — tutorial to how to create a widget
Here i have created branches for all the steps required. I think this project is going to be sufficient to get the idea on how to create a widget in android. ok then, let’s get started.
Introduction to widgets
Widget is the part of our android application, which stays outside the app. It operates in a different process than our application. These are treated as a separate app that works on homescreen. So instead of using normal Views that we use in our application, android uses Remote Views. Remote views seems just like any other xml views that we use in app creation, but with minor changes.
For example, this is the layout file for our widget, for now it just shows an image.
Although they seems similar to normal views they have some limitations on what they can support. They normally support all the popular basic views, but views like constraint layout and recycler views are not supported, to see the full list of supported views you can refer to :
App Widgets | Android Developers
App Widgets are miniature application views that can be embedded in other applications (such as the Home screen) and…
Now, to access the views in java file we use findViewById(). But here we have methods like setTextViewText() to add text to the textview.
Now lets start with adding a widget to our homescreen.
Create a widget of 1*1 dimension
We are going to place a widget on the homescreen, for now it will show a icon there. This icon will be of 1*1 dimension.
Switch to branch step_1-basic_widget_creation.
At first we need to add a file at res/xml. i am calling this file sample_widget_info.xml. It consist of “ appwidget-provider” which gives the basic information regarding our widget. It is as follows:

- According to the above image, to create a widget of 1*1 dimension we need the minWidth and minHeight of 40dp respectively.
- initialLayout attribute decides which view to use initially when we add the widget to the homescreen.
- preview_image attribute decides what icon/image to show in the widget selector. Here as our selection of dimension, the icon is shows as 1*1 widget.
- resizeMode attribute defines if we want the widget to be able to expand horizontally or vertically.
- updatePeriodMillis attribute defines when time interval to update the widget. the minimum time we can give is 30 minutes i.e. 1800000.
- widgetCategory attribute defines where to put the widget homescreen or keyboard.
Now we have to tell android that we have added the widget for our app and we do this by defining a receiver in the manifest file. This receiver will extend AppWidgetProvider , here that file is SampleAppWidgetProvider.
We will add this receiver in the manifest file.
Here we added the action to detect:
- An new instance of Your AppWidget added to Home Screen from AppWidget Chooser( from AppWidget provider) is added.
- When requested update interval having lapsed which you have provided in AppWidget info file using android:updatePeriodMillis attribute.
- When device reboot
The meta-data points to the info file we created for our widget.
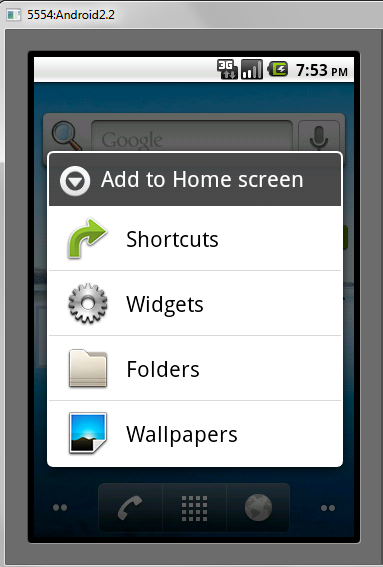
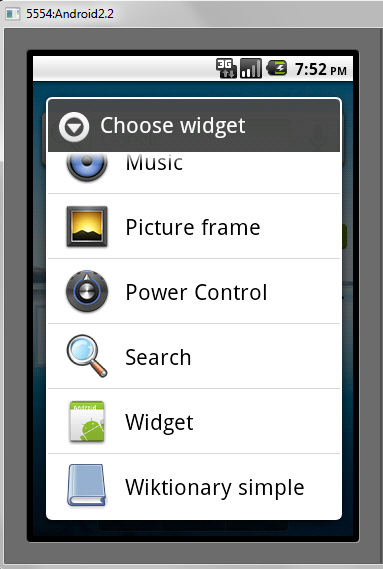
Now if all has gone correctly, after installing the app, you can see the widget option in the widget provider in your mobile. just drag it on the homescreen and you can see it.
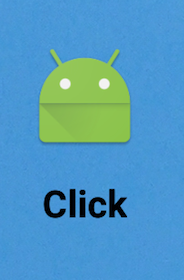
Add the click listener
Now we want to open an activity when we click on that widget. Here the click implementation is a little different than the normal click listener. We are using pending intent to open an activity here. Pending intent is used here because by this we can declare an Intent and and execute it on the click of the widget, same as we use it for notifications.
To learn more about Pending Intent go to:
PendingIntent | Android Developers
By giving a PendingIntent to another application, you are granting it the right to perform the operation you have…
Now switch to the branch step_2-widget_click_implementation.
For implement the click, we are now going to use file SampleAppWidgetProvider. Here we are only going to use onUpdate() method. This method get called whenever there is a chance that the widget gets updated (not the widgets dimensions or options, more on this later).
It provides following parameters:
- Context : To provide us the context. gets information about installed AppWidget providers and other AppWidget related state.
- AppWidgetManager : Gives information about installed AppWidgets providers and other AppWidget related state.
- int[] : This is an array of appWidgetIds, these ids represents all the AppWidgets that are available on the homescreen for our app.
Now, we are going to add a for loop in onUpdate() method to access all the widgets that are available on the homescreen for our app.
Here updateAppWidget() method will handle the Remote Views work. For now we only want to open an activity nothing more. so our updateAppWidget() method will look like this:
Here we did 3 things:
- Created a pending intent to open MainActivity.
- Constructed a Remote View and added the click listener via the method setOnClickPendingIntent().
- Instruct the widget to update the widget, we will call this method everytime we update the widget.
All is done, now try it yourself, now if you click on the icon in the app widget, then you can open an activity.
Ok, now lets go a step further, and we will add 2 images in the widget and we will open different activities on each click. If you have issue regarding that, switch the branch to
Switch to the branch step_2-widget_multi_click_implementation
Adding multiple widgets for your app
We added a single widget to home screen, now what if you want one widget to open an activity like we did before and another widget to show the list on homescreen. Suppose you need these 2 widgets,
Now for this you need 2 types of views.
There are two ways to do it.
- We can use one xml file and one AppWidgetProvider and detect the change in dimension when you increase or decrease the size and refresh the view to show the new view and handle accordingly. But in this case in the Widget provider you will only see one widget with the dimension you define in the info file sample_widget_info.xml.
- We can use 2 xml file and 2 AppWidgetProvider for these 2 widgets. The plus point here is that we will be seeing 2 widgets in the Widget Provider but here we cant change the size of the 2 widgets below the minimum dimensions we provide. Here we will try this step and we will look into the first one afterwards.
Switch to the branch step_3-multiple_widget.
Lets create a second info file white_sample_widget_info.xml, second AppWidgetProvider file SampleWhiteAppWidgetProvider.java and second layout file layout_widget_white_simple.xml. If you have any problem then refer to the code in the above mentioned branch.
Now we will implement the first method to show multiple view in single widget.
Switch to the branch step_3-multiple_view_single_widget
Here we have 2 views but one AppWidgetProvider.
Now this method is a little tricky one, as mentioned above in step 3 the onUpdate() method don’t get called when you change the dimension of the widget, instead onAppWidgetOptionsChanged() methods gets called. So instead of calling the update method to get the Remote View, we are going to use a service which will notify that the view is updated and via that we w will refresh the widget. The service is going to be an Intent Service WidgetUpdateService.java.
This service is triggered from 2 places, from onUpdate() method and from onAppWidgetOptionsChanged(). Now we are going to create a Remote View object from that service, We did this because we want to detect the change in dimensions of the widget and it cant be done from onUpdate() method. So the 2 methods in our SampleAppWidgetProvider.java will look like this:
In startActionUpdateAppWidgets() method we are starting the service as
We will handle ACTION_UPDATE_APP_WIDGETS action in onHandleIntent() method. Here we are going to get an instance of AppWidgetManager and via this we are going to call the update method updateAppAllWidget() of SampleAppWidgetProvider.java class to get the Remote View. We will do this as:
And the updateAppAllWidget() now handles the updation of all the widgets on the screen(the work we were doing in onUpdate() is done here). It looks like this:
Now we want to detect the change in dimension of the widget, we do this as:
As you can see, to get the width we use the method getAppWidgetOptions (). This method can be used to any other option also. So to get the minimum width of the widget i used the code:
So we are providing the updateAppWidget() remote view according to our need. By the table I mentioned above for dimensions, I put the check of widget width less than 300 to occupy minimum of 4 blocks of homescreen. If width is less than 300, i want to show the smaller layout else the larger view of the widget.
One thing to notice, I used 300 as my mark if I want the size of the widget less than 4*1. It came from that table only, but to remember it easily I use multiple of 100. For most cases this will work.
Update the Data/UI for widget
It will be going to be same as above with minor changes, just to make this this updating concept clear.
Switch to the branch step_4-update_view_by_height.
Suppose you want to show a text at the top of widget if the height of the widget is increased. If height of the widget is greater than 100, we will show the text.
Here we use the PendingIntent flag FLAG_UPDATE_CURRENT because we wanted to update the current state of the MainActivity.
Handling adapters for widget
These are all simple views we used to show on the widget, what if we want to show a Collection View(listview or a gridview or a stackview).StackView is the image view we see for some apps. eg. Android Authority app) All uses the same concept so i am going to use a listview here.
As normal Listview for widget, we need the adapter here, but the normal adapter will not work here, instead we are going to start a service which will trigger the adapter and handle our listview.
Switch to the branch step_5-widget_list_view.
Few things to notice here:
- we will use setRemoteAdapter() method to attach the adapter to our ListView. You can see this in our WidgetProvider.
- It will start the RemoteViewsService service which trigger, the RemoteViewsService.RemoteViewsFactory. Its an interface for an adapter between a remote collection view, in our case for ListView. You can see this in ListViewWidgetService.
- We are detecting the change in the size of the widget in onAppWidgetOptionsChanged() and if width is greater than 300 we are starting the service.
In the service we are creating the data and saving it in sharedprefs. You can handle data however you want to handle. After that same process, get the instance of AppWidgetManager and call updateAllAppWidget().
Now in the adapter class AppWidgetListView. Mainly there are 2 important methods, getCount() to get the size of the list to show and getViewAt() to get the remote view of the specific position.
Now, we have to implement the click on the list item to do a task, here we are opening the activity with some data. In remoteView the click works differently on collection views. Implementing the click to each of the item is an expensive task, so we implement the click to the complete list view in the AppWidgetProvider.
Then we add the extra data for our click in the adapter we created in getViewAt. It is done by fillInIntent.
So after implementing the click, our getViewAt() method looks like this:
Now if you run the app, you can see the complete work with the click on the list item.
Источник
Android (Home screen) Widgets — Tutorial
Developing Android Widgets. This article describes how to create home screen widgets in Android.
1. Prerequisites
The following description assume that you already have experience in building standard Android application. Please see https://www.vogella.com/tutorials/Android/article.html — Android Tutorial. It also partly uses Android services. You find an introduction into Android Services in https://www.vogella.com/tutorials/AndroidServices/article.html — Android Service Tutorial.
2. Android Widgets
2.1. Overview about AppWidgets
2.2. Home screen widgets
Home screen widgets are broadcast receivers which provide interactive components. They are primarily used on the Android home screen. They typically display some kind of data and allow the user to perform actions with them. For example, a widget can display a short summary of new emails and if the user selects an email, it could start the email application with the selected email.
To avoid confusion with views (which are also called widgets), this text uses the term home screen widgets, if it speaks about widgets.
A widget runs as part of the process of its host. This requires that the widget preserves the permissions of their application.
Widget use RemoteViews to create their user interface. A RemoteView can be executed by another process with the same permissions as the original application. This way the widget runs with the permissions of its defining application.
The user interface for a Widget is defined by a broadcast receiver. This receiver inflates its layout into an object of type RemoteViews . This object is delivered to Android, which hands it over the home screen application.
2.3. Steps to create a Widget
To create a widget, you:
Define a layout file
Create an XML file ( AppWidgetProviderInfo ) which describes the properties of the widget, e.g. size or the fixed update frequency.
Create a BroadcastReceiver which is used to build the user interface of the widget.
Enter the Widget configuration in the AndroidManifest.xml file.
Optional you can specify a configuration activity which is called once a new instance of the widget is added to the widget host.
2.4. Widget size
Before Android 3.1 a widget always took a fixed amount of cells on the home screen. A cell is usually used to display the icon of one application. As a calculation rule you should define the size of the widget with the formula: ((Number of columns / rows) * 74) — 2 . These are device independent pixels and the -2 is used to avoid rounding errors.
As of Android 3.1 a widget can be flexible in size, e.g., the user can make it larger or smaller. To enable this for widget, you can use the android:resizeMode=»horizontal|vertical» attribute in the XML configuration file for the widget.
3. Creating the Broadcast receiver for the widget
3.1. Create and configure widget
To register a widget, you create a broadcast receiver with an intent filter for the android.appwidget.action.APPWIDGET_UPDATE action.
The receiver can get a label and icon assigned. These are used in the list of available widgets in the Android launcher.
You also specify the meta-data for the widget via the android:name=»android.appwidget.provider attribute. The configuration file referred by this metadata contains the configuration settings for the widget. It contains, for example, the update interface, the size and the initial layout of the widget.
3.2. Available views and layouts
A widget is restricted in the View classes it can use. As layouts you can use the FrameLayout , LinearLayout and RelativeLayout classes. As views you can use AnalogClock , Button , Chromometer , ImageButton , ImageView , ProgressBar and TextView .
As of Android 3.0 more views are available: GridView , ListView , StackView , ViewFlipper and AdapterViewFlipper . These adapter views require that you define a collection view widget which is described later in this tutorial.
The only interaction that is possible with the views of a widget is via an OnClickListener event. This OnClickListener can be registered on a widget and is triggered by the user.
3.3. AppWidgetProvider
Your BroadcastReceiver implementation typically extends the AppWidgetProvider class.
The AppWidgetProvider class implements the onReceive() method, extracts the required information and calls the following widget life cycle methods.
As you can add several instances of a widget to the home screen, you have life cycle methods which are called only for the first instance added / removed to the home screen and others which are called for every instance of your widget.
| Method | Description |
|---|---|