- Live debug your Cordova/Ionic application with Visual Studio Code
- Once upon a time, debugging Ionic apps was taking way too much time.
- Ionic and live reload
- Debug step by step within VS Code
- Live Debug on Android
- The awesome Genymotion
- Live debug on iOS
- Prerequisites
- Conclusion
- Mitch
- Отладка на устройстве Android
- Отладка приложения
- Android
- adelphes
- Android for VS Code
- What’s New
- Features
- Requirements
- Limitations
- Extension Settings
- Building your app automatically
- .vscode/launch.json
- .vscode/tasks.json
- Java Intellisense
- Expression evaluation
- Powered by coffee
- Questions / Problems
Live debug your Cordova/Ionic application with Visual Studio Code
By Mitch , 25 September 2018
In this article, I will show you how to setup your development environment using VS Code to be able to debug correctly your Ionic app running on iOS or Android.
- Live reload the running app each time you make changes to your code without having to build it all over again.
- Putting breakpoints directly in VS Code to pause your app running directly on a device or emulator.
I’ll consider you have already been playing around with Ionic 3 and managed to make it run it on a device or emulator. If you haven’t done that yet, I invite you to learn all that on the Ionic website.
I’ll also assume that you have already installed Visual Studio Code. If you haven’t tried it, it’s a really lightweight IDE and has pretty much all the features you need to develop mobile applications using Ionic 3. Also, it’s free and has a huge community making it better and better every day.
Once upon a time, debugging Ionic apps was taking way too much time.
Ionic 1 was a real revolution for me as a frontend developer. Suddenly I could create mobile apps working on iOS AND Android just with my web developer knowledge. It was awesome!
But, as for many early technologies, there were caveats. And the biggest one of all was: Debugging. At first, I thought that just serving the app and having live reload on the browser would be enough to be able to find and fix easily all the bugs just by using console.log(). You know, these console.log() you forget in your code after fixing your bug and that haunts your debug console for days, because you’re too lazy to remove them. Yeah, you’re a javascript developer, you know what I’m talking about :). And for the platform specific bugs, I would just have to debug my Android apps with the chrome dev tools and iOS apps with the Safari dev tools. There couldn’t be so many bugs specific to each platform! I was wrong.
If you create an hybrid app, you’ll surely run into some nasty platform specific bugs. And they’ll be tricky to fix. Trust me, you need the most efficient debug environment to find and fix them quickly.
At that time, when I needed to find a bug on Android, I had to build the web app, build the Android app with Cordova, launch it on a device or an emulator, launch chrome dev tool to connect to the running app, put my breakpoints, find a possible cause, fix it in my code and do this process all over again. This whole process was taking way too much time.
And now, thanks to Ionic 3 and Visual Studio code, I can finally put my breakpoints directly in my own code and live reload my apps running on an iOS or Android device!
So, less talking, more debugging. I’ll show you how to make the magic happen.
Ionic and live reload
Starting from Ionic 2, you can live reload your Android/iOS application connected to your computer. You can change the code, and the app will reload with the changes directly. No need to build it all over again!
To do that on Android, nothing easier, just run:
This should launch the app on an Android emulator or a device if you plugged one in. And MAGIC, you can edit your code and the app will refresh itself!
OK, that’s a start, but we still need to put our breakpoints in the chrome dev tool if we need to debug our app step by step. And we don’t want that, do we?
Debug step by step within VS Code
First, you’ll need to install the Cordova Tools extension for Visual Studio Code.
Open up VS Code, click the extension icon on the left-hand side and search for «Cordova Tools». Install it and reload VS Code, as asked.
 Install the Cordova Tools Extension for VS Code
Next, click the debug icon on the left-hand side and click the gear icon at the top of the Debug panel and select «Cordova» in the dropdown at the top.
 Select the Cordova environment in the Debug Panel
This will create a launch.json file inside the .vscode folder in the project directory. You will now have several debug options at the top of the debug panel, such as «Run Android on device» or «Attach to running Android on device».

If you run «Serve to the browser (ionic serve)», a new browser window will launch and you’ll already be able to debug step by step within VS Code your app running in the browser.

That’s already way better than debugging step by step in chrome dev tools and then making again the changes in your code. We’re actually debugging directly in our own code in VS Code!
So now, let’s test this baby with a running iOS and Android app!
Live Debug on Android
First, if you haven’t build an Android app before, you’ll need to install Android Studio to be able to do so. You’ll also need to create an Android virtual device with AVD manager.
You will also need to enable the developer mode on your Android device if you want to run the app on a real device. To do so, you can take a look at my post explaining how to debug a Cordova application on Android with Chrome.
Once you’ve done all that, running your app on Android should work perfectly. just run the «Run Android on emulator» and of course, set the «ionicLiveReload» parameter to true if you want to be able to make live changes to your app:
 Debugging the app running on an Android emulator
That’s it for Android! Pretty awesome, right?
The awesome Genymotion
If you haven’t heard about Genymotion, I really recommend you take a look. Their Android emulators are way faster than the ones in Android Studio. And, as I already said in this article, time is precious when debugging!
If you do use Genymotion, careful, it seems that adb recognises the emulator as a real device.
So launch your Genymotion virtual device and execute «Run Android on device» instead of «Run Android on emulator».
Live debug on iOS
This was a little trickier to make it running smoothly on iOS.
Prerequisites
VS Code will need one more thing to be able to connect to running iOS devices: iOS Webkit Debug Proxy (IWDP). Install it using Brew:
If, like me, you’ve updated XCode and got the new iOS versions (11.3), you’ll probably get an error while VS Code tries to attach to the iOS simulator:
Like mentioned in a comment in this issue, if you get this error, you need to reinstall IWDP with the latest libmobiledevice. On the terminal, just run this:
Well, actually, that didn’t do the trick for me. I suppose there’s currently a problem with the 11.4 version of iOS, I can’t seem to see the device through the proxy. It worked fine with 11.2 for me.
So let me show you a nice trick if you have the same problem: let’s specify the emulator target to run, for example, on an older iOS version.
To do so, you need to run this command:
This will list all the available emulations like this:
All you need to do now is open the launch.json file in VS Code and in the «Run iOS on simulator» parameters, replace the «target» parameter, which was «emulator», by one of the virtual devices listed above. For example «iPhone-6, 10.0».
Of course, if you want to be able to make live changes to the app, set the «ionicLiveReload» parameter to true in the «Run iOS on simulator» parameters.
In a nutshell, to run your application in an emulator with iOS 10 and be able to debug step by step and make live changes to your code, here’s the needed configuration in the launch.json :
Now execute the «Run iOS 10 simulator» in the Debug panel list. The specified iOS emulator will launch and you will be able to debug your iOS app directly in VS Code!
 Debugging the app running on an iOS emulator
Conclusion
I hope this article helped you setup a working environment to help you debug Ionic applications with Visual Studio code.
So no more excuses, go find these nasty platforms bugs and fix them!
If you have questions or remarks concerning this article, please feel free to share them in the comments below!

Mitch
I’m a freelance full stack developer working in Paris. I love everything that involves websites and mobile apps. That includes startups, UX design, growth hacking, productivity and many more.
Источник
Отладка на устройстве Android
В этой статье содержатся сведения об отладке приложения Xamarin.Android на физическом устройстве Android.
Отладку приложения Xamarin.Android можно выполнить на устройстве Android с помощью Visual Studio для Mac или Visual Studio. Перед отладкой устройство необходимо настроить для разработки и подключить к ПК или Mac.
Отладка приложения
После подключения устройства к компьютеру отладка приложения Xamarin.Android выполняется так же, как отладка любого продукта Xamarin или приложения .NET. Убедитесь, что в интегрированной среде разработки выбраны конфигурация Отладка и внешнее устройство. Это необходимо, чтобы обеспечить доступность соответствующих отладочных символов и возможность подключения среды IDE к запущенному приложению:

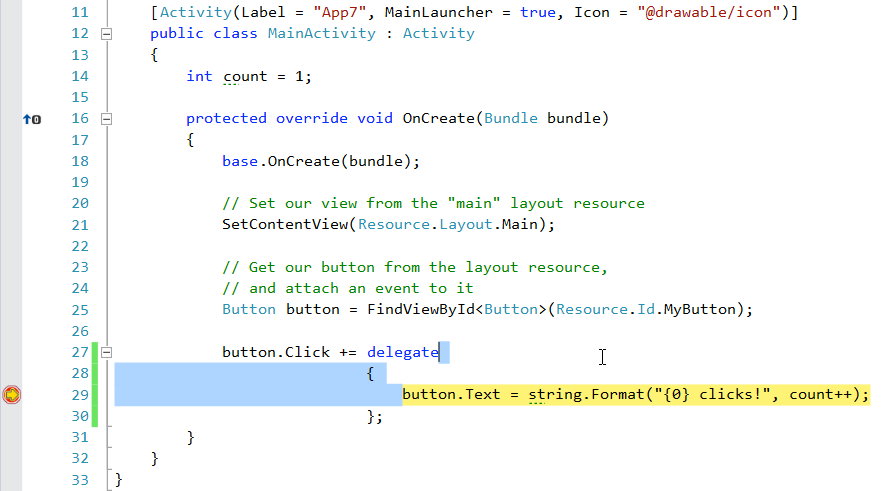
Затем в коде устанавливается точка останова:

После выбора устройства Xamarin.Android подключится к устройству, развернет приложение и запустит его. По достижении точки останова отладчик остановит приложение, которое затем проходит отладку так же, как любые другие приложения C#:

Затем в коде устанавливается точка останова:
Источник
Android
adelphes
Android for VS Code
This is a preview version of the Android for VS Code Extension. The extension allows developers to install, launch and debug Android Apps from within the VS Code environment.
What’s New
- Java Intellisense for Android is now in beta.
Features
- Line by line code stepping
- Breakpoints
- Variable inspection and modification
- Logcat viewing [ Command Palette -> Android: View Logcat ]
- Break on exceptions
- Step through Android sources
Requirements
You must have Android SDK Platform Tools installed. This extension communicates with your device via the ADB (Android Debug Bridge) interface.
You are not required to have Android Studio installed — if you have Android Studio installed, make sure there are no active instances of it when using this extension or you may run into problems with ADB.
Limitations
- This is a preview version so expect the unexpected. Please log any issues you find on GitHub.
- This extension will not build your app.
If you use gradle (or Android Studio), you can build your app from the command-line using ./gradlew assembleDebug or configure a VSCode Build Task to run the command (see below).
You must use gradle or some other build procedure to create your APK. Once built, the extension can deploy and launch your app, allowing you to debug it in the normal way. See the section below on how to configure a VSCode Task to automatically build your app before launching a debug session.
- Some debugger options are yet to be implemented. You cannot set conditional breakpoints and watch expressions must be simple variables.
- If you require a must-have feature that isn’t there yet, let us know on GitHub.
Extension Settings
This extension allows you to debug your App by creating a new Android configuration in launch.json .
The following settings are used to configure the debugger:
Building your app automatically
This extension will not build your App. If you would like to run a build each time a debug session is started, you can add a preLaunchTask option to your launch.json configuration which invokes a build task.
.vscode/launch.json
Add a preLaunchTask item to the launch configuration:
Add a new task to run the build command:
.vscode/tasks.json
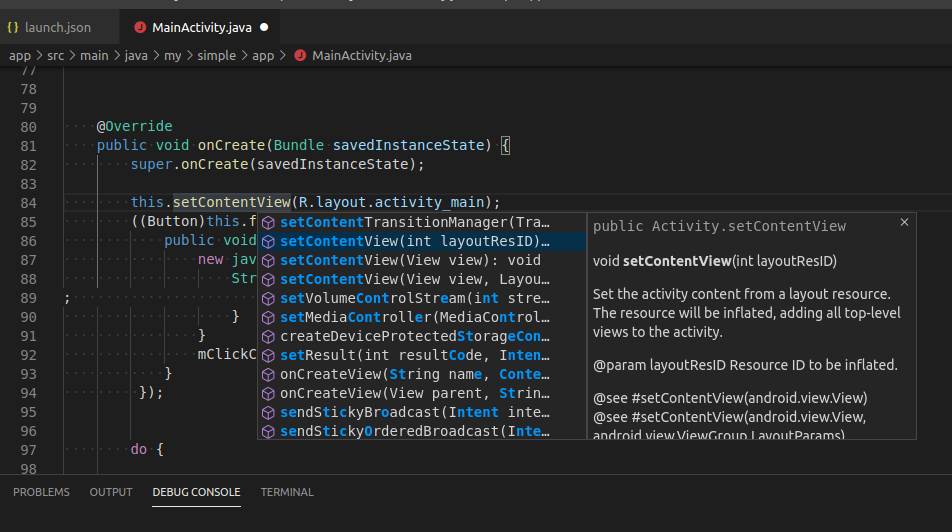
Java Intellisense
Support for Java Intellisense is currently in beta, so any feedback is appreciated.
To use Java intellisense, make sure the option is enabled in Settings (Extensions > Android > Enable Java language support for Android) and press ctrl/cmd-space when editing a Java source file.
You can read more about using code-completion on the VSCode website and how to configure code-completion to suit your Android project in the wiki.
Expression evaluation
Format specifiers can be appended to watch and repl expressions to change how the evaluated result is displayed. The specifiers work with the same syntax used in Visual Studio. See https://docs.microsoft.com/en-us/visualstudio/debugger/format-specifiers-in-cpp for examples.
You can also apply the specifiers to object and array instances to format fields and elements:
Note: Format specifiers for floating point values ( e / g ) and string encoding conversions ( s8 / su / s32 ) are not supported.
Powered by coffee
The Android Developer Extension is a completely free, fully open-source project. If you’ve found the extension useful, you can support it by buying me a coffee.
If you use ApplePay or Google Pay, you can scan the code with your phone camera:

Every coffee makes a difference, so thanks for adding your support.
Questions / Problems
If you run into any problems, tell us on GitHub or contact me on Twitter.
Источник


