- Virtual Machine in Android: Everything you need to know
- Virtual Machine?
- Java Virtual Machine
- How it works?
- Android OS
- Why Android use virtual machine?
- Dalvik Virtual Machine
- Dalvik EXecutable
- Compare with Java VM
- Android Runtime
- Just-In-Time vs Ahead-Of-Time
- Compare with Dalvik VM
- Optimized Garbage Collector
- In Conclusion
- Switch
- Move your stuff from iOS ® .
- Step 1 Get Google Drive.
- Step 2 Back up your stuff.
- Step 3 Turn off iMessage ® .
- Step 4 Sign in on your new phone.
- Say hello to Android.
- Help when you need it with Google Assistant.
- Digital Wellbeing tools to find your balance.
- Features that make the world more accessible.
- A battery that works smarter and longer.
- Have more questions?
- Get to know your Android.
- For developers
- For enterprise
- For the press
- The ecosystem
- Support
- Welcome to the android
Virtual Machine in Android: Everything you need to know

Aug 4, 2019 · 6 min read
Virtual Machine?
A virtual machine is based on computer architectures to provide functionality of a computer.
There are 2 main types of Virtual Machine (VM):
- System virtual machines (full virtualization VMs) provide a substitute for a real machine.
- Process virtual machines are designed to execute computer programs in a platform-independent environment.

Java Virtual Machine
Follow “write once, run anywhere” principle, JVM allows programs — written in Java/Kotlin — to run on any device or operating system.

How it works?
IDEs — like IntelliJ / Android Studio — use Java Compiler ( javac ) to compile Java code ( .java ) into Java bytecode ( .class ).

Then on runtime environments (Web, PC, Android), JVM translates it into machine specs instruction set that this environment can understand.
- Start JVM.
- Start main thread. Load .class into memory using Classloader.
- Verify bytecode is valid and not violate Java’s security restrictions.
- Translate bytecode into machine instructions and execute them.
- Unload classes. Terminate main thread.
- Shutdown JVM.
Note that: It’s possible to compile Java code to native code ahead-of-time, then run. And it’s also possible to interpret Java code directly.
Android OS
Android is an open source, Linux-based software stack created for a wide array of devices and form factors. For example, the Android Runtime (ART) relies on the Linux kernel for underlying functionalities: networking, multi-threading and low-level memory management.
Why Android use virtual machine?
There are many reason that Google engineers decide to use Android with VM, but two main reason is:
- Security: In theory, app code is totally isolated by the VM and cannot even “see” the host OS. So app code that contains malware cannot affect system directly, make app and system more robust and reliable.
- Platform independent: Android platform can run on different devices with different architectures (ARM, MIPs, x86). To abstract out the need to compile binaries for each architecture, VM comes into play.
Dalvik Virtual Machine
Dalvik Virtual Machine (DVM) is a Process virtual machine for Android.
DVM is a virtual machine that optimized for mobile environment (memory, battery life, performance. )

Dalvik EXecutable
Dalvik EXecutable ( .dex ) is Dalvik bytecode which translated from Java bytecode using dx tool (replaced by D8 tool since API 28). This format was designed for systems that have constrained memory and processor speed.

Multiple classes are included in a single .dex file:

Compare with Java VM
The DVM was built specifically for Android, to address the battery life, processing speed. Moreover, the Java tools are free but the JVM is not, so Google engineers made their own VM and made it as free.

Unlike JVM, which are simple stack machines, the DVM uses a register-based — which requires fewer instructions, fewer code units, avoid unnecessary memory access — resulting in better performance code.

Android Runtime
Android Runtime (ART) is the managed runtime used by apps and system services on Android. Replacing the predecessor Dalvik, ART performs the translation of the app’s bytecode into native instructions that are later executed by the device’s runtime environment.
The ART is written to run multiple VMs on low-memory devices. To maintain backward compatibility, ART also uses the same input bytecode as Dalvik — the standard Dalvik EXecutable ( .dex ) files — which also designed for Android to minimize memory footprint.

From Android 5.0, each app runs in its own process, with its own instance of ART. But prior to this, it use Dalvik. If your app runs well on ART, then it should work on Dalvik as well, but the reverse may not true.
Just-In-Time vs Ahead-Of-Time
Just-In-Time (JIT) added in Android 2.2. It dynamically compiles bytecode into native machine code at run-time to make app runs faster. It does all this while app is running, and that’s where the “Just-In-Time” comes from.
Ahead-Of-Time (AOT) added in Android 4.4. It statically compiles bytecode into machine code at install-time — using on-device dex2oat tool — and stores data in the device’s storage, to improve run-time performance.

Compare with Dalvik VM
Dalvik is a JIT compilation based engine.
The ART includes a JIT compiler (with code profiling). The JIT compiler complements new AOT compiler and improves runtime performance, speed up apps and system updates.

Furthermore, ART has many more advantage:
- Optimized garbage collector: one GC pause instead of two.
- Loop optimizations: Bounds check, Induction variable is eliminated.
- Faster native calls using @FastNative and @CriticalNative annotations.
- Improve battery life.
- Reduce startup time as native code is directly executed.
- Faster runtime performance because AOT compile at install-time.
- From API 28, convert APK’s DEX files to more compact machine code.
- Better debugging support (dedicated sampling profiler, detailed exceptions reporting, and ability to set watchpoints to specific fields).

Optimized Garbage Collector
Garbage Collector (GC) can impact app’s performance with “stop-the-world” events, which resulting in frozen frames, poor UI responsiveness. The default GC plan is the CMS (concurrent mark sweep).
The ART improves GC in several ways:
- The number of pauses is reduced from 2 to 1 compared to Dalvik. Dalvik’s first pause — which mostly root Marking — is done concurrently in ART by getting the threads to mark their own roots.
- Parallelized processing in the second pause (before Sweeping phase).
- Increased GC throughput enabled by the sticky CMS collector.
- Reduce total time when clean up recently-allocated, short-lived objects.
- Performs heap compaction — when app changes process state to background or cached — to reduce background memory usage.
In Conclusion
Before Android 5.0 (API 21), Android use Dalvik Virtual Machine (DVM) — a Process virtual machine — that optimized for mobile environment (memory, battery life, performance. ).
After that, each Android app runs in its own process and with its own instance of the Android Runtime (ART) — an app runtime environment used by Android OS. Replacing Dalvik, ART performs the translation of the app’s bytecode into native instructions that are later executed by the device’s runtime environment.
Источник
Switch
Move your stuff from iOS ® .
With Android, you get the right help when you need it. Around the clock security and new privacy tools. And Google apps that work smarter together. It’s easy to move from iPhone ® to Android. Ready, set, switch.
Step 1 Get Google Drive.
Make sure you have the latest version of Google Drive on your iPhone, then sign in to Drive with your Google Account.
If you don’t have a Google Account, you can create one after you download Drive.

Step 2 Back up your stuff.
Back up your content in Google Drive. 1 Pull up Settings in Google Drive, then tap Backup. You can pick specific things to store, or do it all at once. Your choice.
Step 3 Turn off iMessage ® .
Go to Settings and turn off iMessage on your iPhone. Also turn off FaceTime ® . So you won’t miss any messages or calls once you’ve switched to Android.
Step 4 Sign in on your new phone.
Sign in on your Android device with the same Google Account you used during backup. And just like that, you’re in. Your data will automatically be available in your Google Contacts, Calendar and Photos apps.
Say hello to Android.
Welcome to the world of Android. All your stuff is just where it should be: your calendar events, contacts, photos and videos. And there’s a ton of new things to discover. With Android, get more out of every moment.
Help when you need it with Google Assistant.
Your Google Assistant helps you get more done. Control your phone, your favorite apps and the web with your voice. So things are easier, wherever you are.
Digital Wellbeing tools to find your balance.
The tools you need to find balance with your phone. Turn on Wind Down to disconnect before bedtime or use app timers to set boundaries you can keep.
Features that make the world more accessible.
So more people can connect in new ways. From captioning almost anything on your phone to features that help you hear more clearly, Android is built for everyone.
A battery that works smarter and longer.
Adaptive Battery sends power to the apps and services you use most. Saving battery life, for when you need really need it.
Have more questions?
Get the answers you need to make the switch.
Get to know your Android.
Learn how to use your Android phone and get the most out of Google. Get step-by-step guides and other resources to help you unlock your device’s potential.
For developers
For enterprise
For the press
The ecosystem
Support
Some features and devices may not be available in all countries. Subject to availability.
Some features and availability vary by OEM and/or device manufacturer.
1 Directions vary for business and educational accounts.
Источник
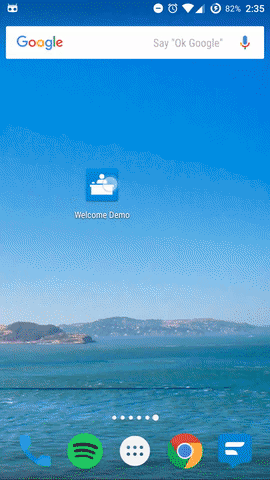
Welcome to the android
![]()


![]()
An easy to use and customizable welcome screen for Android apps.
Look in the sample to see how the above welcome screen is created.
Features
- Fully customizable
- RTL support
- Ability to use built in layouts or custom fragments
- Built in layouts support all screen sizes and orientations
Please open a new issue if you find a bug or have a problem.
Major Changes in 1.0.0
If you used the library prior to version 1.0, read 1.0.0.md for details on all breaking changes.
A demo app is available on Google play:
![]()
The source code is in the sample module.
Feel free to open a PR to add a feature or fix a bug, all contributions are welcome. Please read the contribution notes.
All development takes place on the dev branch.
Table of Contents
Adding to your project
This library is available through jCenter.
If you use proguard, add the following to your proguard rules
To create a welcome screen, add a class to your project that extends WelcomeActivity and add it to AndroidManifest:
The theme must be a child theme of WelcomeScreenTheme
Override the Activity’s configuration() method. Use WelcomeConfiguration.Builder to set it up:
You do not need to override onCreate or call setContentView .
Note: For now, defaultBackgroundColor() needs to be called before adding pages.
Show the welcome screen
Welcome screens are started with WelcomeHelper . onSaveInstanceState is needed to be sure only one instance of the welcome screen is started. Add the following to the Activity you want to show the welcome screen before (probably your launcher activity):
If you have issues with the buttons/indicator being covered by the nav bar, use one of the .SolidNavigation welcome screen themes.
To force the welcome screen to be shown, for example, to let the user view it again when a button is pressed, create a WelcomeHelper as shown above and call .forceShow() .
Skipping/Back button behavior
By default, the welcome screen can be skipped, and pressing the back button will navigate to the previous page or close (skip) the welcome screen if on the first page. This can be changed with Builder.canSkip() , backButtonSkips() (only applies if canSkip is true), and backButtonNavigatesPages() . If you disable skipping, the welcome screen will not be stored as completed when it closes.
If you want to require users to navigate through the welcome screen before using the app, call canSkip(false) and close your app if the welcome screen’s result is RESULT_CANCELED .
See Results below for how to respond if a welcome screen is canceled.
The classes listed below are subclasses of WelcomePage and can be used with the page method of WelcomeConfiguration.Builder
A page with an image and a title. A parallax effect can be applied to the image.
A page with an image, heading, and description. A parallax effect can be applied to the image.
Similar to the basic page, but instead of an image you can supply a layout that will have a parallax effect applied to it. The speed at which the layout’s children move is determined by their position in the layout, the first will move the slowest and the last will move the fastest.
Applies a parallax effect in the same way the normal parallax page does, but the layout you provide fills the whole fragment, and there isn’t a header or description.
You can add your own fragments to the welcome screen with FragmentWelcomePage :
See animations below for adding animations to custom fragments.
Custom Done Button
If you want to use a button in a custom fragment instead of the default done button, call useCustomDoneButton(true) on the builder and new WelcomeFinisher(MyFragment.this).finish() in the button’s OnClickListener .
The layout shown beneath the pages can be changed with the bottomLayout Builder method, which uses the WelcomeConfiguration.BottomLayout enum. The possible values are explained below.
The default layout, can have skip/previous buttons, the current page indicator, and next/done buttons.
Same as STANDARD , but the done button is an ImageButton rather than a Button . Uses a check mark as the image by default (that can be changed with styles).
Has two buttons side by side at the bottom with the current page indicator above them. By default the text is «Log In» and «Sign Up», but can be changed with styles. In your WelcomeActivity subclass, override onButtonBarFirstPressed and onButtonBarSecondPressed to handle clicks. More documentation will be added later, see ButtonBarWelcomeActivity in the sample for an example.
Same as BUTTON_BAR , but with just one button (uses onButtonBarFirstPressed for clicks).
Just the current page indicator, no buttons.
No layout; no buttons, no indicator
The provided themes are listed below.
Transparent status/navigation on API 19+. Content does not flow under status bar:
- WelcomeSceenTheme — The default theme. For use with dark backgrounds; the text, indicator, and buttons are light colored.
- WelcomeScreenTheme.Light — For use with light backgrounds; the text, indicator, and buttons are dark colored.
Transparent status bar, solid navigation bar on API 19+. Content does not flow under status bar:
Transparent status bar, solid navigation bar on API 19+. Content flows under status bar:
Typefaces and a few other things (animations, button visibility) have to be set with WelcomeConfiguration.Builder , but everything else that is customizable can be changed with styles.
You can add styles as shown below. Optional items are in square brackets.
Welcome screen keys
If you want to use multiple welcome screens (in different parts of your app) or have updated one and want to show it again, you can assign keys (Make sure they are unique!) to welcome screens by adding the following to your welcome screen Activity.
Note: Only change this to a new value if you want everyone who has already used your app to see the welcome screen again! This key is used to determine whether or not to show the welcome screen.
You can listen for the result of a welcome screen in the Activity that started it by overriding onActivityResult :
One use for this is making sure users see the whole welcome screen before using your app — disable skipping and then close your main activity when the welcome screen is canceled.
Источник


