- What is Sign in with Apple?
- About Sign in with Apple
- Privacy and security
- Use Sign in with Apple
- Learn more
- Find the software version on your iPhone, iPad, or iPod
- On an iPhone, iPad, or iPod touch
- On your iPod, iPod classic, iPod nano, or iPod mini
- On an iPod shuffle
- With your computer
- iDevice Central
- iOS Signing Status
- Please select your Device:
- What is the iOS Signing Status (TSS)?
- Proven Ways to Restore Unsigned IPSW
- Is It Possible to Restore To Unsigned IPSW?
- What is Unsigned IPSW?
- Restore Unsigned IPSW Using SHSH2 Blobs
- Restore Unsigned IPSW by FutureRestore
- Bonus: How to Downgrade iOS with WooTechy iMaster
- Conclusion
What is Sign in with Apple?
Sign in with Apple is the fast, easy, and more private way to sign in to third-party apps and websites using the Apple ID that you already have.
About Sign in with Apple
When you see a Sign in with Apple button on a participating app or website, it means you can set up an account using your Apple ID. No need to use a social media account, fill out forms, or choose another new password.
Sign in with Apple is built from the ground up to respect your privacy and keep you in control of your personal information. It works natively on iOS, macOS, tvOS, and watchOS, and in any browser.
Privacy and security
- At your first sign in, apps and websites can ask only for your name and email address to set up an account for you.
- You can use Hide My Email—Apple’s private email relay service—to create and share a unique, random email address that forwards to your personal email. This lets you receive useful messages from the app without sharing your personal email address. Learn more about how Hide My Email works.
- Sign in with Apple won’t track or profile you as you use your favorite apps and websites. Apple retains only the information that’s needed to make sure you can sign in and manage your account.
- Security is built in to Sign in with Apple with two-factor authentication. If you use an Apple device, you can sign in and re-authenticate with Face ID or Touch ID anytime.
![]()
Use Sign in with Apple
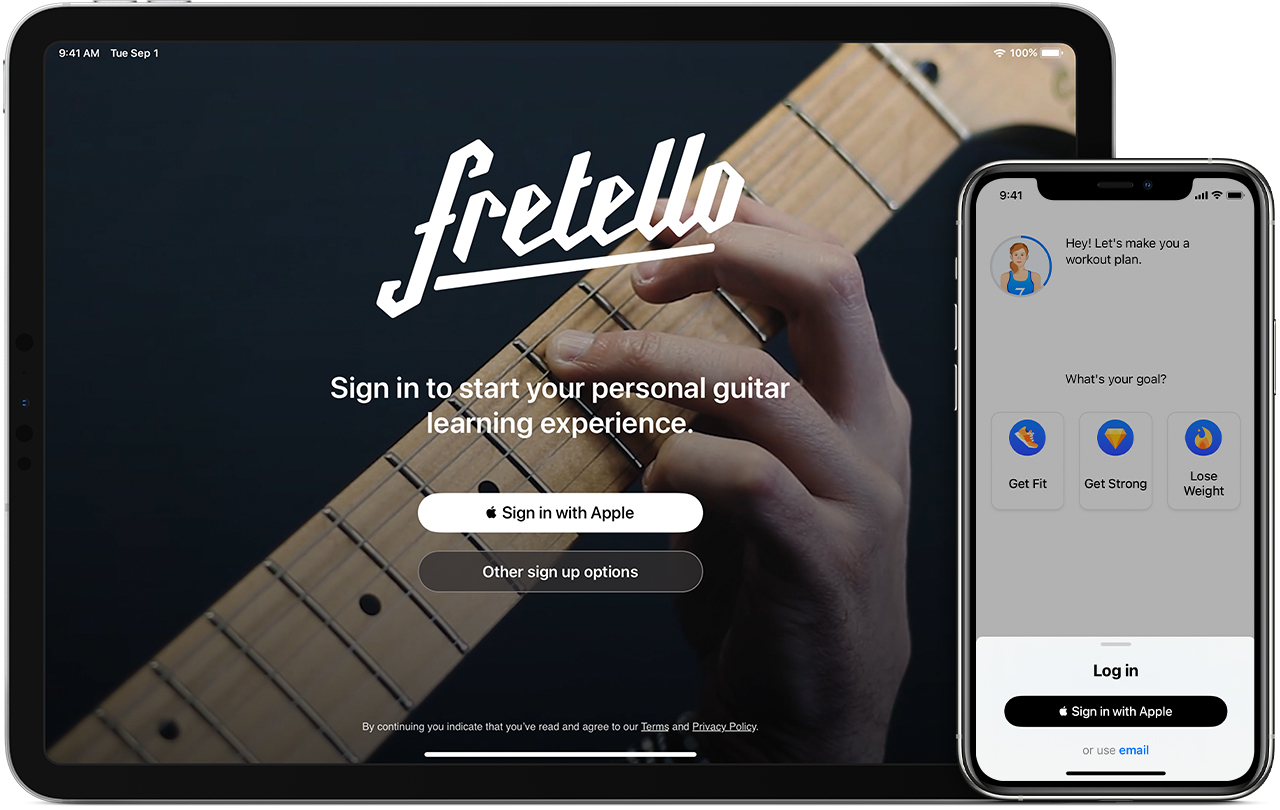
To use Sign in with Apple, tap the Sign in with Apple button on a participating app or website, review your information, and sign in quickly and securely with Face ID, Touch ID, or your device passcode.
Learn how to use Sign in with Apple on your iPhone, iPad, iPod touch, or web browser.
You need to be signed in with your Apple ID in System Preferences > Apple ID on your Mac or Settings > [your name] on your iPhone, iPad, or iPod touch. You also need two-factor authentication turned on. Learn more.
![]()
Learn more
- If you don’t see a Sign in With Apple button, that app or website doesn’t support Sign in With Apple yet.
- Sign in with Apple is not available for children under 13 years old. This age may vary by country or region.
- Learn how to review the apps you use with Sign in with Apple.
- If you need help signing into or updating your Apple ID, or changing your account information, learn what to do.
Information about products not manufactured by Apple, or independent websites not controlled or tested by Apple, is provided without recommendation or endorsement. Apple assumes no responsibility with regard to the selection, performance, or use of third-party websites or products. Apple makes no representations regarding third-party website accuracy or reliability. Contact the vendor for additional information.
Источник
Find the software version on your iPhone, iPad, or iPod
You can find the version of iOS, iPadOS, or iPod software installed on your iPhone, iPad, or iPod with your device or by using your computer.
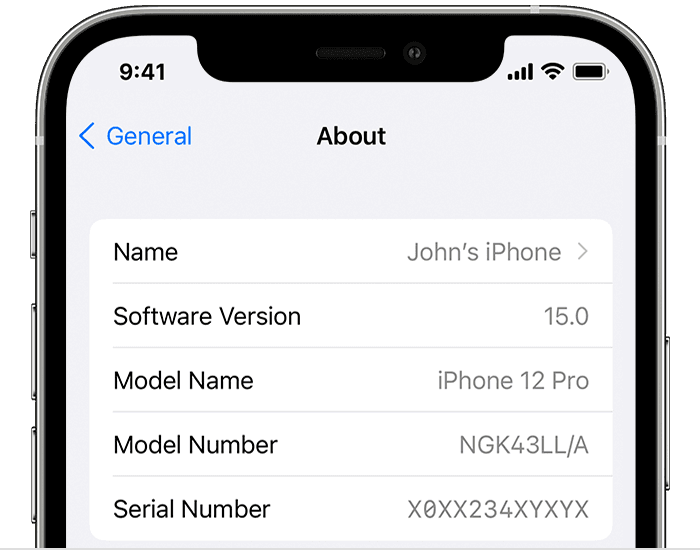
On an iPhone, iPad, or iPod touch
To find the software version installed on your device, go to Settings > General, then tap About.
On your iPod, iPod classic, iPod nano, or iPod mini
- Press the Menu button multiple times until the main menu appears.
- Scroll to and select Settings > About.
- The software version of your device should appear on this screen. On iPod nano (3rd or 4th generation) and iPod classic, press the Center button twice on the About screen to see the software version.
On an iPod shuffle
To find the software version installed on your iPod shuffle, use the Finder or iTunes on your computer.
With your computer
You can also use your computer to find the software version of your device. Follow these steps:
- On a Mac with macOS Catalina or later, open the Finder. On a Mac with macOS Mojave or earlier, or on a Windows PC, open iTunes.
- Connect your device to your computer.
- Locate your device on your computer. Learn what to do if your computer doesn’t recognize your device.
- Look under the General tab or the Summary tab to see the software version.
Источник
iDevice Central
iOS Jailbreak News, Tutorials and Downloads!
iOS Signing Status
To view the current signed iOS versions, signed iOS Betas, as well as the versions that are no longer signed for your device, please select your device model from the list. You will be redirected automatically to the results page*.
Please select your Device:
* Updated every few minutes automatically.
iOS Releases Data provided by api.ipsw.me
iOS Betas Data provided by @_m1sta
What is the iOS Signing Status (TSS)?
Apple signs only a few iOS versions at a time, and usually the latest builds. This is to prevent users from freely downgrading to older iOS versions and jailbreak. Once a new iOs version is released by Apple, the previous 1-2 versions may stay signed for a few more days or weeks before getting unsigned.
Once an iOS version has been unsigned, it’s not possible to downgrade or upgrade to it anymore unless you have saved SHSH2 blobs while it was still signed, SEP and Baseband are compatible, and there’s a way to set a Nonce Generator on the version you’re currently running.
On this website, you can monitor the changes in the signing of all iOS versions for all devices, including iPad, iPod Touch and iPhone. Apple does not post anywhere when they sign a version, so if you wanna downgrade to a specific version, make sure to check here if it’s still signed first.
Note: The data on this website is updated in real-time. Once a new iOS version is released or an older one stops being signed, the data is updated in minutes thanks to the API used.
Источник
Proven Ways to Restore Unsigned IPSW

Apr 18, 2021 (Updated: Nov 15, 2021) • Filed to: Downgrade iOS
6K views, 7 min read
As Apple releases new iOS software versions, it also stops signing some older versions. This means sooner or later, your current iOS version will no longer be supported, and you may have to upgrade to a newer iPhone firmware version.
But every iOS update comes with its downsides. While the 14.4.2 version update fixes some performance issues introduced by earlier versions, the update also caused new problems like short battery lifespan, iPhone freezes, and charging issues.
One way to solve update-related issues on iOS is to move back to a known stable version, in other words, downgrade to unsigned iOS version. But what if Apple has stopped signing a version you intend to move back to? You might be wondering whether it’s possible to restore unsigned IPSW of that said version. Regardless of what you think, let’s find out.

Bonus: How to Downgrade iOS with WooTechy iMaster 
Is It Possible to Restore To Unsigned IPSW?
Yes, you can restore your iOS device to an unsigned IPSW firmware, but not in the traditional way. Usually, when you want to upgrade or downgrade to an iOS version using the IPSW restore file, you will do so through iTunes.
During the downgrade process, iTunes will make some verifications and checks with Apple servers to ensure you are restoring a signed IPSW file. Anyone trying to work with unsigned IPSWs firmware will only get you an error message.
To upgrade or downgrade to a previous iOS firmware that has stopped being signed by Apple, part of the requirements are a third-party restore app, the destination unsigned iOS IPSW file, and its SHSH blob file. You will learn more about these requirements in this blog. So keep reading.
What is Unsigned IPSW?
IPSW is the file extension of Apple’s iPhone mobile operating system. An unsigned IPSW means Apple has stopped supporting the iOS version. iOS users wouldn’t be able to use iTunes to restore to an unsigned firmware.
Apple periodically unsigns iOS version because of security issues and to encourage users to make use of additions newer updates have to offer.
Regardless of the reason and as we mentioned earlier, new versions of iOS software often cause unpleasant experiences to device performance and features. To resolve firmware update bugs and issues, reverting to a previous stable iOS version might be the solution.
Restore Unsigned IPSW Using SHSH2 Blobs
You learned earlier that it is possible to restore unsigned IPSWs with the help of SHSH2 Blobs. These blob files are the digital signatures that Apple places on each IPSW firmware file for each iOS device. When Apple stops signing a particular firmware, it removes the sign (signature) from the firmware so users won’t be able to upgrade or downgrade to it.
Note: You must have saved a blob (digital signature) file of the iOS version you want to restore while the version is still being signed by Apple. Once Apple stops signing an iOS firmware version, the signature is removed, and then, you can’t restore the firmware.
Online tools like TTS Saver can help with blob saving. You can start saving the digital signature of your current iOS firmware now for possible future use. For how to save and restore SHSH2 blob files, see the steps below. You’ll find this useful when restoring iOS.
Step 1: Connect your iPhone to your Mac or Windows computer using a data transfer cable.
Step 2: Open iTunes on your PC and navigate to the iPhone device information page by clicking the mobile icon at the top screen. Keep clicking on Serial Number until ECID appears. Copy the value next to it.
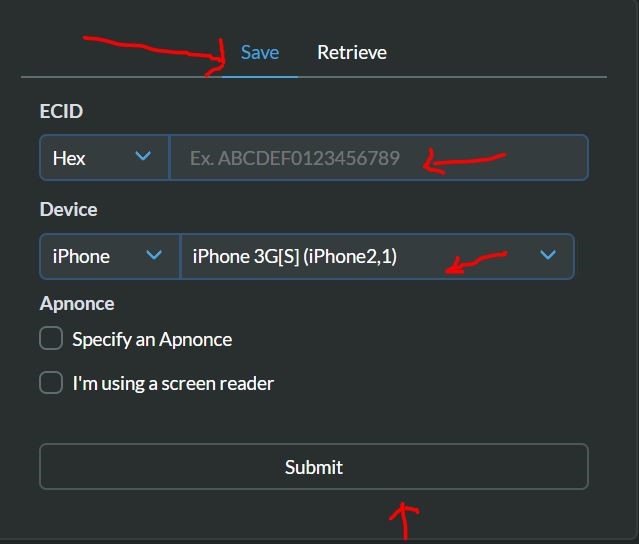
 How to Save SHSH2 Blob File Using TSS Saver
Step 3: Go to this website. Enter your ECID, choose your iPhone model and click «Submit«. The online tool will automatically save the blob of all available iOS firmware for your iPhone device and provide you with an option to download any of them.
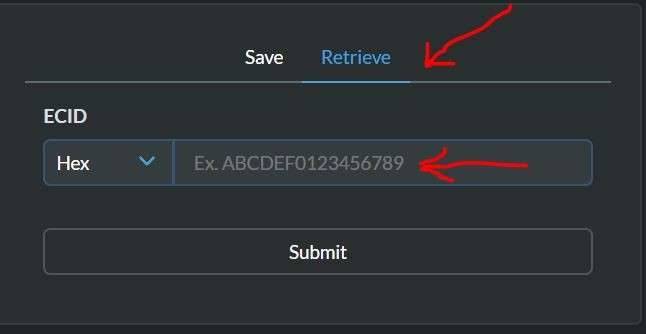
How to Retrieve a Blob File With TSS Saver
Step 4: Referring to the image below, insert your ECID value and click submit to see all blob files you’ve previously saved.
With your blob files ready, you’re only halfway through completing how to downgrade to unsigned iOS. That said, follow the instructions in the next section to discover how to use FutureRestore to complete unsigned iOS restore.
Restore Unsigned IPSW by FutureRestore
FutureRestore is a tool developed for iOs users who want to restore, upgrade, or downgrade to any iOS version that is no longer signed by Apple. But FutureRestore can’t do the job alone. It needs the help of other files — the destination unsigned iOS IPSW file you’re moving to and the blob file of that said destination iOS firmware.
To downgrade to unsigned IPSW file using FutureRestore, follow the steps below:
Requirements:
A more recent version of the Futurerestore.
The IPSW file of the unsigned iOS you’re restoring to.
The blob file of #2 (which you’ve learned how to save and retrieve in the previous section).
With all these requirements set, continue with the instructions below.
Step 1: Connect your iPhone to your PC, making sure your PC has an Internet connection.
Step 2: Put all the 3 items listed in the requirements into one folder.
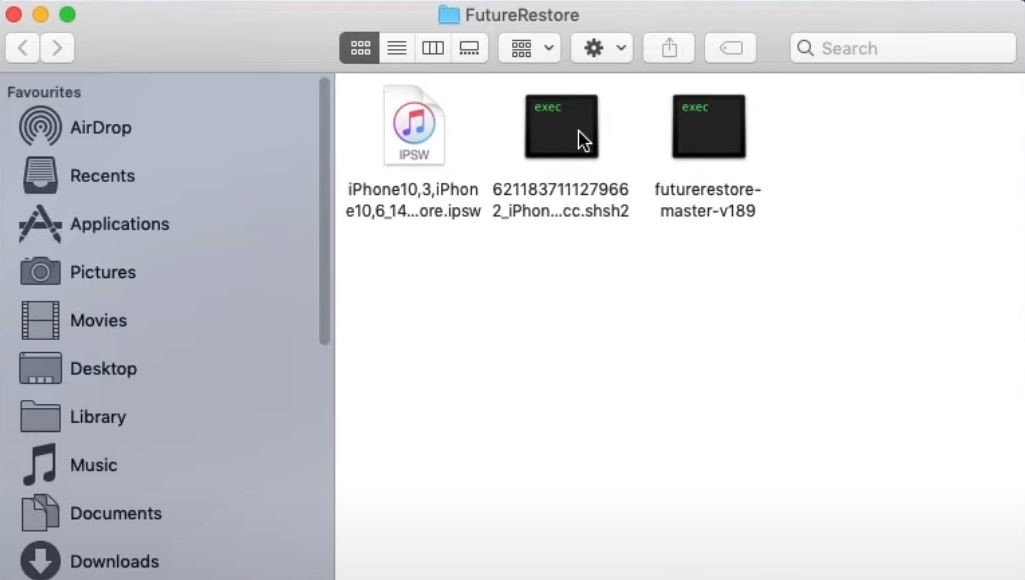
Step 3: Open up Terminal on your Mac computer or Command Prompt (for Windows users).
Step 4: Drag the unarchived FutureRestore file into Terminal and type -t.
Step 5: Next, drag the blob file into the Terminal interface and type —latest-sep —latest-no-baseband (if your iPhone is not sim-enabled) or —latest-sep —latest-baseband (if your iPhone uses sim).
Step 6: Drag the unsigned iOS firmware into the Terminal screen as well. After performing steps #4 through #6, your terminal or Command Prompt interface should look like the one in the image below.
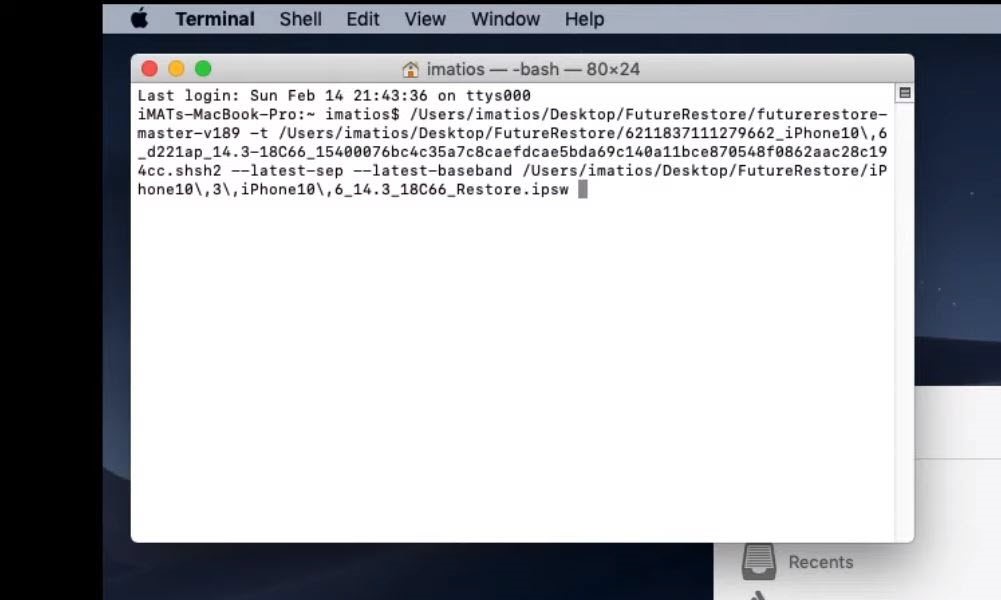
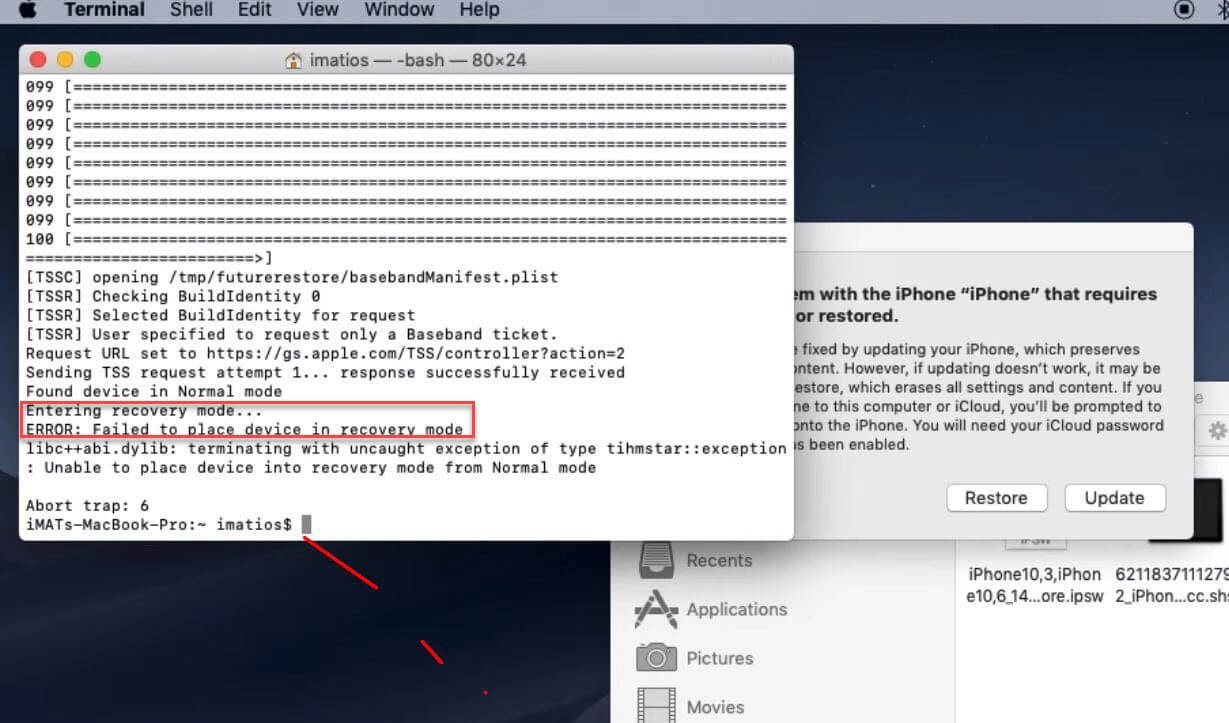
Step 7: Press enter and let the downgrade process begin and complete.
Step 8: If the log on the Terminal screen indicated that the process is stuck and failed at recovery mode, simply reenter the line of codes and try again.
Bonus: How to Downgrade iOS with WooTechy iMaster
Although you can use methods above to downgrade iOS, its still risky and terribly complicated. If you don’t want to deal with any technical process, you may turn to WooTechy iMaster, which offers a surprisingly easy solution to downgrade your iOS.
Great Features of WooTechy iMaster
User-friendly, without any technical knowedge required to downgrade iOS.
Easy to downgrade and upgrade, with no risk of losing data at all.
Free to back up and upgrade, during which you can check the compability.
Able to downgrade the newest iOS 15 to previous iOS 14.
Video tutorial for iOS downgrade:

Here are the steps to downgrade iOS with iMaster:
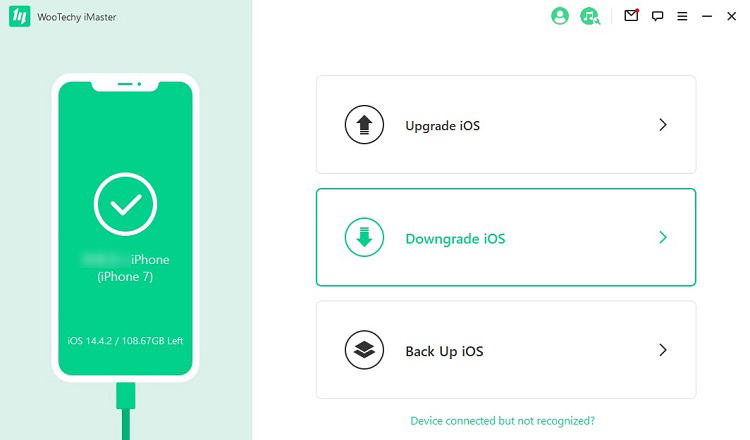
Step 1: Download and launch WooTechy iMaster. Conect your iOS device to your computer via USB, and select «Downgrade iOS» mode.
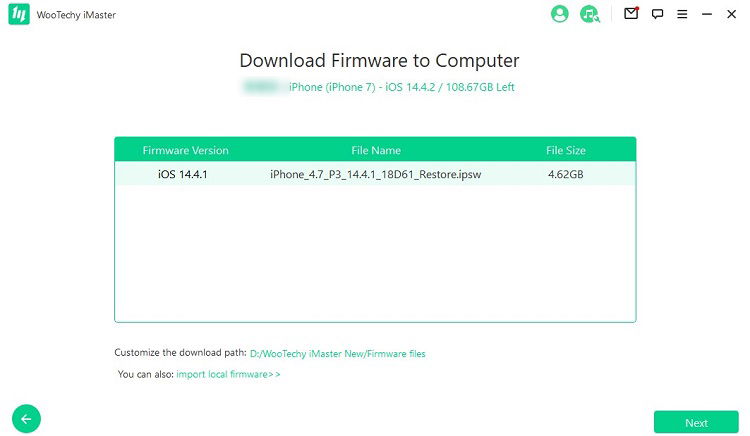
Step 2: The program will then prompt you to choose a firmware version you need. Note that you can customize the firmware download path here and import local firmware. Click «Next» to start downloading the firmware to computer.
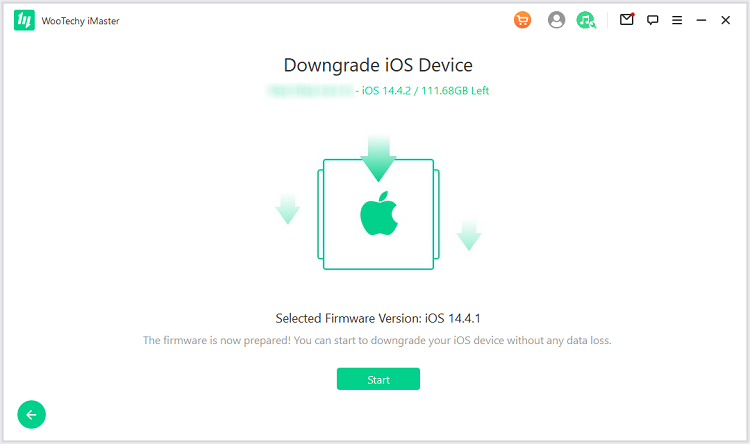
Step 3: Once the firmware is downloaded and verified, your device is then well-prepared for downgrade. Click «Start» to proceed.
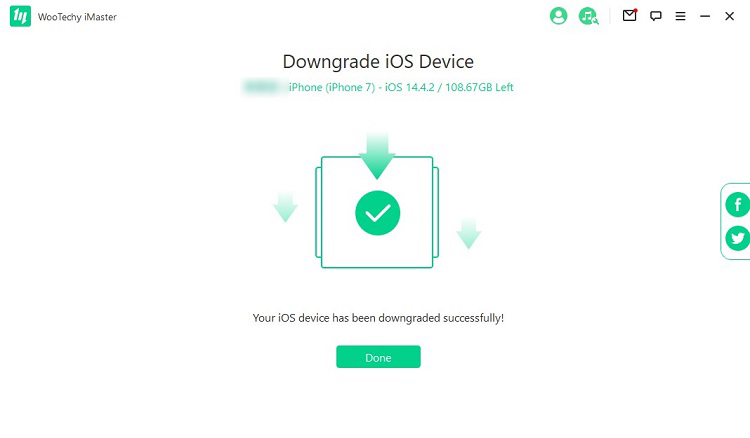
Step 4: You will see a prompt saying «downgraded successfully«. Just click «Done» to finish the downgrade process.
Conclusion
Apple periodically stops signing previous iOS versions when new versions are rolled out. This blog, however, has helped you see that you can still restore unsigned IPSW if you saved it with an online tool like TTS Saver. With your blob file and the unsigned firmware ready, you can make use of the FutureRestore tool to move back to your favorite, buggy-free iOS version.
In addition, as a professional software designed for the iOS downgrade and upgrade, WooTechy iMaster can help downgrade your iOS device even from the newest iOS 15 to iOS 14 in a few clicks. If you and found this post useful, share it with those who might be looking for a resource like this. And don’t hesitate to drop any questions or feedback you might have.
Источник


