- What Is the Android Activity Lifecycle?
- Activity Lifecycle
- Lifecycle Methods
- Starting an Activity
- Starting an Activity With No Expected Result
- Starting an Activity With a Result
- Example of Starting an Activity
- Terminating an Activity
- Activity Instance State
- Conclusion
- Памятка по жизненному циклу Android — часть I. Отдельные Activity
- Часть 1: Activity
- Одно Aсtivity — Сценарий 1. Приложение завершено и перезапущено
- Одно Aсtivity — Сценарий 2. Пользователь уходит
- Одно Aсtivity — Сценарий 3. Изменение кофигурации
- Одно Aсtivity — Сценарий 4. Приложение приостановлено системой
- Activity Lifecycle
- Activity Lifecycle Overview
- Activity Lifecycle
- Activity States
- Activity Re-Creation in Response to Configuration Changes
- Activity Lifecycle Methods
- OnCreate
- OnStart
- OnResume
- OnPause
- OnStop
- OnDestroy
- OnRestart
- Back vs. Home
- Managing State Throughout the Lifecycle
- Bundle State
- OnSaveInstanceState
- OnRestoreInstanceState
- Bundle Limitations
- Persisting Complex Data
- Summary
What Is the Android Activity Lifecycle?
In my previous post, you learned that Intents let us send messages from one Android component to another. Well, one very important kind of component is an Activity.
Activities are a fundamental part of Android app development. And it’s impossible to understand Activities without also understanding their lifecycles. In this post, you’ll learn all about the Activity lifecycle.


Activity Lifecycle
An Activity is a single screen in Android. It is like a window in a desktop app, or a Frame in a Java program. An Activity allows you place all your UI components or widgets together on the screen.
It’s important to understand that an Activity has a lifecycle: that is to say that it can be in one of several different states, depending on what is happening with the app and with the user interaction.
Lifecycle Methods
Let’s look more closely at the lifecycle of an Android Activity. Each time the Activity state changes, one of the following lifecycle methods will be called on the Activity class.
onCreate() : This is called when the Activity is first initialized. You need to implement this method in order to do any initialization specific to your Activity.
onStart() : This is called the first time that the Activity is about to become visible to the user, as the Activity prepares to come to the foreground become interactive. Once this callback finishes, the onResume() method will be called.
onResume() : When the Activity goes into this state, it begins to interacts with the user. The Activity continues in this state till something happen to take focus from the app or Activity (such as an incoming call). When this happens, the onPause() method will be called.
onPause() : This method is used to pause operations that should not happen when the Activity is in paused state. A call to this method indicates that the user is leaving the app. For example, in a music player app, an incoming call will cause the app to transition into a paused state. This should mute or pause the currently playing music. When the user returns to the app, the onResume() method will be called.
onStop() : This method is called when the Activity is no longer visible in the app. It can happen, for example, when another Activity has been loaded and is taking the full screen of the device. When this method is called, the Activity is said to be in a stopped state. In this state, the system either calls the onRestart() to bring back interactivity with Activity. Or it calls the onDestroy() method to destroy the Activity.
onDestroy() : This gets called before the Activity is destroyed. The system calls this method when a user terminates the Activity, or because the system is temporarily destroying the process that contains the Activity to save space. Be sure to free up any resources your Activity has created in this method, or else your app will have a memory leak!
onRestart() : This gets called when an Activity restarts after it had been stopped.
Starting an Activity
Most user interactions with an app cause the active Activity to be changed. So an app transitions between Activities many times during its lifetime.
It’s necessary to link Activities together when one Activity needs to start another Activity. To start an Activity, you either use startActivity() or startActivityForResult() . You have to pass an Intent in either case.
Starting an Activity With No Expected Result
startActivity() is used if the newly started Activity does not need to return a result.
The following code snippet shows how to start another Activity using this method:
You can also perform actions such as passing data from one Activity to another. In this case, your current Activity (the calling Activity) wants to pass data a target Activity. This is where Intents come in handy. To learn about using Intents to start an Activity, check out my previous article.
Starting an Activity With a Result
startActivityForResult() is used to start another Activity and expects to get data back from the newly started Activity. In other words, use this when you want to get a result from the target Activity back to the calling Activity, e.g. if the target Activity is collecting some user information in a modal dialog.
You receive the result from the Activity in the onActivityResult(int requestCode, int resultCode, Intent data) method. The result will be returned as an Intent.
Example of Starting an Activity
Here is an example to show how starting an Activity works.
First, you create your MainActivity with your onCreate() method, a layout file, and a request code.
In your onCreate() method, you’ll create a new instance of an intent to start your second Activity.
When you’re ready to start that Activity, say in response to a button click, you’ll call startActivityForResult() , which will pass the newly created intent and the request code.
Still, in your MainActivity , you need to handle Activity result events. You do this by implementing the onActivityResult() method. This is how you will receive the result from the other Activity.
Here’s how it should look:
Now go ahead and create your SecondActivity . It should look something like the code below.
Terminating an Activity
Before an Activity terminates, the corresponding lifecycle methods will be called.
The onPause() method should stop all listeners and UI updates. The onStop() method should save the application data. Finally, the onDestroy() method will free up any resources that the Activity has allocated.
When the user switches back to an app that has been terminated by the system, the onResume() method is called. Based on saved data, it can re-register listeners and trigger UI updates.
Activity Instance State
An Activity needs a way to keep valuable state and user data that it has obtained. These data might be obtained from user input or created while the Activity was not on-screen.
For example, a change of device orientation can cause an Activity to be destroyed and recreated. In such a scenario, you need to make sure to save all Activity state before it is destroyed and reload it again when it is recreated. Otherwise, any data your Activity has at that time can be completely lost.
To save Activity state, you can override the onSaveInstanceState() method. This method is passed a Bundle object as a parameter. A bundle can contain strings, primitive data types, or objects. In this method, simply add any important state data to the bundle. This bundle will be returned to the Activity later so you can restore the Activity state.
To extract the saved state from the bundle and restore it, implement the onRestoreInstanceState() method. This callback is invoked between the onStart() and the onResume() lifecycle methods.
We will look deeper into Activity instance state in a future article.
Conclusion
After following this post, you’ll have a good understanding of how an Activity lifecycle works. And you’ve learned that there are two ways to start an Activity, as well as getting some pointers to how instance state is handled in the Activity lifecycle.
Thanks for reading, and while you’re here, check out some of our other posts on coding Android apps.
Источник
Памятка по жизненному циклу Android — часть I. Отдельные Activity

Android спроектирован так, чтобы использование приложения пользователем было максимально интуитивным. Например, пользователи приложения могут повернуть экран, ответить на уведомление или переключиться на другое приложение, и после этих манипуляций они все так же должны иметь возможность продолжить использовать приложение без каких-либо проблем.
Чтобы обеспечить такое взаимодействие с пользователем, вы должны знать, как управлять жизненными циклами компонентов. Компонентом может быть Activity, Fragment, Service, класс Application и даже сам процесс приложения. Компонент имеет жизненный цикл, в течение которого он проходит через различные состояния. Всякий раз, когда происходит переход, система уведомляет вас об этом при помощи методов жизненного цикла.
Чтобы нам было легче объяснить, как работает жизненный цикл в Android, мы определили несколько сценариев (примеров из жизни), которые сгруппированы по компонентам:
Часть 1: Activity — ЖЦ одного активити (этот пост)
Диаграммы также доступны в виде шпаргалки в формате PDF для краткого ознакомления.
Примечание: эти диаграммы соответствуют поведению в Android P/Jetpack 1.0.
Следующие сценарии демонстрируют поведение компонентов по умолчанию, если не указано иное.
Если вы обнаружили ошибки в статье или считаете, что не хватает чего-то важного, напишите об этом в комментариях.
Часть 1: Activity
Одно Aсtivity — Сценарий 1. Приложение завершено и перезапущено
Будет вызван, если:
Пользователь нажимает кнопку Назад или
Вызван метод Activity.finish()
Самый простой сценарий показывает, что происходит, когда приложение с одним активити запускается, завершается и перезапускается пользователем:
Управление состоянием
onSaveInstanceState не вызывается (поскольку активити завершено, вам не нужно сохранять состояние)
onCreate не имеет Bundle при повторном открытии приложения, потому что активити было завершено и состояние не нужно восстанавливать.
Одно Aсtivity — Сценарий 2. Пользователь уходит
Будет вызван, если:
Пользователь нажимает кнопку «Домой»
Пользователь переключается на другое приложение (через меню «Все приложения», из уведомления, при принятии звонка и т. д.)
В этом случае система остановит активити, но не завершит его сразу.
Управление состоянием
Когда ваше активити переходит в состояние Stopped, система использует onSaveInstanceState для сохранения состояния приложения на тот случай, если впоследствии система завершит процесс приложения (см. ниже).
Предполагая, что процесс не был убит, экземпляр активити сохраняется в памяти, сохраняя все состояние. Когда активити возвращается на передний план, вам не нужно повторно инициализировать компоненты, которые были созданы ранее.
Одно Aсtivity — Сценарий 3. Изменение кофигурации
Будет вызван, если:
Изменена конфигурация, такие как поворот экрана
Пользователь изменил размер окна в многооконном режиме
Управление состоянием
Изменения конфигурации, такие как поворот или изменение размера окна, должны позволить пользователям продолжить работу с того места, где они остановились.
Активити полностью уничтожено, но состояние сохраняется и восстанавливается при создании нового экземпляра.
Bundle в onCreate тот же самый, что и в onRestoreInstanceState .
Одно Aсtivity — Сценарий 4. Приложение приостановлено системой
Будет вызван, если:
Включён многооконный режим (API 24+) и потерян фокус
Другое приложение частично покрывает работающее приложение: диалоговое окно покупки (in-app purchases), диалоговое окно получения разрешения (Runtime Permission), стороннее диалоговое авторизации и т. д.
Появится окно выбора приложения (при обработке неявного интента), например диалоговое окно шейринга.
Этот сценарий не применим к:
Диалогам в том же приложении. Отображение AlertDialog или DialogFragment не приостанавливает базовое активити.
Уведомлениям. Пользователь, получающий новое уведомление или открывающий панель уведомлений, не приостанавливает текущее активити.
Источник
Activity Lifecycle
Activities are a fundamental building block of Android applications and they can exist in a number of different states. The activity lifecycle begins with instantiation and ends with destruction, and includes many states in between. When an activity changes state, the appropriate lifecycle event method is called, notifying the activity of the impending state change and allowing it to execute code to adapt to that change. This article examines the lifecycle of activities and explains the responsibility that an activity has during each of these state changes to be part of a well-behaved, reliable application.
Activity Lifecycle Overview
Activities are an unusual programming concept specific to Android. In traditional application development there is usually a static main method, which is executed to launch the application. With Android, however, things are different; Android applications can be launched via any registered activity within an application. In practice, most applications will only have a specific activity that is specified as the application entry point. However, if an application crashes, or is terminated by the OS, the OS can try to restart the application at the last open activity or anywhere else within the previous activity stack. Additionally, the OS may pause activities when they’re not active, and reclaim them if it is low on memory. Careful consideration must be made to allow the application to correctly restore its state in the event that an activity is restarted, especially if that activity depends on data from previous activities.
The activity lifecycle is implemented as a collection of methods the OS calls throughout the lifecycle of an activity. These methods allow developers to implement the functionality that is necessary to satisfy the state and resource management requirements of their applications.
It is extremely important for the application developer to analyze the requirements of each activity to determine which methods exposed by the activity lifecycle need to be implemented. Failure to do this can result in application instability, crashes, resource bloat, and possibly even underlying OS instability.
This chapter examines the activity lifecycle in detail, including:
- Activity States
- Lifecycle Methods
- Retaining the State of an Application
This section also includes a walkthrough that provide practical examples on how to efficiently save state during the Activity lifecycle. By the end of this chapter you should have an understanding of the Activity lifecycle and how to support it in an Android application.
Activity Lifecycle
The Android activity lifecycle comprises a collection of methods exposed within the Activity class that provide the developer with a resource management framework. This framework allows developers to meet the unique state management requirements of each activity within an application and properly handle resource management.
Activity States
The Android OS arbitrates Activities based on their state. This helps Android identify activities that are no longer in use, allowing the OS to reclaim memory and resources. The following diagram illustrates the states an Activity can go through during its lifetime:
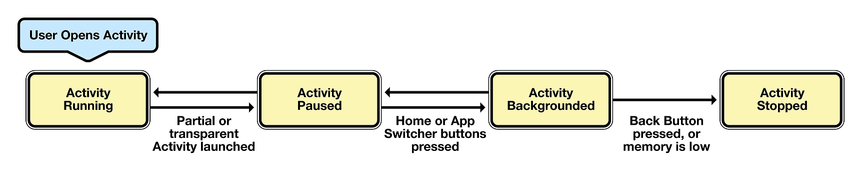
These states can be broken into 4 main groups as follows:
Active or Running – Activities are considered active or running if they are in the foreground, also known as the top of the activity stack. This is considered the highest priority activity in Android, and as such will only be killed by the OS in extreme situations, such as if the activity tries to use more memory than is available on the device as this could cause the UI to become unresponsive.
Paused – When the device goes to sleep, or an activity is still visible but partially hidden by a new, non-full-sized or transparent activity, the activity is considered paused. Paused activities are still alive, that is, they maintain all state and member information, and remain attached to the window manager. This is considered to be the second highest priority activity in Android and, as such, will only be killed by the OS if killing this activity will satisfy the resource requirements needed to keep the Active/Running Activity stable and responsive.
Stopped/Backgrounded – Activities that are completely obscured by another activity are considered stopped or in the background. Stopped activities still try to retain their state and member information for as long as possible, but stopped activities are considered to be the lowest priority of the three states and, as such, the OS will kill activities in this state first to satisfy the resource requirements of higher priority activities.
Restarted – It is possible for an activity that is anywhere from paused to stopped in the lifecycle to be removed from memory by Android. If the user navigates back to the activity it must be restarted, restored to its previously saved state, and then displayed to the user.
Activity Re-Creation in Response to Configuration Changes
To make matters more complicated, Android throws one more wrench in the mix called Configuration Changes. Configuration changes are rapid activity destruction/re-creation cycles that occur when the configuration of an activity changes, such as when the device is rotated (and the activity needs to get re-built in landscape or portrait mode), when the keyboard is displayed (and the activity is presented with an opportunity to resize itself), or when the device is placed in a dock, among others.
Configuration changes still cause the same Activity State changes that would occur during stopping and restarting an activity. However, in order to make sure that an application feels responsive and performs well during configuration changes, it’s important that they are handled as quickly as possible. Because of this, Android has a specific API that can be used to persist state during configuration changes. We’ll cover this later in the Managing State Throughout the Lifecycle section.
Activity Lifecycle Methods
The Android SDK and, by extension, the Xamarin.Android framework provide a powerful model for managing the state of activities within an application. When an activity’s state is changing, the activity is notified by the OS, which calls specific methods on that activity. The following diagram illustrates these methods in relation to the Activity Lifecycle:

As a developer, you can handle state changes by overriding these methods within an activity. It’s important to note, however, that all lifecycle methods are called on the UI thread and will block the OS from performing the next piece of UI work, such as hiding the current activity, displaying a new activity, etc. As such, code in these methods should be as brief as possible to make an application feel well performing. Any long-running tasks should be executed on a background thread.
Let’s examine each of these lifecycle methods and their use:
OnCreate
OnCreate is the first method to be called when an activity is created. OnCreate is always overridden to perform any startup initializations that may be required by an Activity such as:
- Creating views
- Initializing variables
- Binding static data to lists
OnCreate takes a Bundle parameter, which is a dictionary for storing and passing state information and objects between activities If the bundle is not null, this indicates the activity is restarting and it should restore its state from the previous instance. The following code illustrates how to retrieve values from the bundle:
Once OnCreate has finished, Android will call OnStart .
OnStart
OnStart is always called by the system after OnCreate is finished. Activities may override this method if they need to perform any specific tasks right before an activity becomes visible such as refreshing current values of views within the activity. Android will call OnResume immediately after this method.
OnResume
The system calls OnResume when the Activity is ready to start interacting with the user. Activities should override this method to perform tasks such as:
- Ramping up frame rates (a common task in game development)
- Starting animations
- Listening for GPS updates
- Display any relevant alerts or dialogs
- Wire up external event handlers
As an example, the following code snippet shows how to initialize the camera:
OnResume is important because any operation that is done in OnPause should be un-done in OnResume , since it’s the only lifecycle method that is guaranteed to execute after OnPause when bringing the activity back to life.
OnPause
OnPause is called when the system is about to put the activity into the background or when the activity becomes partially obscured. Activities should override this method if they need to:
Commit unsaved changes to persistent data
Destroy or clean up other objects consuming resources
Ramp down frame rates and pausing animations
Unregister external event handlers or notification handlers (i.e. those that are tied to a service). This must be done to prevent Activity memory leaks.
Likewise, if the Activity has displayed any dialogs or alerts, they must be cleaned up with the .Dismiss() method.
As an example, the following code snippet will release the camera, as the Activity cannot make use of it while paused:
There are two possible lifecycle methods that will be called after OnPause :
- OnResume will be called if the Activity is to be returned to the foreground.
- OnStop will be called if the Activity is being placed in the background.
OnStop
OnStop is called when the activity is no longer visible to the user. This happens when one of the following occurs:
- A new activity is being started and is covering up this activity.
- An existing activity is being brought to the foreground.
- The activity is being destroyed.
OnStop may not always be called in low-memory situations, such as when Android is starved for resources and cannot properly background the Activity. For this reason, it is best not to rely on OnStop getting called when preparing an Activity for destruction. The next lifecycle methods that may be called after this one will be OnDestroy if the Activity is going away, or OnRestart if the Activity is coming back to interact with the user.
OnDestroy
OnDestroy is the final method that is called on an Activity instance before it’s destroyed and completely removed from memory. In extreme situations Android may kill the application process that is hosting the Activity, which will result in OnDestroy not being invoked. Most Activities will not implement this method because most clean up and shut down has been done in the OnPause and OnStop methods. The OnDestroy method is typically overridden to clean up long running tasks that might leak resources. An example of this might be background threads that were started in OnCreate .
There will be no lifecycle methods called after the Activity has been destroyed.
OnRestart
OnRestart is called after your activity has been stopped, prior to it being started again. A good example of this would be when the user presses the home button while on an activity in the application. When this happens OnPause and then OnStop methods are called, and the Activity is moved to the background but is not destroyed. If the user were then to restore the application by using the task manager or a similar application, Android will call the OnRestart method of the activity.
There are no general guidelines for what kind of logic should be implemented in OnRestart . This is because OnStart is always invoked regardless of whether the Activity is being created or being restarted, so any resources required by the Activity should be initialized in OnStart , rather than OnRestart .
The next lifecycle method called after OnRestart will be OnStart .
Back vs. Home
Many Android devices have two distinct buttons: a «Back» button and a «Home» button. An example of this can be seen in the following screenshot of Android 4.0.3:

There is a subtle difference between the two buttons, even though they appear to have the same effect of putting an application in the background. When a user clicks the Back button, they are telling Android that they are done with the activity. Android will destroy the Activity. In contrast, when the user clicks the Home button the activity is merely placed into the background – Android will not kill the activity.
Managing State Throughout the Lifecycle
When an Activity is stopped or destroyed the system provides an opportunity to save the state of the Activity for later rehydration. This saved state is referred to as instance state. Android provides three options for storing instance state during the Activity lifecycle:
Storing primitive values in a Dictionary known as a Bundle that Android will use to save state.
Creating a custom class that will hold complex values such as bitmaps. Android will use this custom class to save state.
Circumventing the configuration change lifecycle and assuming complete responsibility for maintaining state in the activity.
This guide covers the first two options.
Bundle State
The primary option for saving instance state is to use a key/value dictionary object known as a Bundle. Recall that when an Activity is created that the OnCreate method is passed a bundle as a parameter, this bundle can be used to restore the instance state. It is not recommended to use a bundle for more complex data that won’t quickly or easily serialize to key/value pairs (such as bitmaps); rather, it should be used for simple values like strings.
An Activity provides methods to help with saving and retrieving the instance state in the Bundle:
OnSaveInstanceState – This is invoked by Android when the activity is being destroyed. Activities can implement this method if they need to persist any key/value state items.
OnRestoreInstanceState – This is called after the OnCreate method is finished, and provides another opportunity for an Activity to restore its state after initialization is complete.
The following diagram illustrates how these methods are used:

OnSaveInstanceState
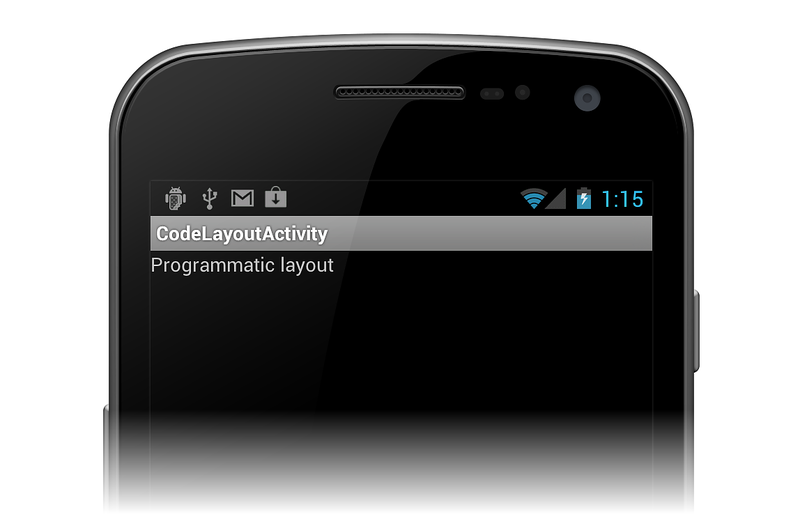
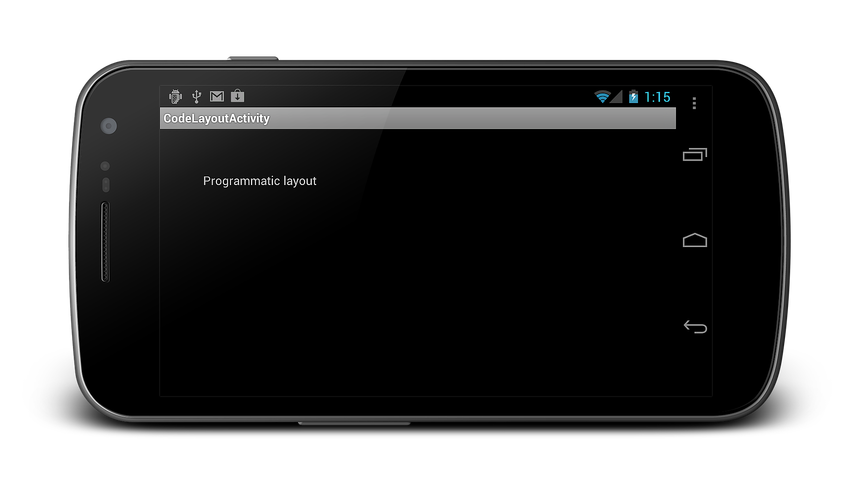
OnSaveInstanceState will be called as the Activity is being stopped. It will receive a bundle parameter that the Activity can store its state in. When a device experiences a configuration change, an Activity can use the Bundle object that is passed in to preserve the Activity state by overriding OnSaveInstanceState . For example, consider the following code:
The code above increments an integer named c when a button named incrementCounter is clicked, displaying the result in a TextView named output . When a configuration change happens — for example, when the device is rotated — the above code would lose the value of c because the bundle would be null , as shown in the figure below:
To preserve the value of c in this example, the Activity can override OnSaveInstanceState , saving the value in the bundle as shown below:
Now when the device is rotated to a new orientation, the integer is saved in the bundle and is retrieved with the line:
It is important to always call the base implementation of OnSaveInstanceState so that the state of the view hierarchy can also be saved.
View State
Overriding OnSaveInstanceState is an appropriate mechanism for saving transient data in an Activity across orientation changes, such as the counter in the above example. However, the default implementation of OnSaveInstanceState will take care of saving transient data in the UI for every view, so long as each view has an ID assigned. For example, say an application has an EditText element defined in XML as follows:
Since the EditText control has an id assigned, when the user enters some data and rotates the device, the data is still displayed, as shown below:
OnRestoreInstanceState
OnRestoreInstanceState will be called after OnStart . It provides an activity the opportunity to restore any state that was previously saved to a Bundle during the previous OnSaveInstanceState . This is the same bundle that is provided to OnCreate , however.
The following code demonstrates how state can be restored in OnRestoreInstanceState :
This method exists to provide some flexibility around when state should be restored. Sometimes it is more appropriate to wait until all initializations are done before restoring instance state. Additionally, a subclass of an existing Activity may only want to restore certain values from the instance state. In many cases, it’s not necessary to override OnRestoreInstanceState , since most activities can restore state using the bundle provided to OnCreate .
For an example of saving state using a Bundle , refer to the Walkthrough — Saving the Activity state.
Bundle Limitations
Although OnSaveInstanceState makes it easy to save transient data, it has some limitations:
It is not called in all cases. For example, pressing Home or Back to exit an Activity will not result in OnSaveInstanceState being called.
The bundle passed into OnSaveInstanceState is not designed for large objects, such as images. In the case of large objects, saving the object from OnRetainNonConfigurationInstance is preferable, as discussed below.
Data saved by using the bundle is serialized, which can lead to delays.
Bundle state is useful for simple data that doesn’t use much memory, whereas non-configuration instance data is useful for more complex data, or data that is expensive to retrieve, such as from a web service call or a complicated database query. Non-configuration instance data gets saved in an object as needed. The next section introduces OnRetainNonConfigurationInstance as a way of preserving more complex data types through configuration changes.
Persisting Complex Data
In addition to persisting data in the bundle, Android also supports saving data by overriding OnRetainNonConfigurationInstance and returning an instance of a Java.Lang.Object that contains the data to persist. There are two primary benefits of using OnRetainNonConfigurationInstance to save state:
The object returned from OnRetainNonConfigurationInstance performs well with larger, more complex data types because memory retains this object.
The OnRetainNonConfigurationInstance method is called on demand, and only when needed. This is more economical than using a manual cache.
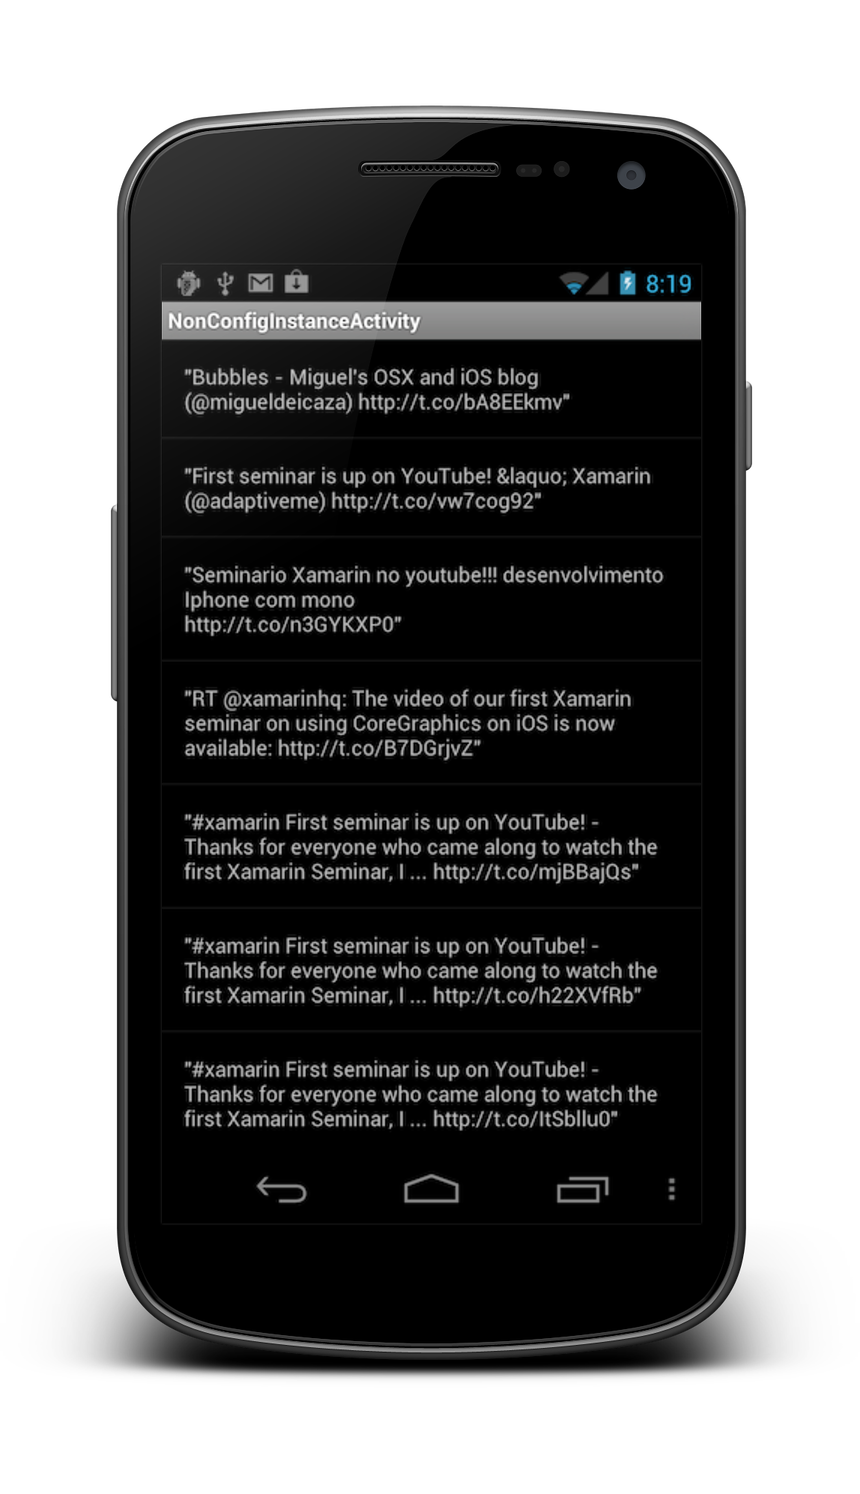
Using OnRetainNonConfigurationInstance is suitable for scenarios where it is expensive to retrieve the data multiple times, such as in web service calls. For example, consider the following code that searches Twitter:
This code retrieves results from the web formatted as JSON, parses them, and then presents the results in a list, as shown in the following screenshot:
When a configuration change occurs — for example, when a device is rotated — the code repeats the process. To reuse the originally retrieved results and not cause needless, redundant network calls, we can use OnRetainNonconfigurationInstance to save the results, as shown below:
Now when the device is rotated, the original results are retrieved from the LastNonConfiguartionInstance property. In this example, the results consist of a string[] containing tweets. Since OnRetainNonConfigurationInstance requires that a Java.Lang.Object be returned, the string[] is wrapped in a class that subclasses Java.Lang.Object , as shown below:
For example, attempting to use a TextView as the object returned from OnRetainNonConfigurationInstance will leak the Activity, as illustrated by the code below:
In this section, we learned how to preserve simple state data with the Bundle , and persist more complex data types with OnRetainNonConfigurationInstance .
Summary
The Android activity lifecycle provides a powerful framework for state management of activities within an application but it can be tricky to understand and implement. This chapter introduced the different states that an activity may go through during its lifetime, as well as the lifecycle methods that are associated with those states. Next, guidance was provided as to what kind of logic should be performed in each of these methods.
Источник


