- Creating and Managing Apple Developer Certificates
- Streamlining the Process
- Overview
- Step 0 — Create an account
- Step 1 — Get Your Phone’s Device ID
- Step 2 — Visit iOS Certificate Portal
- Step 3 — Add a Device
- Substep A — Go to Devices
- Substep B — Add a Device
- Substep C — Complete Form
- Step 4 — Create a Signing Certificate Request
- Substep — A — Open Keychain Access
- Substep — B — Create a Signing Certificate Request from the CA
- Substep — C — Complete the Certificate Request Form
- Substep — D — Download your Signing Certificate Request Application
- Step 5 — Request an Official Signing Certificate from Apple
- Substep — A — Request a Signing Certificate
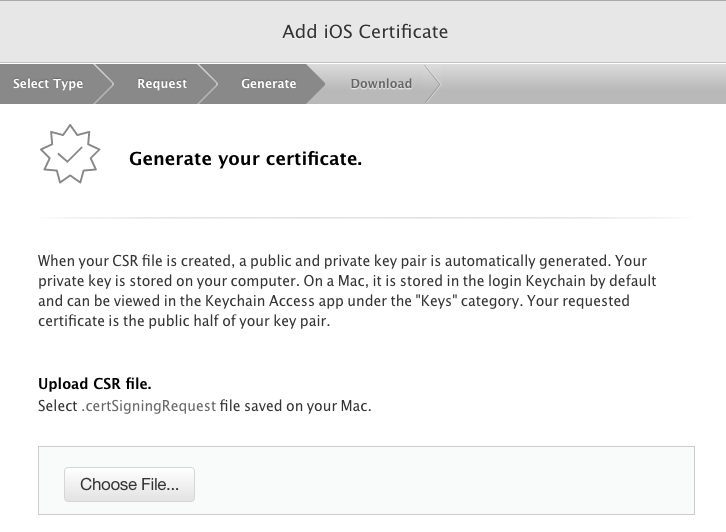
- Substep — B — Upload your Signing Certificate Request
- Substep — C — Success
- Substep — D — Repeat
- Let’s Take a Break
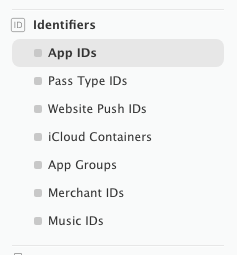
- Step 6 — Create an App ID
- Substep A — Go to App ID’s
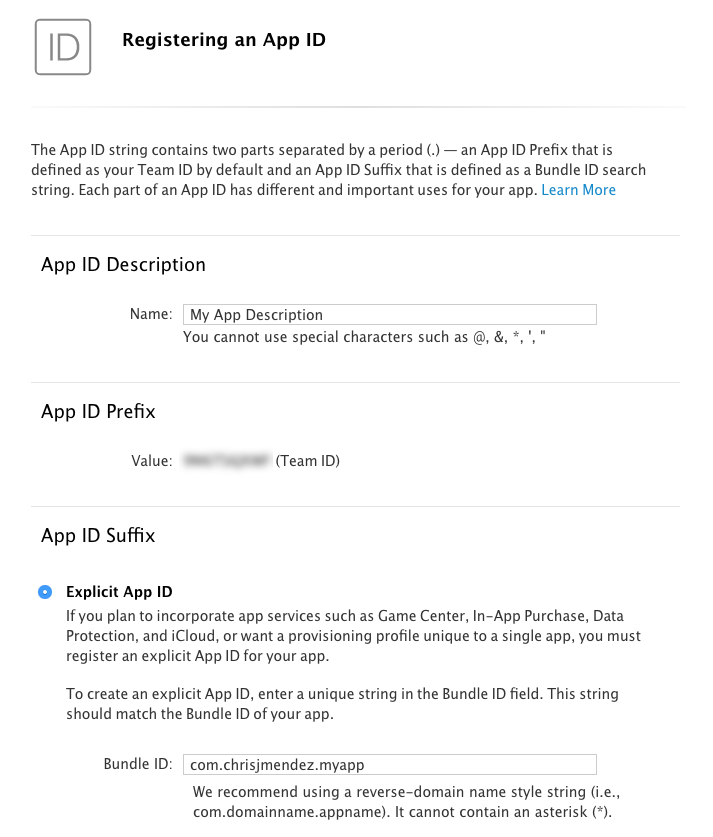
- Substep B — Create a new App ID
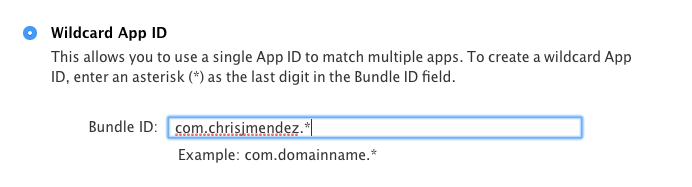
- Substep C — Complete App ID Form
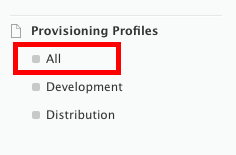
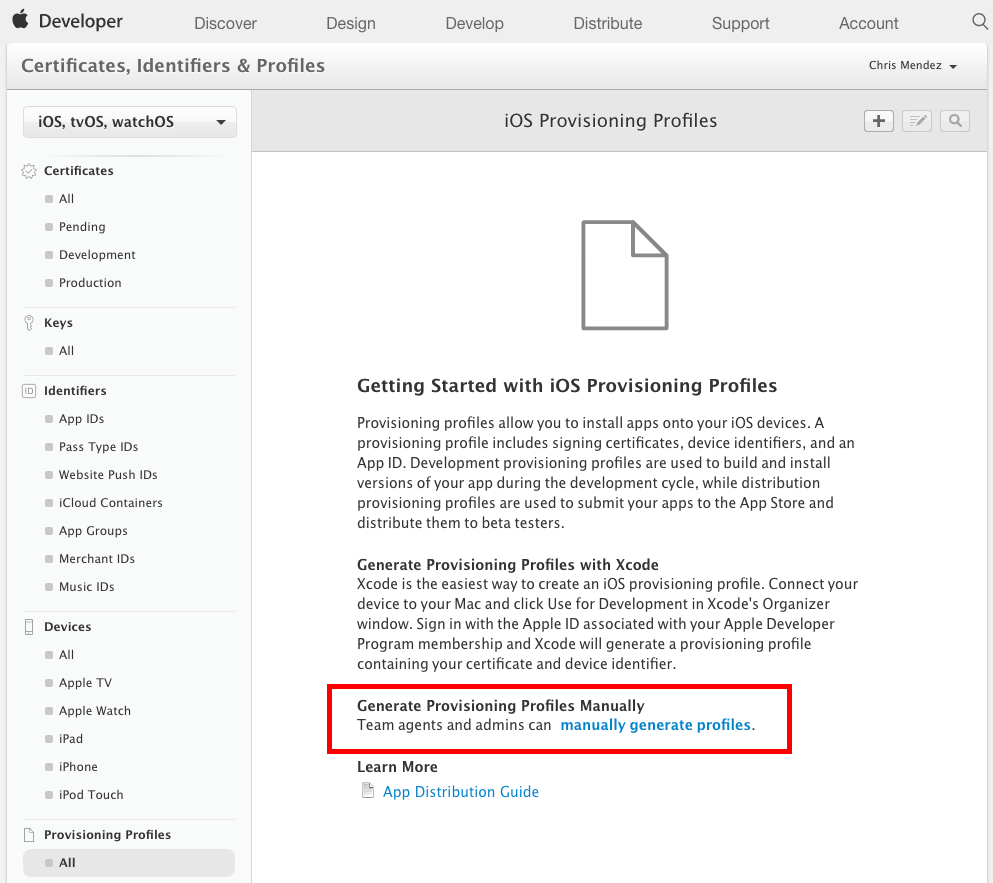
- Step 7 — Generate Mobile Provisioning Profile
- Substep A — Go to Provision Profiles
- Substep B — Manually Generate a Profile
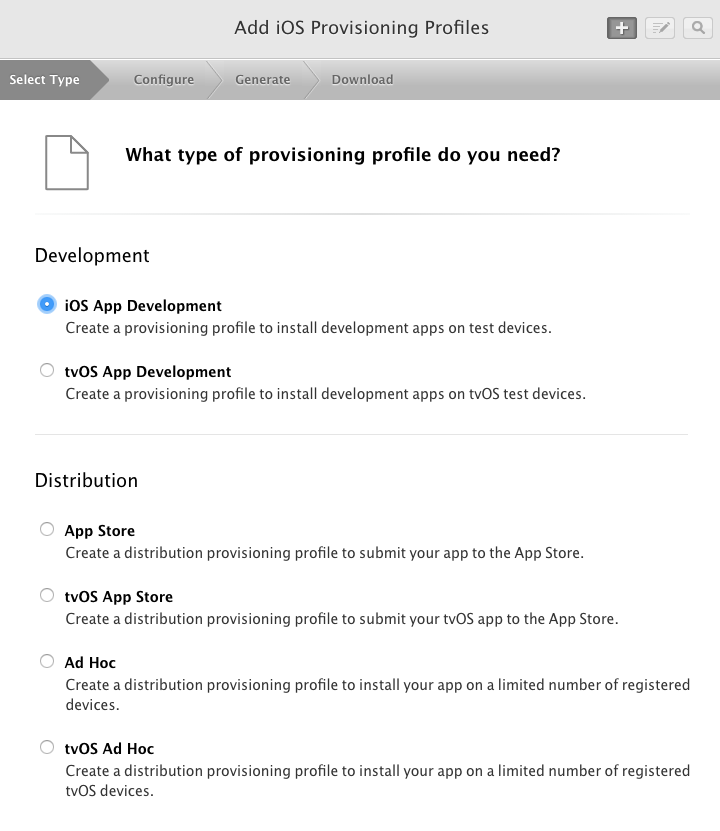
- Substep C — Pick a Profile Type
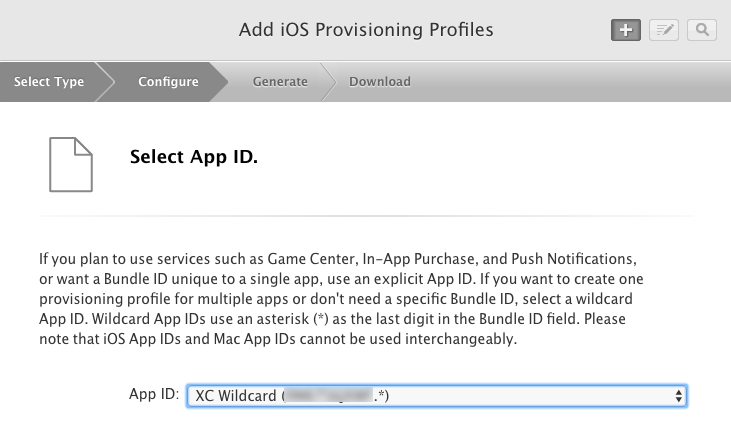
- Substep D — Select an App ID
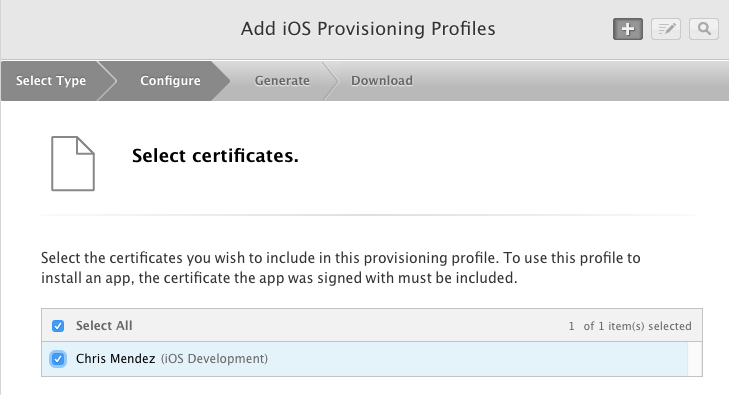
- Substep E — Select a Signing Certificate
- Substep F — Select Devices
- Substep G — Name Your Provision Profile
- Substep H — Download Your Provision Profile
- Substep I — Repeat
- Troubleshooting
- Create a Windows Signing Certificate Request
- Signing Your Apps for Gatekeeper
- Prepare for Distribution
- Generate your Developer ID certificate.
- Sign and test your app.
- Get Your Software Notarized
- Submitting with Xcode
- Viewing Upload Logs
- iPhone: What is a WWDR intermediate certificate?
- 7 Answers 7
Creating and Managing Apple Developer Certificates
How to create and manage signing certificates and provision profiles without XCode.

This is one of the few topics developers rarely want to discuss. When they do, here’s what the dialog looks like.
Part of the challenge is that the entire process is excruciatingly confusing. The Apple documentation could be better but it’s not so here’s my attempt to streamline the steps.
Streamlining the Process
This article is unique in that I am intentionally not going to use XCode to complete the provisioning process. The main reason is because I work with teams from all over the world and some prefer to develop apps using Hackintosh computers. These steps therefore will show you, an administrator, how to manage your apps and certificates without relying on XCode.
Note: This article is for developers interested in building apps, not beta testers. If you’re trying to use TestFlight, that’s a whole other topic which will not be covered here.
Overview
Here is a high-level overview of the steps required to create an Apple Provision Profile.
- Gather the device UUID’s you’ll be using to test your app.
- Add the UUID’s to Apple’s device portal.
- Create a Signing Certificate Request on my local machine.
- Request a Signing Certificate from Apple’s portal.
- Create an App ID from Apple’s App ID portal.
- Create a Provisioning Profile from Apple’s Provisioning Profile portal.
Step 0 — Create an account
You’ll need an Apple Developer account. You can access it by visiting http://developer.apple.com.
Step 1 — Get Your Phone’s Device ID
There are a few different ways to get your phone’s device ID. I suggest reading this article first. I promise, it won’t take you more than 3 minutes to read.
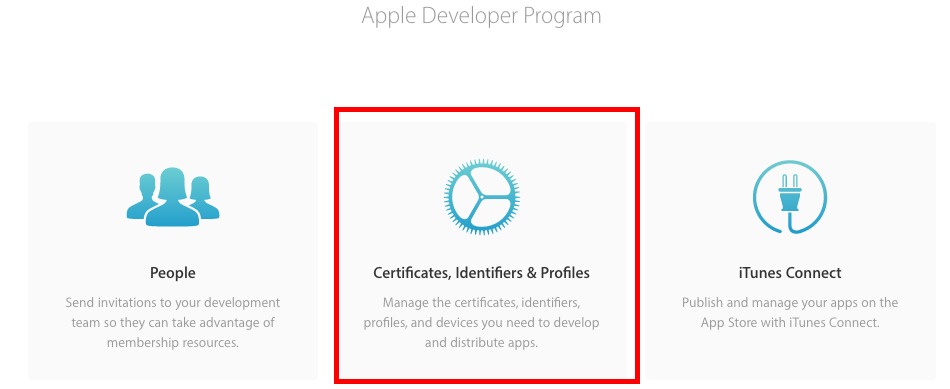
Step 2 — Visit iOS Certificate Portal
Let’s first go to our Account Overview. This is where we set up devices and get the files you need to compile an app.
Step 3 — Add a Device
You will need to add an actual device for testing purposes.
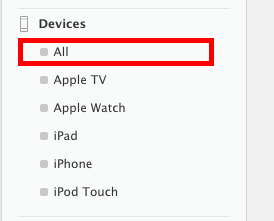
Substep A — Go to Devices
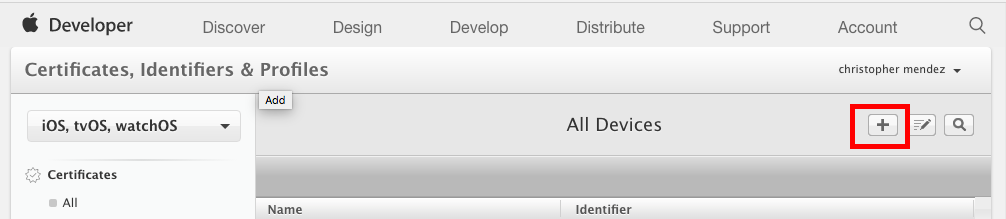
Substep B — Add a Device
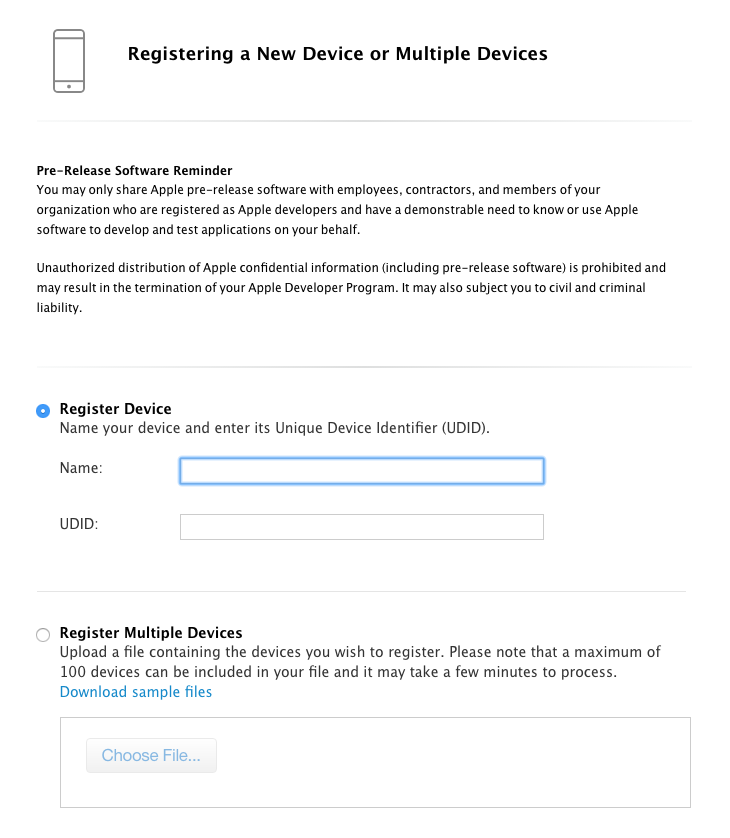
Substep C — Complete Form
Step 4 — Create a Signing Certificate Request
A Signing Certificate Request is sort of like an administrative application. This application is what you will send to Apple for an official Signing Certificate.
You can start your application by first opening Keychain Access.
Substep — A — Open Keychain Access

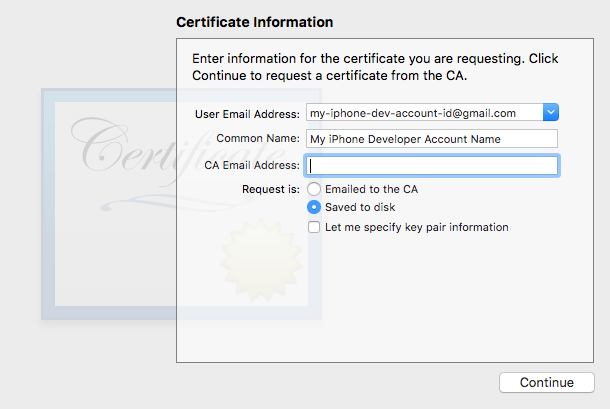
Substep — B — Create a Signing Certificate Request from the CA
The purpose of this step is not to create a certificate but to create a certificate request. This request is sort of like an application you will later send to Apple for an official Signing Certificate.

Substep — C — Complete the Certificate Request Form
It’s important to get this right. I recommend using the email and organization name you used to create your Apple Developer Account.
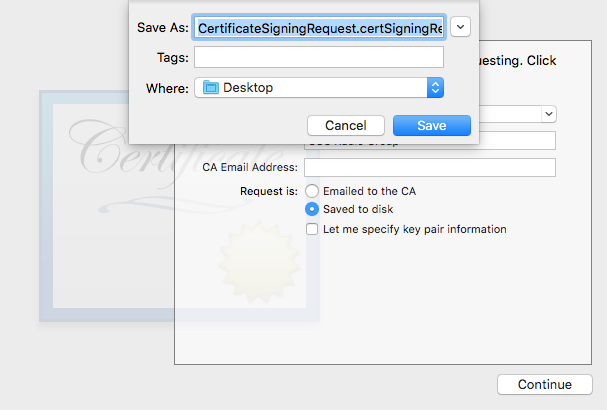
Substep — D — Download your Signing Certificate Request Application
Download the file.
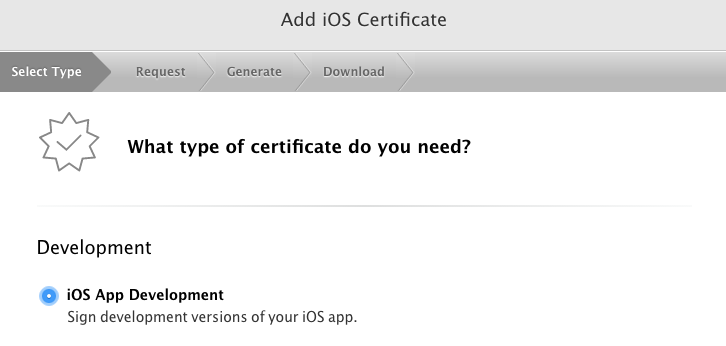
Step 5 — Request an Official Signing Certificate from Apple
This is the step where you will submit your Signing Certificate Request to Apple. If things work out, you will be granted an official Signing Certificate.
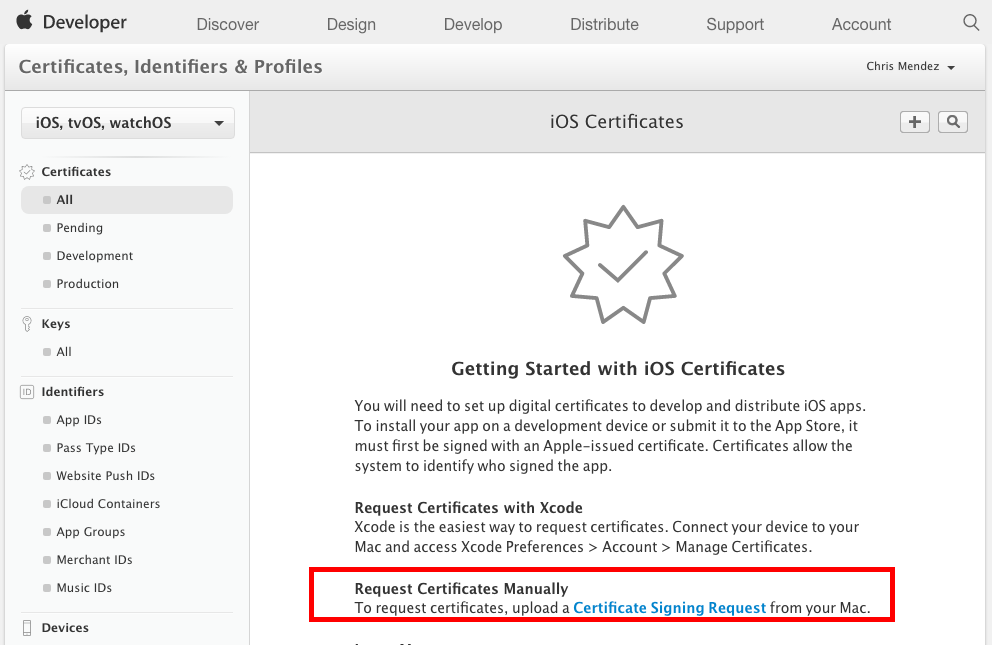
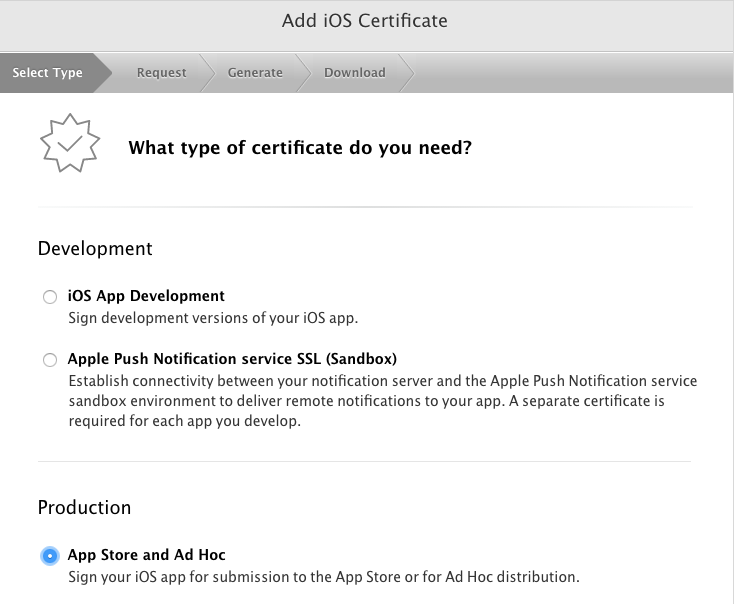
Substep — A — Request a Signing Certificate
Visit the Apple Certificate Portal and select «Request Certificates Manually». This will initiate a signing certificate request.
Substep — B — Upload your Signing Certificate Request
The last step is to upload the signing request.
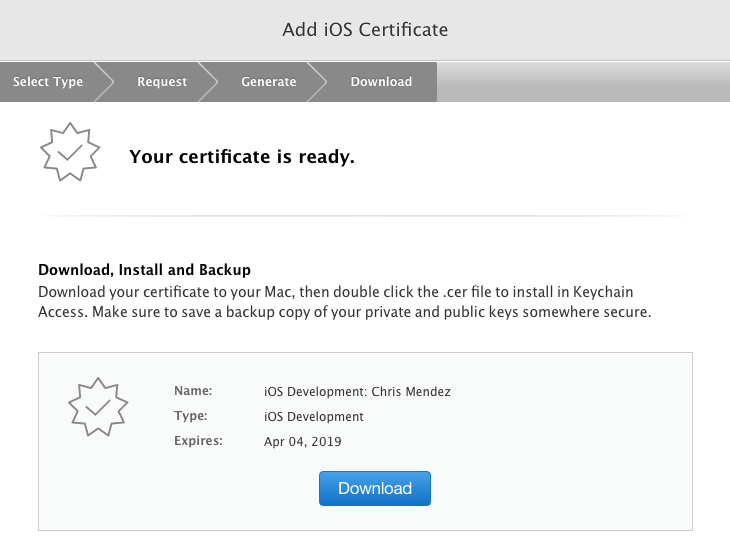
Substep — C — Success
If you do this correctly, you will get a pretty «Download» button with your actual Signing Certificate.
Substep — D — Repeat
At some point you will want to repeat this process to create a Distribution Certificate. This is the cert you will need to later publish to TestFlight.
Let’s Take a Break
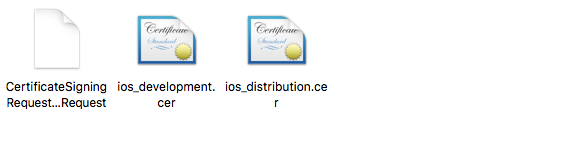
Phew, that’s a lot of steps.
If you’ve followed each of the steps above, you should now have three files.
Step 6 — Create an App ID
The Apple ID is the unique ID you will use within the Apple Store Marketplace. Think of the App ID as your website domain name, there is only one in the world and you will never be able to change it.
Substep A — Go to App ID’s
Substep B — Create a new App ID

Substep C — Complete App ID Form
Most companies prefer to use a pattern called reverse domain name notation to create a bundle id. This will often prevent naming conflicts.
If you want to create multiple apps for testing purposes, then it makes more sense to select «Wildcard App ID». This will save you time from having to complete multiple form applications.

Step 7 — Generate Mobile Provisioning Profile
Woo Hoo! We’re at the home stretch. Let’s finish.
Now that you’ve created an App ID, you can now create a mobile provisioning profile.
Substep A — Go to Provision Profiles
Substep B — Manually Generate a Profile
Substep C — Pick a Profile Type
Substep D — Select an App ID
Pick the app you want to start developing.
Substep E — Select a Signing Certificate
Substep F — Select Devices
This is where you select the hardware devices you added earlier.

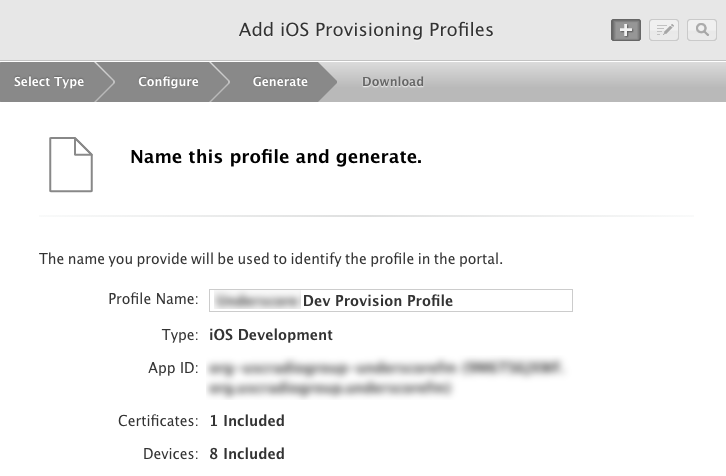
Substep G — Name Your Provision Profile
Substep H — Download Your Provision Profile

Substep I — Repeat
You will want to create another provision profile for «AD Hoc» (aka TestFlight) and actual «App Store» distribution.
We did it! Woot woot! Congratulate yourself on a provision well done.
Troubleshooting
Create a Windows Signing Certificate Request
If you’re on a Windows machine, I cannot help you. All I know is that you’ll probably need to:
- Download and install OpenSSL.
- Generate some sort of private key.
- Use that key to create to a signing certificate.
Источник
Signing Your Apps for Gatekeeper
Gatekeeper on macOS helps protect users from downloading and installing malicious software by checking for a Developer ID certificate from apps distributed outside the Mac App Store. Make sure to sign any apps, plug-ins, or installer packages that you distribute to let Gatekeeper know they’re safe to install. And now, you can give users even more confidence in your apps running on macOS Mojave by submitting them to Apple to be notarized.
Prepare for Distribution
A Developer ID certificate lets Gatekeeper verify that you’re a trusted developer when a user opens your app, plug-in, or installer package downloaded from outside the Mac App Store. Software signed with a Developer ID certificate can also take advantage of advanced capabilities such as CloudKit and Apple Push Notifications.
Generate your Developer ID certificate.
You can generate your Developer ID certificate in Xcode or in the Certificates, Identifiers & Profiles section of your developer account. Please note that you must be the Account Holder of your development team in the Apple Developer Program.
Sign and test your app.
Enable the hardened runtime capability and declare entitlements for the functions your app requires in Xcode. Archive your app and test the end-user experience of launching your Developer ID-signed app using a Gatekeeper-enabled Mac.
Xcode
To build your apps for macOS and submit them to be notarized by Apple, use Xcode 10 or later, available from the Mac App Store.
Get Your Software Notarized
Give users even more confidence in your software by submitting it to Apple to be notarized. The service automatically scans your Developer ID-signed software and performs security checks. When it’s ready to export for distribution, a ticket is attached to your software to let Gatekeeper know it’s been notarized.
For step-by-step details on uploading your Mac software to be notarized, read Notarizing Your App Before Distribution and the Xcode documentation.
Submitting with Xcode
Unpublished Software. It’s easy to get unpublished software notarized with the Export process or xcodebuild . Custom build workflows are supported by the xcrun altool command line tool for uploading, and you can use xcrun stapler to attach the ticket to the package.
Published Software. To submit software you’ve already published, upload it using the xcrun altool command line tool. Several file types are supported, including .zip, .pkg, and .dmg, so you can upload the same package you already distribute to users.
Viewing Upload Logs
In addition to checking for malicious software, the notary service catches common code signing problems that can prevent your software from installing properly. If notarization fails for your upload, check the status log for details.
Requirements
When users on macOS Mojave 10.14 or later first open a notarized app, installer package, or disk image, they’ll see a more streamlined Gatekeeper dialog and have confidence that it is not known malware.
Mac apps, installer packages, and kernel extensions that are signed with Developer ID must also be notarized by Apple in order to run by default on macOS Catalina.
Источник
iPhone: What is a WWDR intermediate certificate?
In the Apple Developer Portal, in Certificates, Developer (or Distribution) it says:
«If you do not have the WWDR intermediate certificate installed, click here to download now.»
I don’t even know what that means. Do I need to download and run that? or do I need to only download the current certificate only?


7 Answers 7
You need to download it and double click on it. It will get stored in your computer’s KeyChain. It can be described best as something like root level certificate authority that affirms that your development or distribution profile certificate was issued by Apple’s WWDR and not forged somewhere else.
iPhone Game Development book says:
Apple’s World Wide Developer Relations (WWDR) certificate is available from Apple at http://developer.apple.com/certificationauthority/AppleWWDRCA.cer. Download and install the certificate so that you can use it to certify builds. The WWDR certificate links your development certificate to Apple, completing the trust chain for your application.
The WWDR certificate is needed to tell Xcode that your other certificates are valid. You need to download them all and drop them on your KeyChain.

WWDR certificate is required since it contains the public key of the Certificate Authority(CA).Here the Certificate Authority is Apple itself(Apple Root CA).
This certificate is to ensure that your Development and Distribution certificates are indeed issued by the CA and the owner of that certificate(ie your identity) has been verified.
wiki regarding Certificate Authority
To help protect customers and developers, we require that all third party apps, passes for Apple Wallet, Safari Extensions, Safari Push Notifications, and App Store purchase receipts are signed by a trusted certificate authority. The Apple Worldwide Developer Relations Certificate Authority issues the certificates you use to sign your software for Apple devices, allowing our systems to confirm that your software is delivered to users as intended and has not been modified.

I understand basic public key cryptography. You generate a key pair on your machine. Then you upload your public key to the certificate authority and they sign and return it to you. You then install the certificate on your key chain and use that to sign your apps in XCode (with the private key).
Pretty straight forward.
The WWDR Intermediate Certificate (WWDRIC) doesn’t seem to fit that model. You need to only download it once (unless it expires) and you may have multiple developer signing certificates over an extended period of time.
My hypothesis is that it allows Xcode to validate your developer certificates with a local source (the WWDRIC) and not have to go on to the network to validate your signing certificates. This avoids the latencies associated with networks (or you might not even be on the net).
Источник


