- «Дисковая утилита» в macOS
- Возможности приложения
- Базовые манипуляции с носителями
- Расширенные функции утилиты
- Заключение
- Repair a storage device in Disk Utility on Mac
- How to repair a Mac disk with Disk Utility
- Open Disk Utility
- Select your disk in Disk Utility
- Repair volumes, then containers, then disks
- If Disk Utility found errors that it can’t repair
- If your disk doesn’t appear in Disk Utility
«Дисковая утилита» в macOS
Возможности приложения
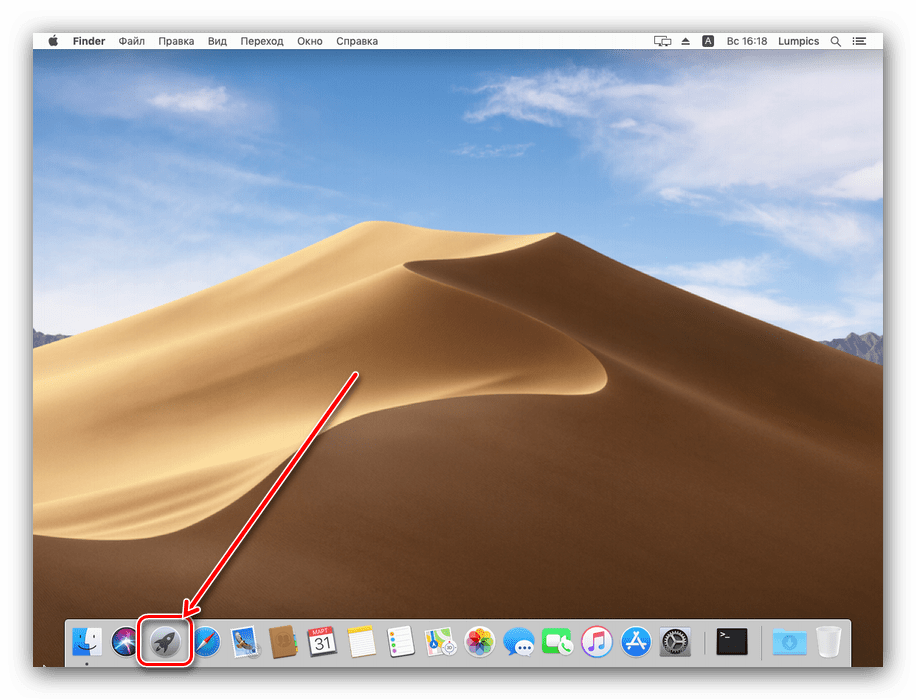
Первым делом покажем, как получить доступ к указанной программе.
- Найдите в панели Dock иконку Launchpad и кликните по ней.
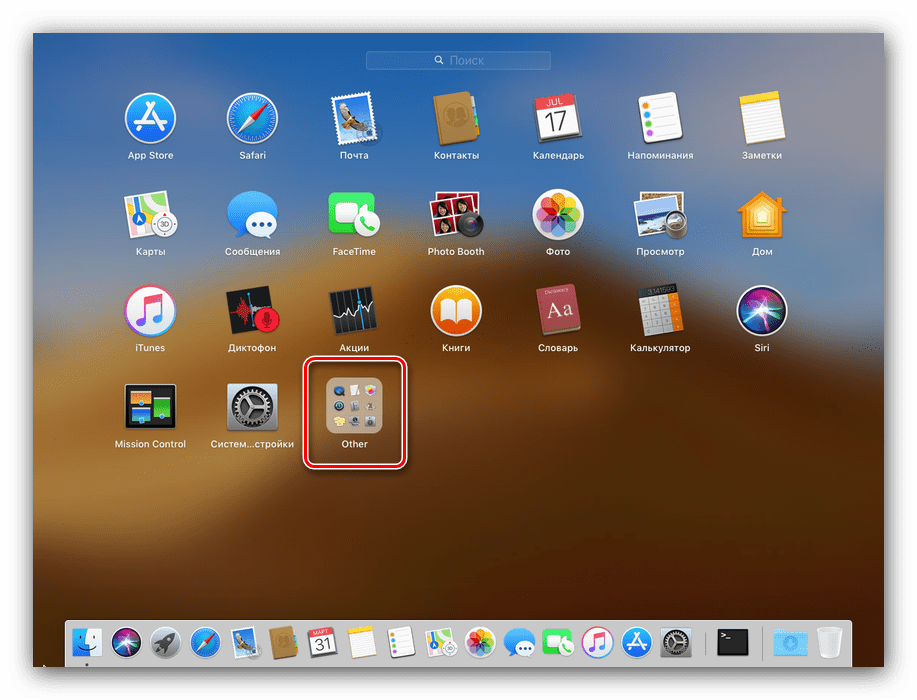
Затем в меню лаунчера выберите каталог «Other» (также может называться «Утилиты» или «Utilites»).
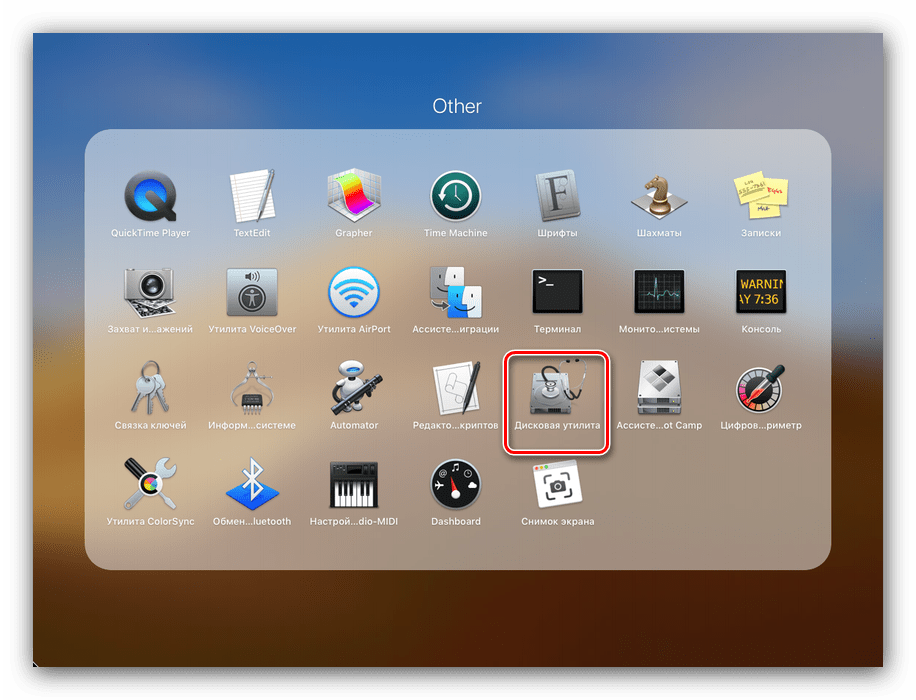
После запуска «Дисковой утилиты» можно приступать к обзору её функциональности.
Базовые манипуляции с носителями
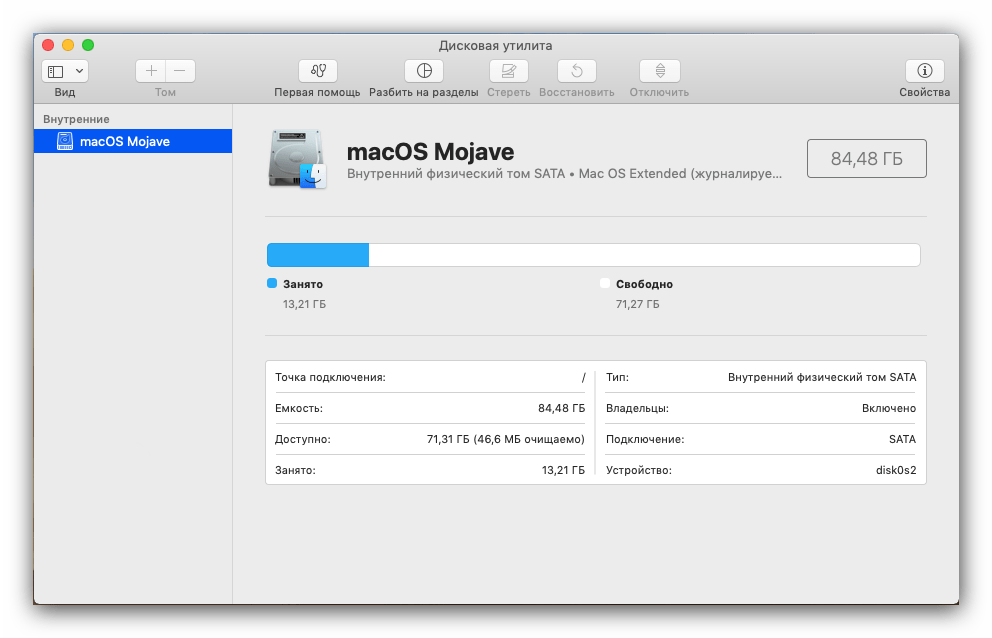
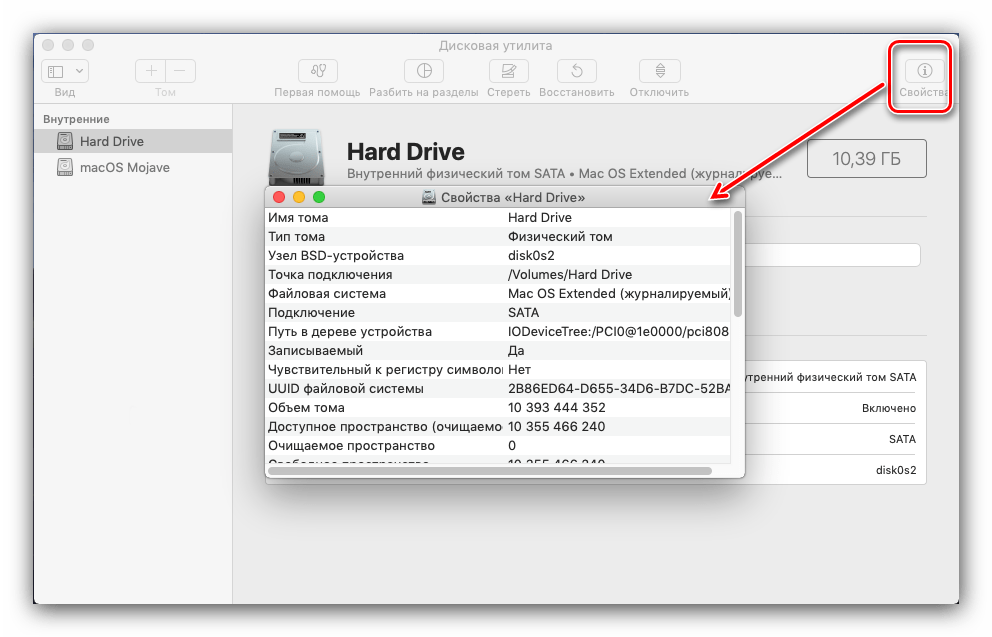
Рассматриваемое средство предоставляет возможности базового управления распознанными носителями информации, такие как просмотр свойств, форматирование, разбиение на разделы и прочее.
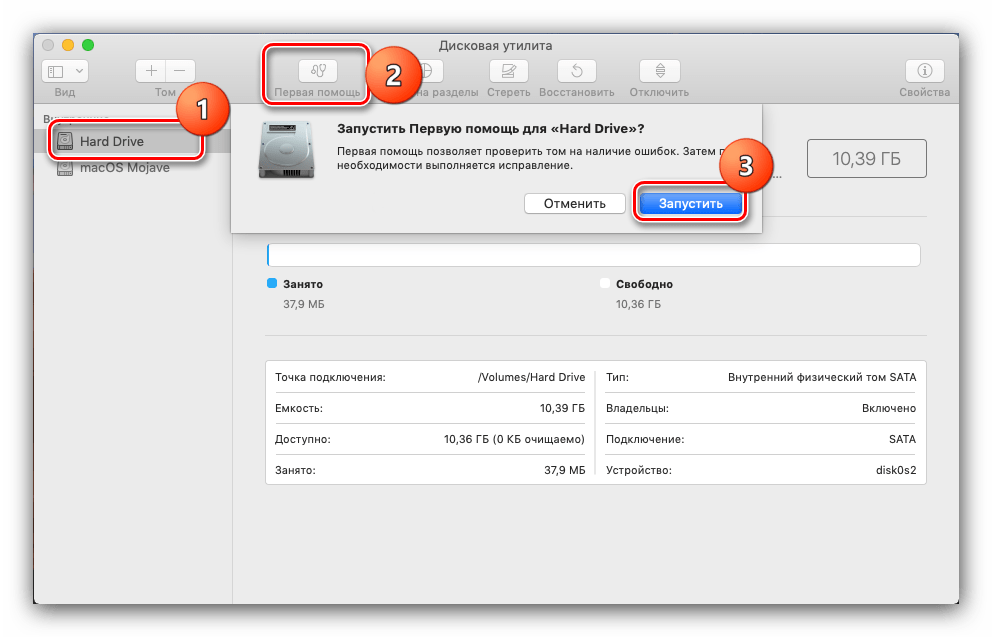
- Кнопка «Первая помощь» вызывает автоматизированный инструмент устранения ошибок жесткого диска, флешки или SSD: достаточно выбрать нужный накопитель в меню слева, нажать на указанную кнопку и подтвердить согласие на устранение ошибок.

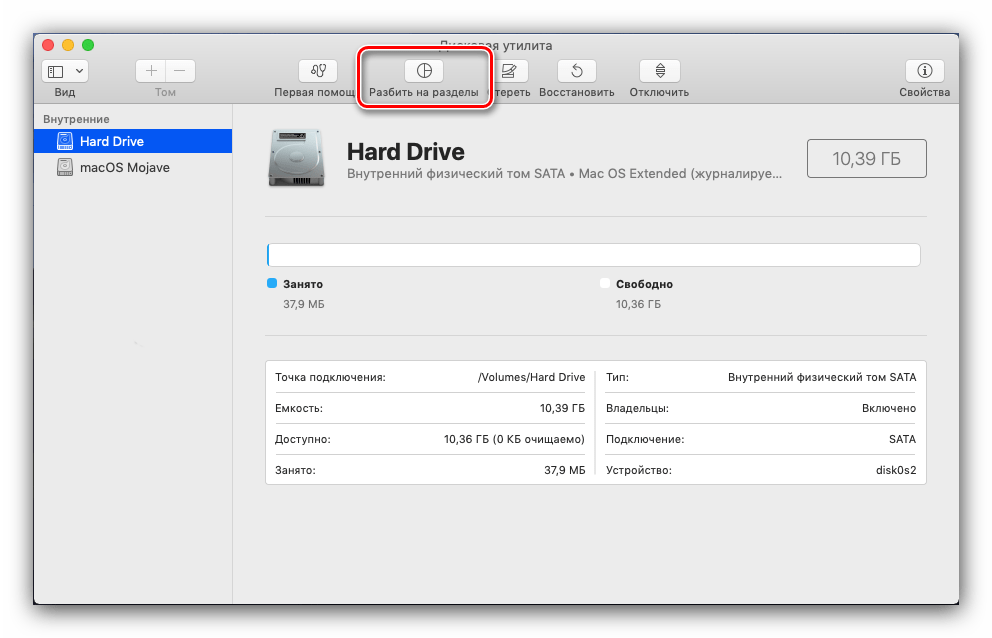
Обратите внимание, что это средство порой работает неэффективно, поэтому не стоит возлагать на него большие надежды. - Название функции «Разбить на разделы» говорит само за себя – она предлагает пользователю разбить жесткий диск на два или больше томов.
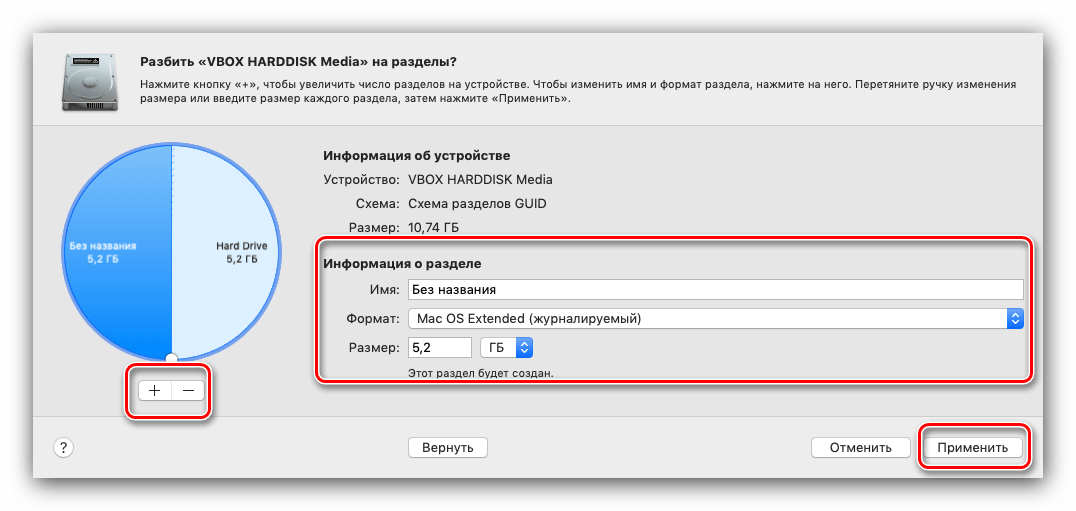
Нажатие на эту кнопку вызовет дополнительное окно, в котором можно настроить разделы: количество, название, формат и объём. Последний параметр можно как задать вручную, так и воспользоваться автоматизированным средством – для этого просто нажимайте на кнопки «+»«-» под диаграммой диска.
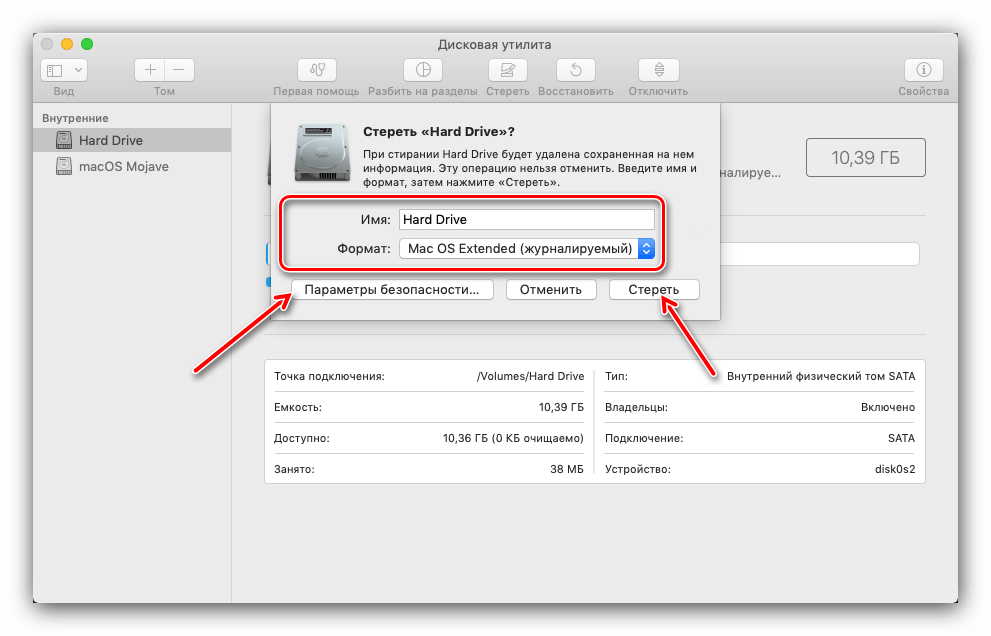
Опция «Стереть» тоже особых пояснений не требует – она запускает форматирование выбранного накопителя. 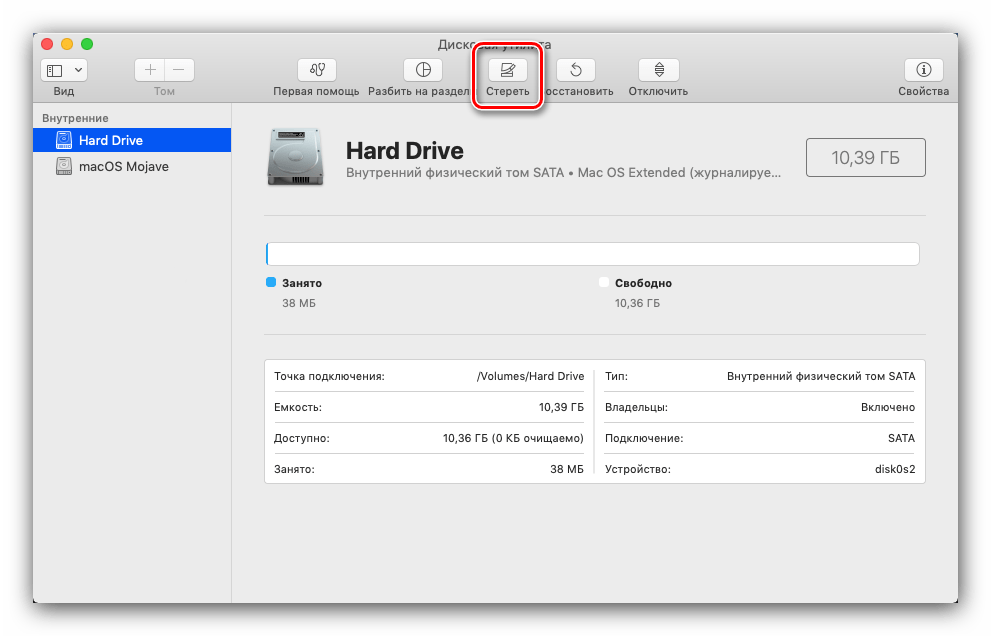
Перед началом процедуры можно задать новое название носителя или раздела, выбрать формат (кроме форматов Apple, доступны также совместимые варианты FAT и ExFat), а также параметры глубины удаления информации на диске (кнопка «Параметры безопасности»).
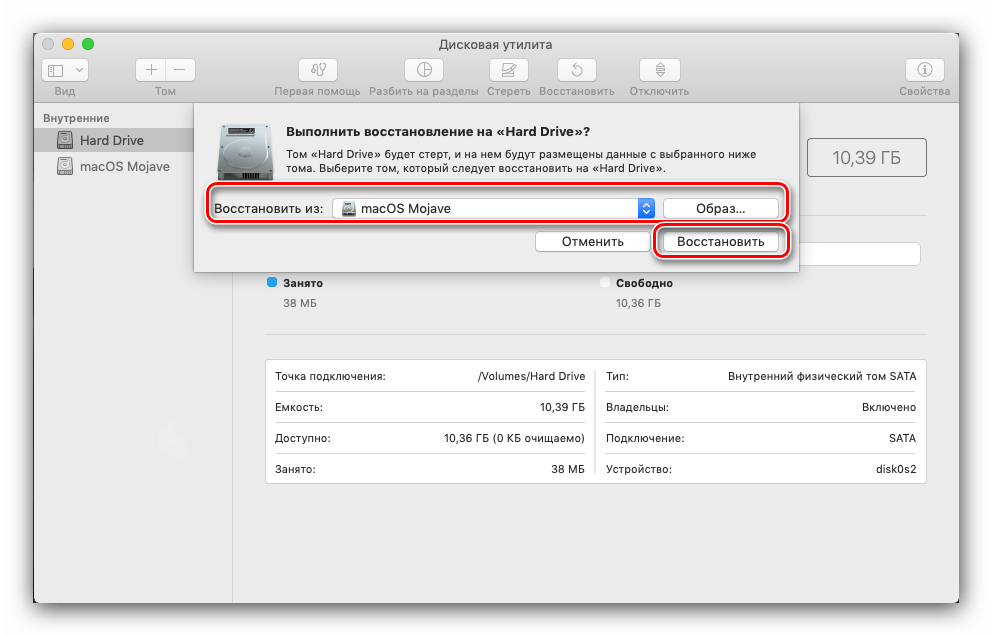
Кнопка «Восстановить» вызывает средство клонирования данных с другого раздела или образа диска. Пользоваться этим инструментом просто: выберите нужный накопитель или образ (нажатие на соответствующую кнопку вызовет диалоговое окно Finder) и нажмите «Восстановить».
Обзор базового функционала на этом завершен, и мы переходим к расширенным возможностям «Дисковой утилиты».
Расширенные функции утилиты
Опции, доступные в «Дисковой утилите», не ограничиваются простыми возможностями, приведёнными в разделе выше. Посредством этого приложения можно также создавать и настраивать образы дискового пространства, а также RAID-массивы.
Работа с образами дискового пространства
Для новичков в macOS объясним: под термином «образ» в ОС от Apple подразумевается нечто иное, чем в Windows. Образом на Макинтошах называется своего рода архив в формате DMG, который в системе выглядит как подключённое устройство. Создание такого образа происходит по такому алгоритму:
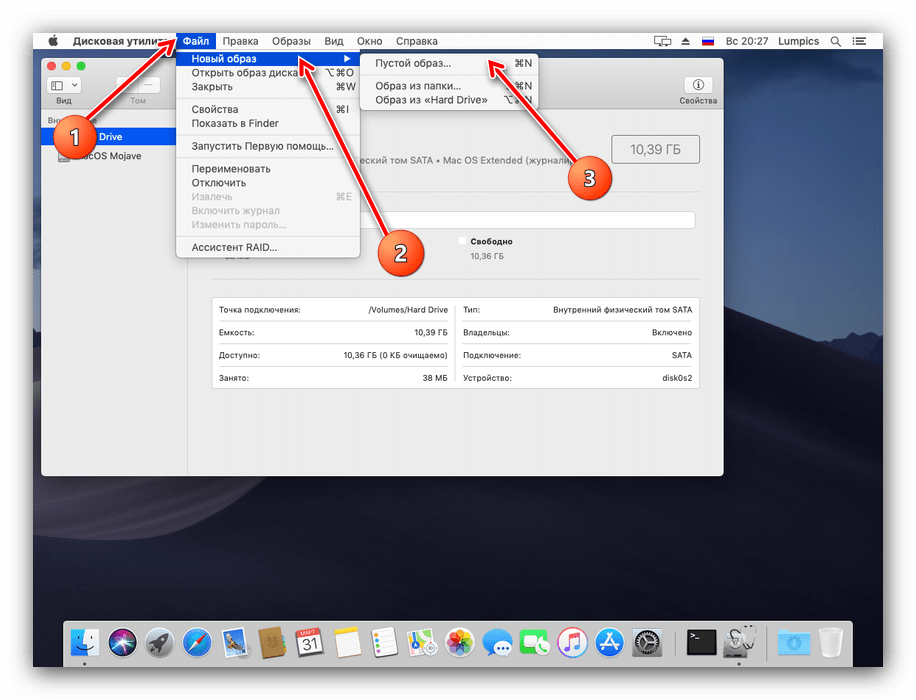
- В панели инструментов «Дисковой утилиты» выберите пункты «Файл» – «Новый образ». Далее можно выбрать источник данных. «Пустой образ» предполагает создание хранилища в файловой системе, в которой файлы будут добавляться позже.
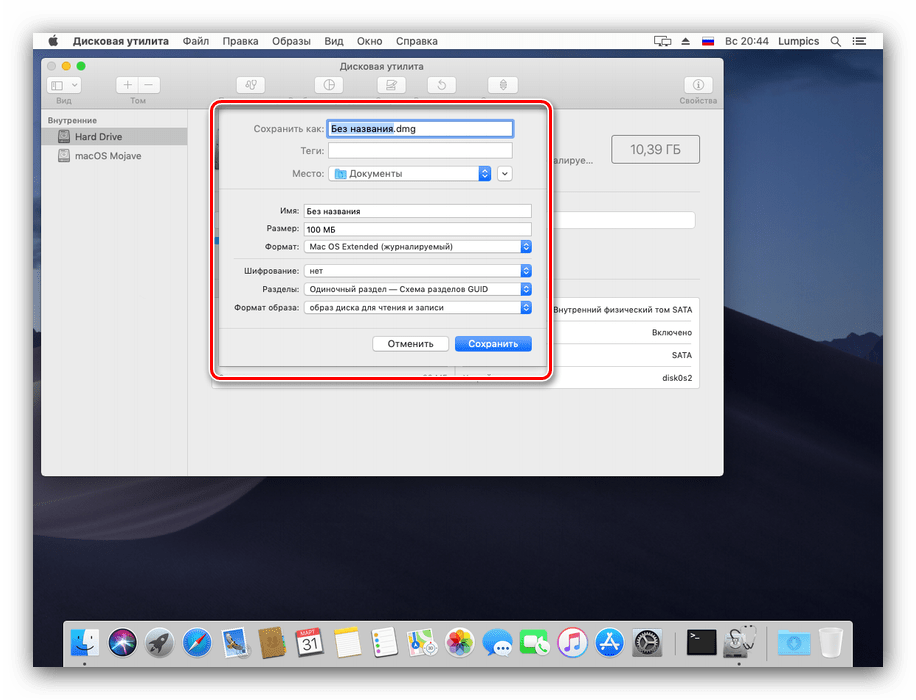
Функция «Образ из папки» предполагает выбор той или иной директории в Finder, на основе которой будет создан образ-архив. «Образ из *имя накопителя*» позволяет создать копию диска целиком. - Дальнейшие действия зависят от выбранного источника. При создании пустого образа можно выбрать название, формат, местоположение, размер (можно даже поделить на разделы) и шифрование.
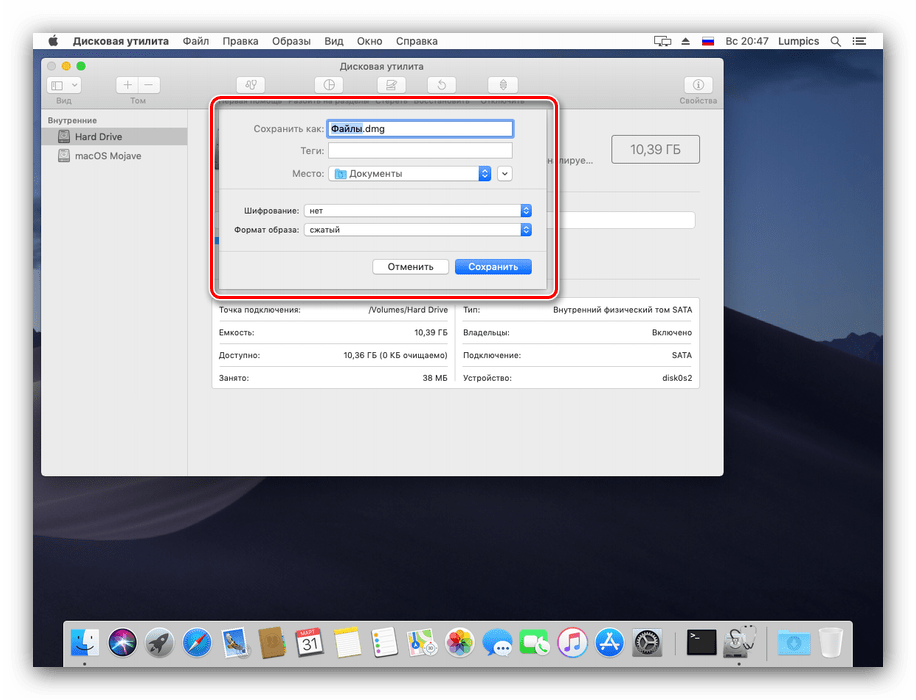
В варианте образа из папки доступны только параметры имени, тэгов, формата и шифрования.
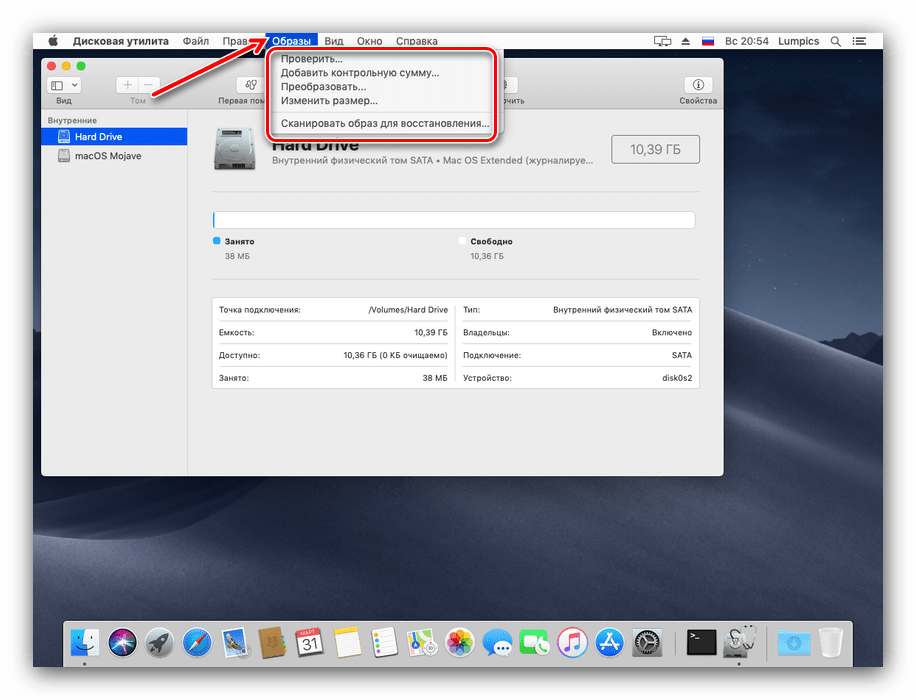
Для образа носителя получится настроить лишь имя и формат, а также задать шифрование. - Управление образами доступно через одноимённый пункт в меню «Дисковой утилиты». Есть опции проверки целостности данных, добавление контрольных сумм, преобразования в другой тип или формат, изменение размера (не для всех форматов) и сканирование образа восстановления.
Создание RAID-массива
Посредством «Дисковой утилиты» можно создавать массивы RAID, для лучшей организации сохранности данных. Выглядит это следующим образом:
- Воспользуйтесь пунктами «Файл» – «Ассистент RAID».
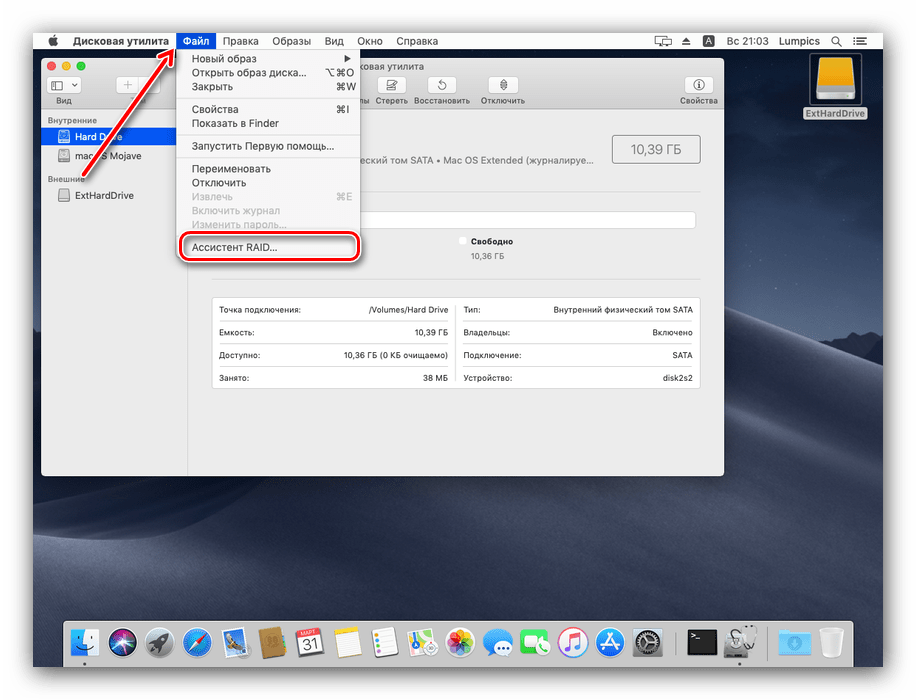
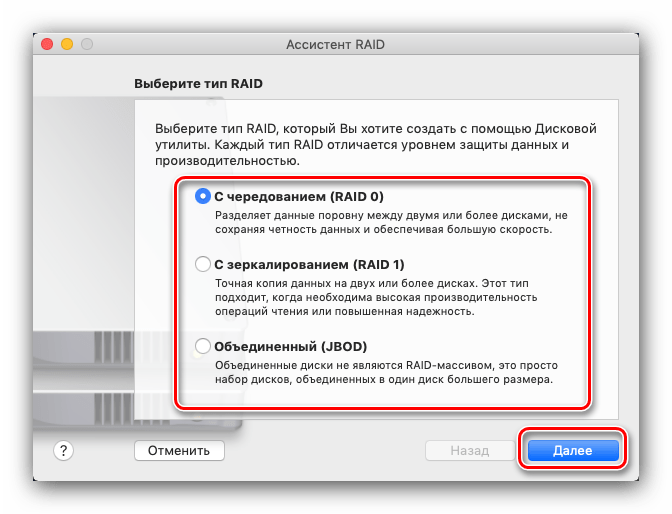
Запустится средство создания указанного массива. Первым делом нужно выбрать подходящий тип – поставьте отметку напротив нужного и нажимайте «Далее».
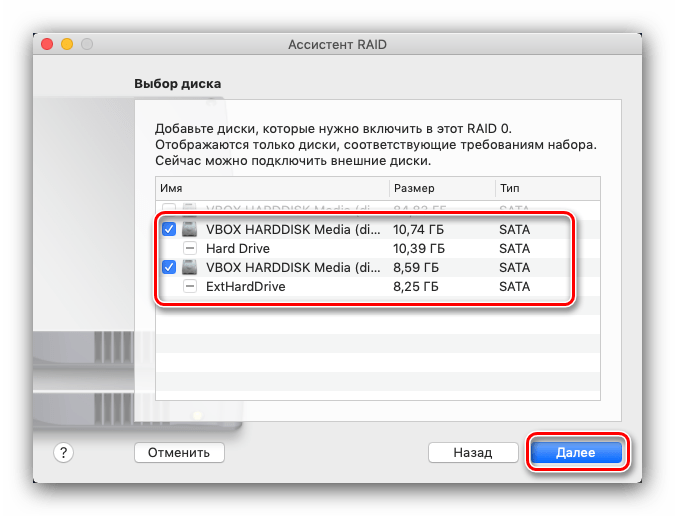
На этом этапе нужно выбрать накопители, которые хотите объединить в RAID. Обратите внимание, что загрузочный накопитель (на который установлена система) в массив добавить нельзя.
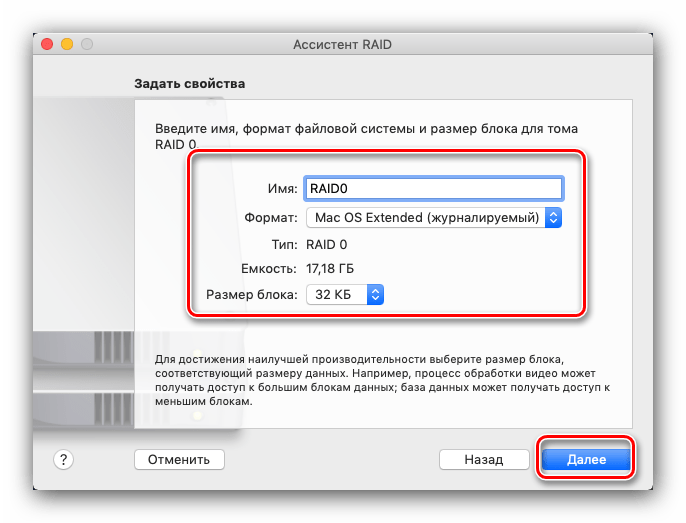
Здесь предстоит выполнить настройку свойств массива. Можно задать имя, формат и размер блока.
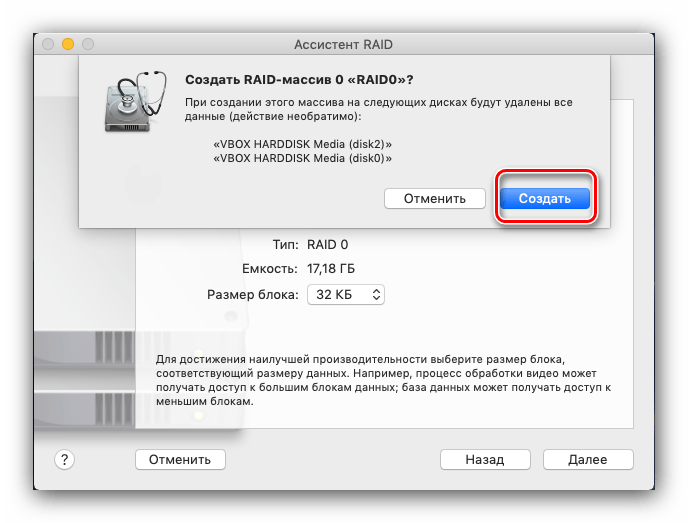
Перед созданием массива система предупредит вас, что выбранные накопители будут отформатированы. Проверьте, есть ли резервные копии хранящихся на них данных, после чего нажимайте «Создать».
Дождитесь окончания процедуры, затем нажмите «Готово». 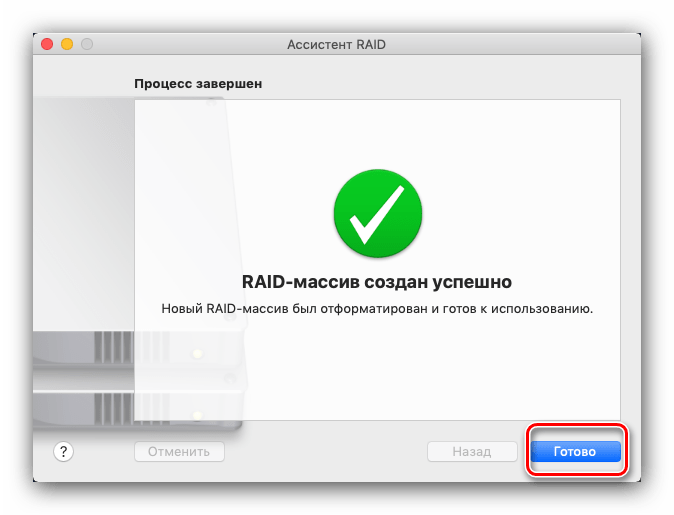
Теперь в «Дисковой утилите» появится новый пункт со свежесозданным RAID.
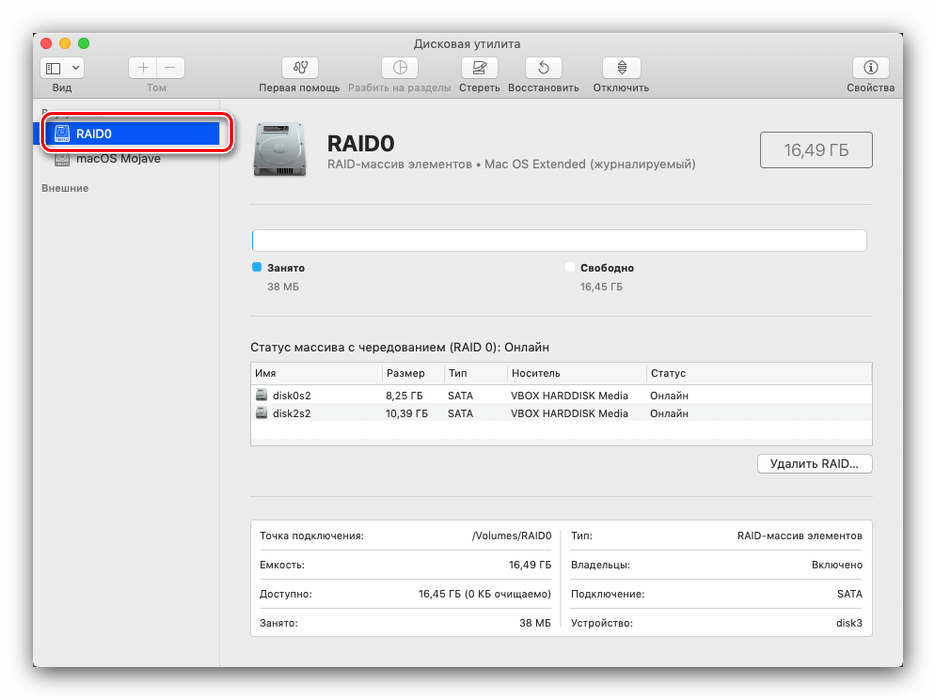
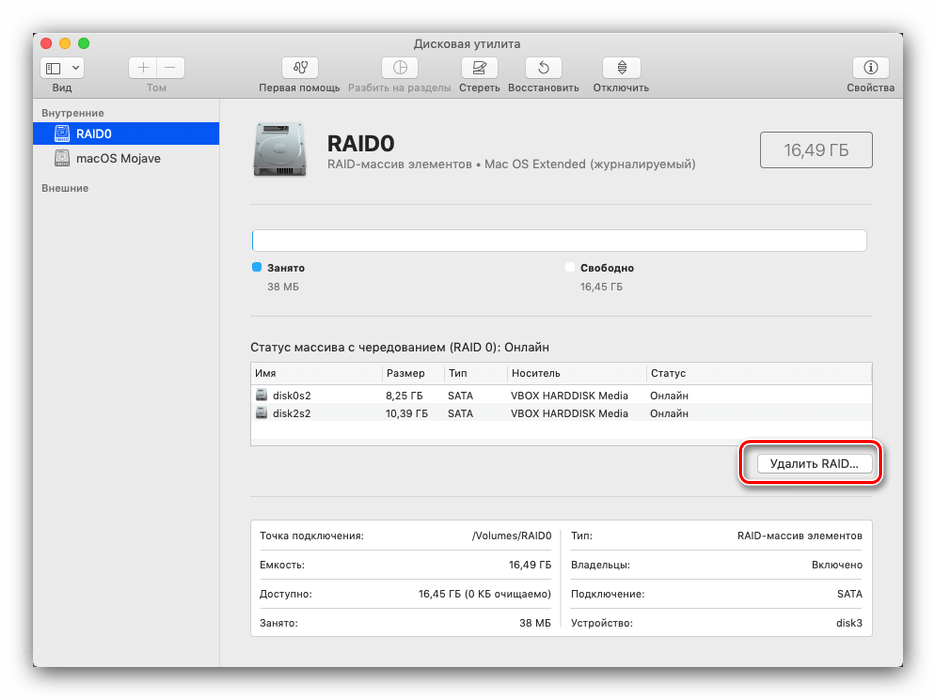
При этом диски будут форматированы, так что имейте это в виду.
Заключение
Как видим, «Дисковая утилита» в macOS представляет собой мощный инструмент управления накопителями с полезными дополнительными возможностями, которые пригодятся всем категориям пользователей.
Помимо этой статьи, на сайте еще 12486 инструкций.
Добавьте сайт Lumpics.ru в закладки (CTRL+D) и мы точно еще пригодимся вам.
Отблагодарите автора, поделитесь статьей в социальных сетях.
Источник
Repair a storage device in Disk Utility on Mac
Disk Utility can check for and fix errors related to the formatting and directory structure of a Mac storage device.
Disk Utility can fix certain disk problems—for example, multiple apps quit unexpectedly, a file is corrupted, an external device doesn’t work properly, or your computer won’t start up. Disk Utility can’t detect or repair all problems that a disk may have.
To check and repair a disk, you need to run First Aid on each volume and container on the storage device in turn, then run it on the storage device itself.
If Disk Utility tells you the disk is about to fail, back up your data and replace the disk—you can’t repair it.
In the Disk Utility app  on your Mac, choose View > Show All Devices.
If Disk Utility isn’t open, click the Launchpad icon  in the Dock, type Disk Utility in the Search field, then click the Disk Utility icon .
Note: If you’re checking your startup disk or startup volume, restart your computer in macOS Recovery, select Disk Utility in the macOS Recovery window, then click Continue. If you check your startup volume (Macintosh HD), make sure you also check your data volume (Macintosh HD — Data).
In the sidebar, select a volume, then click the First Aid button  .
.
In the First Aid dialog, click Run, then follow the onscreen instructions.
When the First Aid process is complete, click Done.
Repeat steps 2 through 4 for each volume on the storage device.
In the sidebar, select a container, then click the First Aid button .
In the First Aid dialog, click Run, then follow the onscreen instructions.
When the First Aid process is complete, click Done.
Repeat steps 6 through 8 for each container on the storage device.
In the sidebar, select the storage device, then click the First Aid button .
In the First Aid dialog, click Run, then follow the onscreen instructions.
When the First Aid process is complete, click Done.
If Disk Utility reports that the disk appears to be OK or has been repaired, you’re done. You can click Show Details to see more information about the repairs. Otherwise, you may need to do one of the following.
If Disk Utility reports “overlapped extent allocation” errors, two or more files occupy the same space on your disk, and at least one of them is likely to be corrupted. You need to check each file in the list of affected files. Most of the files in the list have aliases in a DamagedFiles folder at the top level of your disk.
If you can replace a file or re-create it, delete it.
If it contains information you need, open it and examine its data to make sure it hasn’t been corrupted.
If Disk Utility can’t repair your disk, or you receive a report that the First Aid process failed, try to repair the disk or partition again. If that doesn’t work, back up as much of your data as possible, reformat the disk, reinstall macOS, then restore your backed-up data.
If your Mac has a Fusion Drive and you see a flashing question mark or alert, see the troubleshooting section of the Apple Support article About Fusion Drive, a storage option for some Mac computers.
If you continue to have problems with your disk or it can’t be repaired, it may be physically damaged and need to be replaced. For information about servicing your Mac, see Find out how to service or repair your Mac.
Источник
How to repair a Mac disk with Disk Utility
Use the First Aid feature of Disk Utility to find and repair disk errors.
Disk Utility can find and repair errors related to the formatting and directory structure of a Mac disk. Errors can lead to unexpected behavior when using your Mac, and significant errors might even prevent your Mac from starting up completely.
Before proceeding, make sure that you have a current backup of your Mac, in case you need to recover damaged files or Disk Utility finds errors that it can’t repair.
Open Disk Utility
In general, you can just open Disk Utility from the Utilities folder of your Applications folder. However, if your Mac doesn’t start up all the way, or you want to repair the disk your Mac starts up from, open Disk Utility from macOS Recovery:
- Determine whether you’re using a Mac with Apple silicon, then follow the appropriate steps:
- Apple silicon: Turn on your Mac and continue to press and hold the power button until you see the startup options window. Click the gear icon labeled Options, then click Continue.
- Intel processor: Turn on your Mac, then immediately press and hold these two keys until you see an Apple logo or other image: Command (⌘) and R.
- You may be asked to select a user you know the password for. Select the user, then click Next and enter their administrator password.
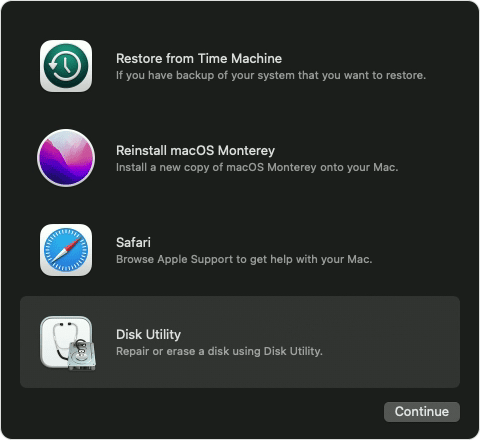
- From the utilities window in macOS Recovery, select Disk Utility and click Continue.
Select your disk in Disk Utility
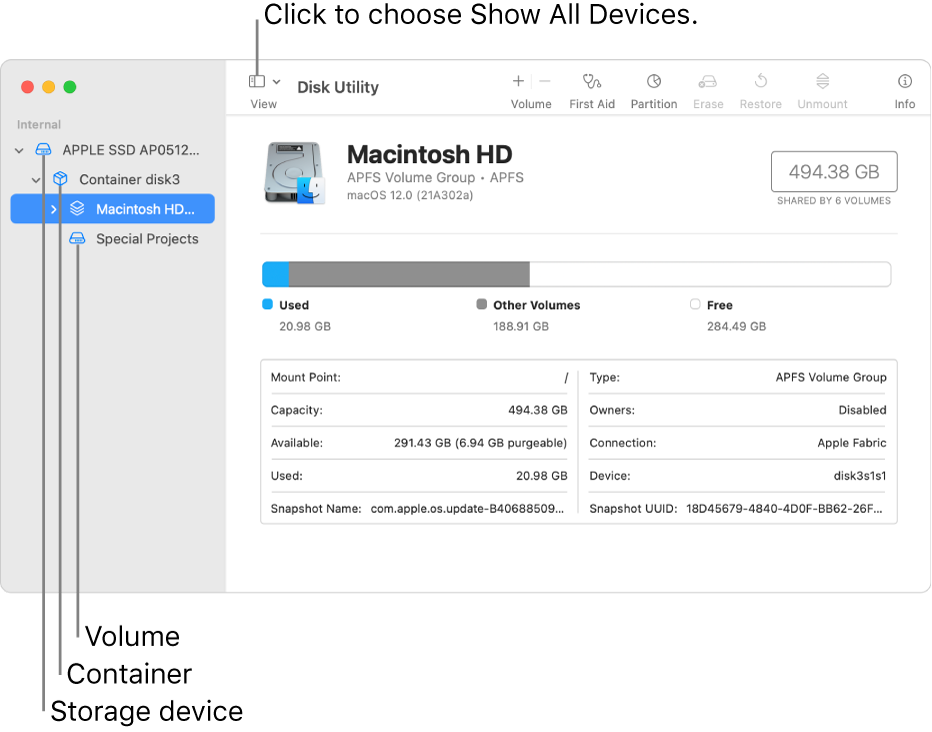
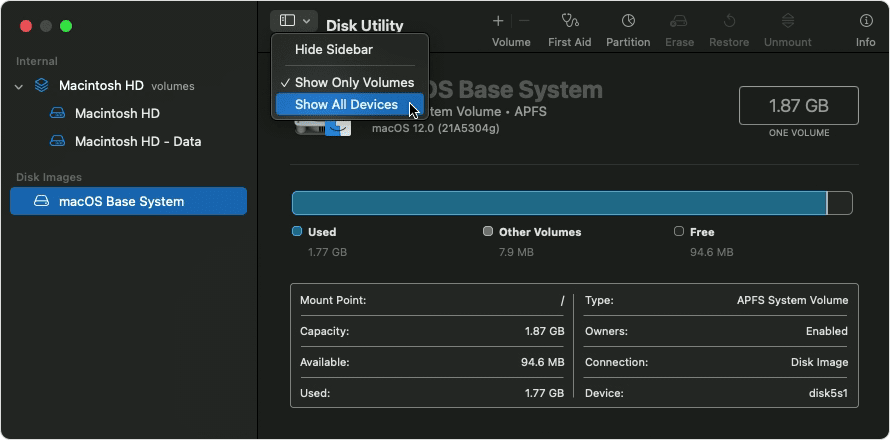
Choose View > Show All Devices (if available) from the menu bar or toolbar in Disk Utility.
The sidebar in Disk Utility should now show each available disk or other storage device, beginning with your startup disk. And beneath each disk you should see any containers and volumes on that disk. Don’t see your disk?

In this example, the startup disk (APPLE SSD) has one container and two volumes (Macintosh HD, Macintosh HD — Data). Your disk might not have a container, and it might have a different number of volumes.
Repair volumes, then containers, then disks
For each disk that you’re repairing, start by selecting the last volume on that disk, then click the First Aid button or tab.
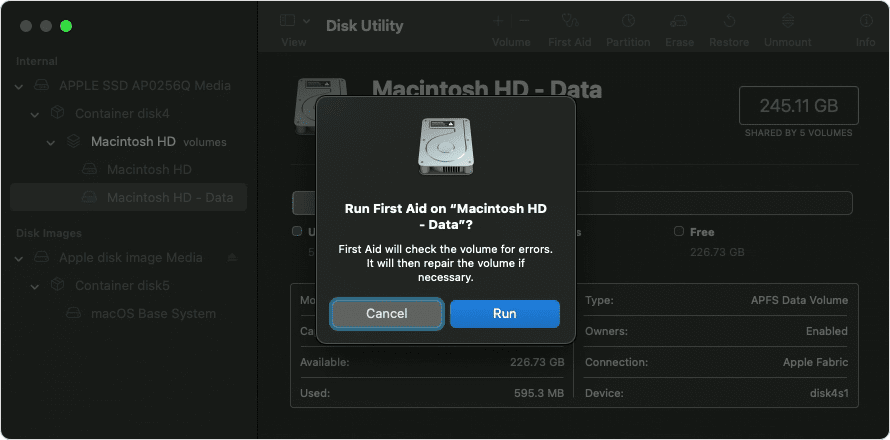
In this example, the last volume on the disk is Macintosh HD — Data.
Click Run to begin checking the selected volume for errors.
- If there is no Run button, click the Repair Disk button instead.
- If the button is dimmed and you can’t click it, skip this step for the disk, container, or volume you selected.
- If you’re asked for a password to unlock the disk, enter your administrator password.
After Disk Utility is done checking the volume, select the next item above it in the sidebar, then run First Aid again. Keep moving up the list, running First Aid for each volume on the disk, then each container on the disk, then finally the disk itself.
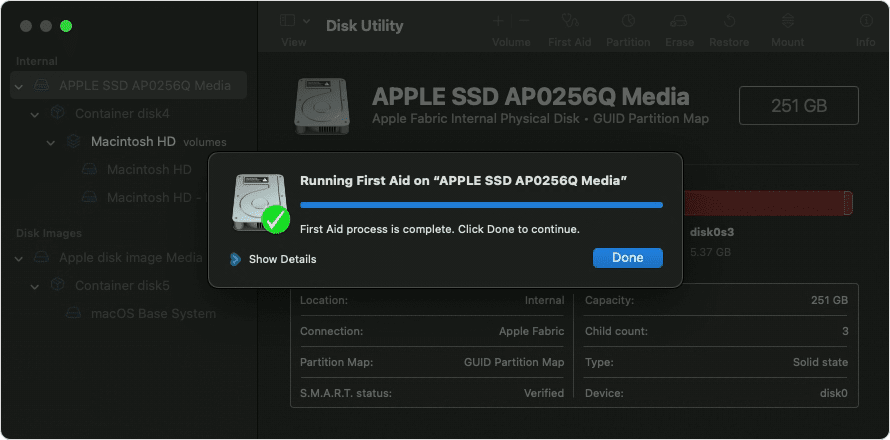
The order of repair in this example was Macintosh HD — Data, then Macintosh HD, then Container disk4, then APPLE SSD.
When done, quit Disk Utility. If you used Disk Utility from macOS Recovery, you can now restart your Mac: choose Apple menu > Restart.
If Disk Utility found errors that it can’t repair
If Disk Utility found errors that it could not repair, use Disk Utility to erase (format) your disk.
If your disk doesn’t appear in Disk Utility
If Disk Utility can’t see your disk, it also can’t see any containers or volumes on that disk. In that case, follow these steps:
- Shut down your Mac, then unplug all nonessential devices from your Mac.
- If you’re repairing an external drive, make sure that it’s connected directly to your Mac using a cable that you know is good. Then turn the drive off and back on.
- If your disk still doesn’t appear in Disk Utility, your Mac might need service. If you need help, please contact Apple Support.
Источник


