- What is Sign in with Apple?
- About Sign in with Apple
- Privacy and security
- Use Sign in with Apple
- Learn more
- Manage and use your Apple ID
- Sign in with your Apple ID
- Manage your Apple ID
- Help us protect your account
- How to use Sign in with Apple
- Create an account using Sign in with Apple on your iPhone, iPad, iPod touch, or Mac
- Create a Sign in with Apple account on other platforms
- Upgrade an existing third-party account to Sign in with Apple
- Mail Support
- Mail Settings Lookup
- Incoming Mail Server
- Outgoing Mail Server
- Outgoing Mail Server (Mac OS)
- Incoming Mail Server
- Outgoing Mail Server (iOS)
- Featured topics
- Add an email account to your iOS device
- If your info on iCloud won’t sync
- Use emoji and symbols on your Mac
- Add an email account to your iPhone, iPad, or iPod touch
- How to set up your email account automatically
- How to set up your email account manually
- Enter account settings manually
- Do more with Mail
What is Sign in with Apple?
Sign in with Apple is the fast, easy, and more private way to sign in to third-party apps and websites using the Apple ID that you already have.
About Sign in with Apple
When you see a Sign in with Apple button on a participating app or website, it means you can set up an account using your Apple ID. No need to use a social media account, fill out forms, or choose another new password.
Sign in with Apple is built from the ground up to respect your privacy and keep you in control of your personal information. It works natively on iOS, macOS, tvOS, and watchOS, and in any browser.
Privacy and security
- At your first sign in, apps and websites can ask only for your name and email address to set up an account for you.
- You can use Hide My Email—Apple’s private email relay service—to create and share a unique, random email address that forwards to your personal email. This lets you receive useful messages from the app without sharing your personal email address. Learn more about how Hide My Email works.
- Sign in with Apple won’t track or profile you as you use your favorite apps and websites. Apple retains only the information that’s needed to make sure you can sign in and manage your account.
- Security is built in to Sign in with Apple with two-factor authentication. If you use an Apple device, you can sign in and re-authenticate with Face ID or Touch ID anytime.
![]()
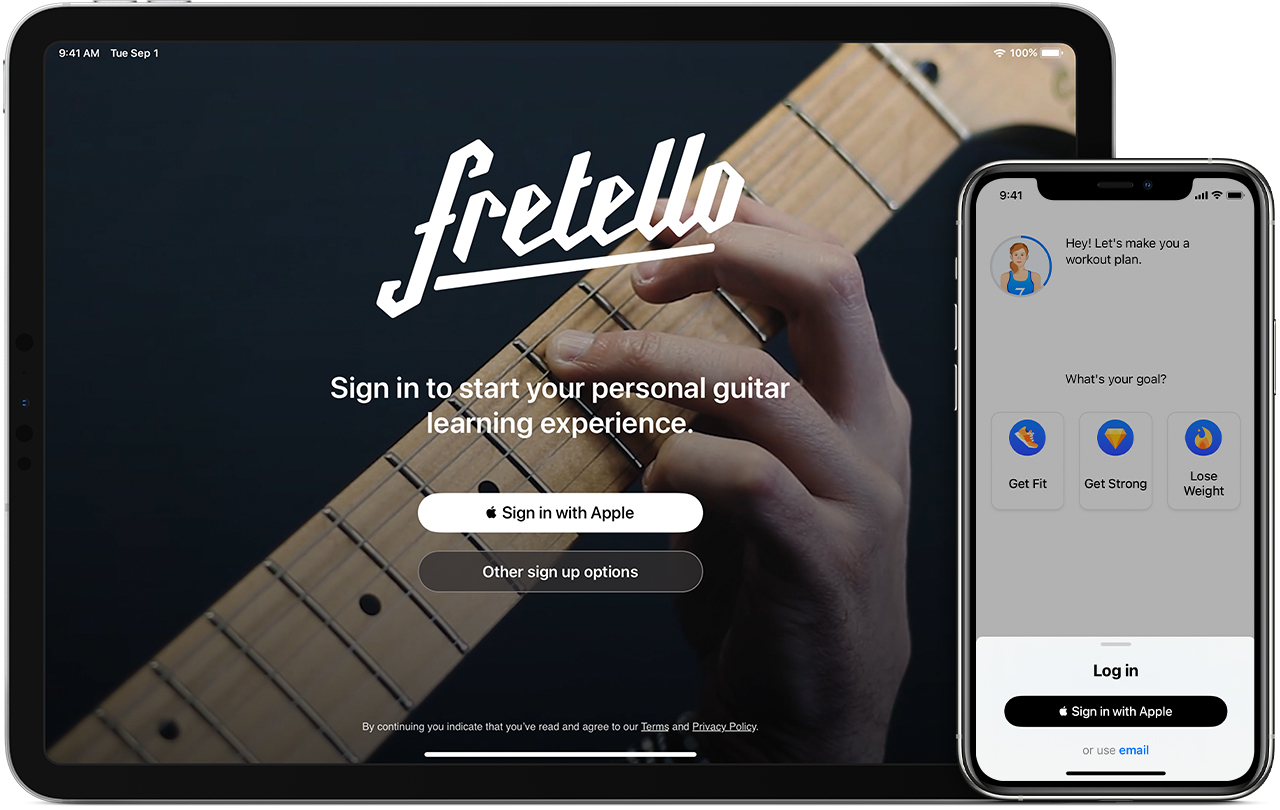
Use Sign in with Apple
To use Sign in with Apple, tap the Sign in with Apple button on a participating app or website, review your information, and sign in quickly and securely with Face ID, Touch ID, or your device passcode.
Learn how to use Sign in with Apple on your iPhone, iPad, iPod touch, or web browser.
You need to be signed in with your Apple ID in System Preferences > Apple ID on your Mac or Settings > [your name] on your iPhone, iPad, or iPod touch. You also need two-factor authentication turned on. Learn more.
![]()
Learn more
- If you don’t see a Sign in With Apple button, that app or website doesn’t support Sign in With Apple yet.
- Sign in with Apple is not available for children under 13 years old. This age may vary by country or region.
- Learn how to review the apps you use with Sign in with Apple.
- If you need help signing into or updating your Apple ID, or changing your account information, learn what to do.
Information about products not manufactured by Apple, or independent websites not controlled or tested by Apple, is provided without recommendation or endorsement. Apple assumes no responsibility with regard to the selection, performance, or use of third-party websites or products. Apple makes no representations regarding third-party website accuracy or reliability. Contact the vendor for additional information.
Источник
Manage and use your Apple ID
Your Apple ID is the account you use to access Apple services like the App Store, Apple Music, iCloud, iMessage, FaceTime, and more. You can sign in to all Apple services with a single Apple ID and password.
Sign in with your Apple ID
Use the same Apple ID and password every time you’re asked to sign in to an Apple device or service. If you don’t have an Apple ID, learn how to create a new Apple ID. You can use your Apple ID to:
- Automatically set up all of your Apple services when you set up a new device and sign in with your Apple ID.
- Keep your personal content up to date on all of your devices when you sign in to iCloud.
- Sign in to the iTunes, Books, and App Store to make purchases and access previous purchases.
- Sign in to iMessage and FaceTime 1 to talk and text with friends and family.
- Sign in to third-party apps and websites with Sign in with Apple.

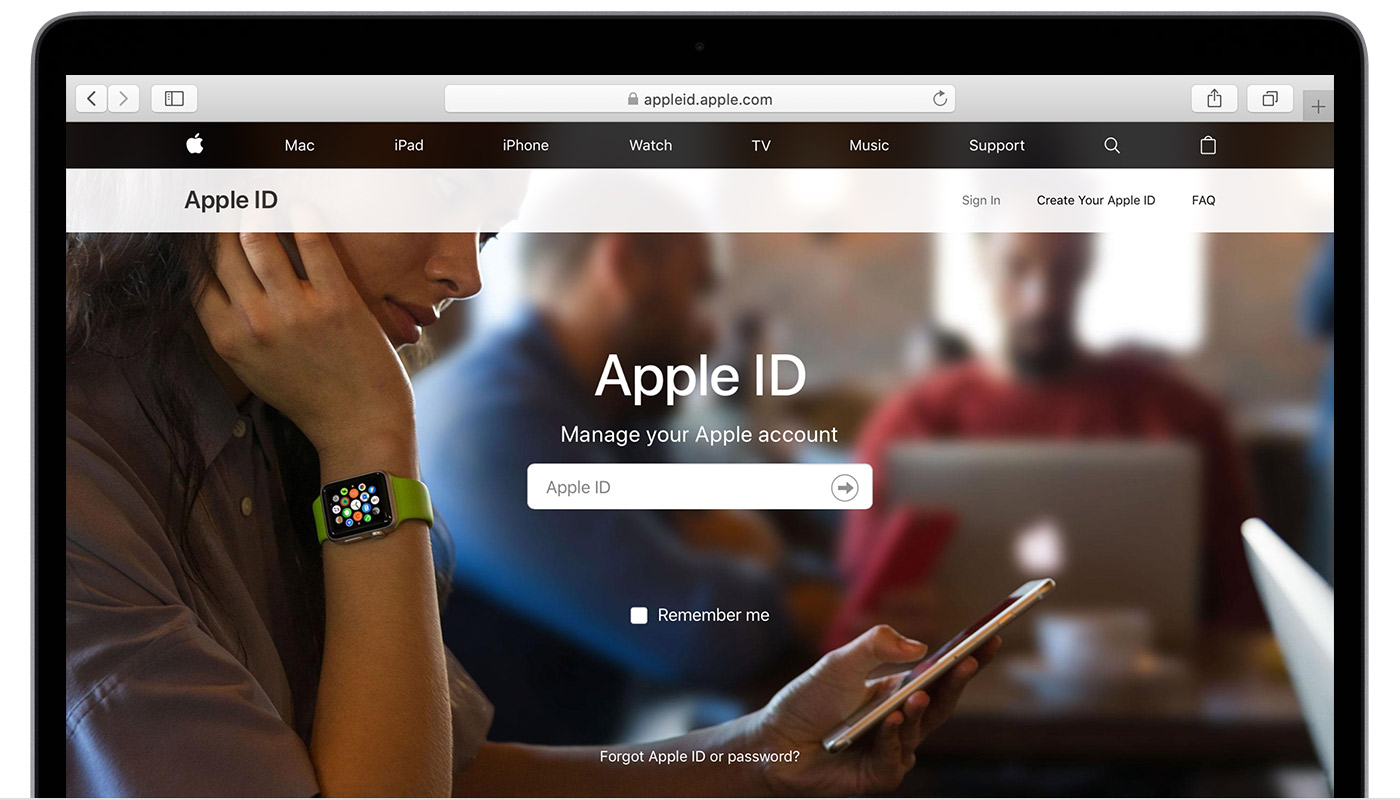
Manage your Apple ID
Because your Apple ID is used across all your devices and services, it’s important to keep your account information up to date. Simply sign in to your Apple ID account page 2 at any time to manage your account:
- Update trusted phone numbers and devices that you’re currently signed in to with your Apple ID.
- Change your password to help maintain the security of your account.
- Update your Apple ID email address 3 to make sure it’s an address that you use frequently.
- Add additional email addresses to help people find and communicate with you on Apple services like FaceTime 1 , iMessage, and Find My.
- Update the birth date associated with your Apple ID.
- Change your Apple ID country or region.
Help us protect your account
The security and privacy of your Apple ID is very important to us. Here are some things you can do to make sure your account remains private and secure:
- If you haven’t already, set up two-factor authentication to add an extra layer of security to your account. Depending on when you created your Apple ID, it might already be protected by two-factor authentication.
- If you can’t set up two-factor authentication, reset your security questions and add a rescue email address. If you forget your password or the answers to your security questions, your rescue email address will help you regain access to your account.
- Learn about best security practices for your Apple ID.
1 FaceTime isn’t available in all countries or regions.
2 Depending on how you created your Apple ID, you might be required to provide additional information or change your Apple ID username from a mobile phone number to an email address.
3 In China mainland and India, you can use your phone number as your Apple ID. In China mainland, you might be required to provide a +86 phone number for your Apple ID. You can change the number later, or change your country or region to a location that doesn’t require it. This number is only used for verification purposes.
Источник
How to use Sign in with Apple
Learn how to use Sign in with Apple to create an account for a third-party app or website on your iPhone, iPad, iPod touch, or a web browser.
To use Sign in with Apple, you need to use two-factor authentication and be signed in to iCloud with that Apple ID on your Apple device. Learn more about Sign in with Apple.

Create an account using Sign in with Apple on your iPhone, iPad, iPod touch, or Mac
- Tap the Sign in with Apple button on the participating app or website.*
- If you’re asked to provide your name and email address, Sign in with Apple automatically fills in the information from your Apple ID. You can edit your name if you like and choose Share My Email or Hide My Email. Learn more about Hide My Email.
- Tap Continue and confirm with Face ID, Touch ID, or your device passcode to sign in. If you don’t have Face ID, Touch ID, or a passcode set up, enter your Apple ID password.
Anytime you need to sign in to that app or website, just tap the Sign in with Apple button and complete a simple Face ID, Touch ID, or passcode confirmation. It works the same way on your other Apple devices that you’re signed into with the same Apple ID.
* You need to be signed in with your Apple ID in System Preferences > Apple ID on your Mac or Settings > [your name] on your iPhone, iPad, or iPod touch. You also need two-factor authentication turned on.
![]()
Create a Sign in with Apple account on other platforms
You can also use Sign in with Apple on participating apps and websites on the web and on other platforms like Android or Windows.
- Tap the Sign in with Apple button on the participating app or website.
- When you see a secure, Apple-hosted webpage, enter your Apple ID and password.
- The first time you sign in, you’re prompted for a verification code from your trusted Apple device or phone number. Check your device and enter the code. On the web, you can skip this step for 30 days after your initial sign in by choosing to trust the browser you’re currently using.
- If you’re asked to provide your name and email address, Sign in with Apple automatically fills in the information from your Apple ID. You can edit your name if you like and choose Share My Email or Hide My Email. Learn more about Hide My Email.
- Tap Continue to complete the sign-in process.
![]()
Upgrade an existing third-party account to Sign in with Apple
Participating third-party apps and websites might give you the option to upgrade an existing account to Sign in with Apple. You can do this through the settings menu of the app or website.
In iOS 14 and iPadOS 14 or later, you might also be given the option to upgrade to Sign in with Apple if you use an easily-guessed, reused, or compromised password with a participating app or website. If you see the prompt, just tap Use Sign in with Apple and follow the onscreen steps. Or, you can upgrade on your iPhone, iPad, or iPod touch:
- Go to Settings > Passwords.
- Under Security Recommendations, tap an app or website name.*
- Tap Use Sign in with Apple, then follow the onscreen steps.
* Only participating apps or websites will be listed.
If you want to use Hide My Email, create a new account with Sign in with Apple. After you convert your account to Sign in with Apple, you can’t change it back.
Источник
Mail Support
Mail Settings Lookup
Need to verify your email settings? Simply enter your email address below and we will use it to provide your Mail settings.
Incoming Mail Server
Kerberos Version 5 (GSSAPI)
Authenticated POP (APOP)
Outgoing Mail Server
Outgoing Mail Server (Mac OS)
Kerberos Version 5 (GSSAPI)
Authenticated POP (APOP)
Incoming Mail Server
Kerberos Version 5 (GSSAPI)
Authenticated POP (APOP)
Outgoing Mail Server (iOS)
Kerberos Version 5 (GSSAPI)
Authenticated POP (APOP)
Note: Apple may collect and use your domain address (i.e. yahoo.com, gmail.com, etc.) for purposes of improving our products and services. Otherwise, your full email address will not be stored and will not be used by Apple or shared with any other entities.
Featured topics
How-to and troubleshooting tips to get the most out of the Mail app
Add an email account to your iOS device
There are two ways you can set up an email account in the Mail app on your iPhone, iPad, or iPod touch — automatically or manually. Learn which option is best for you.
If your info on iCloud won’t sync
Learn what to do if you need help. For example, the changes you made to Contacts, Calendars, or Reminders on one device didn’t appear on all of your devices.

Use emoji and symbols on your Mac
macOS includes features that make it easy to find and type special characters like emoji, accents, and currency symbols.
Источник
Add an email account to your iPhone, iPad, or iPod touch
There are two ways that you can set up an email account in the Mail app on your iOS device — automatically or manually. Learn which option is best for you.
How to set up your email account automatically
If you use an email provider like iCloud, Google, or Yahoo, Mail can automatically set up your email account with just your email address and password. Here’s how:
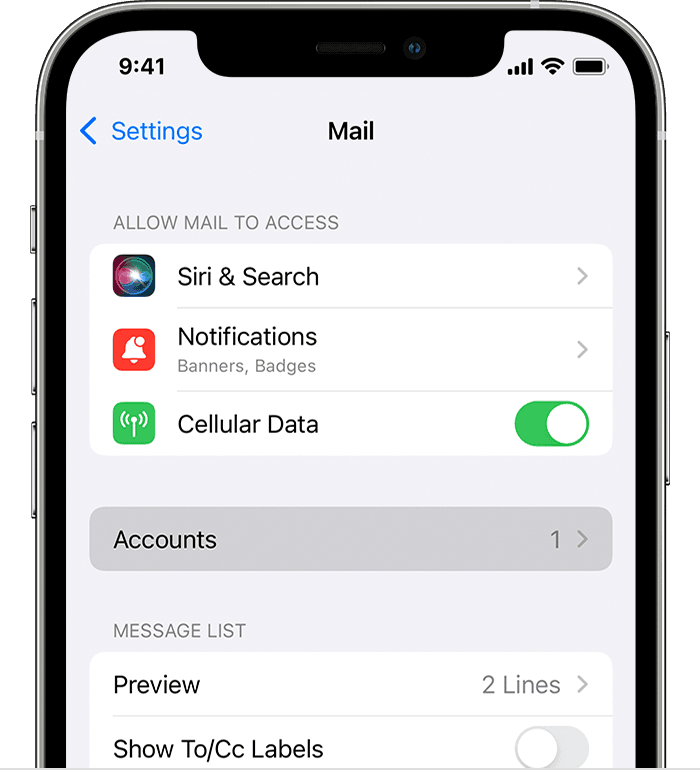
- Go to Settings > Mail, then tap Accounts.

- Tap Add Account, then select your email provider.
- Enter your email address and password.
- If you see Next, tap Next and wait for Mail to verify your account.
- If you see Save, tap Save.
If you don’t see your email provider, tap Other to add your account manually.
How to set up your email account manually
If you need to set up your email account manually, make sure that you know the email settings for your account. If you don’t know them, you can look them up or contact your email provider. Then follow these steps:
- Go to Settings > Mail, then tap Accounts.
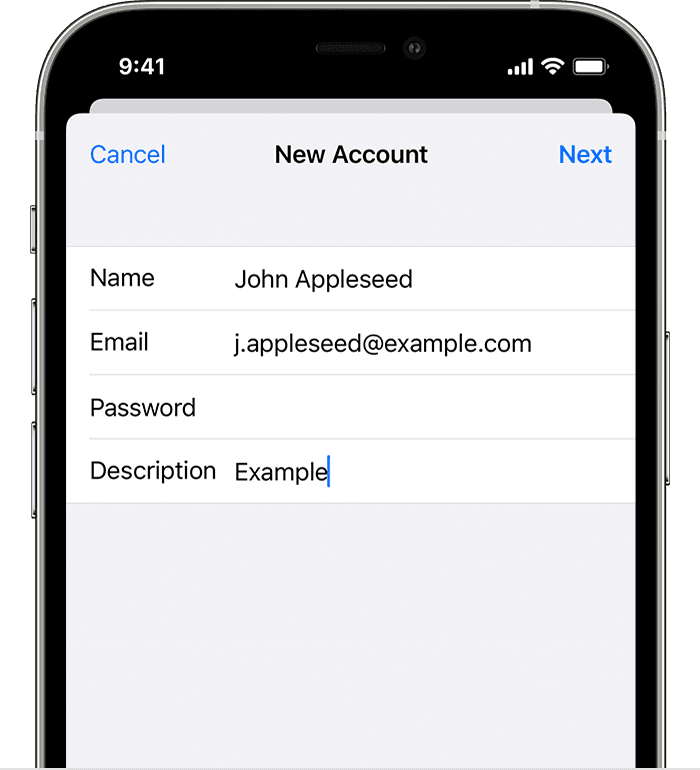
- Tap Add Account, tap Other, then tap Add Mail Account.
- Enter your name, email address, password, and a description for your account.
- Tap Next. Mail will try to find the email settings and finish your account setup. If Mail finds your email settings, tap Done to complete your account setup.
![]()
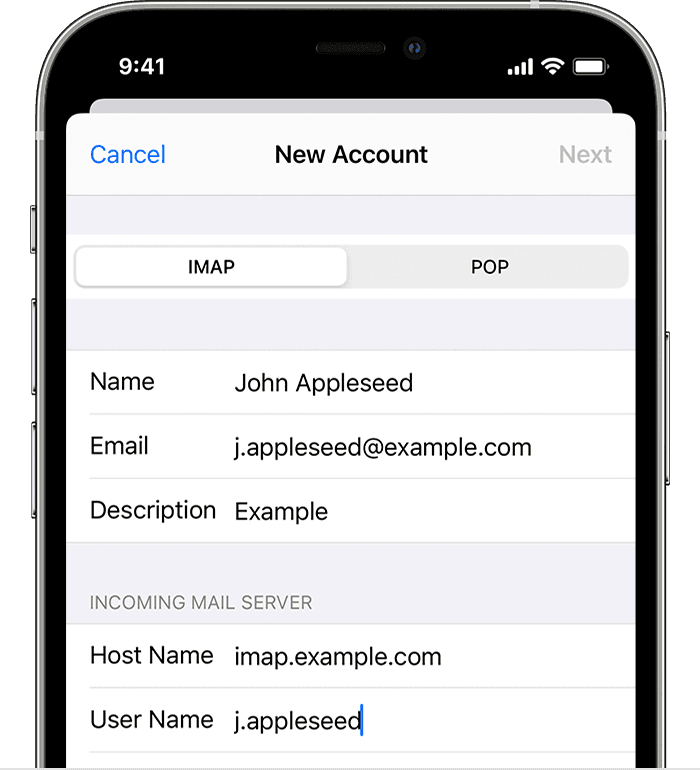
Enter account settings manually
If Mail can’t find your email settings, then you need to enter them manually. Tap Next, then follow these steps:
- Choose IMAP or POP for your new account. If you aren’t sure which one to choose, contact your email provider.
- Enter the information for Incoming Mail Server and Outgoing Mail Server. Then tap Next. If you don’t have this information, try to look it up.
- If your email settings are correct, tap Save to finish. If the email settings are incorrect, you’ll be asked to edit them.
If you still can’t set up your email account or save your email settings, contact your email provider.
Do more with Mail
Information about products not manufactured by Apple, or independent websites not controlled or tested by Apple, is provided without recommendation or endorsement. Apple assumes no responsibility with regard to the selection, performance, or use of third-party websites or products. Apple makes no representations regarding third-party website accuracy or reliability. Contact the vendor for additional information.
Источник


