- iOS remote push notifications in a nutshell
- What are remote Push Notifications?
- What can Push Notifications do?
- Stuff needed prepared Before APNS configuration can start
- APNS Configuration and initial step-by-step implementation
- Adding media attachments
- Adding custom actions
- Conclusion
- Update providing additional clarification regarding APNs certificates
iOS remote push notifications in a nutshell
What are remote Push Notifications?
Well if you ask the folks at Apple, they will probably direct you to this page on their website where they describe notifications as follows:
Apple Push Notification service (APNs) is the centerpiece of the remote notifications feature. It is a robust, secure, and highly efficient service for app developers to propagate information to iOS (and, indirectly, watchOS), tvOS, and macOS devices.
And I understand it as somewhat fancier words for just saying “This is how you remind users about the fact that they have your app installed on their phones”. I also see there: “Better make use of this robust feature, dude/lady!”. And this is exactly what we are going to do in this guide!
What can Push Notifications do?
I am going to refer to Push Notifications as Push Notifications, PNs, APNs, Notifications, Remote Push Notifications, Remote Notifications and I will always have the same notion in mind.
Here is what you can do with APNs these days:
- Display a message
- Play a sound
- Set a badge icon on your app
- Provide actions the user can act upon with or without opening the app
- Show an image or other type of media
- Be silent but ask the app to perform some action in the background
Way too many things probably but all useful. Still, as the title of the article goes, I am going to concentrate upon displaying messages, media and actions. Nobody likes a know-it-all anyways, right?
However, before seeing any of the APNs magic happen, there is some configuration to be done! It will help us protect our precious remote notifications from possible invaders — “ robust, secure, and highly efficient” from the definition does sound scarier now but don’t you worry!
Stuff needed prepared Before APNS configuration can start
- A real iOS device. Simulators cannot receive notifications unfortunately. I am going to test things on iPhone 8 Plus with iOS 11 on it.
- Apple Developer Program Membership — that is right, you need to finally pay what you have been avoiding to.
- A way to send notification payloads to your device — a good way to do that is the simple to install and use Pusher app .
APNS Configuration and initial step-by-step implementation
Step 1, project set-up: Like anything else you are probably learning these days about iOS apps, it all starts with creating a project. That is right, mine is named Unicorner. The idea is simple — when a fellow unicorner user sees a unicorn and takes a picture of it, every user will receive that picture in a notification .
Step 2, enabling APNs: In Xcode, go to your Targets, under your app’s name, select Capabilities and find Push Notifications in the list , switch to ON:
Step 3, get APNs certificate: Go to your Apple Dev Member Center Account and log in. Click Certificates, IDs & Profiles -> Identifiers -> App IDs where you should see all your app identifiers, select the one you are creating the notifications for. You will see a big list of Application Services available — Push Notifications should be marked as configurable:
There should be an Edit Button at the bottom, click it and find Push Notifications in that list again:
What you need is the Development SSL Certificate( clarification regarding development vs. productions certificates provided at the end of the article), click on the Create Certificate Button, and follow the instructions to create a CSR File. In short, hold CMD + Space to start the spotlight search on your Mac, write Keychain Access, and press enter to launch the Keychain Access App:
Next step per Apple’s instructions:
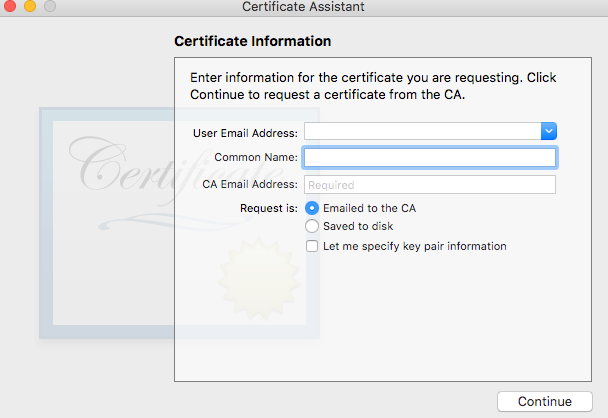
Within the Keychain Access drop down menu, select Keychain Access > Certificate Assistant > Request a Certificate from a Certificate Authority.
Properly fill in the Certificate Information and make sure you save the .certSigningRequest file at an easy-to-find place because then you need to upload it here:
Do that. Then you will get this screen:
Download the generated Certificate, double-click the . cer file and find it it installed in your Keychain Access:
This step was a long one but worth it. Follow these steps again Certificates, IDs & Profiles -> Identifiers -> App IDs and you should see that Push Notifications are now enabled for Development:
Step 4, some code finally: Lengthy configuration, I know, but as mentioned earlier, security is security. Time to code!
Go back to the project and open the AppDelegate.swift file. This is where we are going to ask the user for a permission to receive notifications from us before we try sending some 🦄.
On top of your AppDelegate.swift file, first:
Then within the AppDelegate class, add this function:
Well, what is the code above actually doing? It is quite straightforward — we access the instance of the UserNotificationCenter, and then ask it to authorize us to send push notifications to the user in the form of alerts, sounds and badge app numbers. If granted, we call the registerForRemoteNotifications() function of the shared application instance on the main thread. We need to explicitly do it on the main thread or else, we would get the annoying error saying that we are calling the function on a background thread 😅.
Then we call registerForPushNotifications() function at the end of application(_:didFinishLaunchingWithOptions:) but before the return true statement, like this:
In that way, we make sure the user is asked to register for push notifications at the start of the application. Run the project to see this:
The picture is quite self-explanatory, so, do press Allow, and voila, notifications will be received when sent! However, there is a pitfall to bear in mind in general — a user can always disallow push notifications authorization in the phone’s settings. We are not going to think about it now but such situation should be handled in a production app!
Ok, lets continue. There’s two more delegate functions ( whose purpose is obvious I believe — one gets us the device token, the other one checks for errors if any) to implement before we see any Push Notification action:
The code in the didRegister … function may seem weird at first but all it does is stringify the token for us so we can use it within the Pusher App.
Step 5, sending a notification finally: Open Pusher after installing it:
There is a drop-down menu where Pusher automatically detects what Push Certificates you already have in your Keychain Access. Click it and pick the one that corresponds to your app, like this:
Then in the next field, paste in your Device Token which you should see in the Xcode console on every start-up of your app when permission to send PNs is granted ( Please note that a device token may change when you delete and re-install the app on your device). What I got for a token in my console is this:
Luckily, Pusher comes with a super-simple default payload which is just a JSON dictionary with specific Apple-defined keys ( no worries, they can be more than three). What do Pusher’s given JSON keys mean?
- the alert key is going to display just a standart alert with a message saying “Testing ….”.
- the badge key will just modify the badge of your app icon, this time to the number 1( it can be any number, indeed).
- the sound key is quite obvious, the notification will just play the default sound.
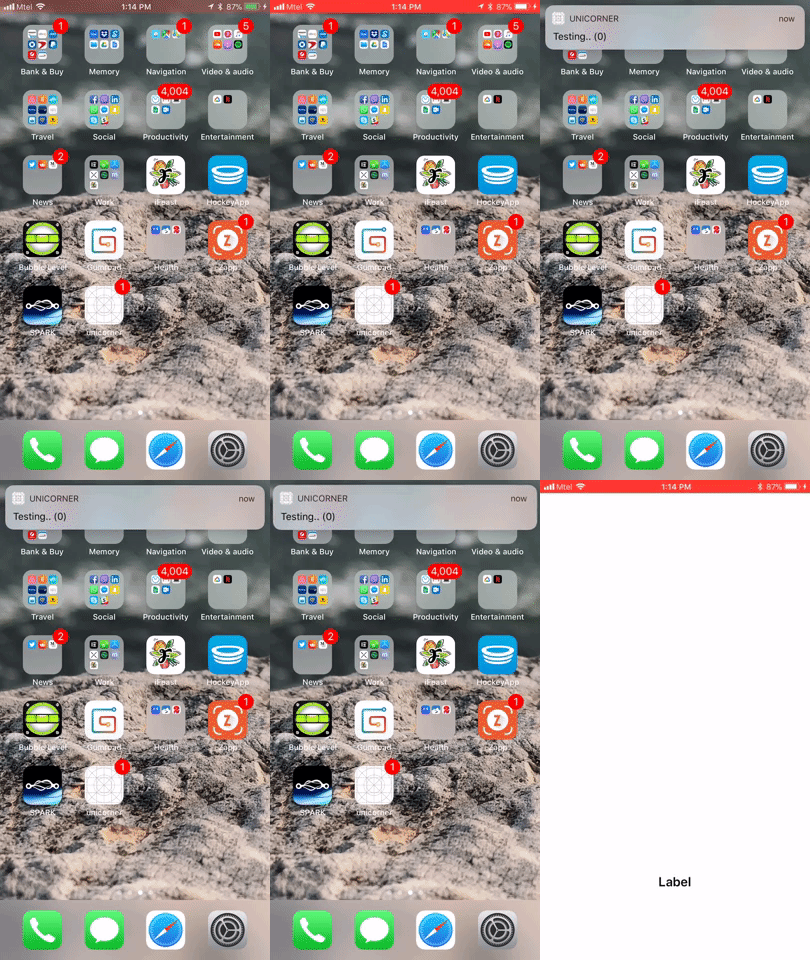
All right, the app is built and running on our real device, the needed certificate is added, the device token too, lets press the Push Button in Pusher and see some magic happen:
Yey, it works. Not very impressive because of no unicorns present. Eh, we will get there! ( If you want to know what a notification payload can carry, read here and here .)
Adding media attachments
Well, well, we made it to actually sending a notification with some alert in it. Not bad but surely, most of us have received more sophisticated notifications ( pictures, gifs, etc.), right? So, how to do that? I have two words for you — Service Extension. A Service Extension intercepts push payloads from apps, and gives you the chance to change content in the notification before it is presented.
As it is written on the Apple website:
App extensions give users access to your app’s functionality and content throughout iOS and macOS.
And that is what the Service Extension will do for us and our notifications — it will help us give users notifications with fancier appearance 🎊.
Enough jibber-jabber and more work! In Xcode, go to File->New->Target… like this:
Then in the next menu, under iOS, Filter “s ervice” and choose Notification Service Extension like so:
Click the Next Button and give it a name of your choosing. I am going to name mine NotificationService. Click Finish. What we are going to get is a new group of two files created for us:
Go ahead and open the NotificationService.swift file. Do take the time to checkout the code written for us by Xcode. The didReceive(_:withContentHandler:) function is the one that is the more important because that is where we can modify the notification to our liking.
Before that, we need to go to our payload aps dictionary and make sure we add this key-value pair if we actually want to use a notification extension of any kind:
It signifies that the OS should initiate the service extension of the app and do some extra processing.
The other thing that I will add to the payload now is an example unicorn image URL. I will imagine that someone took a picture of a unicorn and uploaded it to the server and that is why I, as a user, am getting notified. This is the final payload:
Now it is time to go back to the NotificationService.swift file and switch it up a bit. Apple team did provide some code ready for us but I would like to change it so that it handles the transformation of just a URL to an image attachment properly. For that I will need from this particular function ( comments added on the side so it makes sense a bit more):
Well, we do have the function that will do the magic for us. Well, let’s use it in the didReceive(_:withContentHandler:) method. This is what it should look like:
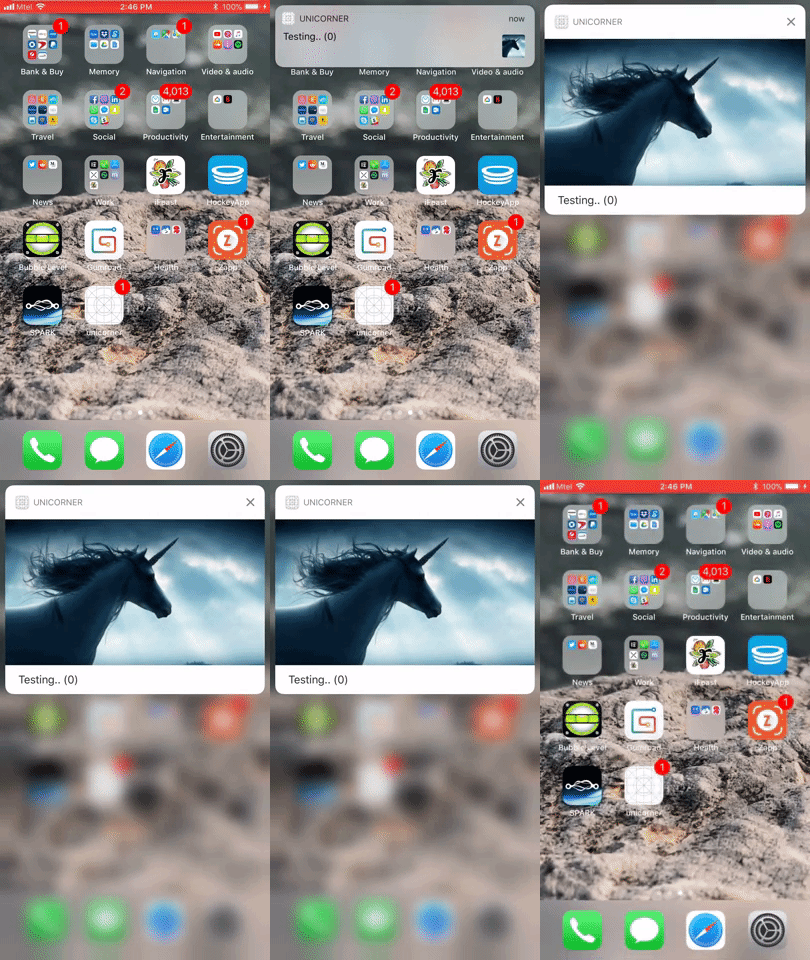
All these steps may seem magical at first so do take the time to make sure you understand them — all they do is just dig into the aps dictionary to extract the values. Then indeed, do test it to see a cool unicorn image show up in the notification 😏 🦄, like below:
Adding custom actions
Well, good job till now I would say. Still, we want to make things even more fancier, like adding some custom actions? What I have in mind are a Like and a Save actions — for liking a picture and for saving a picture respectively.
Ok, go back to the NotificationService.swift file and between // 4. and // 5, add a // 6. like this:
All that is done here is creating the two actions wanted and adding them under a common category( “unicorning”, so original!). That same common category will go in the aps Notification payload we send from Pusher. And that is how the Notification Service would know what notification actions to show! Simple, right?
Alright, try it out! If you do, you will see that when you use the force touch or pull down to see the bigger notification, you will see the custom actions show up there too, like this:
To be honest, we are not ready yet, because if you think about it, we are not handling these custom actions anywhere. The place to do that is in the AppDelegate.swift file. Just add this optional func before closing the AppDelegate class:
What it does is intercept the notification response for us. Within the response, we can check whether the user chose any of the custom actions provided and proceed with app logics based on that. The way I handled the actions, for demo purposes only, is just by printing out statements on the console, like so:
Go ahead, test it out and see some not so fancy prints showing up on the console and the concept I am explaining proven! Indeed, in a real app, you would want to have some real and thoughtful logics happen when a user chooses your custom actions.
Conclusion
After so much work done, probably it is best to go for a short conclusion, right? That is, I hope I not only helped you familiarize yourselves with APNs but also got you to put “ Digging deeper in the APNs and playing with some ideas” topic on your bucket list! Because trust me, there is so much more to it 😃.
Update providing additional clarification regarding APNs certificates
I received some positive criticism pointing out that I was not clear enough when setting up the Unicorner demo app’s APNs certificates. And yes, I need to stress that when testing and building the app using Xcode, I used a development certificate. If you decide to release a beta version using TestFlight, or a production version in the AppStore, you need to use a production certificate and not a development one!
It is also worth mentioning that there is another way to set up your Push Notifications and that is using an APNs Auth Key. Doing that has two main benefits:
- No need to re-generate the push certificate every year.
- One auth key can be used for all your apps — this avoids the complication of maintaining different certificates.
If you think that an APNS Auth Key would work better for you, follow these easy set-up instructions.
Источник


