- Android — Form input and validation using MVVM with DataBinding
- So what are we building? — Requirements:
- Show me the code
- alphamu/android-MVVM-DataBinding-FormExample
- A demo of how to use Jetpack architecture and lifecycle component to implement a form. This includes validation and…
- Some of the code explained
- Why do some of the model objects extend BaseObervable while others do not?
- How do I deal with Strings in my model when context is not available?
- The focus change listener code explained.
- Why does the View go through the ViewModel to get to the Model?
- Why is buttonClick an instance of MutableLiveData and not Observable ?
- When do I use LiveData vs Observable?
- Update 11-Sept-2018: @BindingAdapters annotated static methods only need to be defined once
- Finally
- Passing data between Activities using Intent in Android
- Быстрый старт Data Binding в Android
- Введение
- Начало
- Настройка Layout
- Привязка данных
- Конвертеры
- Обратная связь и Binding
- ObservableFields
- Из View в Model
Android — Form input and validation using MVVM with DataBinding

There is a lot of information on the internet on how to do validations and form in Android using MVVM. I’ve however found a lot of these example don’t quite cover the feature set I would like, so I decided to create the example(s) I was seeking.
The issue with incomplete examples is that they result in a lot of developers defaulting to what is familiar and this results in them making decisions that violate the spirit of MVVM. When using the MVVM pattern, if I find myself holding a reference to Activity or Fragment in my ViewModel, I re-evaluate my approach. A reference to Activity or Fragment to get Context and callbacks for actions are two examples where developers often struggle. Personally the Model and ViewModel should be pure objects and have no dependencies on Fragment/Activity or Context of any nature. Firstly, doing this violates MVVM where the ViewModel should have no reference to View, instead the View about be updated through most of an event/observer pattern. Secondly, we want our code to be as testable as possible using unit testing and pure objects are just easier to test and if you hold a reference to Context in any way, this will mean having to mock the Context object for any functionality you want to use.
Disclaimer: I’m not saying that there is *no* scenario where you’ll be able to solve all your problems without a reference to a context or a callback, I’m just saying that you need to be very sure that this is the only way.
So what are we building? — Requirements:
We are going to build a simple login screen with the following features:
- The page will have a Email and Password field as well as a Login button.
- Fields should validate if they lose focus only *after* they have been modified. This means that if a field is empty, I click on it and click away, I do not want to validate the field.
- If the fields input is too short or the format is incorrect, I want to show a field level error.
- If both the Email and Password fields have valid input in them, I want to enable the Login button. The Login button is disabled by default.
Show me the code
With MVVM there are 2 main approaches you can take.
- Method1 — A model Object is used to represent the form and it’s fields. The state of the form is maintained by the ViewModel and it contains methods for validating input.
- Method2 — The input fields, the error messages and, the form each have their own model. The Form model contains all the logic for form validation and the ViewModel only exposes functionality to the View.
Which method is better? Honestly, when I started down this process, I was leaning towards method1 . After all, code for method1 is more concise. However, as I worked on method2 I grew fonder of it. The main reason for this is that I found that it was easier to write unit tests for method2 and provide greater code coverage for the code using method2 . The operative word here is that I felt it was easier which can be very subjective. Since each of the fields on the form, error messages and the form itself had it’s own model. I could just test the model to test the forms behaviour without having to test the ViewModel. The ViewModel was purely exposing functionality to the View which I felt was better. Now, that is not to say that you don’t need to test the ViewModel, just that I can test the ViewModel and it’s behaviour separate from that of the Form and it’s functionality. All that being said, method2 has a lot more code than method1 and so will take a bit longer to do. That being said, using Kotlin could reduce the extra code and reduce the time difference to a point where it may not matter (thanks to Kotlin Data Classes).
The repo is linked below. Take a look at branches method1 and method2 :
alphamu/android-MVVM-DataBinding-FormExample
A demo of how to use Jetpack architecture and lifecycle component to implement a form. This includes validation and…
Some of the code explained
I feel like there are parts of the code where people may have some questions. I’ve done my best to address some of the concerns here.
Why do some of the model objects extend BaseObervable while others do not?
We are using 2-way data-binding on this project. This is effectively donated with the annotation @=<> in the layout. What this means is that when the fields value is changed, the underlying model object is also changed. When we don’t use 2-way data-binding, the View only displays and does not update the model. In our layout, this is pretty much every macro that does not start with @=<> . As an optimisation, when a field is not changed, the UI does not render it again. The 2-way data-binding means that when the Email is changed, the UI for the email field is re-rendered because the value is updated, however, since our model goes ahead and updates the error states as well, the model and the View do not know that other fields have also changed, hence the changes are not visible. On order to fix this issue, we tell our api what has changed with something like notifyPropertyChanged(BR. valid) where BR is a generated file that contains all the bindings. This method is only available if an object extends BaseObservable . BR only contains variables defined in the layout XML or annotated with @Bindable .
How do I deal with Strings in my model when context is not available?
There may be a temptation to deal with this by creating an Application singleton. However, I would resist this urge. The best way to deal with this is to just use the resource ID’s. The data-binding will accept the resource id’s and just work, in places where you have to explicitly handle it yourself, this isn’t all that hard, just take a look at when we do for setError() :
That code works whether you call setError() with a String or a String resource ID.
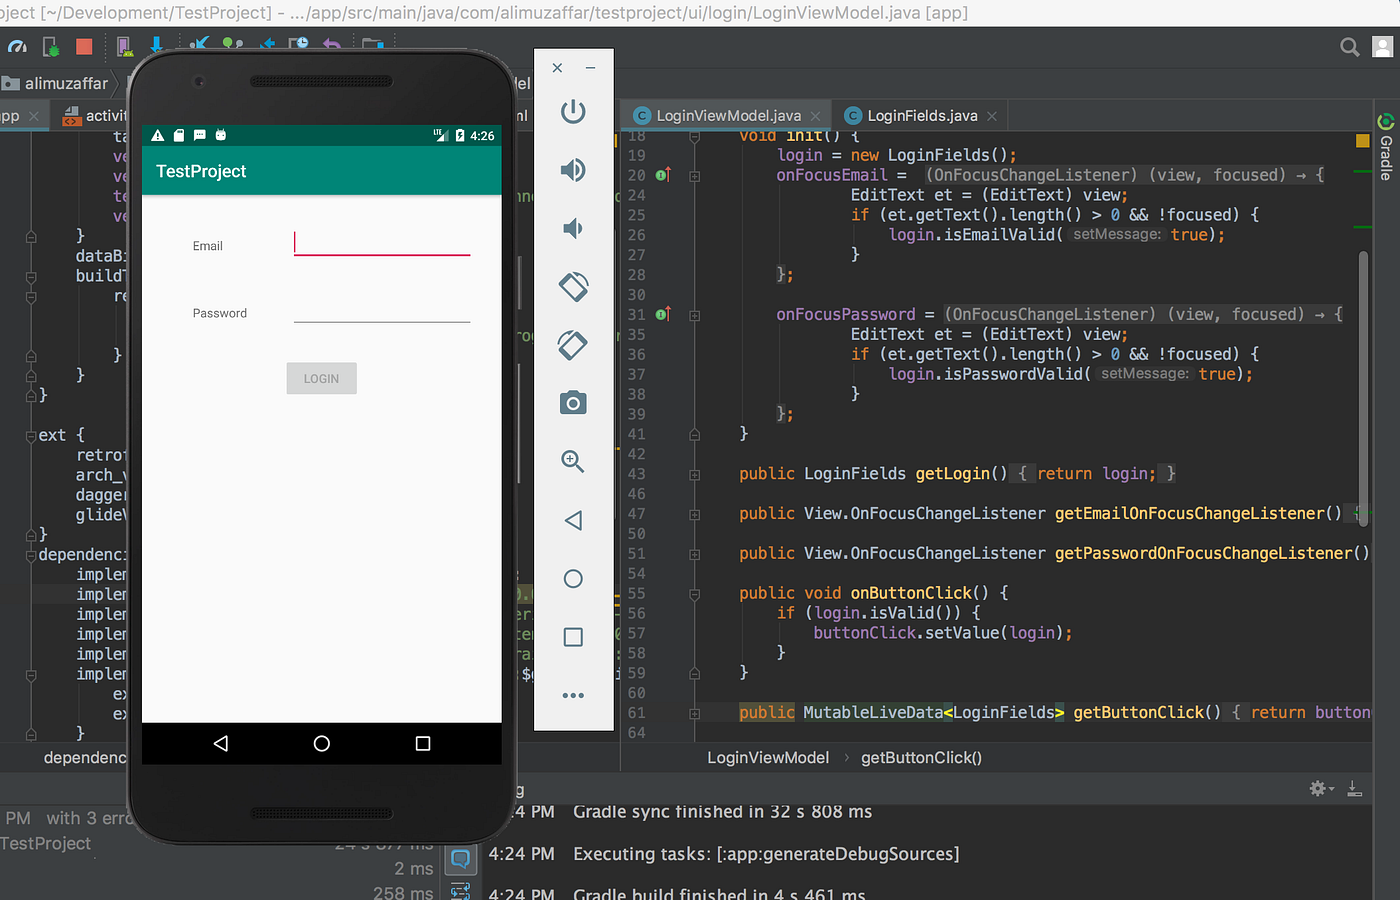
The focus change listener code explained.
There is nothing complex here, but some people might understandable not understand why I chose to do this the way I have. The issue is that in order to bind the focus change listener, I need to get a reference to the View. In a ViewModel you should not have a reference to the View. For Android, this means that having access to Context in any form, whether as an Activity or Fragment is not a good idea. Either a reference to either, how do we get the View? There are some ways around it, but they at the very least require you to know the ID of your View. This is problematic, because it means your ViewModel can’t be used with any other View. In the current setup the ViewModel only exposes the functionality of the OnFocusChangeListener and it’s up to the View to bind to it. Again, this is the purpose of the ViewModel, to expose functionality to the View. Basically, we don’t care what the View is, as long as it uses the ViewModel, the app keeps working.
Why does the View go through the ViewModel to get to the Model?
It’s true that you could simply declare an other variable in the View and use a model object directly, pass that model object to the ViewModel to access functionality as needed. This does generally violate the idea that a model is your logic and a ViewModel is your layer for exposing functionality. This further means that the ViewModel can be passed in objects that it’s not meant to handle or that ViewModel is not aware of the functionality it is providing to the View. This is a problem from a encapsulation and separation of concerns point of View. As long as the model being used by the View is being exposed by the ViewModel, the ViewModel and Model can be changed with predictable results. When the user can specify their own model objects in the View and pass them to the ViewModel to achieve some action, there is no guarantee that the outcome is predictable.
Why is buttonClick an instance of MutableLiveData and not Observable ?
It’s true that it is possible to make this code work with buttonClick being an ObervableInt or an ObservableBoolean or even an ObservableField . There are a few reasons I chose the LiveData approach. Firstly, I was going to bind to the field in the Activity so it is nice to have it be Lifecycle Aware. So, I don’t have to worry about passing data back to my activity if an activities had been opened to “Pay with PayPal” for example. When I set data in LiveData, it will be delivered to the observer (my activity) when it resumes.
Secondly, look at the code for Observable vs. MutableLiveData:
As you can see, there is no way to use the addOnPropertyChangedCallback without explicitly fetching the data from the ViewModel. Where as in the case of LiveData, the changed data is delivered right to me. Also, the “Sender” has to be an Observable which in this example is not a problem, however, your model may not be an instance of Observable .
When do I use LiveData vs Observable?
As a rule of thumb, if your data is being delivered to a lifecycle aware component, consider using LiveData . When you want your View to be aware of changes to a field, use Observable (take a look at the method1:LoginFields.java as an example of this. If the fields are not Observable the error messages will not disable automatically).
Update 11-Sept-2018: @BindingAdapters annotated static methods only need to be defined once
It’s come to my attention that methods such as setError() and bindFocusChange() are being defined again and again by people in each ViewModel they create and want to use this functionality.
This is not necessary.
I put these methods in the ViewModel to keep all the code in one place. When a static method is annotated with @BindingAdapter that functionality is available to all Views through data-binding. If you define the same again and again, the duplicate methods will be ignored (if your binding app:onFocus or app:error is the same). Ideally these methods should probably be moved out to their own class such as a CustomViewBindings so that this is not confusing for readers.
Finally
If you’re still struggling between method1 or method2 , think of it as a stylistic choice. I can easily come up with a third version that takes things I like from both methods to make a 3rd way of doing things. However, that is not to say that the 3rd method would be perfect or even better than the first two. The wonderful thing about the MVVM patten is that if you decide to use method1 and realise it’s not for you, you can change to method2 with relative ease. One thing is for sure in order to build great Android apps, read more of my articles.
Yay! you made it to the end! We should hang out! feel free to follow me on Medium, LinkedIn, Google+ or Twitter.
Источник
Passing data between Activities using Intent in Android

Jul 3, 2019 · 5 min read
In this tutorial, we will learn how to use Intent and then we will pass the data using Intent from one activity to another.
Through Intent we can move from one activity to another activity and Intent can also be used to pass the data from one activity to another activity.
In the previous article, we designed the Login Page and now we will learn how to use Intent to pass data from LoginActivity to the next activity.
First of all, we h ave to link the views of activity_login.xml with LoginActivity In activity_login.xml, we have used two EditTexts and one button. Lets initialize them in our LoginActivity.
EditText edittextfullname,edittextusername; : This is the way to define the views which we have used in the layout and you can give any name you want. Here we have given edittextfullname and edittextusername.
Button loginbutton; : Here we have defined a button with name loginbutton.
Now lets link the views using findViewById in LoginActivity.
edittextfullname=findViewById(R.id.editTextFullName); : This line help to find the id by findViewById method and the id which we have given for widget in l ayout XML file.
edittextusername=findViewById(R.id.editTextUserName); : This line does the same thing as edittextfullname does.
loginbutton=findViewById(R.id.LoginButton);:This line does the same thing as edittextfullname and edittextusername does.
We have successfully linked the views defined in the activity_login with LoginActivity.
Now we have to create a new activity so let’s create an activity with the same procedure we have gone through in the previous article.
Источник
Быстрый старт Data Binding в Android
Введение
Профессионально андроид-разработкой занимаюсь чуть больше года, до этого разрабатывал по Windows Phone и мне понравилась возможность связывать данные из вью модели с самим View при помощи механизма Bindings. А после изучения RX, многие задачи стали решаться более чисто, вью-модель полностью отделилась от View. Она стала оперировать только моделью, совсем не заботясь о том, как она будет отображаться.
В Android такой строгости я не заметил, Activity или Fragment как простейшие представители контроллера чаще всего имеют полный доступ как ко View, так и к модели, зачастуя решая, какой View будет видим, решая таким образом чисто вьюшные задачи. Поэтому я довольно радостно воспринял новость о появлении Data Binding в Android на прошедшем Google IO.
Пока что это только бета релиз, но уже можно протестировать функционал и увидеть направление, в котором двигаются разработчики из Google.
Начало
Я использую Android Studio 1.3. Data binding поддерживает Android 2.1 и выше (API level 7+).
Для сборки используется новый android плагин для Gradle (нужна версия 1.3.0-beta1 и старше). Так как связи отрабатываются во время компиляции, нам понадобиться ещё один плагин к Gradle ‘com.android.databinding:dataBinder:1.0-rc0’. В отличие от того же Windows Phone где механизм привязок реализован глубоко по средством DependencyProperty и в RealTime, в Android эта функция реализуется как бы поверх обычных свойств, во время компиляции и дополнительной кодогенерации, поэтому в случае ошибок будьте готовы разбирать ответ от компилятора.
Итак, заходим в файл build.gradle, который лежит в корневом каталоге проекта (в нём идут настройки Gradle для всего проекта). В блоке dependencies вставляем:
Теперь подключим плагин к конкретному модулю, откроем build.gradle файл, который лежит внутри модуля. По умолчанию app/build.gradle и добавим строчку:
Настройка Layout
Мы должны обернуть наш внешний View в тег
Уже сейчас можно начать его использовать класс Binding для доступа к элементам интерфейса, без использования findViewById. В MainActivity добавим поле и перепишем метод onCreate:
Название поля берётся из Id View, без Id в биндере поле не появиться, если изменить Id View, то поле в биндере сразу же переметнуться. Если с зажатым CTRL нажать на название поля View, то сразу перейдешь к нему в файле разметки. Как по мне так уже одного такого функционала достаточно для того чтобы начать использовать биндинги.
Привязка данных
Например у нас есть карточка пользователя имя и возраст.
Изменим Layout, заменим содержимое LinearLayout на:
И в onCreate заменим последнюю строку на:
Запускаем. Всё работает.
Наверное у всех проектах в активити или в фрагментах встречается такие строчки:
Тут то мы и начинаем использовать непосредственно привязки данных. Перепишем модель:
И добавим в Layout:
На красные выделения студии игнорируем.
Так как мы используем класс View, то его нужно импортировать, добавим в ноду
Или используем его вместе с названием пакета:
Так же возможно в ноде
Конвертеры
Импорт в свою очередь даёт возможность писать конвертеры. Добавим в модель поле с датой рождения и удалим возраст:
Импортируем его в разметку:
Обратная связь и Binding
Попробуем сменить имя пользователя.
Добавим в Layout:
Запускаем и кликаем, тост всплыл, но имя не изменилось. Это случилось из-за того, что модель ни как не известила binder о своём изменении.
Можно создать новую модель и вставить её, но с точки зрения памяти это расточительно:
Или вытащить старую, заменить данные и вставить опять:
Но тогда обновятся все View, связанные с этой моделью. Лучшим вариантом будет связать модель с binder, чтобы она могла его оповестить о своём изменении. Для этого перепишем класс модели, добавив геттеры и сеттеры,
помечая геттеры атрибутом @Bindable, и добавив в сеттеры вызов notifyPropertyChanged(BR.lastName);
Видим новый класс BR, в котором содержатся идентификаторы полей, чьи геттеры помечены атрибутом @Bindable . В Layout оставляем android:text=»@
ObservableFields
В пакете android.databinding есть классы, которые могут упростить нотификацию binder об изменении модели:
- Обёртки над элементарными типами
- ObservableField
- ObservableArrayMap
- ObservableArrayList
Попробуем изменить модель:
По коллекциям аналогично, единственное приведу пример обращения ко ключу к Map:
Из View в Model
Теперь попробуем взять новое имя из UI, привязав EditText к некоторой модели. Так как внутри EditText крутится Editable, то и привязать будет к
Изменю MainActivity:
А в разметку добавлю:
Вот тут возникает проблема, если привязать ObservableField к EditText, то всё будет работать только в сторону View. Как я понял, проблема в том, что Editable, который лежит внутри ObservableField, отличается от того, который лежит внутри EditText.
Если у кого есть идеи — делитесь.
Очень любопытно было увидеть библиотеку для поддержки Data Binding в Android от Google. В документации тоже нет информации про обратную связь данных, но я надеюсь на скорую её реализацию. После официального выхода стабильной версии можно будет посмотреть на интеграцию с JavaRX.
[ Оффициальная документация ]
[ Ссылка на мой простенький пример ]
Источник


