- Use Siri on all your Apple devices
- On iPhone, iPad, or iPod touch
- Say «Hey Siri»
- Press and release the button
- On AirPods or in a car
- On Apple Watch
- Say «Hey Siri»
- Raise to speak
- Press the Digital Crown
- What can I ask Siri?
- First, get Siri’s attention
- Now ask Siri to .
- Make a call
- Send a message
- Find information
- Get directions
- Play music
- Find your Apple device
- Control your home
- Simplify everyday tasks with shortcuts
- Siri knows a shortcut for that
- Do more with the Shortcuts app
- What is siri on the iphone 5
- Contents
- Filesystem
- Porting
- Additional Capabilities
- Additional Filesystems
- Shared Cache Injection
- Connecting to Server
- Changing Server
- Bypassing Authentication
Use Siri on all your Apple devices
Ask Siri to send a message on your iPhone, play your favorite TV show on your Apple TV, or start a workout on your Apple Watch. Whatever it is, Siri can do it for you — and on any of your Apple devices. All you have to do is ask.
iPhone, iPad, or iPod touch
AirPod or CarPlay
On iPhone, iPad, or iPod touch
Here are a few ways to talk to Siri.
Say «Hey Siri»
Just say «Hey Siri,» then immediately say what you need. For example, say «Hey Siri, what’s the weather like today?»
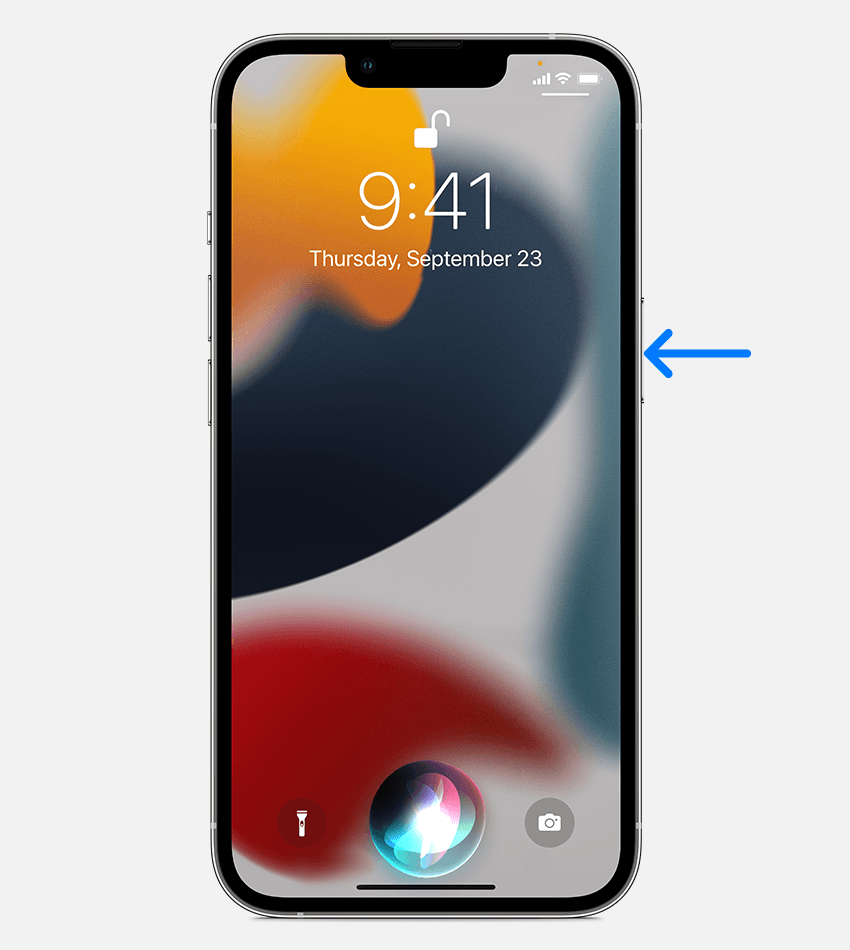
Press and release the button
- On iPhone X or later, press the Side button, then immediately make your request.
- On iPad Pro models without a Home button, press the Top button, then immediately make your request.
- If your device has a Home button, press it, then immediately say what you need.
Want to make a longer request? Just press and hold the button that you use to activate Siri until you’re finished making your request.
![]()

On AirPods or in a car
While wearing AirPods Pro, AirPods (2nd generation), or AirPods (3rd generation), say «Hey Siri,» then immediately say what you need. With your AirPods Pro or your AirPods (3rd generation), you can also set the force sensor on the stem of your left or right AirPod to use Siri. On AirPods (1st generation), double-tap the outside of either AirPod, wait for a chime, then make your request.
If your vehicle supports CarPlay or Siri Eyes Free, hold down the voice-command button on your steering wheel while you make your request.
![]()
On Apple Watch
Talk to Siri on your Apple Watch.
Say «Hey Siri»
Look at your Apple Watch or tap its screen. When it wakes, just say «Hey Siri,» then immediately say what you need.
Raise to speak
With watchOS 5 and later and Apple Watch Series 3 or later, you don’t need to say «Hey Siri.” Just hold your watch near your mouth and say what you need.
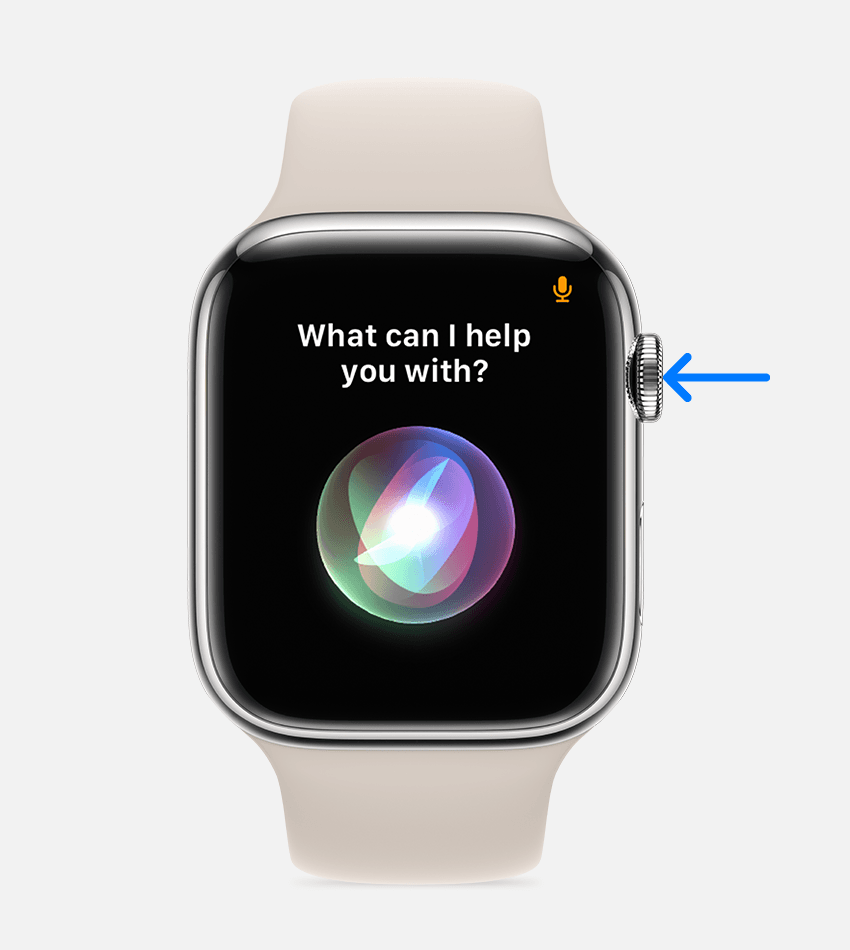
Press the Digital Crown
Press the Digital Crown for a few moments, then tell Siri what you need.
Want to make a longer request? Just press and hold the Digital Crown until you’re finished making your request.
Источник
What can I ask Siri?
Siri can help you do the things you do every day — and on any of your Apple devices. All you have to do is ask.

First, get Siri’s attention
On most Apple devices, you can use Siri hands-free just by starting your request with «Hey Siri.» Or by simply pressing a button.
Now ask Siri to .
Make a call
«Hey Siri, call Mom.»
«Hey Siri, call Vivek’s mobile on speakerphone.»
Send a message
«Hey Siri, send a message to Ming Lu.»
«Hey Siri, text Adrian and Sofia, ‘Where are you?'»
Find information
«Hey Siri, what’s the weather for today?»
«Hey Siri, how high is Mount Everest?»
Get directions
«Hey Siri, find coffee near me.»
«Hey Siri, get directions home.»
Play music
«Hey Siri, play the hottest Taylor Swift tracks.»
«Hey Siri, play the new Tame Impala album.»
Find your Apple device
«Hey Siri, where’s my iPhone?»
«Hey Siri, find my AirPods.»
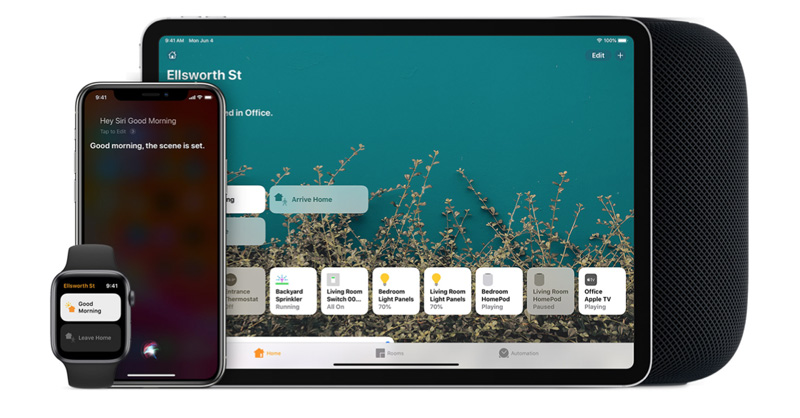
Control your home
Ask Siri to turn on the lights, adjust the thermostat, and control all of the HomeKit products that you use in your home — even when you’re away.
Simplify everyday tasks with shortcuts

Siri knows a shortcut for that
With Siri Shortcuts, you can perform common tasks with the apps you use the most — all with just a tap or by asking Siri.

Do more with the Shortcuts app
Discover ready-made shortcuts that automate a variety of tasks. Or create custom shortcuts with multiple steps that you can use with your favorite apps.
Siri availability, features, and commands varies by language, and country and region. Learn which Siri features are supported in your country or region.
Источник
What is siri on the iphone 5
Siri is a voice assistant feature found in the iPad (3rd generation), iPad mini, iPhone 4S, iPod touch (5th generation) and their successors. Siri has been present since iOS 5 on the iPhone 4S.
A legal port to older devices has been completed by @stroughtonsmith with the help of chpwn, and is available in Cydia as Spire. Spire is only compatible with iOS 5.0.1. There are other ports which are compatible with more iOS versions (iOS 5.1.1 through 7.x), but not all of them are reliable. Ports are not needed as of iOS 8 though as all compatible devices support Siri.
From iOS 6, Siri is supported by iPad (3rd generation) and newer, iPhone 4S and newer, iPod touch (5th generation) and newer, and with all generations of iPad mini.
Contents
Filesystem
| Location | Type | Comments | iOS Version | ||||||
|---|---|---|---|---|---|---|---|---|---|
| 5.x | 6.x | 7.x | 8.x | 9.x | 10.x | 11.x | |||
| /Applications/Preferences.app/*.lproj/*Assistant.strings | Localization file | Localization for Siri preferences. | Yes | No | |||||
| /Applications/Preferences.app/5.0 | |||||||||
General Assistant.plist
Passcode Lock Assistant.plist
Restriction-Assistant.plist
Passcode Lock Assistant.plist
Restrictions-Assistant.plist
Porting
Additional Capabilities
In iOS 5 and 6, additional keys in the capabilities section of /System/Library/CoreServices/SpringBoard.app/XXXAP.plist would be added to enable Siri:
Since the Model definition file is move along in iOS 7, in a DeviceTree instead. MobileSubstrate Hooking is required in order to inject these capabilities. (MGGetBoolAnswer(CFSTR(«assistant»)) for example)
Additional Filesystems
The installation of Siri (its filesystems) on other devices requires access to the iPhone 4S or supported devices filesystem, to copy over the files above to a jailbroken device running the same iOS version, with correct files permissions.
For iOS 5, the stock assistant images from the iPhone 4S are only available in Retina size. On non-Retina devices (iPad, iPad 2 and iPhone 3GS), interface features may look different and the theme Siri Graphics for iPhone 3GS and iPad in Cydia needs to be installed.
Installing on iPad models running iOS 5 causes buggy interface, because the system usually forces the assistant window as full-screen. In this case, you have to manually edit the images to fix. Differently on iOS 6, assistant images are available both in Retina and non-Retina devices (for iPad mini), so you could copy the non-Retina images or artwork file from the non-Retina jailbroken devices.
Shared Cache Injection
One last thing you have to do is dyld_shared_cache injection, according to stroughtonsmith ‘s tweet. Because some of Siri binaries are there, without them mean Siri won’t work.
- Copying /System/Library/Caches/com.apple.dyld/dyld_shared_cache_armv7 from Siri-capable devices.
- Placing it in some directory in your target devices, take note for the location.
- Editing /System/Library/LaunchDaemons/com.apple.SpringBoard.plist using some good text editor, by adding these section:
For iOS 6 and 7, both com.apple.backboardd and com.apple.assistant_service deamons must be injected the code too.
- The cache we inject is commonly from Apple A5 devices, so the system won’t be able to find the compatible graphics driver binary for Apple A4 devices and causes massive slowdown and animation lag if the target devices aren’t iPad 2 or iPad (3rd generation) (A5 devices) as they use the same driver. You can find the A4 Graphics driver named «IMGSGX535GLDriver» from Xcode-inside location: /Applications/Xcode.app/Contents/Developer/Platforms/iPhoneOS.platform/Developer/SDKs/iPhoneOS[THE iOS VERSION NUMBER].sdk/System/Library/Extensions/IMGSGX535GLDriver.bundle/IMGSGX535GLDriver and place into your target devices at /System/Library/Extensions/IMGSGX535GLDriver.bundle directory. This method seems to be impossible for iOS 7 however, as the SDK no longer included the graphic binary.
- Save it and reboot the devices to take effect. Wrong cache location causes infinite SpringBoard crashing.
Purpose for iOS 5 devices
- Add missing binary at /System/Library/Assistant/UIPlugins/SpringBoard.assistantUIBundle/SpringBoard
Purpose for iOS 6 devices
- Add missing framework binary at /System/Library/PrivateFrameworks/AssistantUI.framework/AssistantUI
Purpose for iOS 7 devices
- Add missing framework binary at /System/Library/PrivateFrameworks/AssistantUI.framework/AssistantUI (Applied to SiriViewService.app and SpringBoard)
Connecting to Server
Holding down the home button for a second should activate the Siri tray at the bottom of the screen (iPhone, iPod and iPad running iOS 5), or at the area close to home button on screen (iPad running iOS 6+), but saying anything will make it say it can’t connect because the server rejects any query from these unsupported devices. This is due to the device requiring an identifier that the Siri servers generate every 24 hours for Siri-capable iDevices.
Changing Server
SiriProxy can overcome the server connection issue if you have access to Siri capable iDevices. The server that Siri sends its data through can be changed in a number of ways.
The most reliable method is to use a DNS server, as demonstrated by plamoni.
An easier approach is to edit the com.apple.assistant.plist file in the device’s /var/mobile/Library/Preferences folder. It can be changed either on a jailbroken device with iFile, or via an iPhone backup reading utility. The hostname string simply needs to be replaced with the URL of your SiriProxy (i.e. your computer’s IP address). This method could also allow for your SiriProxy to work outside of your Wi-Fi network, if you set up forwarding for port 443 to your computer in your router, and use your external IP address. However, some routers don’t do port forwarding inside of their network, so you would need to change this setting yourself when you arrive or leave home. A static IP or dynamic DNS address (such as one from Dyn) is recommended.
The /etc/hosts file on a jailbroken device can also be modified. This can also be used externally, like the above method, though domain redirects are disallowed in host files, so a static IP is required. For instance, if you have a server which has the IP 192.168.1.5, enter this on a new line:
Make sure there is at least one blank line at the very end of the file, or this will fail.
Bypassing Authentication
Alternative to dealing with SiriProxy, it’s also possible to trick the Apple server that you are using a Siri-capable device by simply faking device model that the system would include as a «header» to send to the Apple server (method -[ADAceConnection _startConnection] does that). It could be achieved this way: SiriAuthFix.
Источник


