- Quickstart: Record traces on Android
- Starting the tracing services
- Recording a trace
- Recording a trace through the Perfetto UI
- Recording a trace through the cmdline
- Full trace config
- How to Locally Capture a System Trace on Android Pie
- Guide: Collecting System and Analyzing System Traces
- What’s next?
- What’s new in Android Studio System Trace
- All Threads at Once
- More Intuitive Navigation
- The Analysis Panel
- Stability and Performance Improvements
Quickstart: Record traces on Android
Perfetto allows you to collect system-wide performance traces from Android devices from a variety of data sources (kernel scheduler via ftrace, userspace instrumentation via atrace and all other data sources listed in this site).
Starting the tracing services
Perfetto is based on platform services that are avilable since Android 9 (P) but are enabled by default only since Android 11 (R). On Android 9 (P) and 10 (Q) you need to do the following to ensure that the tracing services are enabled before getting started:
# Needed only on Android 9 (P) and 10 (Q) on non-Pixel phones. adb shell setprop persist.traced.enable 1
If you are running a version of Android older than P, you can still capture a trace with Perfetto using the record_android_trace script. See instructions below in the Recording a trace through the cmdline section.
Recording a trace
Command line tools (usage examples below in this page):
- Using the tools/record_android_trace helper script.
- Using directly the /system/bin/perfetto command on device [reference].
Recording a trace through the Perfetto UI
Navigate to ui.perfetto.dev and select Record new trace from the left menu. From this page, select and turn on the data sources you want to include in the trace. More detail about the different data sources can be found in the Data sources section of the docs.
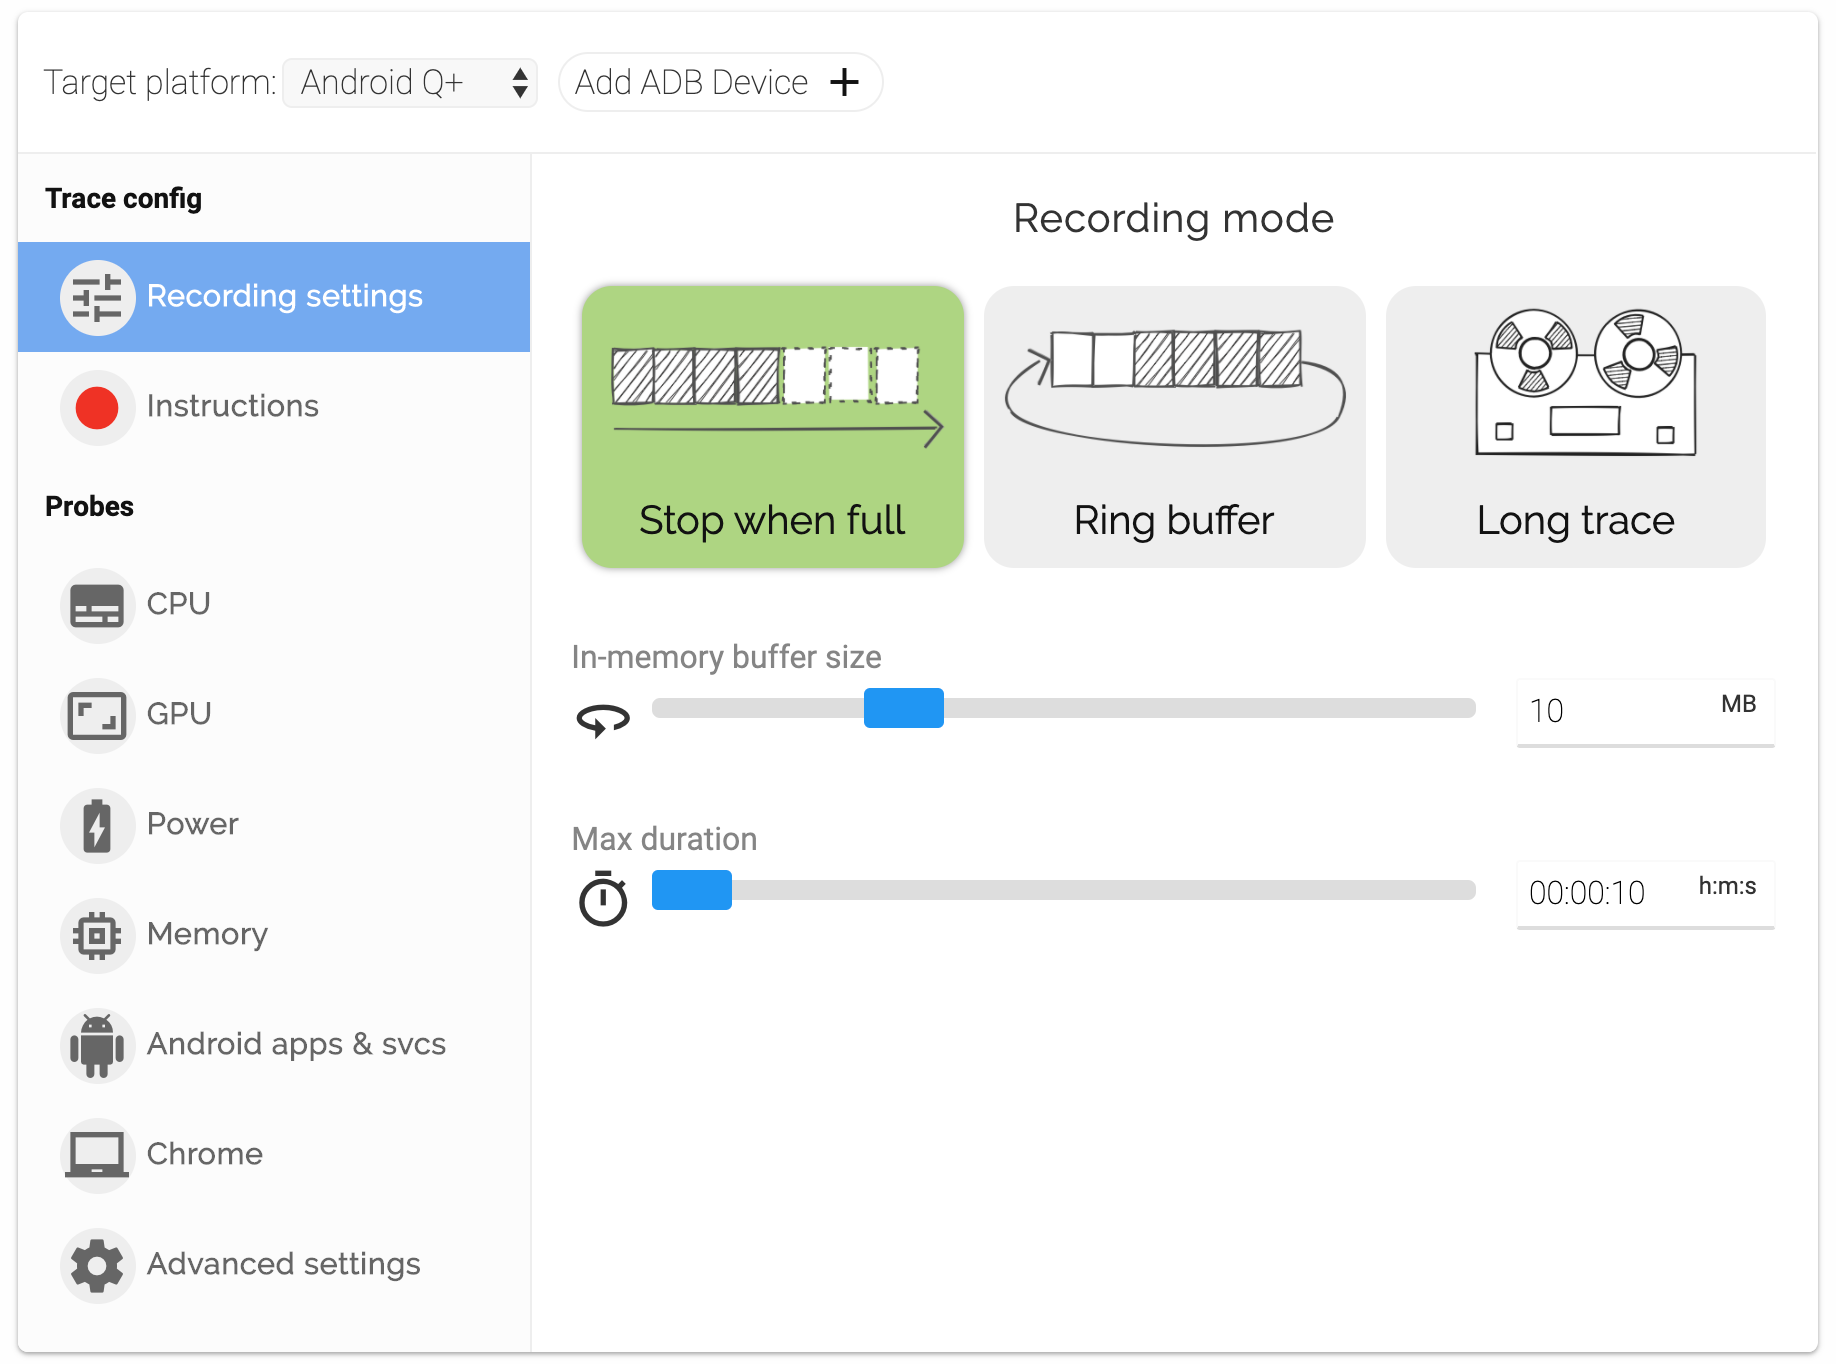
If you are unsure, start by turning on Scheduling details under the CPU tab.
Ensure your device is connected and select Add ADB device. Once your device has successfully paired (you may need to allow USB debugging on the device), select the Start Recording button.
Allow time for the trace to be collected (10s by default) and then you should see the trace appear.
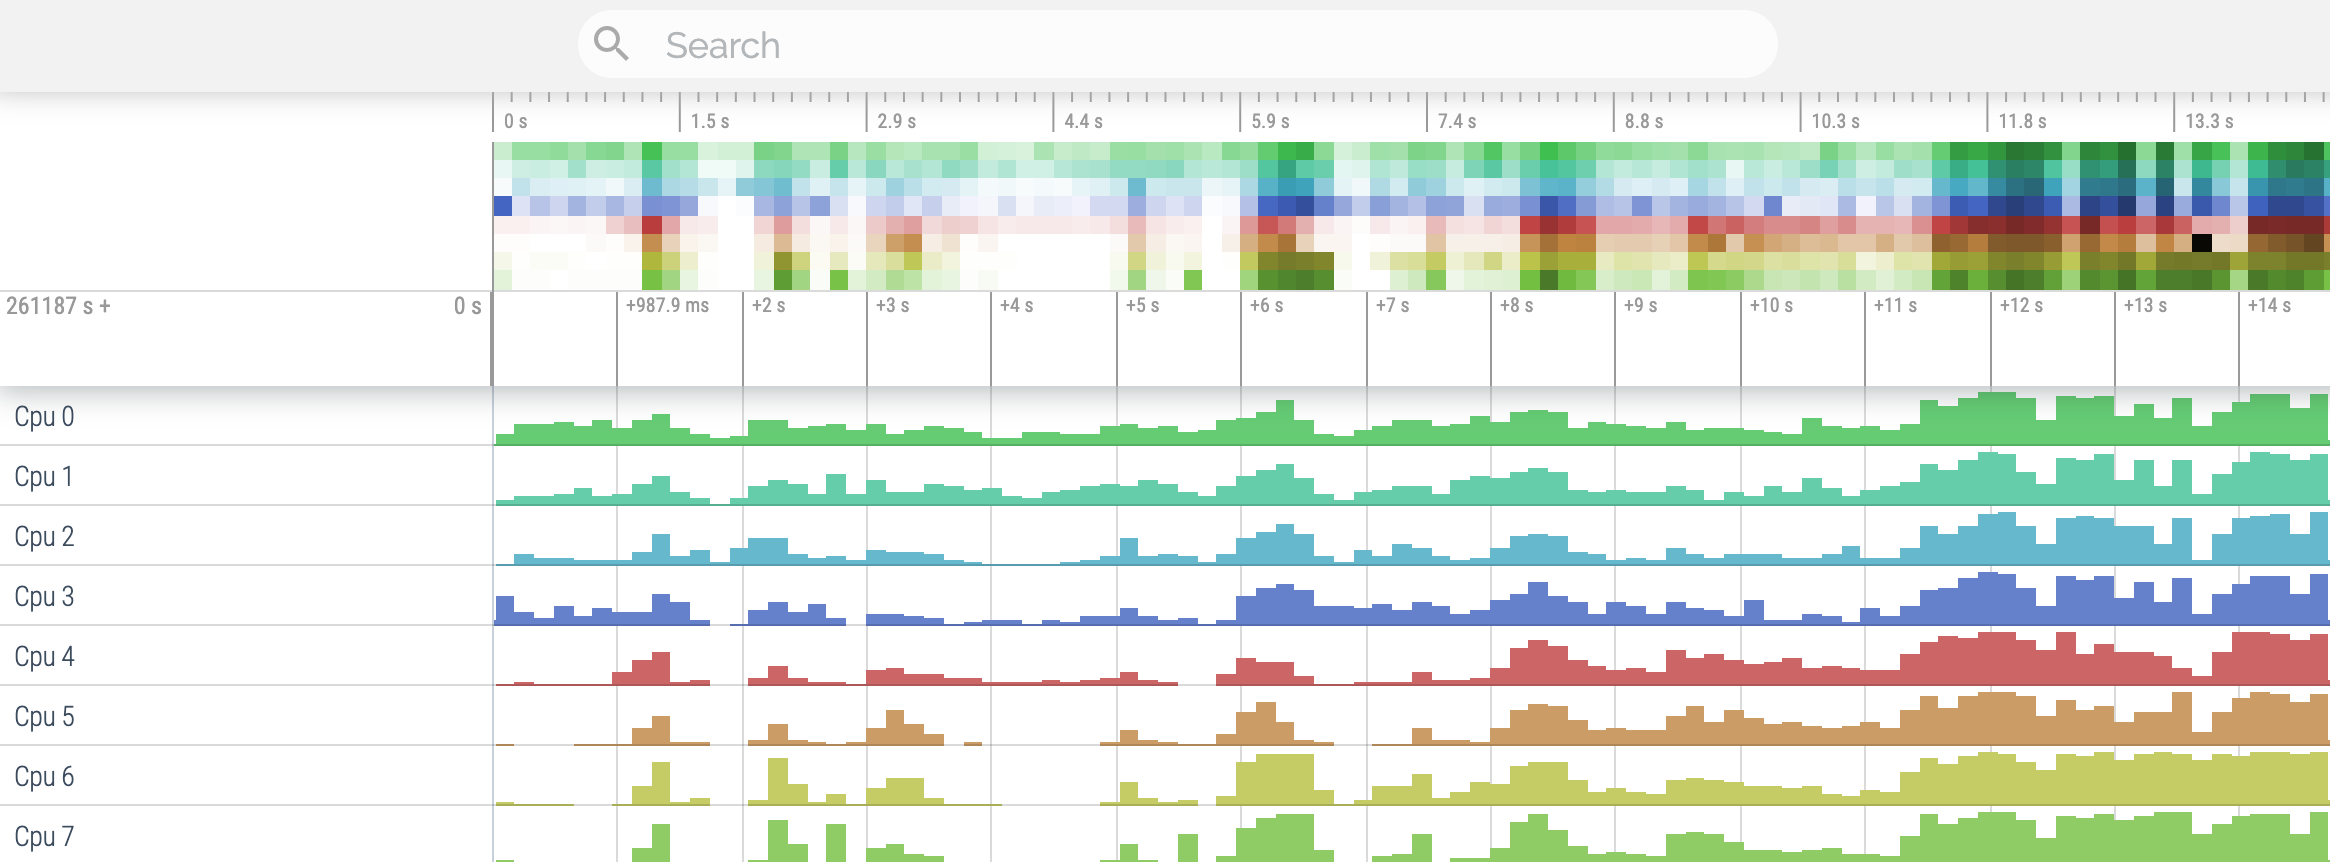
Your trace may look different depending on which data sources you enabled.
Recording a trace through the cmdline
Prerequisites
For the cmdline based workflow you will need the adb (Android Debug Bridge) executable to be in your PATH. ADB binaries for Linux, Mac or Windows can be downloaded from https://developer.android.com/studio/releases/platform-tools .
Using the helper script
We suggest using the tools/record_android_trace script to record traces from the command line. It is the equivalent of running adb shell perfetto but it helps with getting the paths right, auto-pulling the trace once done and opening it on the browser. Furthermore, on older versions of Android it takes care of sideloading the tracebox binary to make up for the lack of tracing system services.
If you are already familiar with systrace or atrace , both cmdline tools support a systrace-equivalent syntax:
On Linux and Mac:
curl -O https://raw.githubusercontent.com/google/perfetto/master/tools/record_android_trace chmod u+x record_android_trace # See ./record_android_trace —help for more ./record_android_trace -o trace_file.perfetto-trace -t 10s -b 32mb \ sched freq idle am wm gfx view binder_driver hal dalvik camera input res memory
curl -O https://raw.githubusercontent.com/google/perfetto/master/tools/record_android_trace python3 record_android_trace -o trace_file.perfetto-trace -t 10s -b 32mb \ sched freq idle am wm gfx view binder_driver hal dalvik camera input res memory
Using the on-device /system/bin/perfetto command
Or, if you want to use directly the on-device binary do instead:
adb shell perfetto -o /data/misc/perfetto-traces/trace_file.perfetto-trace -t 20s \ sched freq idle am wm gfx view binder_driver hal dalvik camera input res memory
Caveats when using directly the adb shell perfetto workflow:
- Ctrl+C, which normally causes a graceful termination of the trace, is not propagated by ADB when using adb shell perfetto but only when using an interactive PTY-based session via adb shell .
- On non-rooted devices before Android 12, the config can only be passed as cat config | adb shell perfetto -c — (-: stdin) because of over-restrictive SELinux rules. Since Android 12 /data/misc/perfetto-configs can be used for storing configs.
- On devices before Android 10, adb cannot directly pull /data/misc/perfetto-traces . Use adb shell cat /data/misc/perfetto-traces/trace > trace to work around.
- When capturing longer traces, e.g. in the context of benchmarks or CI, use PID=$(perfetto —background) and then kill $PID to stop.
Full trace config
The short syntax allows to enable only a subset of the data sources; for full control of the trace config, pass the full trace config in input.
See the Trace configuration page and the examples in each data source doc page for detailed instructions about how to configure all the various knobs of Perfetto.
If you are running on a Mac or Linux host, or are using a bash-based terminal on Windows, you can use the following:
WARNING: The below command does not work on Android P because the —txt option was introduced in Q. The binary protobuf format should be used instead; the details of this can be found on the Trace configuration page.
Or alternatively, when using directly the on-device command:
cat config.pbtx | adb shell perfetto -c — —txt -o /data/misc/perfetto-traces/trace.perfetto-trace
Alternatively, first push the trace config file and then invoke perfetto:
adb push config.pbtx /data/ local /tmp/config.pbtx adb shell ‘cat /data/local/tmp/config.pbtx | perfetto —txt -c — -o /data/misc/perfetto-traces/trace.perfetto-trace’
NOTE: because of strict SELinux rules, on non-rooted builds of Android, passing directly the file path as -c /data/local/tmp/config will fail, hence the -c — + stdin piping above. From Android 12 (S), /data/misc/perfetto-configs/ can be used instead.
Pull the file using adb pull /data/misc/perfetto-traces/trace
/trace.perfetto-trace and open it in the Perfetto UI.
NOTE: On devices before Android 10, adb cannot directly pull /data/misc/perfetto-traces . Use adb shell cat /data/misc/perfetto-traces/trace > trace.perfetto-trace to work around.
The full reference for the perfetto cmdline interface can be found here.
Except as otherwise noted, the content of this page is licensed under the Creative Commons Attribution 4.0 License, and code samples are licensed under the Apache 2.0 License. Java is a registered trademark of Oracle and/or its affiliates.
Источник
How to Locally Capture a System Trace on Android Pie
Tracing is an invaluable tool that enables developers to understand the impact that various changes have on a system and can provide clues to identify the root cause of problems.
systrace is one such powerful tracing tool that collects timing information from processes running on an Android device. systrace was used extensively by the Android performance team at Google to optimize performance on the Google Pixel phones. I have used systrace to inspect the impact of kernel scheduler changes on task placements on CPUs, for example, and to identify possible causes of janks. systrace can capture a wide variety of data, including CPU scheduling, CPU frequency, disk I/O, graphics, Binder activity, and much more. The information is combined into a report that can be analyzed in Google Chrome.
Before Android Pie, the only way to capture traces with systrace was to hook up an Android device to a computer and run systrace from there—usually from a terminal. However, not everyone has constant access to a computer, or the knowledge and confidence to run systrace.
With the release of Android Pie, this inconvenience was addressed with the introduction of the Traceur package, which is a tool that captures raw trace data directly on an Android phone. Traceur is available as the “System Tracing” option in the Developer Options of the Settings app, and the raw trace data captured on the device by Traceur can at a later time be converted by systrace to an HTML report for analysis.
The new “System Tracing” option allows users to easily capture and share traces with developers, without needing to actually know how to run systrace on a computer. Developers benefit from the ability to capture traces without a computer and analyze later at their convenience. The complete raw trace data collected by “System Tracing” is also significantly smaller in size than the HTML report generated by systrace, which therefore makes the raw trace data more suitable for storing and sharing with others.
Guide: Collecting System and Analyzing System Traces
Firstly, ensure that you have a device running Android Pie and a computer with Python 2 installed. The following instructions were performed on a OnePlus 6 running the latest OxygenOS Android Pie beta.
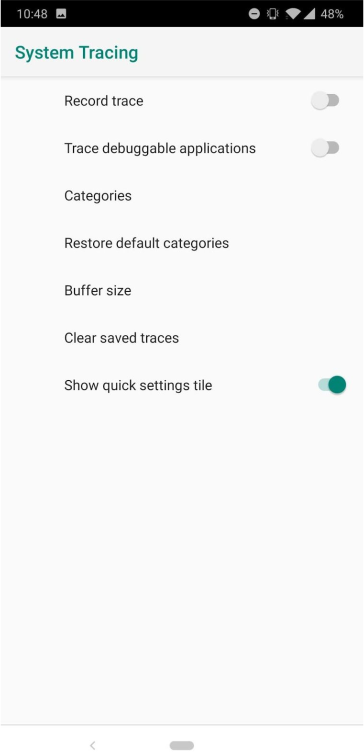
- Enable Developer Options in the Settings app, and then access the “System Tracing” option within the “Debugging” section of Developer Options.

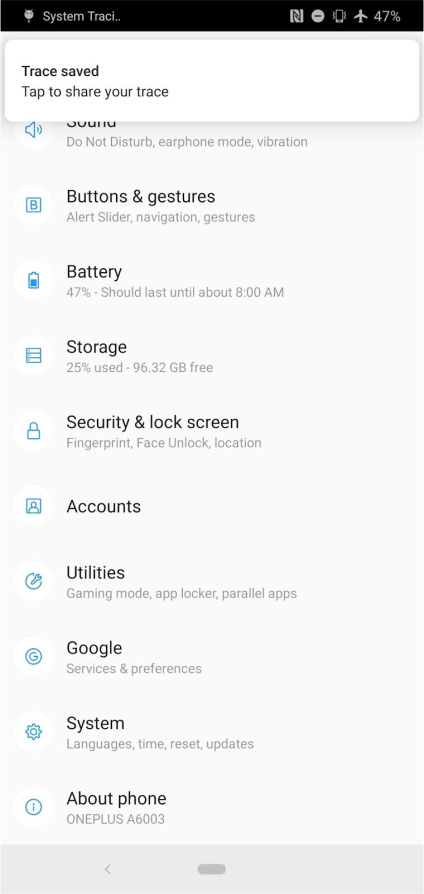
- Upon opening System Tracing, you will be presented a toggle to enable System Tracing, and the ability to customize the tracing categories and buffer size of the traces. For this demonstration, the default categories are used, which is sufficient for most cases. A “Show quick settings tile” toggle allows tracing to be started/stopped via Quick Settings. I have enabled this for this guide.
- To begin capturing a trace, tap on the recently added “Record trace” quick settings tile.
- When you are done tracing a test case, you may stop the tracing from the notification shade.
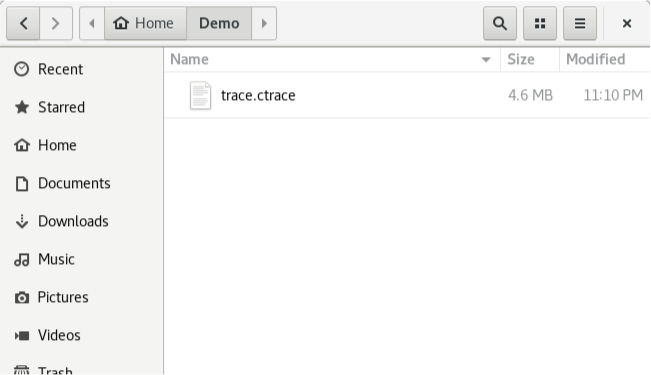
- Great! You have successfully captured a raw trace. A notification will prompt you to share the raw trace file. You should be able to save it to your device, upload it to online storage, email it to someone, etc. Alternatively, you can use ADB to directly pull the trace from your device to your computer ( adb pull /data/local/traces/ ). Go ahead and save the trace file to your computer.
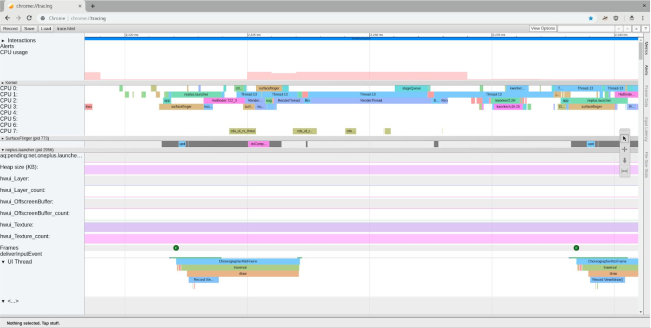
- The raw trace file has the made-up .ctrace format. It cannot be interpreted in its raw form. We can use systrace to generate a more useful and understandable interactive HTML report from our raw trace file.
- We will use the latest version of systrace from the catapult project repo. In a terminal application, clone the repo (ensure git is installed):
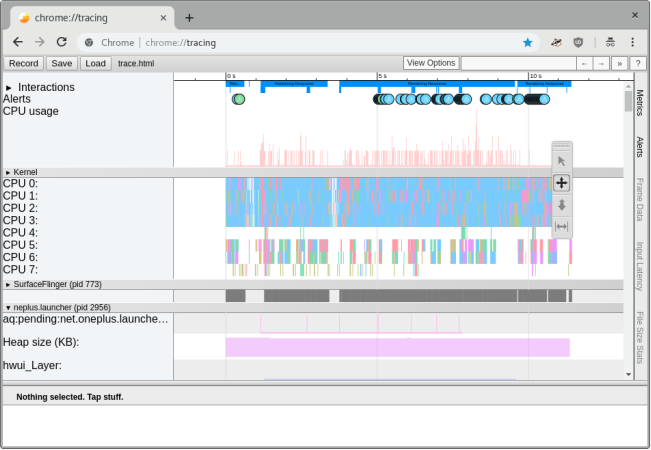
- To generate the HTML report from our raw trace file using systrace, enter the following commands:


An HTML file with the same name as the raw trace file will be generated. Note: systrace only supports Python 2 at the time of writing.

What’s next?
Now that you are able to capture a trace and generate a systrace report, it is important to understand how to read and interpret the data presented in the report. For a start, I recommend reading “Understanding Systrace”, and watching “Android Performance: An Overview (Google I/O ‘17)” and “Systrace for Games” to see systrace in action.
This is a guest post that was originally written by Josh Choo, also known as XDA Recognized Developer joshuous. The post was lightly edited for formatting.
Источник
What’s new in Android Studio System Trace
In Android Studio 4.0, we overhauled the CPU Profiler UI to provide a more intuitive recording workflow. We continued to make improvements based on your feedback and added more features in 4.1.
In this article, we’ll highlight what’s new in Android Studio for System Trace, one of the infrequently-used yet powerful CPU recording configurations. Unlike Java Method or C/C++ Function Traces, System Trace collects device activities (e.g. CPU core scheduling) and Android system processes (e.g. SurfaceFlinger). In addition, you can instrument your code with custom events by calling the Trace API in your app. This way your custom events will be collected along with system events. All of this data combined can come in handy when you investigate performance issues such as UI jankiness or high power consumption.
All Threads at Once
CPU recordings are now separated from the main profiler timeline to allow for easier analysis. In this dedicated view, trace data is organized in sections on the left side of the Profiler window.
You can move sections up and down to reorganize the list, or individual items within a section by simply dragging-and-dropping.
We heard from you that selecting each thread to view its call chart (or trace events for System Trace) is cumbersome, so we combined all thread activities into one view, displaying thread states and call charts all at once. By default we sort the threads by how busy they are, but you can drag-and-drop any individual one to re-order them.

You can also collapse or expand each thread by single-clicking the triangle icon or double-clicking the thread name. Note that for a Java Method Trace or C/C++ Function Trace we collapse all threads by default due to deep call stacks, so that you can get a glance of all thread data up front.
For a System Trace, the trace events are now uniquely colored for easier differentiation.
More Intuitive Navigation
The new trace UI has a revamped timeline navigation scheme. We replaced the old horizontal scroll bar with a master-detail view.
On the top you can see a timeline that maps to only the duration of the trace, instead of the entire profiling session. Using the range selector you can quickly narrow down to a specific time range, for which the sections below display detailed data.
From there you can perform more precise navigation actions.
- Zoom in/out using Ctrl (or Cmd on Mac) + mouse wheel;
- Pan the view by dragging the mouse left and right while holding down the space key;
- Use the “WASD” keys to zoom and pan the view, just like the legacy SysTrace UI in Chrome (chrome://tracing).
Starting in Android Studio 4.1 Canary 9, you can drag your mouse in the Threads section to perform a box selection. Box selection lets you precisely select a rectangle area, which you can zoom into by clicking the Zoom to Selection button on the top right (“M” key). You can even select across multiple threads. This is useful when you drag-and-drop similar threads next to each other and inspect all of them at once. For example, you may want to perform analysis on multiple worker threads, often found in games.
The Analysis Panel
Speaking of analysis, we want to highlight the new Analysis Panel introduced in Android Studio 4.0, in the right-hand column of the Profiler window.
Here you can find analysis data derived from the recorded trace based on your selection. When you select a thread, stack frame or trace event from the left-hand column, the Analysis Panel will show information specific to your selection. For instance, when a thread is selected, its thread states are displayed, along with other useful info.
We want to make this Analysis Panel useful to you, so we’ve been exploring ways to surface helpful analysis data. In addition to the Top Down, Flame Chart and Bottom Up graphs already present in the CPU Profiler, we added a Summary tab in Android Studio 4.1 Canary 10 for things like thread state distribution, trace event statistics, etc. For example, oftentimes we want to find out more about a recurring trace event. The Summary tab displays basic statistics (count, min, max, etc.) as well as the longest running occurrences of the selected trace event. You can even navigate to another occurrence by selecting a row from the table.
Stability and Performance Improvements
Last but not least, we’ve been improving the stability and performance of CPU recording.
- We fixed several bugs that may result in recording failures.
- We built System Trace with Perfetto as the backend on Android API level 28 and later, taking advantage of Android’s latest instrumentation technology.
- We also optimized the profiler code to significantly reduce memory consumption (by up to 80%) when parsing a recorded trace, allowing you to open and analyze longer traces. Remember that you can increase the maximum heap size of Android Studio, which helps with very long traces.
Download the latest Android Studio 4.1 Preview version to try out these features. As always we appreciate your feedback.
Источник


