Полный список
— работаем с файлами
Работа с файлами в Android не сильно отличается от таковой в Java. В этом уроке рассмотрим, как записать/прочесть файл во внутреннюю память и на SD-карту.
Project name: P0751_Files
Build Target: Android 2.3.3
Application name: Files
Package name: ru.startandroid.develop.p0751files
Create Activity: MainActivity
Рисуем экран main.xml:
4 кнопки, смысл которых понятен по тексту на них.
В onclick обрабатываем нажатия 4-х кнопок и вызываем соответствующие методы.
writeFile – запись файла во внутреннюю память. Используется метод openFileOutput, который на вход берет имя файла и режим записи: MODE_PRIVATE – файл доступен только этому приложению, MODE_WORLD_READABLE – файл доступен для чтения всем, MODE_WORLD_WRITEABLE — файл доступен для записи всем, MODE_APPEND – файл будет дописан, а не начат заново.
readFile – чтение файла из внутренней памяти. Используем метод openFileInput, принимающий на вход имя файла. Здесь и в методе записи внутреннего файла вы можете задать только имя файла, а каталог для ваших файлов вам уже выделен.
writeFileSD – запись файла на SD. Используем метод getExternalStorageState для получения состояния SD-карты. Здесь можно посмотреть какие бывают состояния. Нам нужно MEDIA_MOUNTED – когда SD-карта вставлена и готова к работе. Далее мы получаем путь к SD-карте (метод getExternalStorageDirectory), добавляем свой каталог и имя файла, создаем каталог и пишем данные в файл.
readFileSD – чтение файла с SD. Все аналогично предыдущему методу, только файл не пишем, а читаем.
Осталось в манифест добавить разрешение на работу с файлами на SD — android.permission.WRITE_EXTERNAL_STORAGE.
Все сохраним и запустим. Видим экран с 4-мя кнопками:
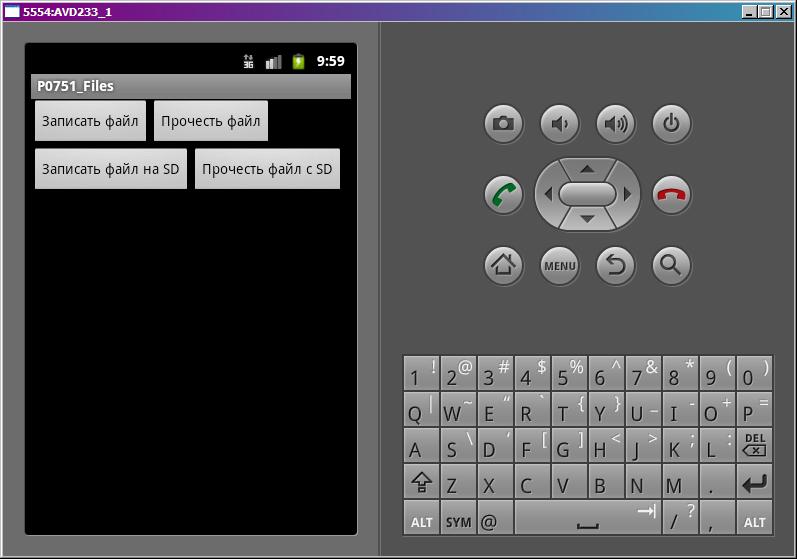
Внутренняя память
Жмем кнопку Записать файл. Видим в логе:
Проверим. Идем в File Explorer (Window > Show View > Other > Android > File Explorer) и открываем там папку data/data/ru.startandroid.develop.p0751files/files и видим там наш файл file.
Возвращаемся в эмулятор. Жмем Прочесть файл и в логе видим:
Это тот текст, который мы записывали в файл.
SD карта
Теперь жмем Записать файл на SD.
Файл записан на SD: /mnt/sdcard/MyFiles/fileSD
Проверяем. Идем в FileExplorer и открываем там папку mnt/sdcard/MyFiles/ а в ней файл fileSD.
Возвращаемся в эмулятор и жмем кнопку Прочесть файл с SD. В логе видим:
Содержимое файла на SD
Этот текст мы и записывали.
mnt/sdcard — обычно этот путь ведет к содержимому SD-карты. Возможно у вас он будет другой.
В общем, при работе с файлами на SD вы используете стандартные java механизмы. А при работе с внутренним хранилищем для удобства можно использовать методы-оболочки от Activity:
openFileOutput – открыть файл на запись
openFileInput – открыть файл на чтение
И есть метод getFilesDir – возвращает объект File, соответствующий каталогу для файлов вашей программы. Используйте его, чтобы работать напрямую, без методов-оболочек.
Подробности работы в java с файловой системой я здесь описывать не буду. На нашем форуме пользователь SKR сделал отличную памятку по работе с файлами. Скорее всего, вы найдете там все что нужно.
Если у вас проверка SD-карты показывает, что карта недоступна (см. лог), то убедитесь в свойствах AVD, что у вас для SDCard указан Size или File. Если указаны, то попробуйте перезапустить AVD.
На следующем уроке:
— создаем экран с вкладками
— используем иконку в названии вкладки
— используем обработчик перехода между вкладками
Присоединяйтесь к нам в Telegram:
— в канале StartAndroid публикуются ссылки на новые статьи с сайта startandroid.ru и интересные материалы с хабра, medium.com и т.п.
— в чатах решаем возникающие вопросы и проблемы по различным темам: Android, Kotlin, RxJava, Dagger, Тестирование
— ну и если просто хочется поговорить с коллегами по разработке, то есть чат Флудильня
— новый чат Performance для обсуждения проблем производительности и для ваших пожеланий по содержанию курса по этой теме
Источник
Write file android studio
Android supports all the standard Java file I/O APIs for create, read, update, and delete (CRUD) operations, along with some additional helpers to make accessing those files in specific locations a little more convenient. There are three main locations in which an application can work with files:
- Internal storage. Protected directory space to read and write file data. Internal storage is always located in the device’s flash memory area — part of the 8 GB or 32 GB of «storage» that your device was advertised with—under /data/data/PKG_NAME/.
- External storage. Externally mountable space to read and write file data. Requires the WRITE_EXTERNAL_STORAGE permission in API Level 4+. Often, this is a physical SD card in the device.
- Assets. Protected read-only space inside the APK bundle. Good for local resources that can’t or shouldn’t be compiled.
However, there are several complications.
First, some devices don’t have removable storage. On these, the external storage directory always exists—it is just in a different partition of the same flash memory storage as internal storage.
Second, on devices that do have removable storage, the storage might be removed at the time your application checks it. There’s no point trying to write it if it’s not there.
Read from res directory
If your application requires external file resources, you can include them in your distribution package by placing them in the res/raw folder of your project hierarchy.
To access these read-only file resources, call the openRawResource method from your application’s Resource object to receive an InputStream based on the specified file. Pass in the filename (without the extension) as the variable name from the R.raw class, as shown in the following code
Read from assets directory
Android offers one more directory where you can keep files which also will be included in package. This directory called /assets. There are some difference from res directory.
With resources, there’s built-in support for providing alternatives for different languages, OS versions, screen orientations, etc., as described here. None of that is available with assets. Also, many parts of the API support the use of resource identifiers. Finally, the names of the resources are turned into constant field names that are checked at compile time, so there’s less of an opportunity for mismatches between the code and the resources themselves. None of that applies to assets.source
Read/Write to Internal Storage
This area of storage is sort of private to the application. It is always available to the application and gets purged when the app is uninstalled by the user.
Internal storage refers to the hard drive on device. Internal storage gives you the ability to prevent other applications from accessing the files you save and are tied directly to your app.
Files stored in /data/data/packagename/files/filename.txt. There are few modes for file access
- MODE_PRIVATE — create a new file or overwrite one if it already exists with the same name
- MODE_APPEND — create the file if it doesn’t exist and allow you to append to the file if it does exist
- MODE_WORLD_READABLE — file is readable by any other application
- MODE_WORLD_WRITEABLE — file is writeable by any other application
Internal storage can be accessed using the Context methods openFileInput(String filename) , which returns a FileInputStream object, or openFileOutput(String filename, int mode) , which returns a FileOutputStream .
Write to file in internal storage
Read from file in internal storage
The Context method getFilesDir() returns the root of this directory, and you can then access it using normal java.io methods and classes.
Data is written to the file streams as bytes, so higher-level data (even strings) must be converted into and out of this format.
Following is a method to save an image to internal storage in Kotlin
Read/Write to SDCard
The key differentiator between internal and external storage is that external storage is mountable. This means that the user can connect his or her device to a computer and have the option of mounting that external storage as a removable disk on the PC. Often, the storage itself is physically removable (such as an SD card), but this is not a requirement of the platform.
External storage is typically either a removable storage media (i.e. SD Card) or an internal non-removable storage that is accessed in the same manner.
The most important thing to remember when storing files on external storage is that no security is enforced on files stored here. Any application can access, overwrite, or delete files stored on the external storage.
In order to write data to SDCard, the application need permission WRITE_EXTERNAL_STORAGE, which can be specified in the file AndroidManifest.xml.
Check external storage
Write to SDCard
Read from SDCard
Following is a method to save an image to external storage in Kotlin
Read/Write to Cache
Should your application need to cache temporary files, Android offers both a managed internal cache, and (since Android API level 8) an unmanaged external cache. You can access them by calling the getCacheDir and getExternalCacheDir methods, respectively, from the current Context.
Files stored in either cache location will be erased when the application is uninstalled. Files stored in the internal cache will potentially be erased by the system when it is running low on available storage; files stored on the external cache will not be erased, as the system does not track available storage on external media.
Read from cache dir
Write to cache dir
Read/Write to publicly readable files
Android 2.2 (API level 8) includes a convenience method, Environment.getExternalStoragePublicDirectory , that can be used to find a path in which to store your application files. The returned location is where users will typically place and manage their own files of each type. Files that’ll remain on the storage even after the application is uninstalled by the user like media (photos, videos, etc.) or other downloaded files. This is particularly useful for applications that provide functionality that replaces or augments system applications, such as the camera, that store files in standard locations.
There are 2 methods that we can use to get the public external storage directory for placing files:
- getExternalStorageDirectory() method returns the primary (top-level or root) external storage directory.
- getExternalStoragePublicDirectorty method returns a top level public external storage directory for showing files of a particular type based on the argument passed. So basically the external storage has directories like Music, Podcasts, Pictures, etc. whose paths can be determined and returned via this function by passing the appropriate environment constants.
The getExternalStoragePublicDirectory method accepts a string parameter that determines which subdirectory you want to access using a series of Environment static constants:
- DIRECTORY_DCIM — pictures and videos taken by the device
- DIRECTORY_DOWNLOADS — files downloaded by the user
- DIRECTORY_MOVIES — movies
- DIRECTORY_MUSIC — audio fi les that represent music
- DIRECTORY_PICTURES — pictures
Note that if the returned directory doesn’t exit, you must create it before writing fi les to the directory, as shown in the following snippet
External System Directories
There are additional methods in Environment and Context that provide standard locations on external storage where specific files can be written. Some of these locations have additional properties as well.
- API Level 8
- Returns a common directory where all applications store media files. The contents of these directories are visible to users and other applications. In particular, the media placed here will likely be scanned and inserted into the device’s MediaStore for applications such as the Gallery.
- Valid type values include DIRECTORY_PICTURES , DIRECTORY_MUSIC , DIRECTORY_MOVIES , and DIRECTORY_RINGTONES .
- API Level 8
- Returns a directory on external storage for media files that are specific to the application. Media placed here will not be considered public, however, and won’t show up in MediaStore .
- This is external storage, however, so it is still possible for users and other applications to see and edit the files directly: there is no security enforced.
- Files placed here will be removed when the application is uninstalled, so it can be a good location in which to place large content files the application needs that one may not want on internal storage.
- Valid type values include DIRECTORY_PICTURES , DIRECTORY_MUSIC , DIRECTORY_MOVIES , and DIRECTORY_RINGTONES .
- API Level 8
- Returns a directory on internal storage for app-specific temporary files. The contents of this directory are visible to users and other applications.
- Files placed here will be removed when the application is uninstalled, so it can be a good location in which to place large content files the application needs that one may not want on internal storage.
Context.getExternalFilesDirs() and Context.getExternalCacheDirs() .
- API Level 19
- Identical features as their counterparts described previously, but returns a list of paths for each storage volume on the device (primary and any secondary volumes)
- For example, a single device may have a block of internal flash for primary external storage, and a removable SD card for secondary external storage.
- API Level 21
- Files placed in these volumes will be automatically scanned and added to the device’s media store to expose them to other applications. These will generally also be visible to the user through core applications like the Gallery.
Sharing files via a FileProvider
Sometimes you want to share internal-storage files with another app, without the bother of putting the data into a Cursor and creating a ContentProvider.
The FileProvider class allows you to make files available to another application, usually in response to an Intent. It is simpler to set up than a ContentProvider , but is actually a subclass of ContentProvider .
This example exposes a photo.jpg file from one application to another. For this example I have created an Android Studio project called FileProviderDemo , which contains two different applications in two different packages, providerapp and requestingapp . We’ll start by discussing the Provider app since it contains the actual FileProvider . However, you have to run the Requester application first, as it will start the Provider app.
Unlike the ContentProvider case, you rarely have to write code for the provider itself; instead, use the FileProvider class directly as a provider in your AndroidManifest.xml file, as shown in following example.
The provider definition
The provider does not have to be exported for this usage, but must have the ability to grant Uri permissions as shown. The meta-data element gives the name of a simple mapping file, which is required to map «virtual paths» to actual paths, as shown.
The filepaths.xml file
Finally, there has to be an Activity to provide the Uri to the requested file. In our example this is the ProvidingActivity , shown in following example.
The important part of this code is in the provideFile() method, which:
- Creates a Uri for the actual file (in this trivial example there is only one file, with a hardcoded filename)
- Adds flags to the result Intent to let the receiving app read this one file (only) with our permissions
- Sets the MIME type of the result
- Adds the file Uri as data to the result Intent
- Sets the result Intent , and the «success» flags to Activity.RESULT_OK • Calls finish() to end the Activity
Remember that the point of the FileProvider is to share files from one application to another, running with different user permissions. Our second application also has only one Activity , the «requesting» Activity. Most of this is pretty standard boilerplate code. In onCreate() , we create the requesting Intent :
The main part of the UI is a text area, which initially suggests that you request a file by pressing the button. That button’s action listener is only one line:
This will result in a subsequent call to onActivityComplete() , which is shown in following example.
Assuming that the request succeeds, you will get called here with requestCode set to the only valid action, RESULT_OK , and the resultIntent being the one that the providing Activity set as the Activity result—that is, the Intent wrapping the Uri that we need in order to read the file! So we just get the Uri from the Intent and open that as an input stream, and we can read the «secret» file from the providing application’s otherwise — private internal storage.
How to check free and used space in internal and external storage
There is auxiliary class to get information about free and used space in internal and external storage
How to download photo from url and save to storage
To download photo from url you can use android-async-http.
How to get file extension and mime type
You can get file extension and mime type:
Method to save an image to gallery and return URI in Kotlin
Источник


