X86 android pxe boot
Hello all,
this is my first post , i am badly in need for help 
I want to network boot android-x86 using iPXE. So far i have done the following
1. i have recompiled the android kernel adding nfs , pnp, ethernet , sunrpc etc related supports.
2. Built the final image successfully
3. tested the ISO in virtual box by live cd mode . it works okay
but i am stuck at pxe booting it.
At my server side laptop i have hosted the build output folder of the android-x86 over NFS . Here all the kernel,initrd, ramdisk, system.sfs images & other folders like root ,system etc are residing.
At my client side laptop during the pxe boot , kernel & initrd gets downloaded and the OS seems starts booting as many log prints but the booting gets stuck at «detecting android-x86 . » . i know that android-x86 has 2 stage booting mechanism and it seems it is stuck at the 2nd stage , maybe it is unable find the ramdisk.img . here is my script ..
————————————————————————————————————
#!ipxe
iPXE> set server_ip 192.168.0.105
iPXE> set nfs_path /home/ayx/android-x86/out/target/product/x86_64
iPXE> kernel nfs://$
iPXE> initrd nfs://$
iPXE> imgargs kernel root=/dev/nfs rw ip=dhcp androidboot.hardware=android_x86_64 netboot=nfs nfsroot=$
How can i load the ramdisk.img over nfs using iPXE ? or how can i properly boot android-x86 using iPXE ?
i will be very grateful to your help


MultimediaMan  iPXE Fan  | Posts: 199 Joined: 2011-May Reputation: 8 |
Check some of your booting requirements: I don’t see that you downloaded ramdisk.img:
iPXE> set server_ip 192.168.0.105
iPXE> set nfs_path /home/ayx/android-x86/out/target/product/x86_64
iPXE> kernel nfs://$
iPXE> initrd nfs://$
iPXE> initrd nfs://$
iPXE> imgargs kernel root=/dev/nfs rw ip=dhcp androidboot.hardware=android_x86_64 netboot=nfs nfsroot=$
try adding another initrd argument in the kernel commandline:
ayx  iPXE User | Posts: 2 Joined: 2018-Jul Reputation: 0 |
Hello @MultimediaMan thanks a lot .. yes you are right i was not downloading the ramdisk.img .
after downloading it the «detecting android . » stage got solved .. here is my iPXE script
echo Hi, trying to boot androidx86
dhcp
set server_ip 192.168.0.103
set nfs_path /home/ayx/android-x86/out/target/product/x86_64
kernel nfs://$
initrd nfs://$
initrd nfs://$
imgargs kernel root=/dev/nfs rw ip=dhcp androidboot.hardware=android_x86_64 netboot=nfs nfsroot=$
boot || read void
echo Booting
but now i have got a new problem . the booting gets failed by showing «/system/bin not found» .. actually there are several system paths shown not to be found . in the end the booting is stuck at showing «binder 1756:1756 transaction failed . «
do i need to modify the init script or code at the source and build again ?.maybe the rootfs is failing to get mount over nfs ?
thanks for the help.
| shahul iPXE User | Posts: 1 Joined: 2018-Dec Reputation: 0 |
(2018-07-10 18:47) ayx Wrote: Hello @MultimediaMan thanks a lot .. yes you are right i was not downloading the ramdisk.img .
after downloading it the «detecting android . » stage got solved .. here is my iPXE script
echo Hi, trying to boot androidx86
dhcp
set server_ip 192.168.0.103
set nfs_path /home/ayx/android-x86/out/target/product/x86_64
kernel nfs://$
initrd nfs://$
initrd nfs://$
imgargs kernel root=/dev/nfs rw ip=dhcp androidboot.hardware=android_x86_64 netboot=nfs nfsroot=$
boot || read void
echo Booting
but now i have got a new problem . the booting gets failed by showing «/system/bin not found» .. actually there are several system paths shown not to be found . in the end the booting is stuck at showing «binder 1756:1756 transaction failed . «
do i need to modify the init script or code at the source and build again ?.maybe the rootfs is failing to get mount over nfs ?
thanks for the help.
I am also facing same issue «binder 1756:1756 transaction failed . «.
can you please help me if issue is solved for you.
Источник
Android-x86
Run Android on your PC


Installation
Introduction
In particular, you can install Android-x86 to an NTFS filesystem to co-exist with Windows. See the Advanced Section for more details.
Step by Step
- Download an iso image from a mirror site. Usually you should just use the latest image.
- Burn the iso image to cdrom, or create a bootable USB disk (recommended). See the Advanced Section for details.
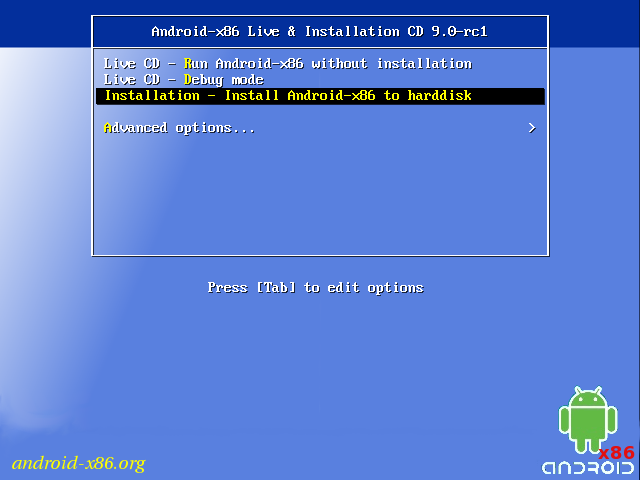
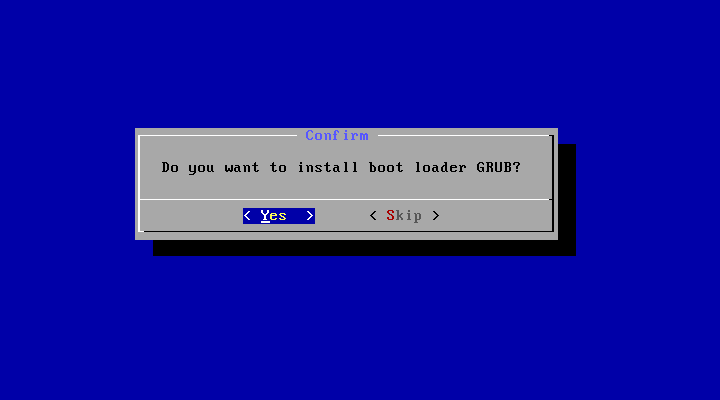
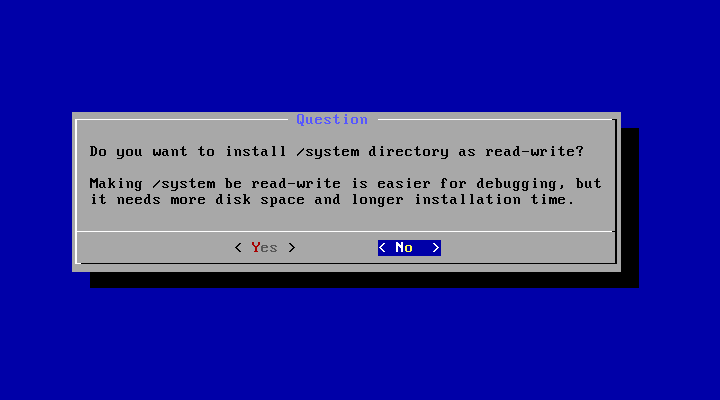
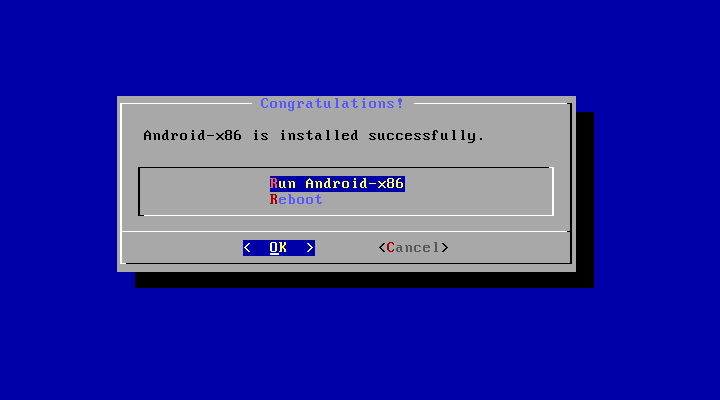
- Boot from the Android-x86 installation CD/USB, choose the ‘Install Android-x86 to harddisk’ item, as shown below:

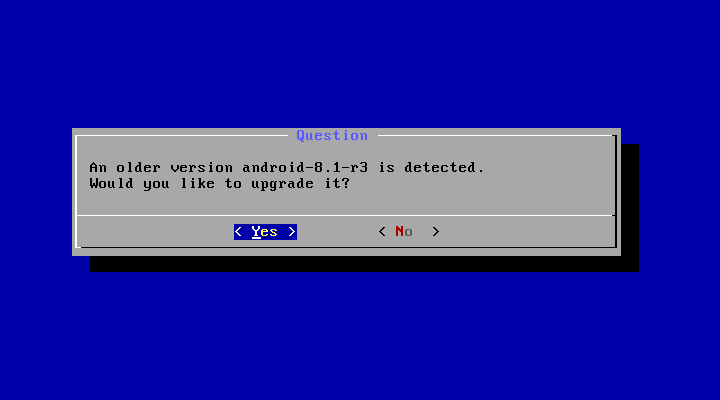
Upgrade
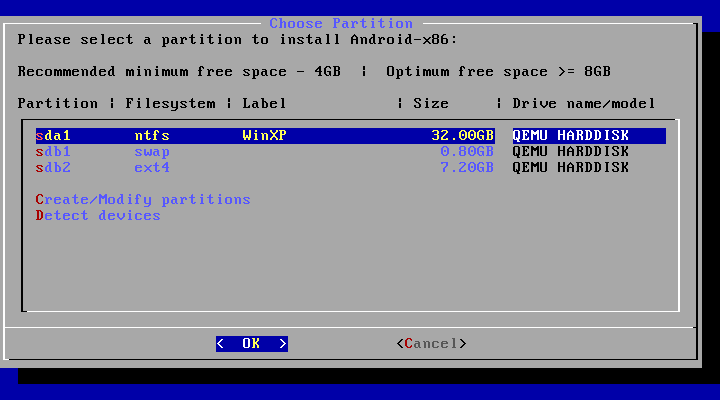
You may upgrade an older Android-x86 installation by the installer. Just select the partition containing the older installation. The installer will prompt if you’d like to upgrade it:
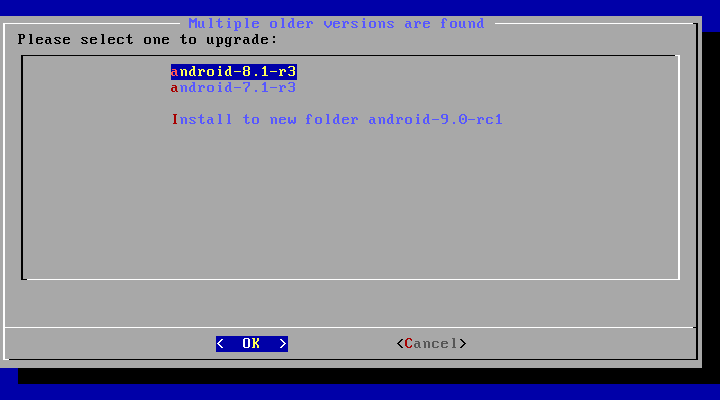
If there are multiple older versions in the same partition, the installer will ask which version to upgrade:
Auto Installation
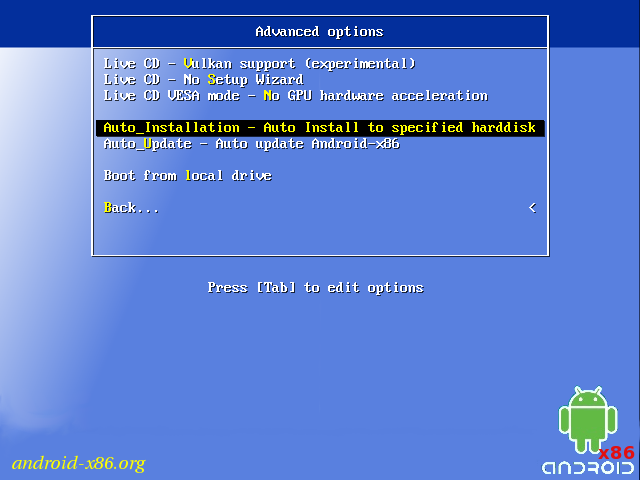
If you want to use Android-x86 as the only OS in your device, you may choose «Auto Installation» under the «Advanced options».
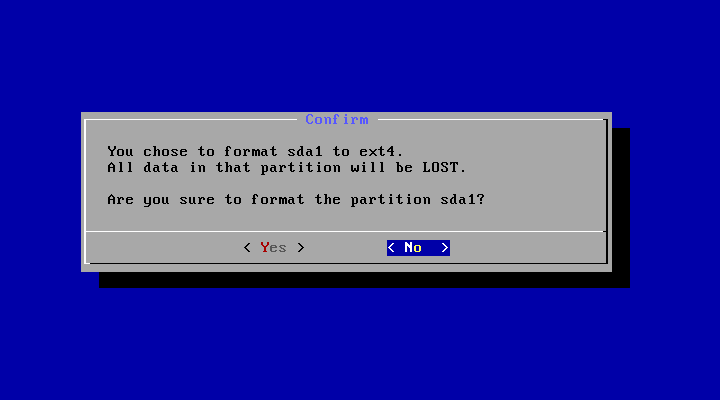
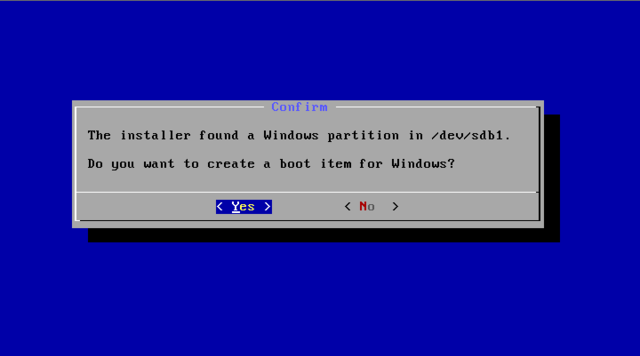
The installer will prompt you to confirm:
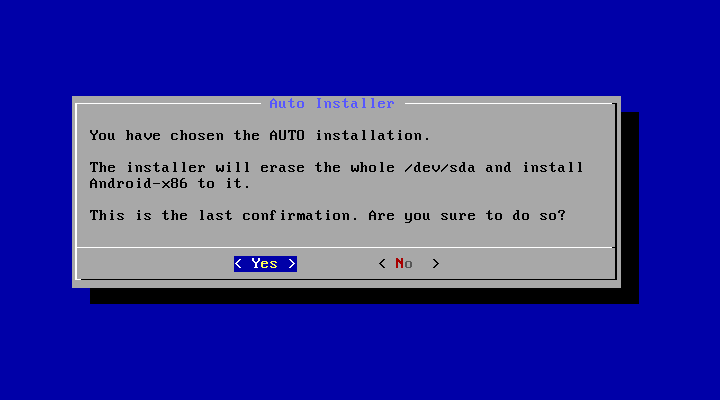
After you select ‘Yes’, the installer will erase the whole content of the hard disk, partition and install Android-x86 to it.
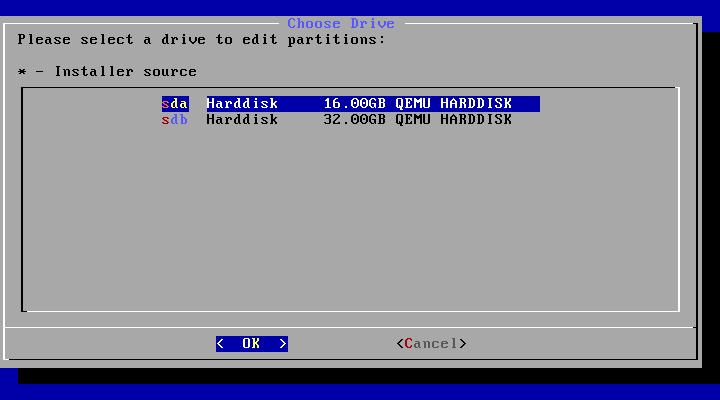
If you have multiple hard drives, the installer will let you choose which one to use. Be careful to choose the correct one.
Auto Update
By choosing «Auto Update» under the «Advanced options», the installer could update an older installation automatically.
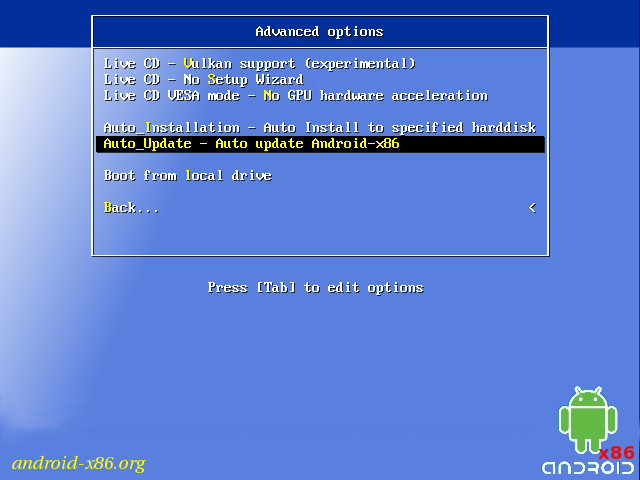
In this mode, the installer searches a partition named «Android-x86» or the first ext4 partition, and update the older installation in it automatically. If no such a partition is found, the auto update mode will be cancelled.
Other boot options
- Live CD — Run Android-x86 without installation
The item means to boot Android-x86 directly. This is useful to check if your hardware is compatible with Android-x86 quickly. All data is stored in RAM (tmpfs) and will lose after poweroff.
Live CD — Debug mode
See the debug howto for more details.
Live CD — Vulkan support (experimental)
Enable the experimental Vulkan support. Not all GPUs support it.
Live CD — No Setup Wizard
Skip the Setup Wizard. It’s useful if you want to test some apps quickly in live mode.
Live CD VESA mode — No GPU hardware acceleration
Disable GPU hardware acceleration. If you encounter black screen after booting, you may try this mode to see if it’s bootable.
Advanced
Create a bootable USB stick for Android-x86
There are several tools which could be used to create a bootable USB stick for Android-x86. The following tools are available for Windows users:
- Win32 Disk Imager — see demo video.
- UNetbootin — see demo video.
- Rufus — see demo video.
- Linux Live USB Creator (LiLi) — Obsolete software, but used to officially support Android-x86 until v4.4.
For Linux users, just use the standard dd command like:
Multi-Boot
To boot other operating systems, you have to add items for them to /grub/menu.lst. For example, to boot Windows, add the following:
This assumes Windows is installed to the first partition of the first hard disk. Alternatively, you need to change rootnoverify to the appropriate value. See Grub Manual for details.
Updated (2010)
Issues
VMware
You have to change your virtual disk type to be IDE because the default type in VMware is SCSI, and Android-x86 kernel is not configured to support SCSI. You can follow these steps:
- Create a virtual machine.
- Edit virtual machine settings after the virtual machine created.
- Choose the hard disk and remove it.
- Add a hard disk to create a new virtual disk, then you can choose IDE as your virtual disk type.
- When finished, you can install android-x86 normally.
Источник
X86 android pxe boot
Android OS на x86
В этой теме обсуждаются вопросы общие для всех Андроидов на платформе x86, конкретно проект портирования Android-х86, а также его братья, не имеющие отдельных тем обсуждения на нашем форуме.
Android в виртуальную машину | Сайт и Форум проекта Android-х86 | Android от Intel

Вопросы, касающиеся только проектов Phoenix OS , Remix OS x86 и Bliss-x86 , обсуждаются в своих темах.
За работоспособность ваших устройств ответственность несёте исключительно Вы. Задавая вопрос, постарайтесь указать следующую информацию .
- Hardware List — список совместимого оборудования
- Графическое ускорение нормально работает на видеоадаптерах от AMD и Intel (кроме GMA 500, GMA 600, GMA 3600, GMA 3650, т.к. они основаны на PowerVR).
Графика nVidia поддерживается начиная с Android-x86 4.4-R3; новое поколение начинает поддерживаться после выхода следующего. - Ситуация с поддержкой планшетов, Критическое замечание о звуке.
- Чипы, которые реализуют одновременно и WiFi, и Bluetooth работают хуже, чем отдельные.
- Если Вы не нашли в шапке или в листе совместимости версию для вашего компьютера/ноутбука (модификации железа), то следует попробовать разные версии и опытным путём подобрать оптимальную.
- Загрузочную флешку или диск необходимо записать с помощью Rufus, UNetbootin, LiLi, или WinImage. UltraISO использовать не рекомендуется потому, что созданные им флешки мало где грузятся.
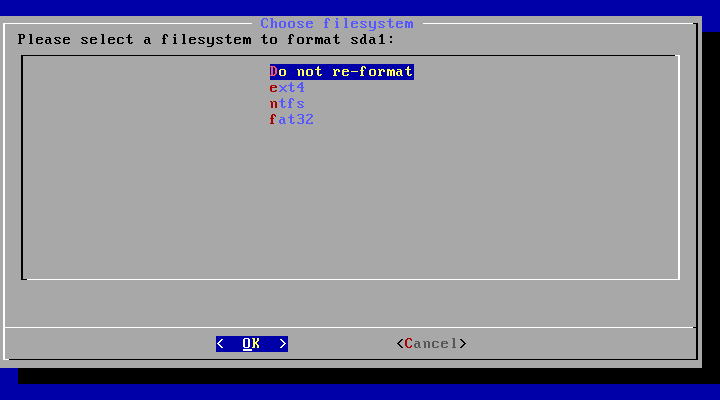
Раздел под Android рекомендуется форматировать в ext3 или ext4 (для версии 5.0 Lollipop и новее) чтобы иметь >4ГБ места под свои нужды и избежать проблем с SuperSU и другим софтом. Форматирование раздела лучше произвести до установки Android сторонним ПО (Acronis, GParted, др.): родной установщик не всегда справляется с этой задачей.
title Android-x86 5.1-rc1
kernel /android-5.1-rc1/kernel quiet root=/dev/ram0 androidboot.hardware=android_x86 SRC=/android-5.1-rc1
initrd /android-5.1-rc1/initrd.img
title Android-x86 5.1-rc1 (Debug mode)
kernel /android-5.1-rc1/kernel root=/dev/ram0 androidboot.hardware=android_x86 DEBUG=2 SRC=/android-5.1-rc1
initrd /android-5.1-rc1/initrd.img
title Android-x86 5.1-rc1 (Debug nomodeset)
kernel /android-5.1-rc1/kernel nomodeset root=/dev/ram0 androidboot.hardware=android_x86 DEBUG=2 SRC=/android-5.1-rc1
initrd /android-5.1-rc1/initrd.img
title Windows
rootnoverify (hd0,1)
chainloader +1
Тут default указывает номер пункта, котоый будет выбран автоматически после истечения timeout секунд. root и rootnoverify указывают с какого диска, и с какого его раздела загружать выбраную операционную систему. Как и в случае с default, нумерация начинается с нуля. Параметры загрузки прописываются в конец строки, которая начинается со слова kernel. Такими параметрами можно повлиять на многие аспекты работы Андроида с железом. К примеру настроить работу с внешним монитором.
GRUB 2 — следующая версия GRUB. Разработчики писали GRUB 2 «с нуля», чтобы добиться переносимости и модульности.
Используется в образах Android-x86 для компьютеров с новым UEFI-BIOS.
Может хранить свои настроки в файле grub.cfg либо menu.lst. Обычно этот файл лежит на отдельном системном разделе EFI (ESP). Типичное содержимое:
set timeout=60
set gfxmode=1024×768
terminal_output gfxterm
Источник


