Xamarin.Android RelativeLayout
RelativeLayout is a ViewGroup that displays child View elements in relative positions. The position of a View can be specified as relative to sibling elements (such as to the left-of or below a given element) or in positions relative to the RelativeLayout area (such as aligned to the bottom, left of center).
A RelativeLayout is a very powerful utility for designing a user interface because it can eliminate nested ViewGroup s. If you find yourself using several nested LinearLayout groups, you may be able to replace them with a single RelativeLayout .
Start a new project named HelloRelativeLayout.
Open the Resources/Layout/Main.axml file and insert the following:
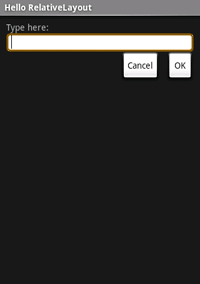
Notice each of the android:layout_* attributes, such as layout_below , layout_alignParentRight , and layout_toLeftOf . When using a RelativeLayout , you can use these attributes to describe how you want to position each View . Each one of these attributes define a different kind of relative position. Some attributes use the resource ID of a sibling View to define its own relative position. For example, the last Button is defined to lie to the left-of and aligned-with-the-top-of the View identified by the ID ok (which is the previous Button ).
All of the available layout attributes are defined in RelativeLayout.LayoutParams .
Make sure you load this layout in the OnCreate() method:
The SetContentView(int) method loads the layout file for the Activity , specified by the resource ID — Resource.Layout.Main refers to the Resources/Layout/Main.axml layout file.
Run the application. You should see the following layout:

Resources
Portions of this page are modifications based on work created and shared by the Android Open Source Project and used according to terms described in the Creative Commons 2.5 Attribution License.
Источник
Xamarin.Android Layouts
Layouts are used to arrange the elements that make up the UI interface of a screen (such as an Activity). The following sections explain how to use the most commonly-used layouts in Xamarin.Android apps.
LinearLayout is a view group that displays child view elements in a linear direction, either vertically or horizontally.

RelativeLayout is view group that displays child view elements in a relative position. The position of a view can be specified as relative to sibling elements.

TableLayout is a view group that displays child view elements in rows and columns.
RecyclerView is a UI element that displays a collection of items in a list or a grid, enabling the user to scroll through the collection.

ListView is a view group that creates a list of scrollable items. The list items are automatically inserted into the list using a list adapter. The ListView is an important UI component of Android applications because it is used everywhere from short lists of menu options to long lists of contacts or internet favorites. It provides a simple way to present a scrolling list of rows that can either be formatted with a built-in style or customized extensively. A ListView instance requires an Adapter to feed it with data contained in row views.
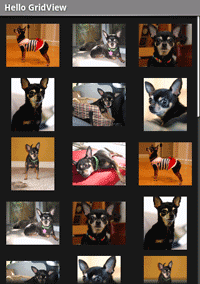
GridView is a UI element that displays items in a two-dimensional grid that can be scrolled.

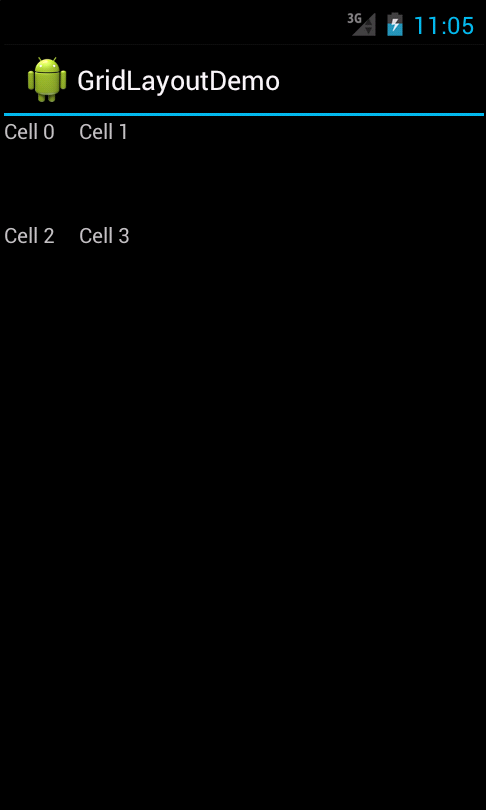
GridLayout is a view group that supports laying out views in a 2D grid, similar to an HTML table.

Tabbed Layouts are a popular user interface pattern in mobile applications because of their simplicity and usability. They provide a consistent, easy way to navigate between various screens in an application.
Источник
Xamarin. Android элемент LinearLayout
LinearLayout является ViewGroup , отображающий дочерний элемент View элементы в линейном направлении: по вертикали или по горизонтали.
Следует соблюдать осторожность при чрезмерном использовании LinearLayout . Если вы приступите к вложению нескольких LinearLayout , возможно, стоит рассмотреть возможность использования RelativeLayout Используйте.
Запустите новый проект с именем хеллолинеарлайаут.
Откройте ресурсы/макет/Main. axml и вставьте следующее:
Внимательно изучите этот XML-код. Существует корень LinearLayout , который определяет ориентацию по вертикали — все дочерние View s (с двумя) будут поровнить по вертикали. Первый дочерний элемент является другим LinearLayout в котором используется горизонтальная ориентация, а второй дочерний — LinearLayout для этого используется вертикальная ориентация. Каждый из этих вложенных элементов LinearLayout s содержит несколько TextView , которые ориентированы друг на друга в соответствии со своими родительскими элементами LinearLayout .
Теперь откройте хеллолинеарлайаут. CS и убедитесь, что он загружает макет ресурсов/макета/Main. axml в OnCreate() Method
SetContentView(int) Метод) загружает файл макета для Activity , ЗАданный идентификатором ресурса — Resources.Layout.Main относится к файлу макета SetContentView(int) .
Запустите приложение. Вы увидите следующее:

Обратите внимание, что атрибуты XML определяют поведение каждого представления. Попробуйте поэкспериментировать с различными значениями android:layout_weight , чтобы увидеть, как будет распространяться фактическое пространство экрана на основе веса каждого элемента. Дополнительные сведения о том, как это делать, см. в документе Общие объекты макета . LinearLayout обрабатывает android:layout_weight атрибут.
Ссылки
части этой страницы являются изменениями на основе работы, созданной и совместно используемой Project Android с открытым кодом, и используются в соответствии с терминами, описанными в лицензии Creative commons attribution 2,5.
Источник
Макеты Xamarin. Android
Макеты используются для упорядочения элементов, составляющих интерфейс ПОЛЬЗОВАТЕЛЬСКОГО интерфейса экрана (например, действия). В следующих разделах объясняется, как использовать наиболее часто используемые макеты в приложениях Xamarin. Android.
Элемент LinearLayout — это группа представлений, отображающая элементы дочернего представления в линейном направлении: вертикально или горизонтально.
RelativeLayout — это группа представлений, отображающая элементы дочернего представления в относительном положении. Расположение представления можно указать относительно родственных элементов.
Таблелайаут — это группа представлений, в которой отображаются элементы дочерних представлений в строках и столбцах.

RecyclerView — это элемент пользовательского интерфейса, который отображает коллекцию элементов в списке или сетке, позволяя пользователю прокручивать коллекцию.
ListView — это группа представлений, которая создает список прокручиваемых элементов. Элементы списка автоматически вставляются в список с помощью адаптера списка. ListView — Это важный компонент пользовательского интерфейса для приложений Android, так как он используется везде из коротких списков вариантов меню с длинными списками контактов или Интернет-избранного. Он предоставляет простой способ представления прокручиваемого списка строк, которые могут быть либо форматированы встроенным стилем, либо настроены с большой настройкой. Экземпляр ListView требует адаптер для передачи данных, содержащихся в представлениях строк.

GridView — это элемент пользовательского интерфейса, который отображает элементы в двумерной сетке, которую можно прокручивать.
GridLayout — это группа представлений, которая поддерживает размещение представлений в двухмерной сетке аналогично таблице HTML.
Макеты с вкладками — это популярный шаблон пользовательского интерфейса в мобильных приложениях из-за простоты и удобства использования. Они обеспечивают единообразный и простой способ перехода между различными экранами в приложении.
Источник
Xamarin.Android LinearLayout
LinearLayout is a ViewGroup that displays child View elements in a linear direction, either vertically or horizontally.
You should be careful about over-using the LinearLayout . If you begin nesting multiple LinearLayout s, you may want to consider using a RelativeLayout instead.
Start a new project named HelloLinearLayout.
Open Resources/Layout/Main.axml and insert the following:
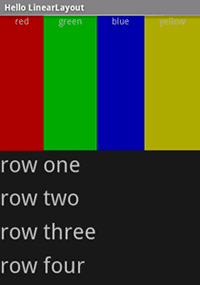
Carefully inspect this XML. There is a root LinearLayout that defines its orientation to be vertical – all child View s (of which it has two) will be stacked vertically. The first child is another LinearLayout that uses a horizontal orientation and the second child is a LinearLayout that uses a vertical orientation. Each of these nested LinearLayout s contain several TextView elements, which are oriented with each other in the manner defined by their parent LinearLayout .
Now open HelloLinearLayout.cs and be sure it loads the Resources/Layout/Main.axml layout in the OnCreate() method:
The SetContentView(int) ) method loads the layout file for the Activity , specified by the resource ID – Resources.Layout.Main refers to the Resources/Layout/Main.axml layout file.
Run the application. You should see the following:

Notice how the XML attributes define each View’s behavior. Try experimenting with different values for android:layout_weight to see how the screen real estate is distributed based on the weight of each element. See the Common Layout Objects document for more about how LinearLayout handles the android:layout_weight attribute.
References
Portions of this page are modifications based on work created and shared by the Android Open Source Project and used according to terms described in the Creative Commons 2.5 Attribution License.
Источник


