- Changes to the Android SDK Tooling
- Changes to Android SDK Tooling
- UI Tools
- CLI Tools
- sdkmanager
- avdmanager
- Downgrading
- Using the old GUI
- Xamarin
- Xamarin SDK
- JetBrains Xamarin SDK
- Before you start
- Create and open Xamarin projects
- Xcode integration on macOS
- How it works under the hood
- When you create a new Xamarin macios project
- When you made changes in Xcode and then switch to Rider
- Run and debug Xamarin applications
- Debug a Xamarin project, which was not created with JetBrains Rider
- Webinar recording: Better Xamarin Development with Rider for Mac
- Install and setup Xamarin.Android
- Windows Installation
- Mac Installation
- Android SDK Setup
- Android Emulator Setup
- Android Device Setup
- Microsoft Mobile OpenJDK Preview
Changes to the Android SDK Tooling
Changes to how the Android SDK manages the installed API levels and AVDs.
Changes to Android SDK Tooling
In recent versions of the SDK Tools for Android, Google has removed the existing AVD and SDK managers in favor of new CLI (Command Line Interface) tooling. The android program has been removed and the Google GUI (Graphical User Interface) managers in Visual Studio for Mac and older versions of Visual Studio Tools for Xamarin will no longer work past version 25.2.5 of Android SDK Tools. For example, attempting to use the android program via the command line will result in an error message like the following:
The following sections explain how to manage the Android SDK and Android Virtual Devices using Android SDK 25.3.0 and later.
UI Tools
Visual Studio and Visual Studio for Mac now provide Xamarin replacements for the discontinued Google GUI-based managers:
To download Android SDK tools, platforms, and other components that you need for developing Xamarin.Android apps, use the Xamarin Android SDK Manager instead of the legacy Google SDK Manager.
To create and configure Android Virtual Devices, use the Android Device Manager instead of the legacy Google Emulator Manager.
These tools are functionally equivalent to the Google GUI-based managers they replace.
CLI Tools
Alternately, you can use CLI tools to manage and update your emulators and Android SDK. The following programs now make up the command line interface for the Android SDK tools:
sdkmanager
Added In: Android SDK Tools 25.2.3 (November, 2016) and higher.
There is a new program called sdkmanager in the tools/bin folder of your Android SDK. This tool is used to maintain the Android SDK at the command line. For more information about using this tool, see sdkmanager.
avdmanager
Added In: Android SDK Tools 25.3.0 (March, 2017) and higher.
There is a new program called avdmanager in the tools/bin folder of your Android SDK. This tool is used to maintain the AVDs for the Android Emulator. For more information about using this tool, see avdmanager.
Downgrading
You can downgrade your Android SDK Tools version by installing a previous version of the Android SDK from the Android Developer website.
Using the old GUI
You can still use the original GUI by running the android program inside your tools folder as long as you are on Android SDK Tools version 25.2.5 or lower.
Источник
Xamarin
JetBrains Rider supports creating and working with Xamarin applications for both Android and iOS. Although currently JetBrains Rider does not provide a designer or a previewer for Xamarin forms, you can still benefit from code analysis, coding assistance, and debugging features in C#, VB.NET, and other languages, as well as from general IDE features, such as the integrated VCS client.
If other tools that Xamarin relies on (for example, Android SDK, Android Emulator) are configured properly, you will be able to build and run your Xamarin application right from the JetBrains Rider IDE.
Xamarin SDK
To develop Xamarin Applications you need to have a Xamarin SDK on your machine. There are two different Xamarin SDKs — for iOS/Mac and for Android .
Xamarin SDK consists of two parts:
Assemblies with .NET types for the target platform. For example, a .NET type to represent the base OSX NSObject . Using these assemblies, IDE and compiler resolve and build user code.
Tools that transform .NET projects into native applications, which can be deployed and executed on the emulator or a physical device. For example, using these tools .apk packages for Android are built.
JetBrains Xamarin SDK
JetBrains Rider can use different Xamarin SDKs, for example the one from Visual Studio. However, if you do not have Visual Studio on your machine, you can use JetBrains Xamarin SDK prepared and packed by the JetBrains Rider team.
JetBrains Xamarin SDK is a custom build of Xamarin GitHub sources with some improvements and additional code.
Currently JetBrains Xamarin SDK lacks some features compared to Visual Studio Xamarin SDK, but it is in the process of constant improvement.
JetBrains Xamarin SDK is available for Windows and macOS:
There are two JetBrains Xamarin SDK builds available on Windows targeting the following platforms:
Apple platform (iOS, Mac, tvOS, watchOS)
JetBrains Xamarin SDK for iOS development provides a limited feature set on Windows. For example, currently it does not support connecting to a remote Mac and perform full build/deploy.
JetBrains Xamarin SDK for Apple platforms on Windows ships as a .zip file (
60Mb) and installs into the JetBrains MsBuild directory:
JetBrains Xamarin SDK for Android development provides a solid feature set. However, fast deployment is currently not supported.
JetBrains Xamarin SDK for Android platforms on Windows ships as a .zip file (
700Mb) and installs into the JetBrains MsBuild directory:
There are two JetBrains Xamarin SDK builds available on macOS targeting the following platforms:
Apple platform (iOS, Mac, tvOS, watchOS)
On macOS, JetBrains Xamarin SDK for Apple platforms provides almost the same feature set as Visual Studio SDK, all known scenarios are supported.
JetBrains Xamarin SDK for iOS development on macOS ships as a .dmg file (
700Mb) and installs into:
JetBrains Xamarin SDK for Android development provides a solid feature set. However, fast deployment is currently not supported.
JetBrains Xamarin SDK for Android development on macOS ships as a .dmg file (
700Mb) and installs into:
Before you start
Xamarin aims to be executed on a variety of different platforms and therefore Xamarin development relies on several different tools for building and running your applications.
On Windows, you can develop Xamarin applications for any platform, but local build and run/debug is limited to Android devices and emulators.
If you use Visual Studio Xamarin SDK, you will be able to build and run your application on iOS and macOS. To do so, configure a Mac agent accessible on the network, and then connect to it ( Tools | iOS | Xamarin Mac Agent ).
Install a Xamarin SDK for iOS on your machine in one of the following ways.
Install Xamarin in Visual Studio. Note that you can use Visual Studio Community, which is free. If you already have Visual Studio installed, you have to add Xamarin support to it.
Start installation of Xamarin iOS & Mac on the Environment page of JetBrains Rider settings Ctrl+Alt+S and follow the installation wizard. This way JetBrains Rider will automatically download and install JetBrains Xamarin SDK for iOS & Mac.
Alternatively you can clone the Xamarin open-source repo from GitHub, build it and install on the machine. This way is quite complicated and we do not recommend it.
Install Android development tools in one of the following ways:
Start installation of Xamarin Android on the Environment page of JetBrains Rider settings Ctrl+Alt+S and follow the installation wizard. This way JetBrains Rider will automatically download and install JetBrains Xamarin SDK for Android.
Alternatively, all components that are automatically installed on the the Environment page of JetBrains Rider settings Ctrl+Alt+S , could be also installed manually:
Rider Xamarin Android Support plugin. It has all necessary features, like Android SDK manager.
Android SDK developed and provided by Google. You can install it from Visual Studio, Android Studio, Rider (with Rider Xamarin Android Support plugin), or downloaded as a set of command line tools.
On macOS, you can develop, build and run fully cross-platform Xamarin applications.
Install a Xamarin SDK on your machine in one of the following ways.
Start installation of Xamarin iOS & Mac on the Environment page of JetBrains Rider settings Ctrl+Alt+S and follow the installation wizard. This way JetBrains Rider will automatically download and install JetBrains Xamarin SDK for iOS & Mac.
Alternatively you can clone the Xamarin open-source repo from GitHub, build it and install on the machine. This way is quite complicated and we do not recommend it.
For iOS and Mac development, install Xcode. You will need an Apple ID for installing and signing into Xcode. If you do not already have it, you can create a new one at https://appleid.apple.com.
JetBrains Rider will detect Xcode automatically. If you have several Xcode versions, you can choose which one to use on the Build, Execution, Deployment | iOS page of JetBrains Rider settings Ctrl+Alt+S .
Install Android development tools in one of the following ways:
Start installation of Xamarin Android on the Environment page of JetBrains Rider settings Ctrl+Alt+S and follow the installation wizard. This way JetBrains Rider will automatically download and install JetBrains Xamarin SDK for Android.
Alternatively, all components that are automatically installed on the the Environment page of JetBrains Rider settings Ctrl+Alt+S , could be also installed manually:
Rider Xamarin Android Support plugin. It has all necessary features, like Android SDK manager.
Android SDK developed and provided by Google. You can install it from Visual Studio, Android Studio, Rider (with Rider Xamarin Android Support plugin), or downloaded as a set of command line tools.
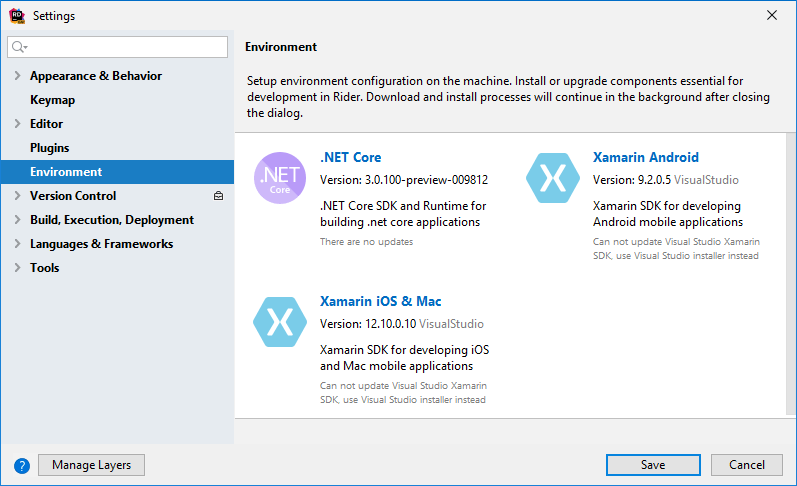
You can check the status of Xamarin tools and install or update them on the Environment page of JetBrains Rider settings Ctrl+Alt+S :
Create and open Xamarin projects
JetBrains Rider supports creating new and working with existing projects. Project templates are available, too.
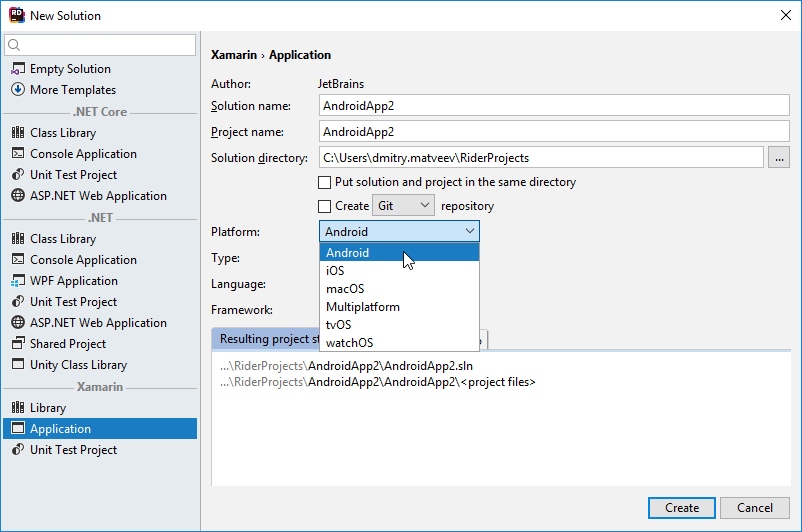
You can create a new Xamarin project in a new solution using File | New. or add a new Xamarin project to the existing solution by right-clicking the solution or solution folder node in the Solution Explorer, and choosing Add | New Project .
Xcode integration on macOS
When developing Xamarin applications on macOS, it is recommended to edit resource files and connect resources to code using Xcode.
You can use context menus of .storyboard , .xib , .plist files or of the Xamarin macios project node to open them in Xcode.
If the file or project has never been opened in Xcode before, JetBrains Rider will generate an Xcode project as follows:
xcodeproj project specifications (a project descriptor similar to csproj but for Xcode) is generated
Source files for all user types inherited NSObject (forms, delegates, views, controls, and so on) in Objective C are generated
All resources (images, designer files) are copied
When the project structure is ready, Xcode will start automatically and you can use it to edit resources. Every time Rider receives focus, it looks for changes (edits in existing files, new files, removed files) and integrates these changes into the Xamarin .NET project. It modifies .designer.cs parts of user types (inherited from NSObject ) and copies back all changed resources.
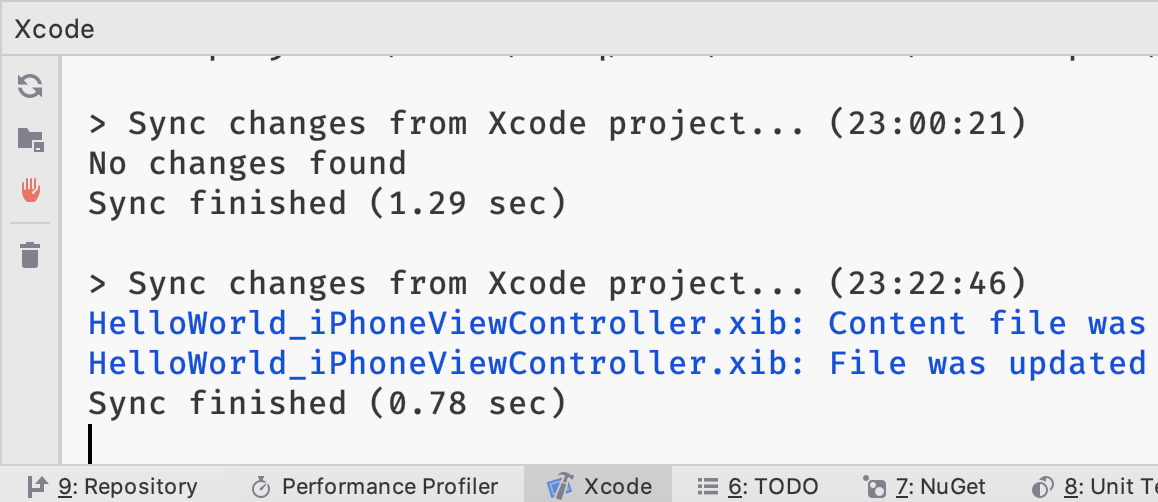
All Xcode-related events are printed in the Xcode console tool window, which appears when you open resources or projects in Xcode:
How it works under the hood
When you create a new Xamarin macios project
JetBrains Rider creates the corresponding xcodeproj project ( pbxproj and other necessary files) project in the obj\xcode subdirectory with all required settings and configurations.
Copies of all content files (views, plist files, images, and so on) are created in that directory.
For each ViewController type JetBrains Rider generates an objc class with actions and outlets.
The generated project is opened automatically in Xcode.
When you made changes in Xcode and then switch to Rider
All modified content files are copied back into .NET project.
Settings are updated.
objc files are parsed and *.designer.cs files are regenerated for view controllers. For all these files you will see a generated header:
Run and debug Xamarin applications
When you create or open a Xamarin project, JetBrains Rider automatically creates run/debug configurations for each Xamarin project in the solution.
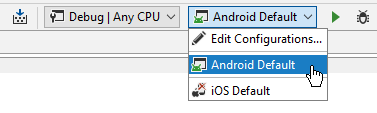
If you want to adjust something in the way your application starts and executes, you can edit and create new run/debug configurations. When you start a Xamarin application from the IDE, you can use the corresponding selector on the navigation bar to choose which configuration should be used:
Debug a Xamarin project, which was not created with JetBrains Rider
Press Ctrl+Alt+S to open the IDE settings and select Environment .
Enable Xamarin Android and Xamarin iOS & Mac support.
If you are on Windows and have Xamarin SDK installed via Visual Studio, it will be detected automatically. Otherwise, JetBrains Rider will suggest installing JetBrains Xamarin SDK.
JetBrains Xamarin SDK cannot be installed alongside with Visual Studio Xamarin SDK.
Once Xamarin SDK is installed, you can create Xamarin-specific run/debug configurations.
Open the Run/Debug Configuration dialog in one of the following ways:
Select Run | Edit Configurations from the main menu.
With the Navigation bar visible ( View | Appearance | Navigation Bar ), choose Edit Configurations from the run/debug configuration selector.
Press Alt+Shift+F10 and then press 0 .
In the Run/Debug Configuration dialog that opens, press Alt+Insert or click , then choose Xamarin.Android , Xamarin.iOS , or Xamarin.Mac from the list.
Specify the target project and other parameters if necessary, then click OK .
Use the newly created configuration to run and debug your Xamarin project.
Webinar recording: Better Xamarin Development with Rider for Mac
You can also watch this webinar recording where Dylan Berry explores the various ways Rider can help you improve your coding speed and quality when developing Xamarin apps.
Источник
Install and setup Xamarin.Android
The topics in this section explain how to install and configure Xamarin.Android to work with Visual Studio on Windows and macOS, how to use the Android SDK Manager to download and install Android SDK tools and components that are required for building and testing your app, how to configure the Android emulator for debugging, and how to connect a physical Android device to your development computer for debugging and final testing your app.
Windows Installation
This guide walks you through the installation steps and configuration details required to install Xamarin.Android on Windows. By the end of this article, you will have a working Xamarin.Android installation integrated into Visual Studio, and you’ll be ready to start building your first Xamarin.Android application.
Mac Installation
This article walks you through the installation steps and configuration details required to install Xamarin.Android on a Mac. By the end of this article, you will have a working Xamarin.Android installation integrated into Visual Studio for Mac, and you’ll be ready to start building your first Xamarin.Android application.
Android SDK Setup
Visual Studio includes an Android SDK Manager that replaces Google’s standalone Android SDK Manager. This article explains how to use the SDK Manager to download Android SDK tools, platforms, and other components that you need for developing Xamarin.Android apps.
Android Emulator Setup
These articles explain how to setup the Android Emulator for testing and debugging Xamarin.Android applications.
Android Device Setup
This article explains how to setup a physical Android device and connect it to a development computer so that the device may be used to run and debug Xamarin.Android applications.
Microsoft Mobile OpenJDK Preview
This guide describes the steps for switching to the preview release of Microsoft’s distribution of the OpenJDK. This distribution of the OpenJDK is intended for mobile development.
Источник


