- Set Up Device for Development
- Enable Debugging on the Device
- Android 9.0+
- Android 8.0 and Android 8.1
- Android 7.1 and lower
- Verify that USB debugging is enabled
- Android 9.0+
- Android 8.0 and Android 8.1
- Android 7.1 and lower
- Connect the device to the computer
- Alternate connection via Wifi
- Connecting over WiFi
- Troubleshooting
- Install USB Drivers
- Download the USB Drivers
- Installing the USB Driver
- Summary
- Managing Virtual Devices with the Android Device Manager
- Android Device Manager on Windows
- Requirements
- Launching the Device Manager
- Main Screen
- New Device
- Edit Device
- Additional Options
- Android Device Manager on macOS
- Requirements
- Launching the Device Manager
- Main Screen
- New Device
- Edit Device
- Additional Options
- Troubleshooting
- Android SDK in Non-Standard Location
- Wrong Version of Android SDK Tools
- Snapshot disables WiFi on Android Oreo
- Wrong Version of Android SDK Tools
- Snapshot disables WiFi on Android Oreo
- Generating a Bug Report
- Summary
- Related Links
- Related Video
Set Up Device for Development
This article explains how to setup an Android device and connect it to a computer so that the device may be used to run and debug Xamarin.Android applications.
After testing on an Android emulator, you will want to see and test your apps running on an Android device. You will need to enable debugging and connect the device to the computer.
Each of these steps will be covered in more detail in the sections below.
Enable Debugging on the Device
A device must be enabled for debugging in order to test an Android application. Developer options on Android have been hidden by default since version 4.2, and enabling them can vary based on the Android version.
Android 9.0+
For Android 9.0 and higher, debugging is enabled by following these steps:
- Go to the Settings screen.
- Select About Phone .
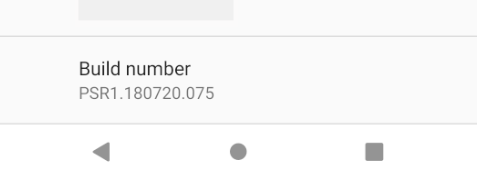
- Tap Build Number 7 times until You are now a developer! is visible.
Android 8.0 and Android 8.1
- Go to the Settings screen.
- Select System.
- Select About Phone
- Tap Build Number 7 times until You are now a developer! is visible.
Android 7.1 and lower
- Go to the Settings screen.
- Select About Phone.
- Tap Build Number 7 times until You are now a developer! is visible.
Verify that USB debugging is enabled
After enabling developer mode on your device, you must ensure that USB debugging is enabled on the device. This also varies based on the Android version.
Android 9.0+
Navigate to Settings > System > Advanced > Developer Options and enable USB Debugging.
Android 8.0 and Android 8.1
Navigate to Settings > System > Developer Options and enable USB Debugging.
Android 7.1 and lower
Navigate to Settings > Developer Options and enable USB Debugging.
Once the Developer Options tab is available under Settings > System, open it to reveal developer settings:
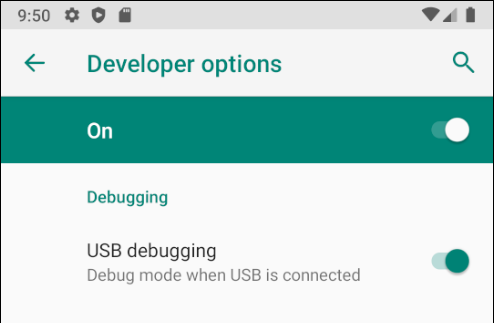
This is the place to enable developer options such as USB debugging and stay awake mode.
Connect the device to the computer
The final step is to connect the device to the computer. The easiest and most reliable way is to do so over USB.
You will receive a prompt to trust the computer on your device if you have not used it for debugging before. You can also check Always allow from this computer to prevent requiring this prompt each time you connect the device.

Alternate connection via Wifi
It is possible to connect an Android device to a computer without using a USB cable, over WiFi. This technique requires more effort but could be useful when the device is too far from the computer to remain constantly plugged-in via cable.
Connecting over WiFi
By default, the Android Debug Bridge (ADB) is configured to communicate with an Android device via USB. It is possible to reconfigure it to use TCP/IP instead of USB. To do this, both the device and the computer must be on the same WiFi network. To setup your environment to debug over WiFi complete the following steps from the command line:
Determine the IP address of your Android device. One way to find out the IP address is to look under Settings > Network & internet > Wi-Fi, then tap on the WiFi network that the device is connected to, and then tap on Advanced. This will open a dropdown showing information about the network connection, similar to what is seen in the screenshot below:
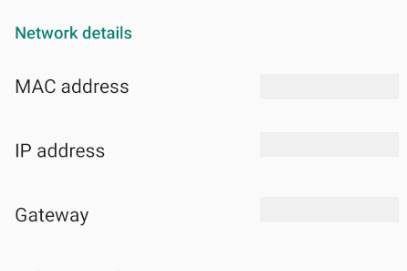
On some versions of Android the IP address won’t be listed there but can be found instead under Settings > About phone > Status.
Connect your Android device to your computer via USB.
Next, restart ADB so that it using TCP on port 5555. From a command prompt, type the following command:
After this command is issued, your computer will not be able to listen to devices that are connected via USB.
Disconnect the USB cable connecting your device to your computer.
Configure ADB so that it will connect to your Android device on the port that was specified in step 1 above:
Once this command finishes the Android device is connected to the computer via WiFi.
When you’re finished debugging via WiFi, it’s possible to reset ADB back to USB mode with the following command:
It’s possible to request ADB to list the devices that are connected to the computer. Regardless of how the devices are connected, you can issue the following command at the command prompt to see what is connected:
Troubleshooting
In some cases you might find that your device cannot connect to the computer. In this case you may want to verify that USB drivers are installed.
Install USB Drivers
This step is not necessary for macOS; just connect the device to the Mac with a USB cable.
It may be necessary to install some extra drivers before a Windows computer will recognize an Android device connected by USB.
These are the steps to set up a Google Nexus device and are provided as a reference. Steps for your specific device may vary, but will follow a similar pattern. Search the internet for your device if you have trouble.
Run the android.bat application in the [Android SDK install path]\tools directory. By default, the Xamarin.Android installer will put the Android SDK in following location on a Windows computer:
Download the USB Drivers
Google Nexus devices (with the exception of the Galaxy Nexus) require the Google USB Driver. The driver for the Galaxy Nexus is distributed by Samsung. All other Android devices should use the USB driver from their respective manufacturer.
Install the Google USB Driver package by starting the Android SDK Manager, and expanding the Extras folder, as can be seen in the follow screenshot:
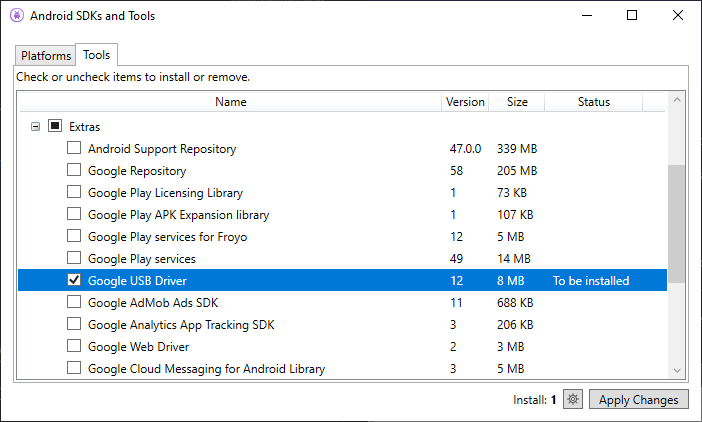
Check the Google USB Driver box, and click the Apply Changes button. The driver files are downloaded to the following location:
[Android SDK install path]\extras\google\usb\_driver
The default path for a Xamarin.Android installation is:
Installing the USB Driver
After the USB drivers are downloaded, it is necessary to install them. To install the drivers on Windows 7:
Connect your device to the computer with a USB cable.
Right-click on the Computer from your desktop or Windows Explorer, and select Manage .
Select Devices in the left pane.
Locate and expand Other Devices in the right pane.
Right-click the device name and select Update Driver Software . This will launch the Hardware Update Wizard.
Select Browse my computer for driver software and click Next .
Click Browse and locate the USB driver folder (the Google USB driver is located in [Android SDK install path]\extras\google\usb_driver).
Click Next to install the driver.
Summary
This article discussed how to configure an Android device for development by enabling debugging on the device. It also covered how to connect the device to a computer using either USB or WiFi.
Источник
Managing Virtual Devices with the Android Device Manager
This article explains how to use the Android Device Manager to create and configure Android Virtual Devices (AVDs) that emulate physical Android devices. You can use these virtual devices to run and test your app without having to rely on a physical device.
After you have verified that hardware acceleration is enabled (as described in Hardware Acceleration for Emulator Performance), the next step is to use the Android Device Manager (also referred to as the Xamarin Android Device Manager) to create virtual devices that you can use to test and debug your app.
Android Device Manager on Windows
This article explains how to use the Android Device Manager to create, duplicate, customize, and launch Android virtual devices.
You use the Android Device Manager to create and configure Android Virtual Devices (AVDs) that run in the Android Emulator. Each AVD is an emulator configuration that simulates a physical Android device. This makes it possible to run and test your app in a variety of configurations that simulate different physical Android devices.
Requirements
To use the Android Device Manager, you will need the following items:
Visual Studio 2019 Community, Professional, or Enterprise.
OR Visual Studio 2017 version 15.8 or later is required. Visual Studio Community, Professional, and Enterprise editions are supported.
Visual Studio Tools for Xamarin version 4.9 or later.
The Android SDK must be installed (see Setting up the Android SDK for Xamarin.Android). Be sure to install the Android SDK at its default location if it is not already installed: C:\Program Files (x86)\Android\android-sdk.
The following packages must be installed (via the Android SDK Manager):
- Android SDK Tools version 26.1.1 or later
- Android SDK Platform-Tools 27.0.1 or later
- Android SDK Build-Tools 27.0.3 or later
- Android Emulator 27.2.7 or later.
These packages should be displayed with Installed status as seen in the following screenshot:

Launching the Device Manager
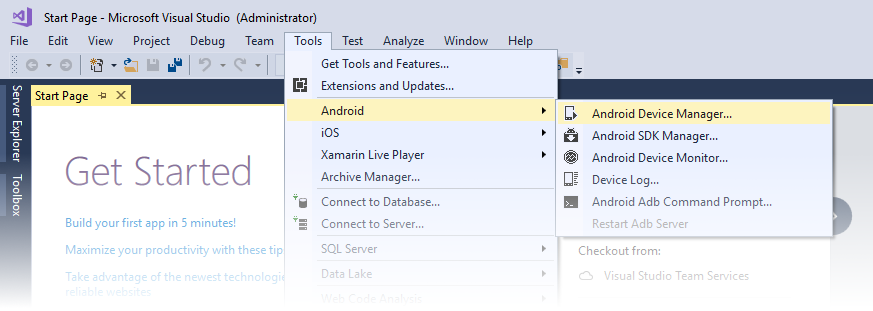
Launch the Android Device Manager from the Tools menu by clicking Tools > Android > Android Device Manager:
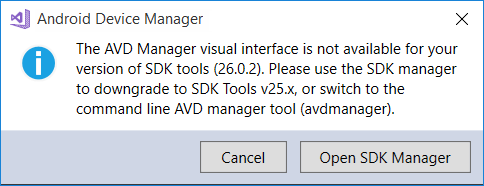
If the following error dialog is presented on launch, see the Troubleshooting section for workaround instructions:
Main Screen
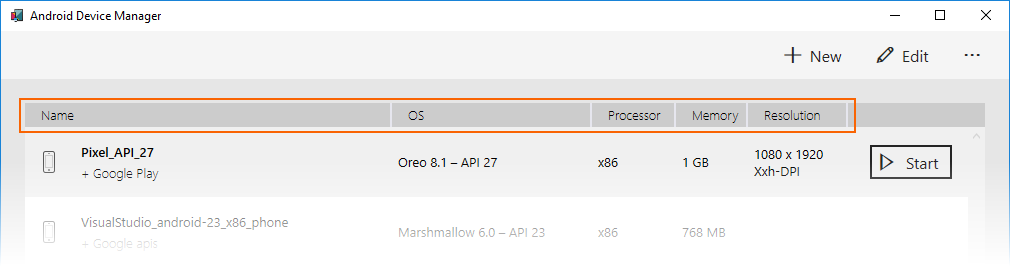
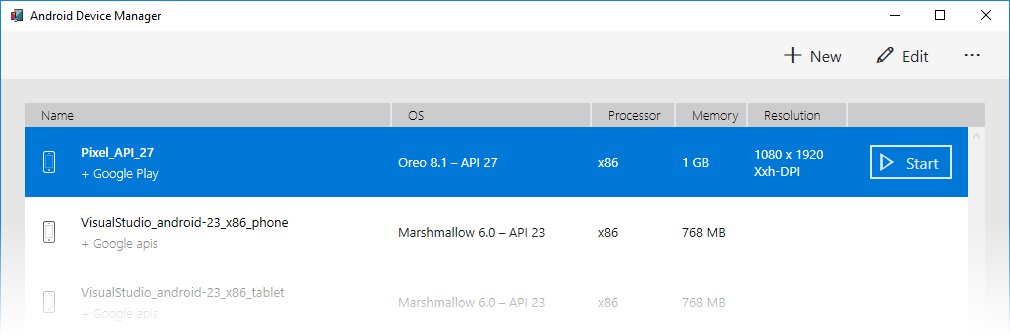
When you first launch the Android Device Manager, it presents a screen that displays all currently-configured virtual devices. For each virtual device, the Name, OS (Android Version), Processor, Memory size, and screen Resolution are displayed:
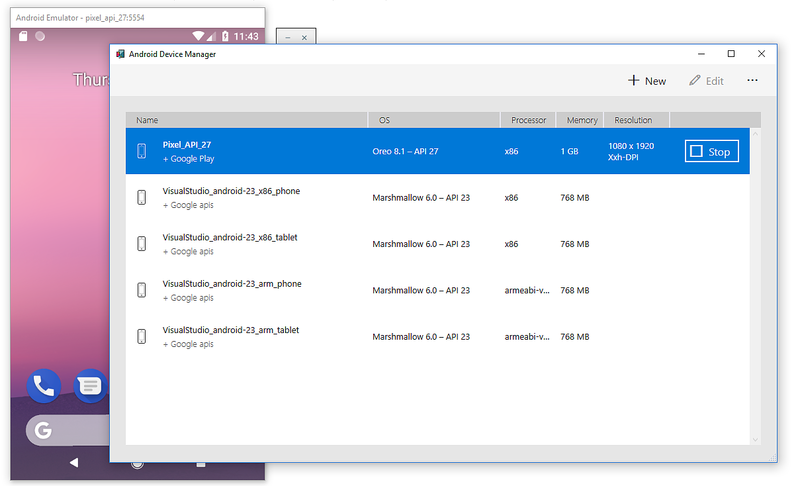
When you select a device in the list, the Start button appears on the right. You can click the Start button to launch the emulator with this virtual device:
After the emulator starts with the selected virtual device, the Start button changes to a Stop button that you can use to halt the emulator:
New Device
To create a new device, click the New button (located in the upper right-hand area of the screen):
Clicking New launches the New Device screen:
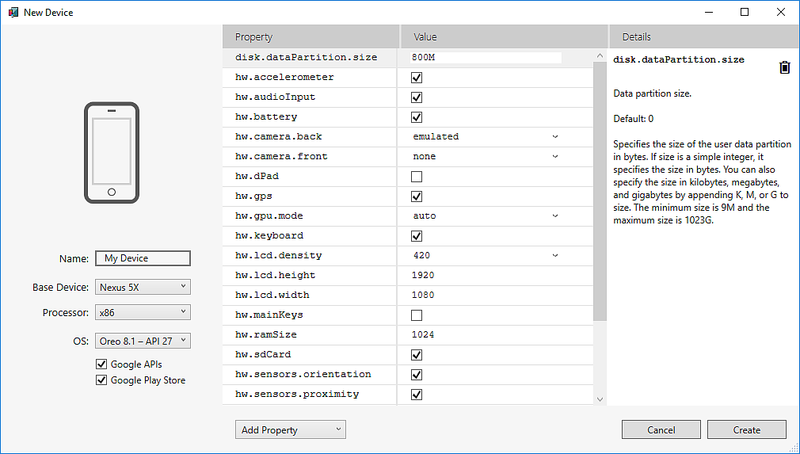
To configure a new device in the New Device screen, use the following steps:
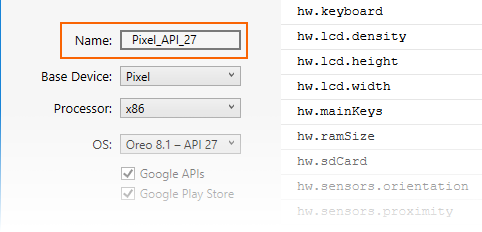
Give the device a new name. In the following example, the new device is named Pixel_API_27:
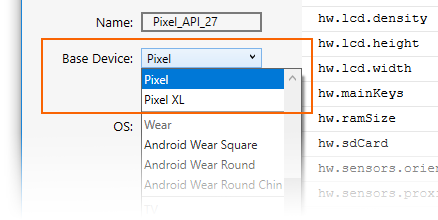
Select a physical device to emulate by clicking the Base Device pull-down menu:
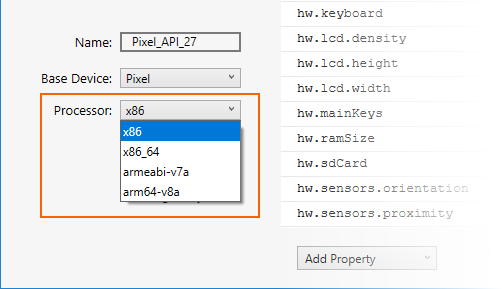
Select a processor type for this virtual device by clicking the Processor pull-down menu. Selecting x86 will provide the best performance because it enables the emulator to take advantage of hardware acceleration. The x86_64 option will also make use of hardware acceleration, but it runs slightly slower than x86 (x86_64 is normally used for testing 64-bit apps):
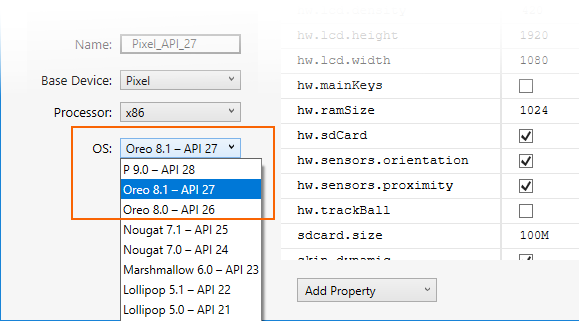
Select the Android version (API level) by clicking the OS pull-down menu. For example, select Oreo 8.1 — API 27 to create a virtual device for API level 27:
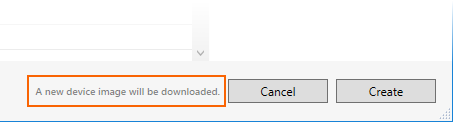
If you select an Android API level that has not yet been installed, the Device Manager will display A new device will be downloaded message at the bottom of the screen – it will download and install the necessary files as it creates the new virtual device:
If you want to include Google Play Services APIs in your virtual device, enable the Google APIs option. To include the Google Play Store app, enable the Google Play Store option:
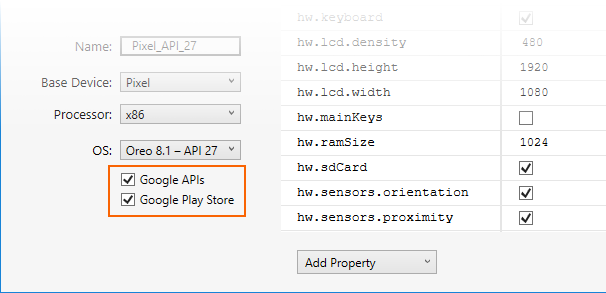
Note that Google Play Store images are available only for some base device types such as Pixel, Pixel 2, Nexus 5, and Nexus 5X.
Edit any properties that you need to modify. To make changes to properties, see Editing Android Virtual Device Properties.
Add any additional properties that you need to explicitly set. The New Device screen lists only the most commonly-modified properties, but you can click the Add Property pull-down menu (at the bottom) to add additional properties:
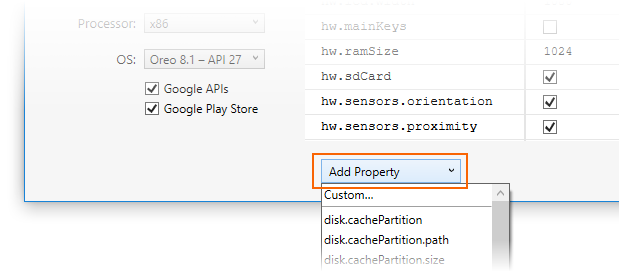
You can also define a custom property by selecting Custom. at the top of the property list.
Click the Create button (lower right-hand corner) to create the new device:
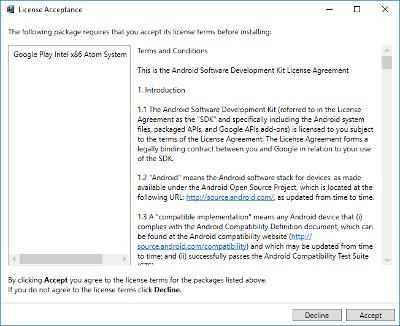
You might get a License Acceptance screen. Click Accept if you agree to the license terms:
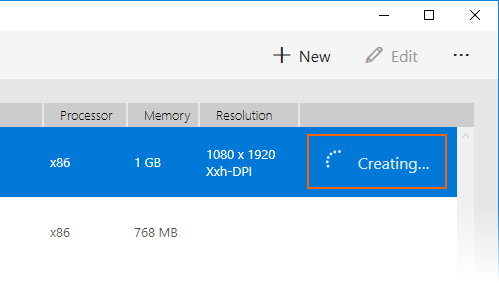
The Android Device Manager adds the new device to the list of installed virtual devices while displaying a Creating progress indicator during device creation:
When the creation process is complete, the new device is shown in the list of installed virtual devices with a Start button, ready to launch:
Edit Device
To edit an existing virtual device, select the device and click the Edit button (located in the upper right-hand corner of the screen):
Clicking Edit launches the Device Editor for the selected virtual device:
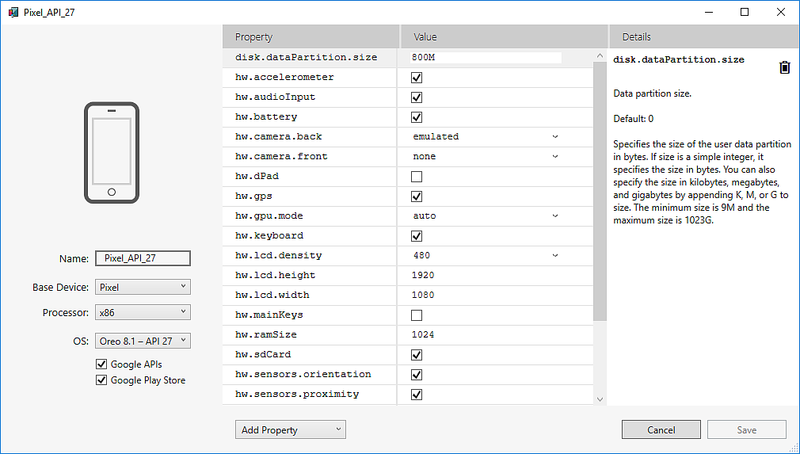
The Device Editor screen lists the properties of the virtual device under the Property column, with the corresponding values of each property in the Value column. When you select a property, a detailed description of that property is displayed on the right.
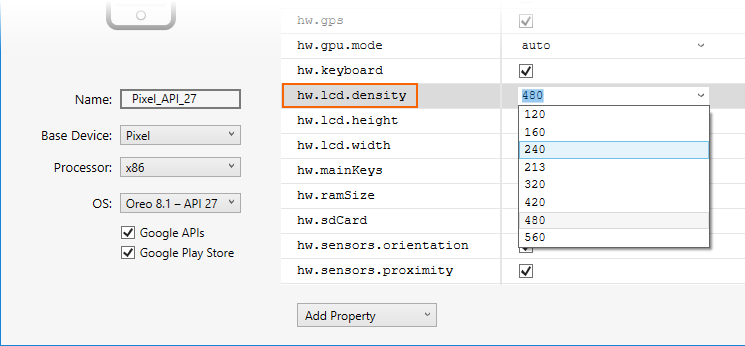
To change a property, edit its value in the Value column. For example, in the following screenshot the hw.lcd.density property is being changed from 480 to 240:
After you have made the necessary configuration changes, click the Save button. For more information about changing virtual device properties, see Editing Android Virtual Device Properties.
Additional Options
Additional options for working with devices are available from the Additional Options (…) pull-down menu in the upper right-hand corner:

The additional options menu contains the following items:
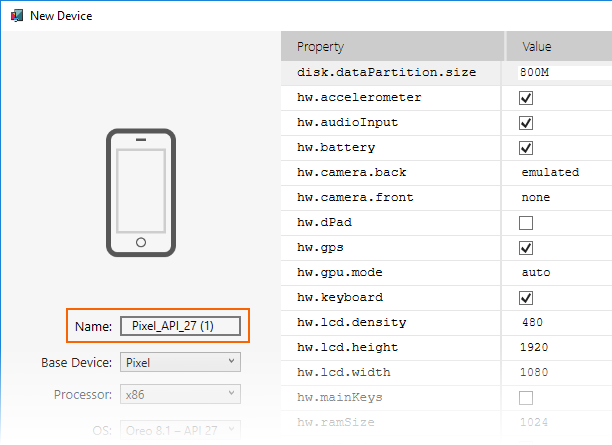
Duplicate and Edit – Duplicates the currently-selected device and opens it in the New Device screen with a different unique name. For example, selecting Pixel_API_27 and clicking Duplicate and Edit appends a counter to the name:
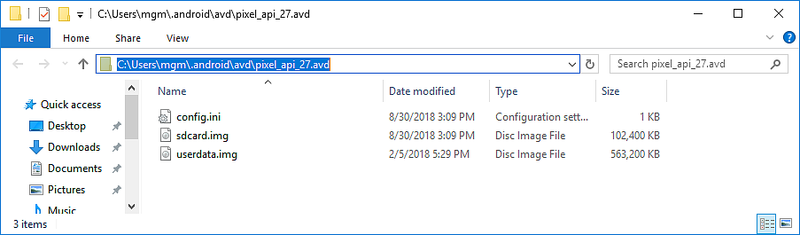
Reveal in Explorer – Opens a Windows Explorer window in the folder that holds the files for the virtual device. For example, selecting Pixel_API_27 and clicking Reveal in Explorer opens a window like the following example:
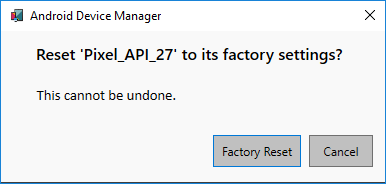
Factory Reset – Resets the selected device to its default settings, erasing any user changes made to the internal state of the device while it was running (this also erases the current Quick Boot snapshot, if any). This change does not alter modifications that you make to the virtual device during creation and editing. A dialog box will appear with the reminder that this reset cannot be undone. Click Factory Reset to confirm the reset:
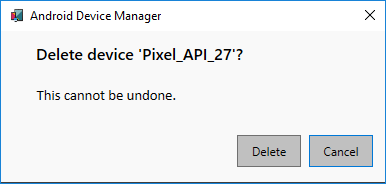
Delete – Permanently deletes the selected virtual device. A dialog box will appear with the reminder that deleting a device cannot be undone. Click Delete if you are certain that you want to delete the device.
If you are using a Mac with an Apple chip, such as the M1, you will need to install the Android Emulator for M1 preview from GitHub.
Android Device Manager on macOS
This article explains how to use the Android Device Manager to create, duplicate, customize, and launch Android virtual devices.

You use the Android Device Manager to create and configure Android Virtual Devices (AVDs) that run in the Android Emulator. Each AVD is an emulator configuration that simulates a physical Android device. This makes it possible to run and test your app in a variety of configurations that simulate different physical Android devices.
Requirements
To use the Android Device Manager, you will need the following items:
Visual Studio for Mac 7.6 or later.
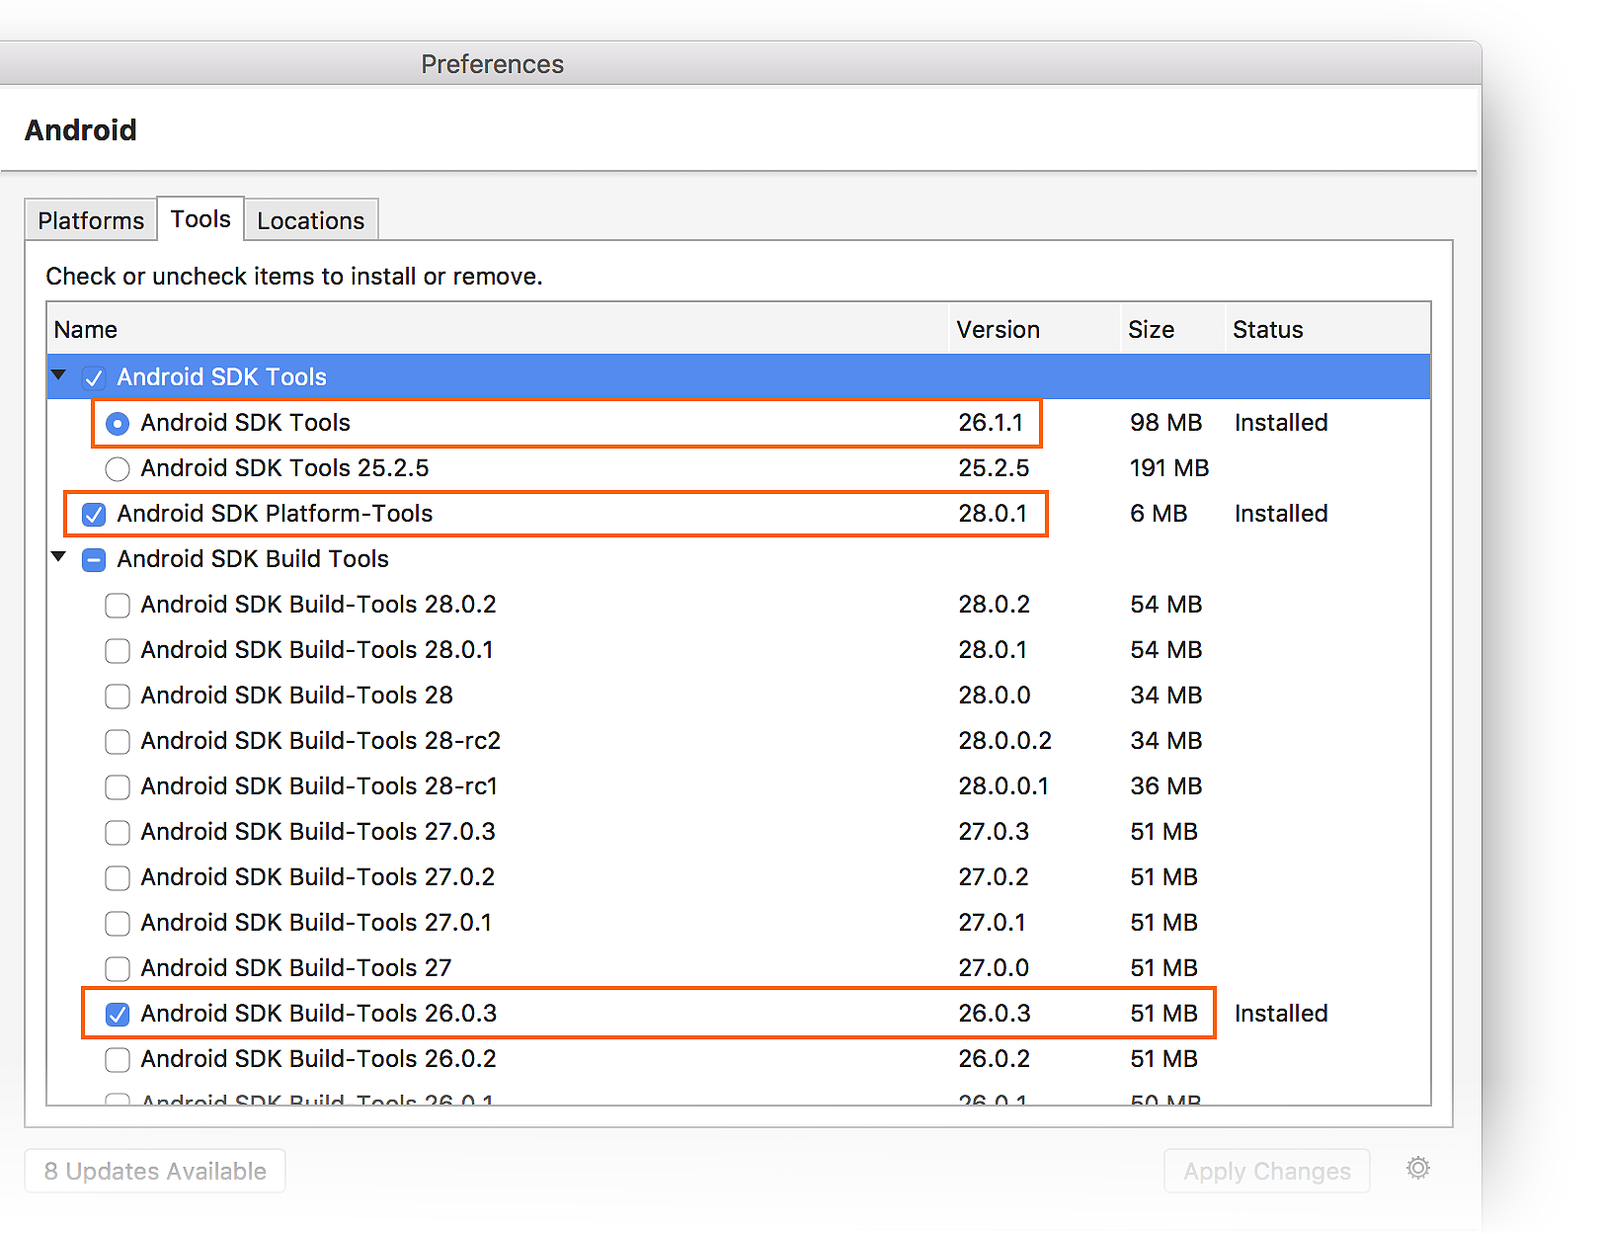
The following packages must be installed (via the Android SDK Manager):
- SDK tools version 26.1.1 or later
- Android SDK Platform-Tools 28.0.1 or later
- Android SDK Build-Tools 26.0.3 or later
These packages should be displayed with Installed status as seen in the following screenshot:
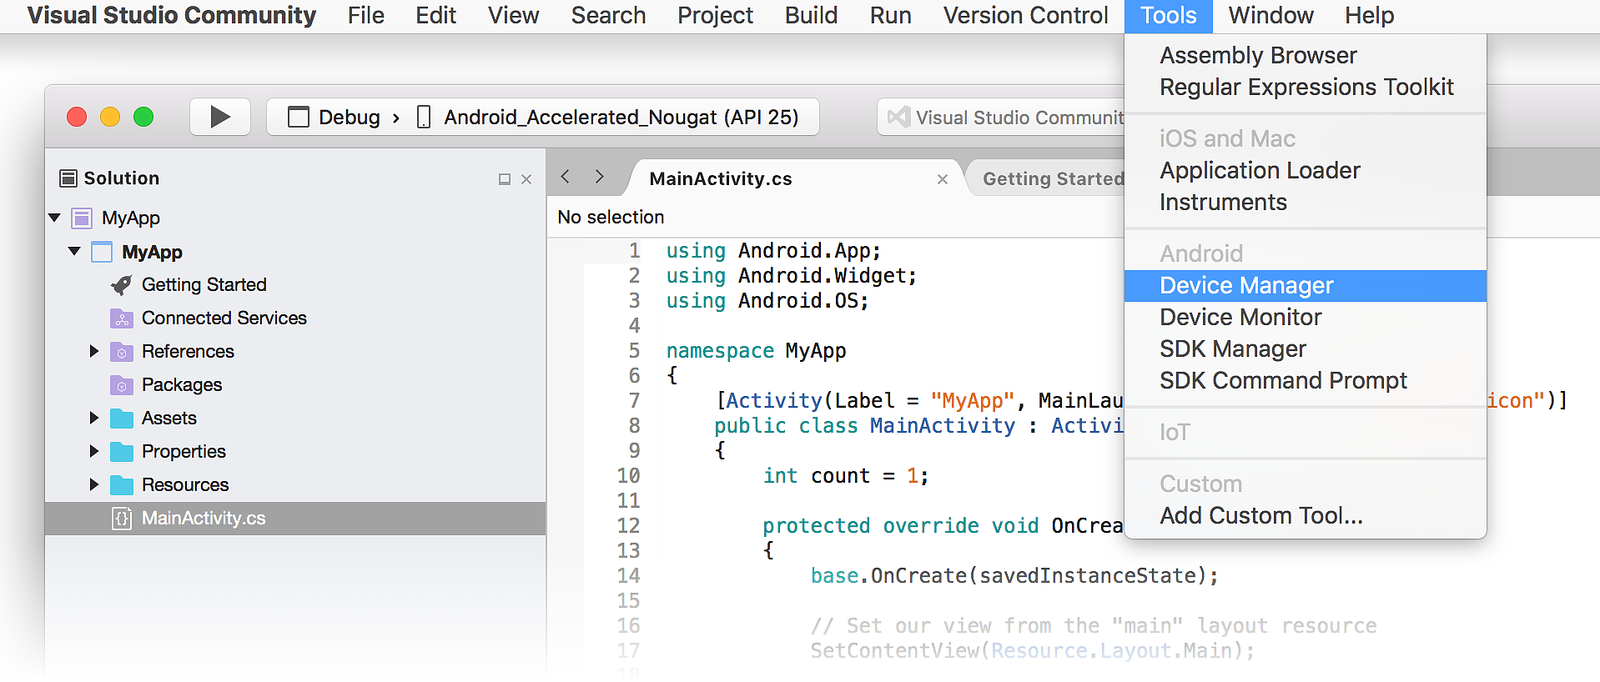
Launching the Device Manager
Launch the Android Device Manager by clicking Tools > Device Manager:
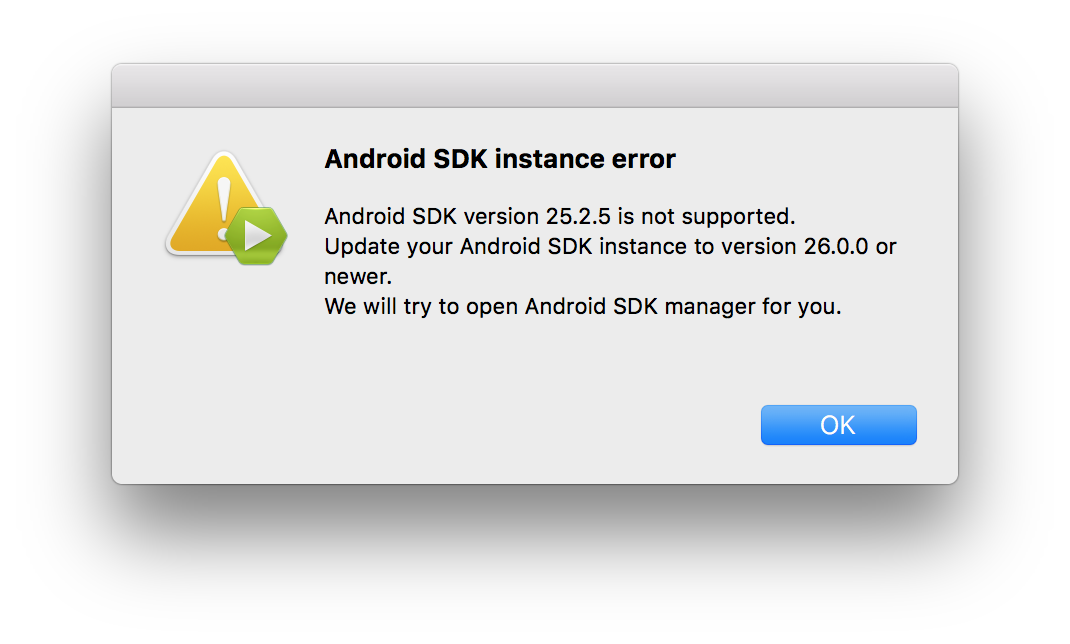
If the following error dialog is presented on launch, see the Troubleshooting section for workaround instructions:
Main Screen
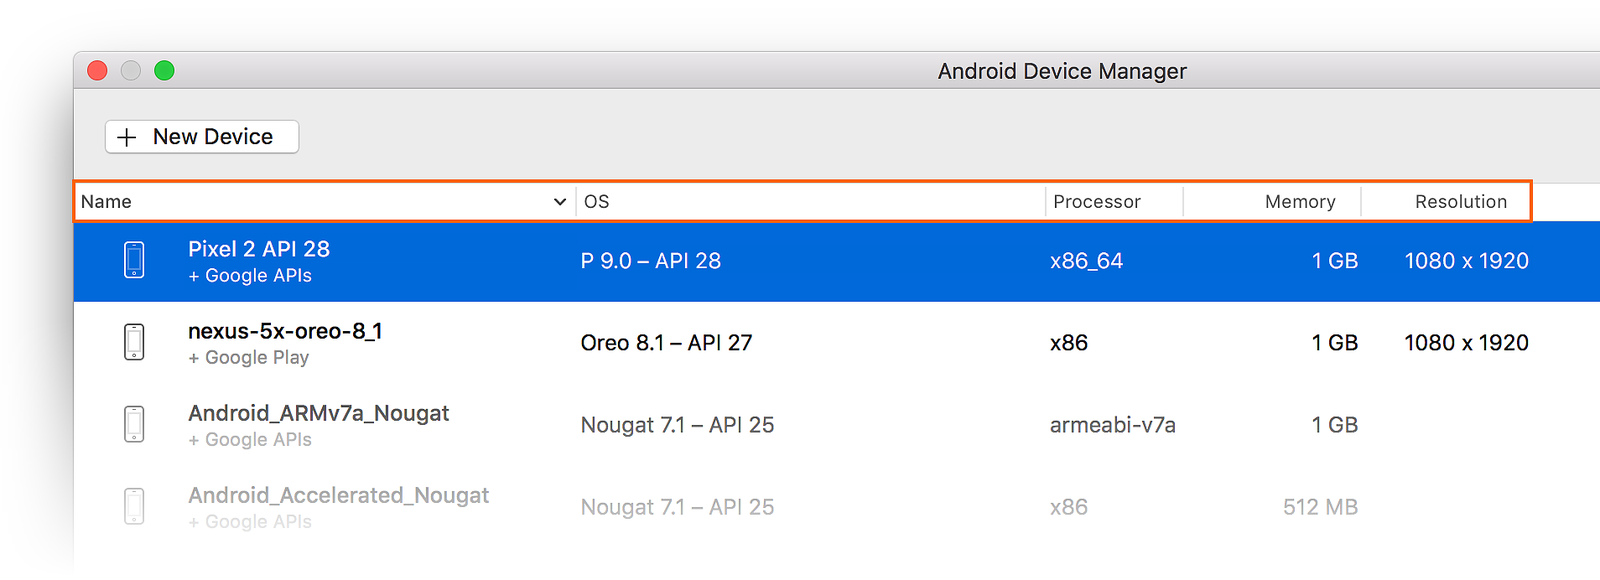
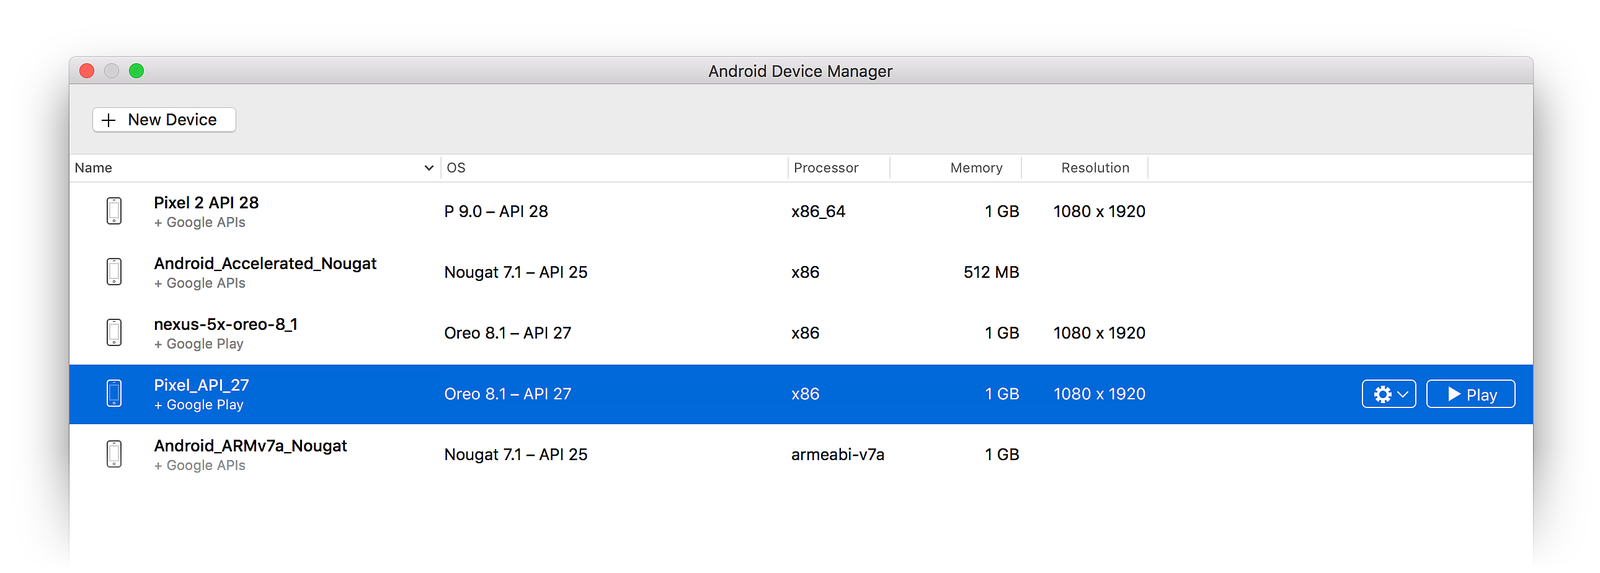
When you first launch the Android Device Manager, it presents a screen that displays all currently-configured virtual devices. For each virtual device, the Name, OS (Android Version), Processor, Memory size, and screen Resolution are displayed:
When you select a device in the list, the Play button appears on the right. You can click the Play button to launch the emulator with this virtual device:
After the emulator starts with the selected virtual device, the Play button changes to a Stop button that you can use to halt the emulator:
When you stop the emulator, you may get a prompt asking if you want to save the current state for the next quick boot:
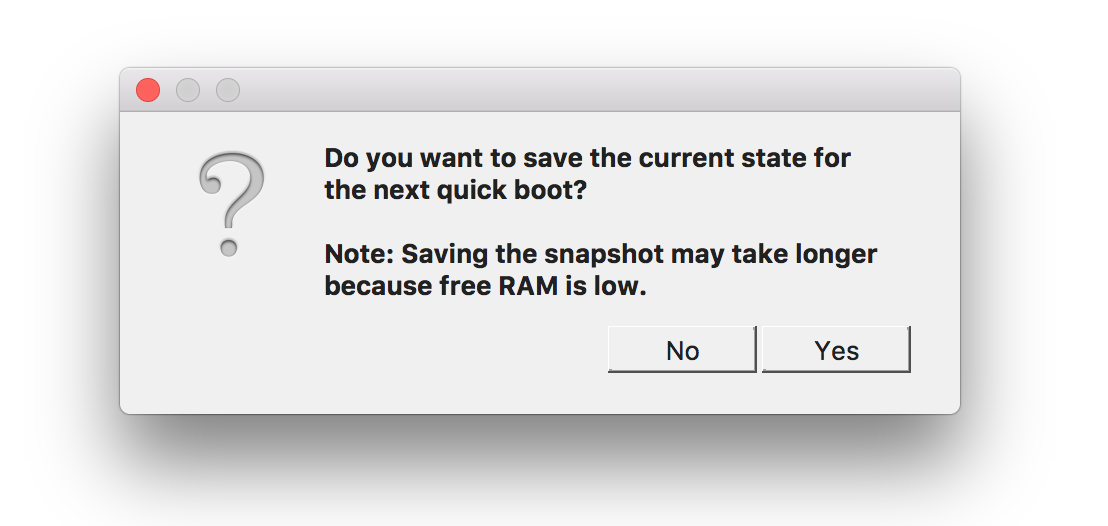
Saving the current state will make the emulator boot faster when this virtual device is launched again. For more information about Quick Boot, see Quick Boot.
New Device
To create a new device, click the New Device button (located in the upper left-hand area of the screen):
Clicking New Device launches the New Device screen:
Use the following steps to configure a new device in the New Device screen:
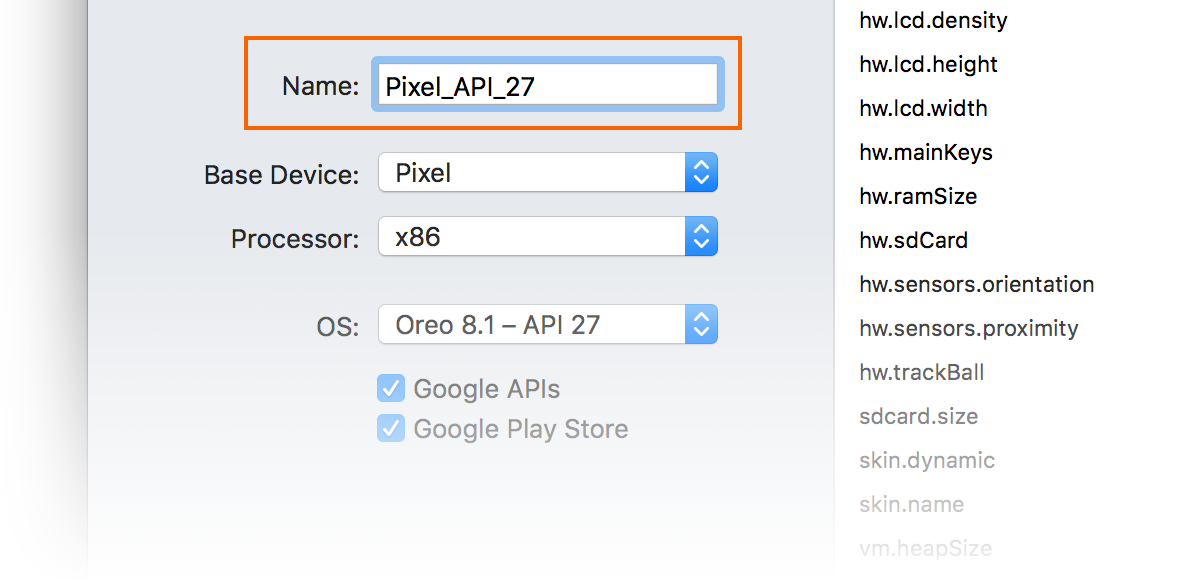
Give the device a new name. In the following example, the new device is named Pixel_API_27:
Select a physical device to emulate by clicking the Base Device pull-down menu:

Select a processor type for this virtual device by clicking the Processor pull-down menu. Selecting x86 will provide the best performance because it enables the emulator to take advantage of hardware acceleration. The x86_64 option will also make use of hardware acceleration, but it runs slightly slower than x86 (x86_64 is normally used for testing 64-bit apps):

Select the Android version (API level) by clicking the OS pull-down menu. For example, select Oreo 8.1 — API 27 to create a virtual device for API level 27:
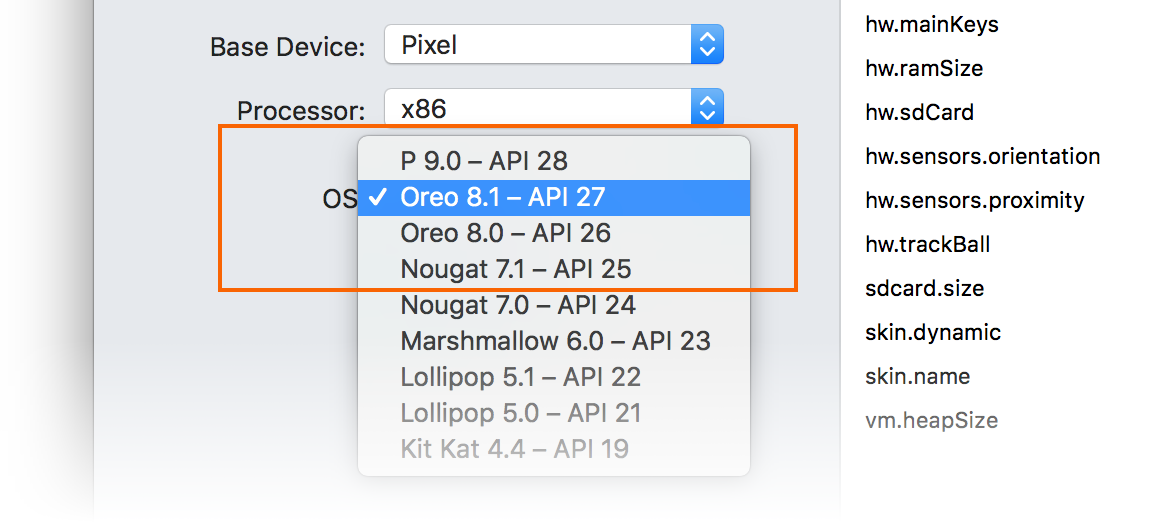
If you select an Android API level that has not yet been installed, the Device Manager will display A new device will be downloaded message at the bottom of the screen – it will download and install the necessary files as it creates the new virtual device:

If you want to include Google Play Services APIs in your virtual device, enable the Google APIs option. To include the Google Play Store app, enable the Google Play Store option:
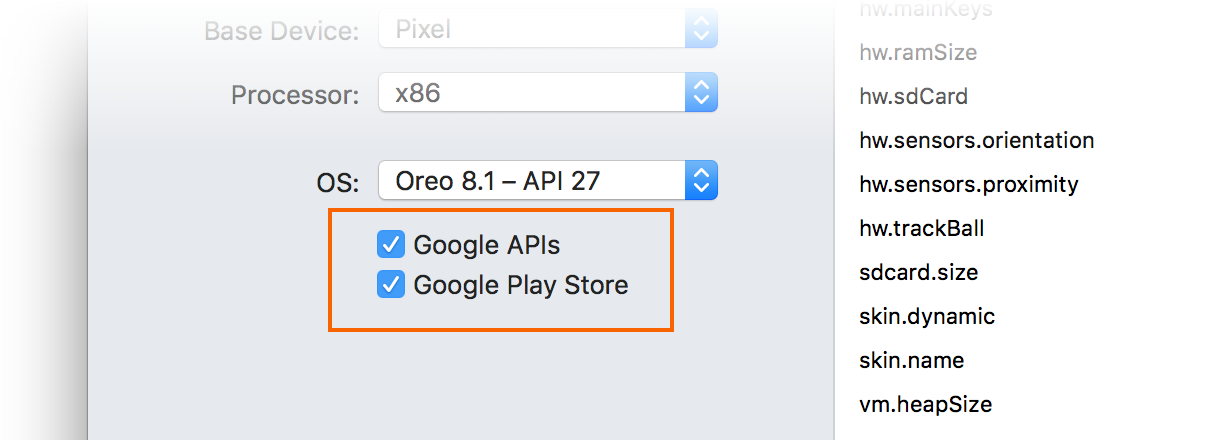
Note that Google Play Store images are available only for some base device types such as Pixel, Pixel 2, Nexus 5, and Nexus 5X.
Edit any properties that you need to modify. To make changes to properties, see Editing Android Virtual Device Properties.
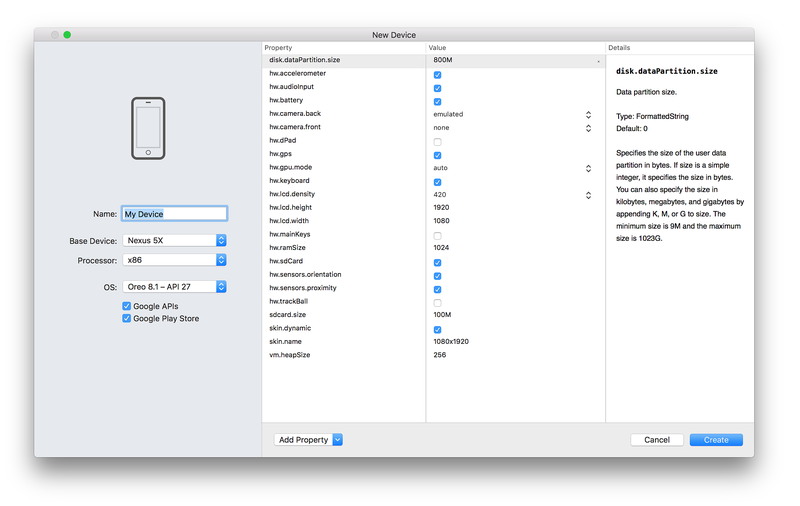
Add any additional properties that you need to explicitly set. The New Device screen lists only the most commonly-modified properties, but you can click the Add Property pull-down menu (at the bottom) to add additional properties:
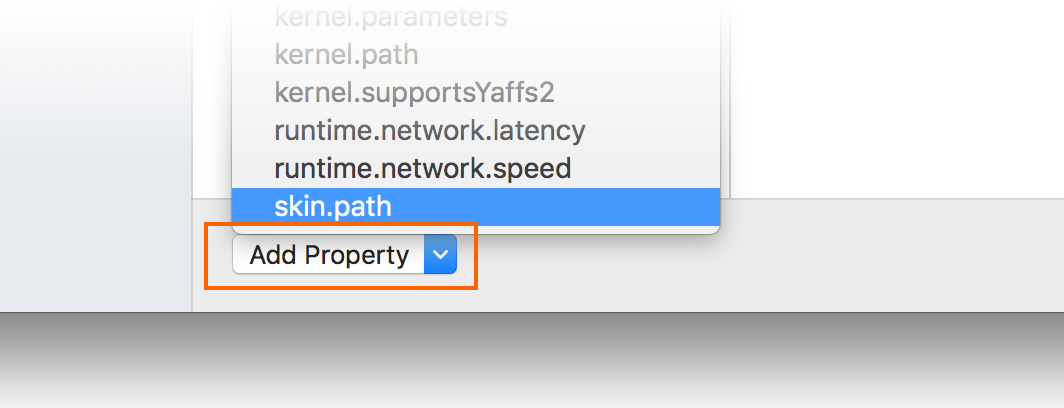
You can also define a custom property by clicking Custom. at the top of this property list.
Click the Create button (lower right-hand corner) to create the new device:
The Android Device Manager adds the new device to the list of installed virtual devices while displaying a Creating progress indicator during device creation:

When the creation process is complete, the new device is shown in the list of installed virtual devices with a Start button, ready to launch:
Edit Device
To edit an existing virtual device, select the Additional Options pull-down menu (gear icon) and select Edit:
Clicking Edit launches the Device Editor for the selected virtual device:
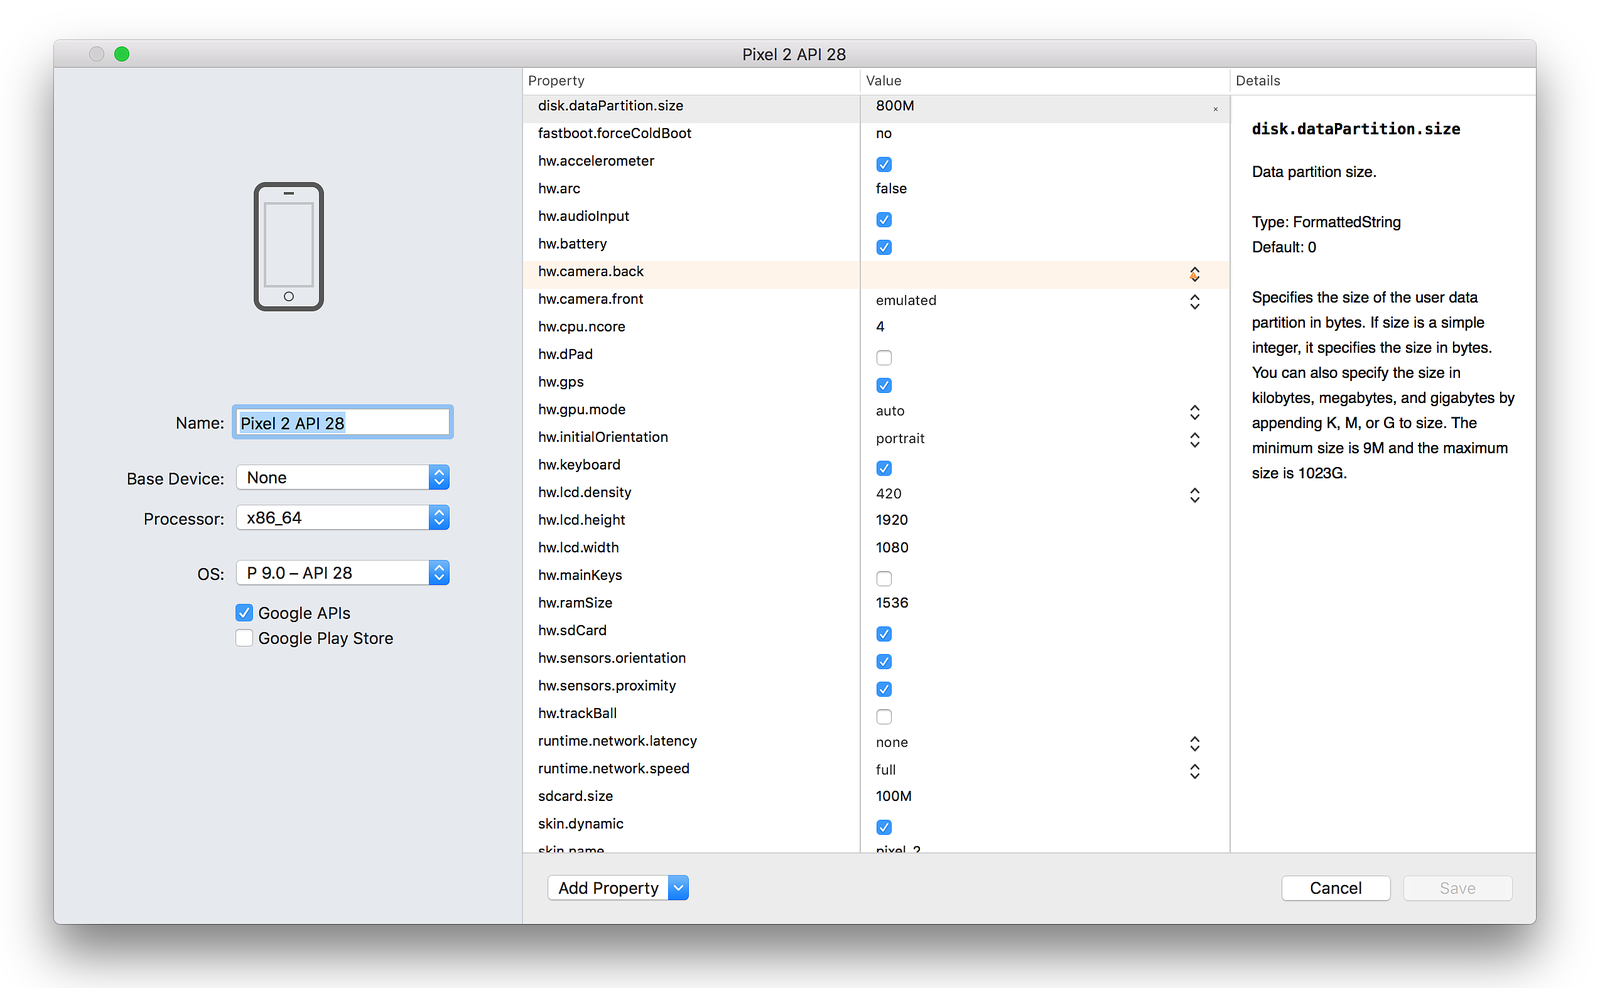
The Device Editor screen lists the properties of the virtual device under the Property column, with the corresponding values of each property in the Value column. When you select a property, a detailed description of that property is displayed on the right.
To change a property, edit its value in the Value column. For example, in the following screenshot the hw.lcd.density property is being changed from 480 to 240:
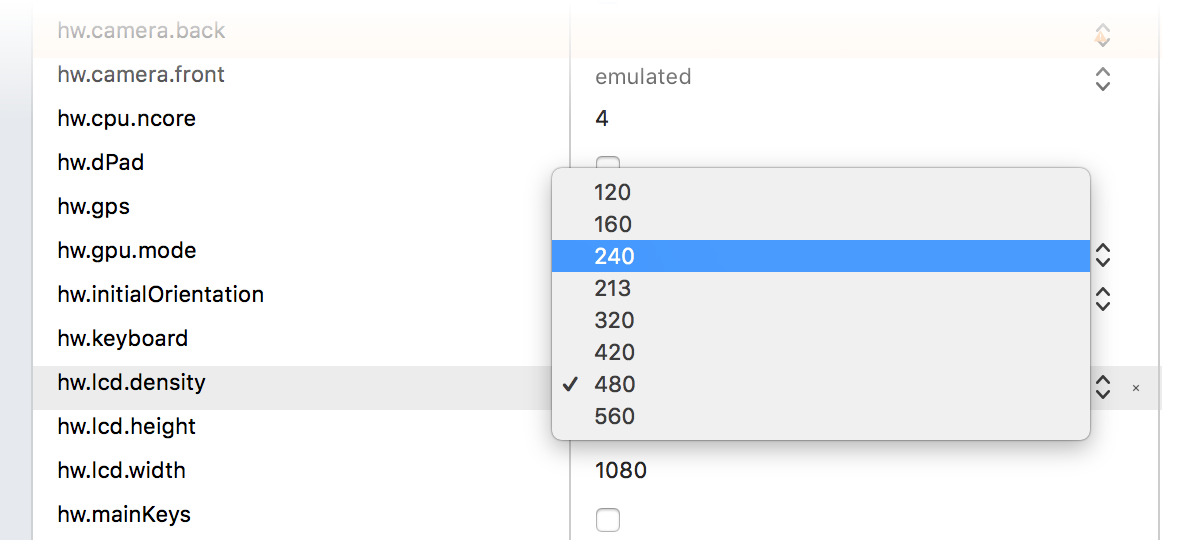
After you have made the necessary configuration changes, click the Save button. For more information about changing virtual device properties, see Editing Android Virtual Device Properties.
Additional Options
Additional options for working with a device are available from the pull-down menu located to the left of the Play button:
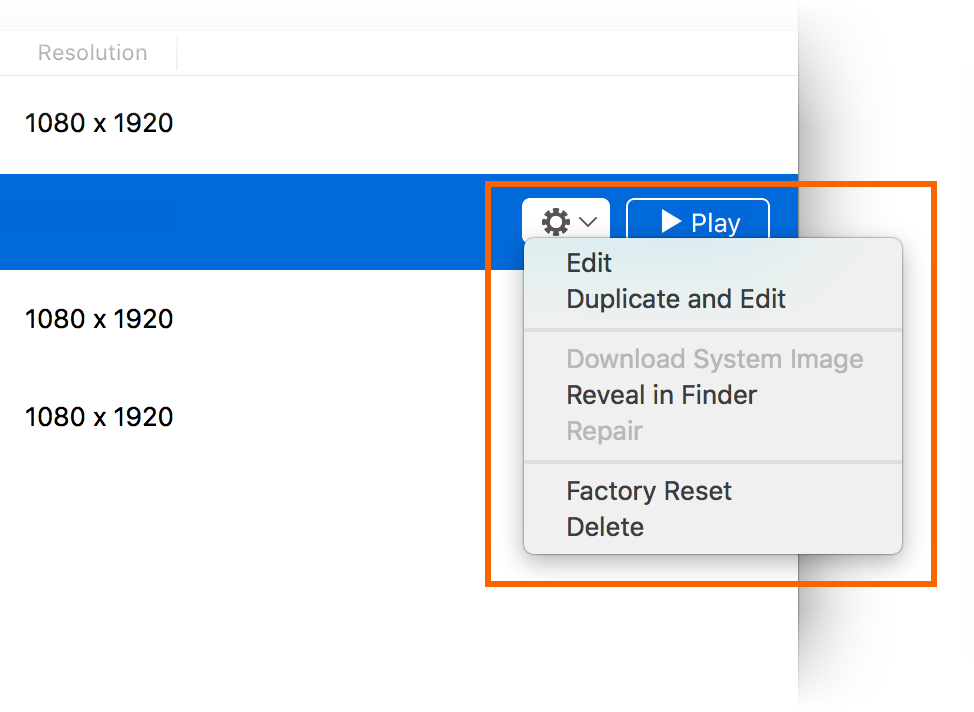
The additional options menu contains the following items:
Edit – Opens the currently-selected device in the device editor as described earlier.
Duplicate and Edit – Duplicates the currently-selected device and opens it in the New Device screen with a different unique name. For example, selecting Pixel 2 API 28 and clicking Duplicate and Edit appends a counter to the name:

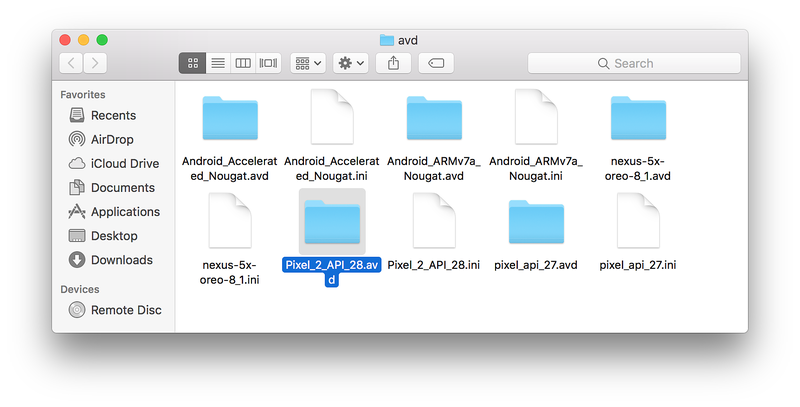
Reveal in Finder – Opens a macOS Finder window in the folder that holds the files for the virtual device. For example, selecting Pixel 2 API 28 and clicking Reveal in Finder opens a window like the following example:
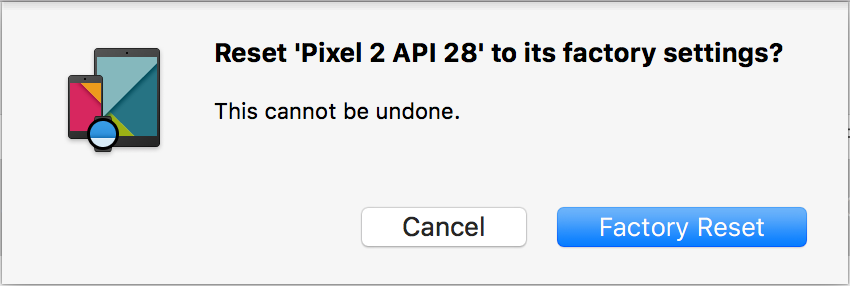
Factory Reset – Resets the selected device to its default settings, erasing any user changes made to the internal state of the device while it was running (this also erases the current Quick Boot snapshot, if any). This change does not alter modifications that you make to the virtual device during creation and editing. A dialog box will appear with the reminder that this reset cannot be undone. Click Factory Reset to confirm the reset.
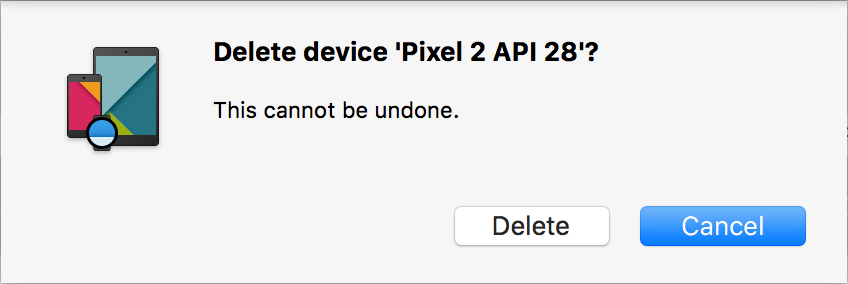
Delete – Permanently deletes the selected virtual device. A dialog box will appear with the reminder that deleting a device cannot be undone. Click Delete if you are certain that you want to delete the device.
Troubleshooting
The following sections explain how to diagnose and work around problems that may occur when using the Android Device Manager to configure virtual devices.
Android SDK in Non-Standard Location
Typically, the Android SDK is installed at the following location:
C:\Program Files (x86)\Android\android-sdk
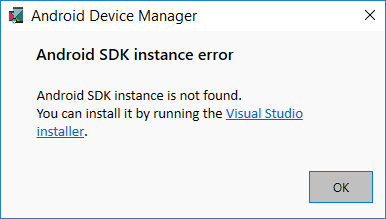
If the SDK is not installed at this location, you may get this error when you launch the Android Device Manager:
To work around this problem, use the following steps:
From the Windows desktop, navigate to C:\Users\username\AppData\Roaming\XamarinDeviceManager:

Double-click to open one of the log files and locate the Config file path. For example:

Navigate to this location and double-click user.config to open it.
In user.config, locate the element and add an AndroidSdkPath attribute to it. Set this attribute to the path where the Android SDK is installed on your computer and save the file. For example, would look like the following if the Android SDK was installed at C:\Programs\Android\SDK:
After making this change to user.config, you should be able to launch the Android Device Manager.
Wrong Version of Android SDK Tools
If Android SDK tools 26.1.1 or later is not installed, you may see this error dialog on launch:

If you see this error dialog, click Open SDK Manager to open the Android SDK Manager. In the Android SDK Manager, click the Tools tab and install the following packages:
- Android SDK Tools 26.1.1 or later
- Android SDK Platform-Tools 27.0.1 or later
- Android SDK Build-Tools 27.0.3 or later
Snapshot disables WiFi on Android Oreo
If you have an AVD configured for Android Oreo with simulated Wi-Fi access, restarting the AVD after a snapshot may cause Wi-Fi access to become disabled.
To work around this problem,
Select the AVD in the Android Device Manager.
From the additional options menu, click Reveal in Explorer.
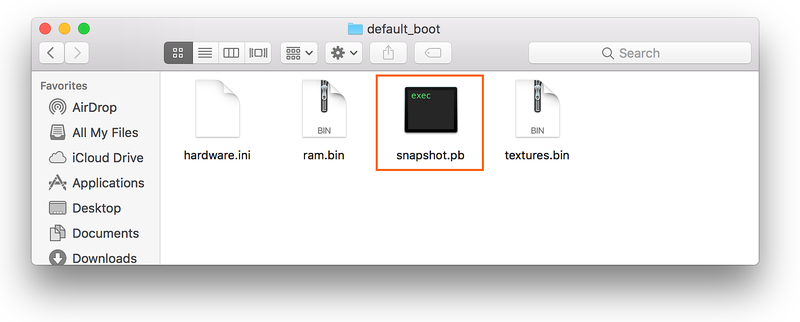
Navigate to snapshots > default_boot.
Delete the snapshot.pb file:
Restart the AVD.
After these changes are made, the AVD will restart in a state that allows Wi-Fi to work again.
Wrong Version of Android SDK Tools
If Android SDK tools 26.1.1 or later is not installed, you may see this error dialog on launch:

If you see this error dialog, click OK to open the Android SDK Manager. In the Android SDK Manager, click the Tools tab and install the following packages:
- Android SDK Tools 26.1.1 or later
- Android SDK Platform-Tools 28.0.1 or later
- Android SDK Build-Tools 26.0.3 or later
Snapshot disables WiFi on Android Oreo
If you have an AVD configured for Android Oreo with simulated Wi-Fi access, restarting the AVD after a snapshot may cause Wi-Fi access to become disabled.
To work around this problem,
Select the AVD in the Android Device Manager.
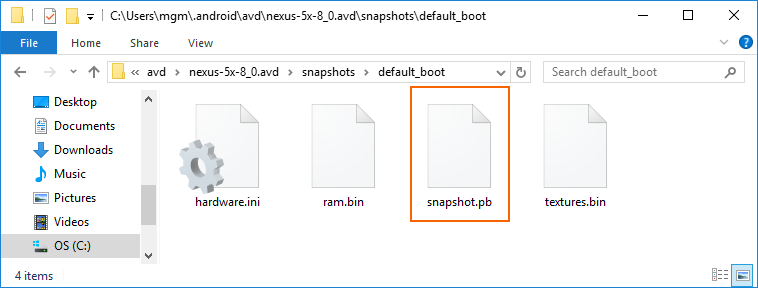
From the additional options menu, click Reveal in Finder.
Navigate to snapshots > default_boot.
Delete the snapshot.pb file:
Restart the AVD.
After these changes are made, the AVD will restart in a state that allows Wi-Fi to work again.
Generating a Bug Report
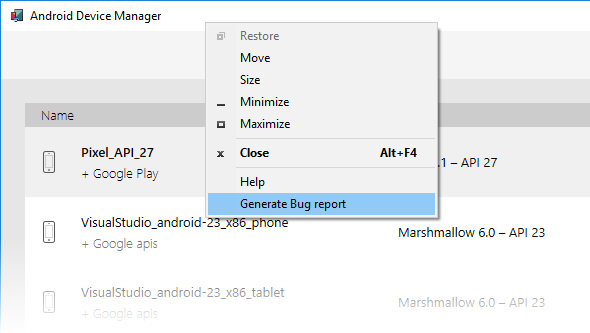
If you find a problem with the Android Device Manager that cannot be resolved using the above troubleshooting tips, please file a bug report by right-clicking the title bar and selecting Generate Bug Report:
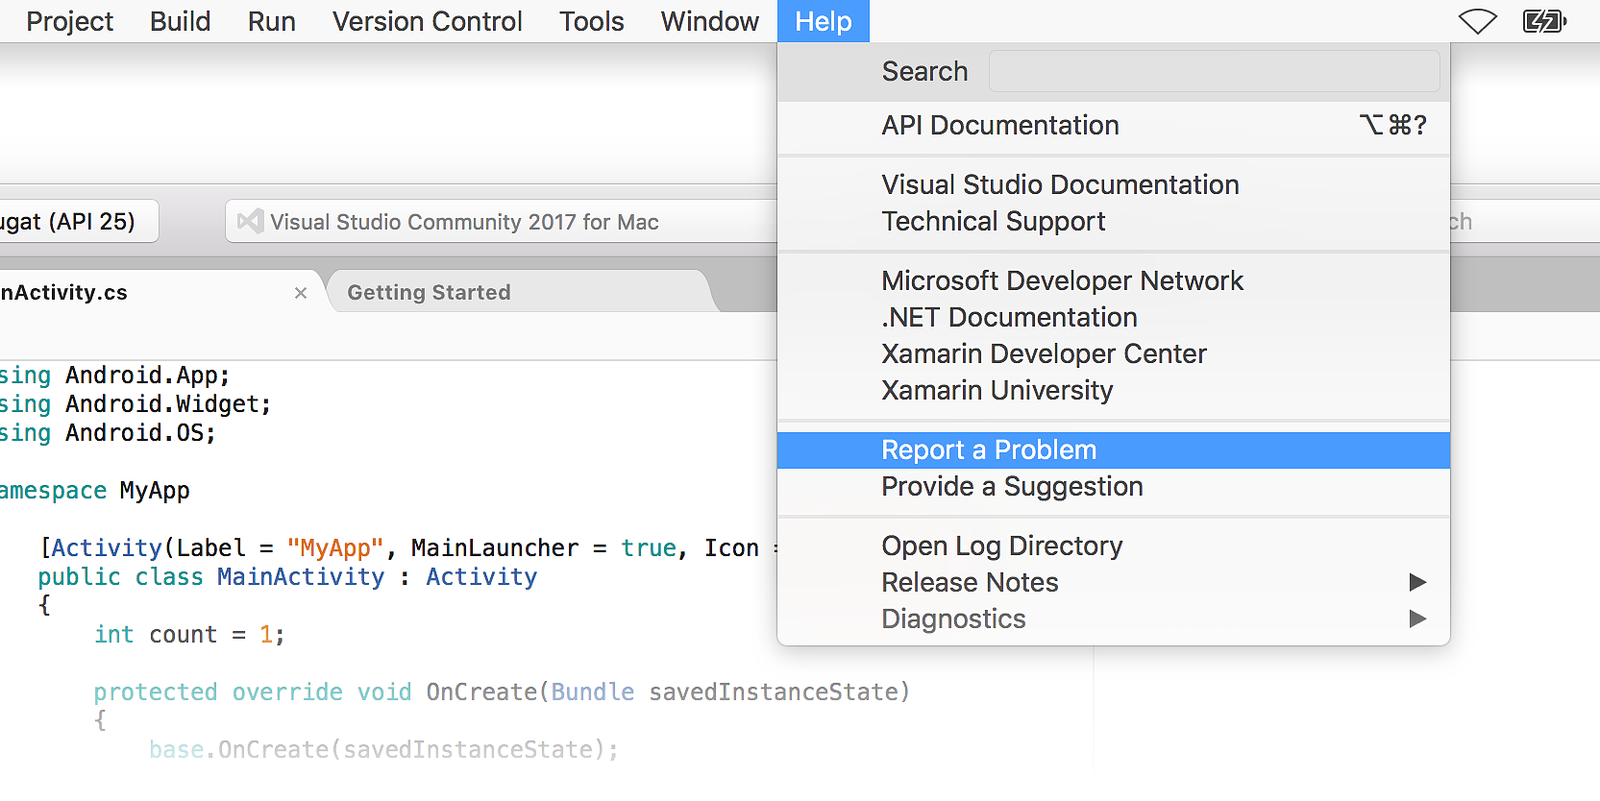
If you find a problem with the Android Device Manager that cannot be resolved using the above troubleshooting tips, please file a bug report by clicking Help > Report a Problem:
Summary
This guide introduced the Android Device Manager available in Visual Studio Tools for Xamarin and Visual Studio for Mac. It explained essential features such as starting and stopping the Android emulator, selecting an Android virtual device (AVD) to run, creating new virtual devices, and how to edit a virtual device. It explained how to edit profile hardware properties for further customization, and it provided troubleshooting tips for common problems.
Related Links
Related Video
Find more Xamarin videos on Channel 9 and YouTube.
Источник


