- You have android crack
- Why crack an app? рџ”—
- Contents рџ”—
- Online alternatives рџ”—
- Getting the tools рџ”—
- Getting the APK рџ”—
- Decoding the APK рџ”—
- Altering the app рџ”—
- Getting the app back together рџ”—
- A few addtional tips рџ”—
- Wrapping it up рџ”—
- Cracking UnCrackable Android apps: step-by-step guide (part 1)
- What this guide covers
- The tools
- Level 1
- See what you are dealing with: install and uninstall the app
- Make the app debuggable
- Sign the app
- Install debuggable app
- Bypass dialogs
- Decompile the app – see the source code
- Attach the debugger
- Alter variables during runtime
- Get the secret
You have android crack
This tutorial for how to crack Android apps is one of my more technical posts. If you aren’t a developer you might want to skip this one. 🙂 I’m assuming some basic knowledge of UN*X, Java and Android.
Why crack an app? рџ”—
Sometimes I like to check if online services I use really are secure. I’ve presented quite a few cases to prove that they very often are not. Mostly I can use very simple techniques to check the security as there are so many basic security vulnerabilities out there. When it comes to apps I often use a HTTP proxy like Charles to take a look at the HTTP and HTTPS traffic. However, once in a while there are apps that use e.g. HTTP tunneling or certificate pinning. In those cases you need to go one step further to be able to listen to the network traffic.
Other reasons to decompile apps could be to recover lost source code, to inject language translations or even fix a bug. But hey, remember, don’t do anything you are not allowed to. Don’t break the law. This guide is just for educational purposes when you have legitimate reasons to do what you do.
Contents рџ”—
These are the topics that I’ll cover.
Online alternatives рџ”—
Very often you don’t have to get your hands too dirty getting the hands of a decompiled app. There are some good services out there that can provide you with most Android APKs, and then even some to decompile them.
Online APK archives рџ”—
To get hold of an APK you can typically just google the package name. There are quite a few sites where to download them from. Some are more frequently updated than others. Note that you can get hold of different versions and the APK for different architectual platforms.
A word of wisdom: Don’t download and run some random APK out there (at least do it in a sandboxed and/or emulated environment). There are quite a few sites that serves bogus or altered APKs. The app might look allright, but still have some malware injected. Don’t blindly trust the ones that I recommend either. If the APK is signed with the same key as an APK that you got from Play Store you should be able to trust its origin (though there have been cases of private keys in the wild (even repackaged APKs uploaded to the vendor’s own web site)).
Here’s a few you might want to try out:
Online decompiler рџ”—
The quickest and easiest way to decompile an APK is to just use an online service. You just upload the APK and get an archive with all the resources and decompiled files. javadecompilers.com is the one I have used, and I have been pretty happy with it.
As you might know, the APK file is really just a ZIP file, so you can typically just rename it to .zip and double click it or run unzip and you can start investigating the app. If it’s a hybrid app you might not have to decompile it at all to get access to everything. Actually, the Gator Watch app was a hybrid app and gave away everything with little effort.
Getting the tools рџ”—
Android — SDK, tools and emulators рџ”—
You need to have at least the Android tools and SDK, but for most people I would recommend to just install Android Studio and follow the instructions to set it up as normal (but skip stuff like the SDK for Android TV and other stuff that will slow down your download).
Apktool — disassembling and reassembling APKs рџ”—
Apktool can be installed manually, or if it’s available via your package manager you can just install it using a command like apt-get install apktool .
Getting the APK рџ”—
The first step of the reverse engineering is to get hold of the APK. I’ll use my own Android app Developer Tools as an example app. It’s open source and if you want you can get the source code and APKs from GitHub.
The command-line tool adb (Android Debug Bridge) is used for all communication with the device or emulator. You can find the tool in the Android’s installation folder platform-tools .
Note on App Bundles / multi-APK рџ”—
It’s increasingly common (and required for Play Store releases in the second half of 2021) that apps use Android App Bundles. This adds a layer of complexity when cracking apps.
When the app is an App Bundle you will in the above example see more than one APK file. Typically you will see base.apk (the common code), split_config.arm64_v8a.apk (config for the CPU architecture), split_config.xxxhdpi.apk (config for the screen resolution) and typically a split for the language and maybe some dynamic features.
You need copy all the APK files — either in separate adb pull commands or pull the whole app directory.
Decoding the APK рџ”—
The next step is to unzip and decompile the APK. Apktool does this for us.
Note on App Bundles / multi-APK рџ”—
If you are interested in the core code and not the resource files you only have to consider the base.apk files and not the rest. But note that you need to either decompile and compile them (or at least unzip them and remove the META-INF folder before zipping again) if you need to resign the app as shown in a later step.
Altering the app рџ”—
This is where the hard work starts. The code files are now fully readable, but the code is now in the smali format. You can think of smali as a sort of assembly language.
As an example we’ll first change the language string app_name to Hacker Tools .
Then we’ll change some hard coded text so that we have changed both resources and actual code.
Reading Java instead of smali рџ”—
There’s a way out if you rather want to read Java instead of smali. The excellent tool jadx provides both a command-line and GUI tool for converting dex to Java.
You can open the APK files directly in the the program and have all the code decompiled and converted. Reading Java is after all easier than reading the smali format. Just note that you cannot simply change the Java code and recompile it with jadx. You can always try to get a project up and running in Android Studio, but it will typically take some major effort as jadx seldom can fully decompile everything 100%.
Getting the app back together рџ”—
There are quite a few steps getting everything together. We need to rebuild the app, sign it, zipalign it, and then install it. If the properly signed app is still installed it needs to first be uninstalled as our signature violates the existing one.
The command-line tool zipalign is needed to align the contents of the APK for Android to be able to run it. You can find the tool in the Android’s installation folder build-tools/ .
Note on App Bundles / multi-APK рџ”—
If you have multiple APK files and you just signed the altered APK file with a new certificate you will need to sign every single APK file with jarsigner and then zipalign them.
Installing them will need the install-multiple option and all APK files as arguments:
A few addtional tips рџ”—
Reading smali рџ”—
It might take a little bit of getting used to, but reading smali isn’t all too bad. If you have any concrete problems you’ll find the answer with some googling. But a good tip is to create some small very simple Java classes yourself and check out what they look like in the smali format.
If you are having trouble navigating the smali code and understand the flow of an app you can use the following smali code. It will call Thread.dumpStack() which logs the current thread’s call stack.
If you need to know the value of a string — e.g. a parameter — you can use Log.d(String tag, String message) to log it to the system log.
Proguard рџ”—
Very often — but not in the case of my Developer Tools app — the code will be shrinked and obfuscated using ProGuard. This makes the code a lot harder do read and understand. There aren’t really any good ways around it, but doing the thread dump trick and taking your time to follow the code will eventually get you where you want to be.
Wrapping it up рџ”—
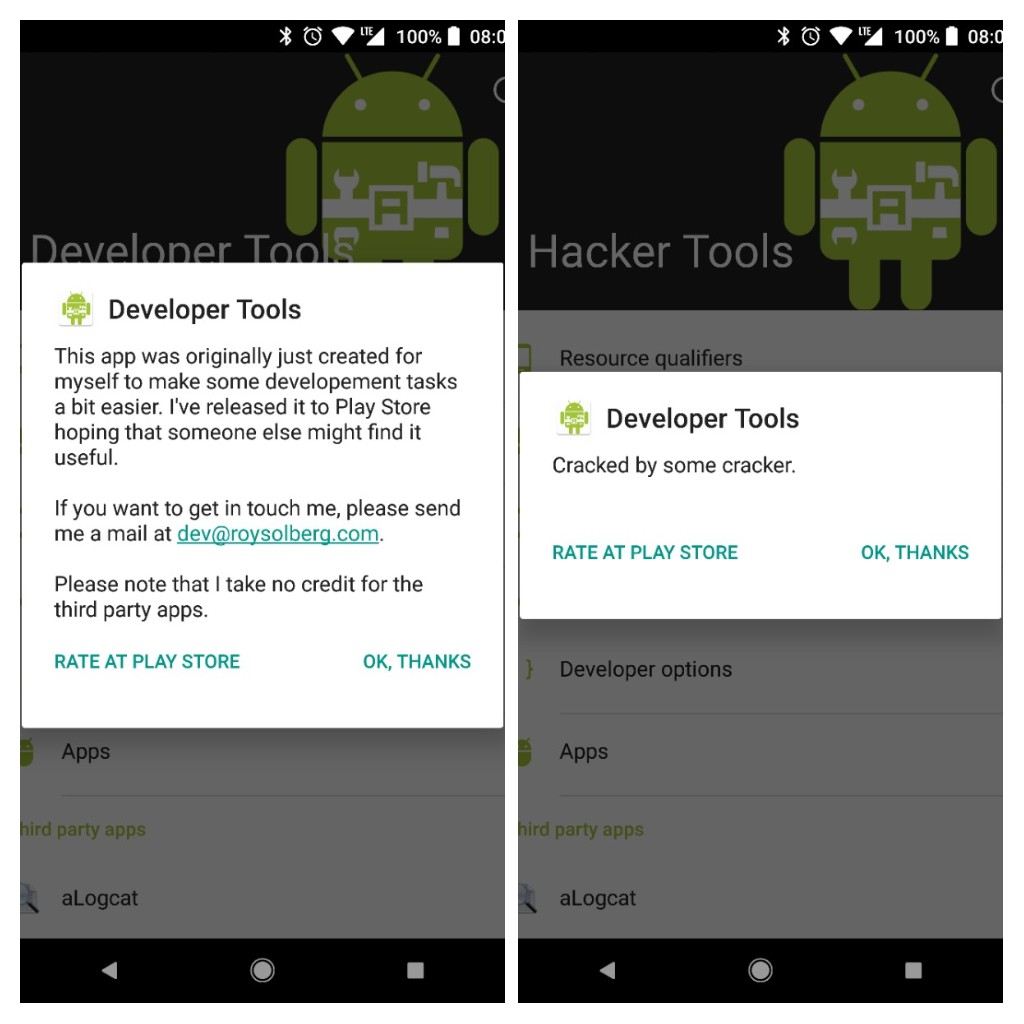 If you have followed along the guide you would see the app change from the version on the left to something like the one on the right. One of the reasons I wrote this guide was for my own sake to have something to easily copy and paste from when doing some reverse engineering myself, but I thought this might be useful one for others as well. 🙂
Источник
Cracking UnCrackable Android apps: step-by-step guide (part 1)
The best way to learn how something works is to break it apart — or build it yourself. I assume you’re an Android developer and you’re familiar with the later part, so let’s focus on the former one by cracking two Android apps, extracting a secret String from them.
Why cracking?
- To patch bugs in software whose code-base you have no influence over.
- To make your projects more secure by learning the ways that bad guys might compromise them.
- To discover secrets 🙂
What this guide covers
There is a great online resource dedicated to mobile security: the Mobile Security Testing Guide (MSTG). I’m going to present here a solution for two Android CRACKMEs provided by it. What is a CRACKME? Think of it as an app built purposefully to be cracked. MSTG provides several CREACKMEs with varying difficulty level; I’m going to go over the basic ones, level 1 and level 2 (in my next blog post).
Level 1: the secret is on the Java side, debugging Java code.
Level 2: the secret is on the native side, debugging and patching native library.
The MSTG repository also contains links to other solutions of the same CRACKME challenges – I encourage you to check them out after reading this guide.
The tools
- adb — install apk, get shell
- apktool — unpack/re-package apk
- dex2jar — convert .dex files to .class files
- jd-gui — java decompiler with GUI
- jdb — Java debugger
- gdb — GNU project debugger
- cutter — binary patching with GUI
- radare2 — binary patching
Level 1
Level 1 app is a simple one screen app, with an input field and a VERIFY button. Pressing the button will compare whatever is in the input field with the secret String. The main goal of the cracking challenge is to find out the value of that secret String.
The plan is to put the app into debug mode and debug it. The debugger will allow you to see the value of the secret String, as well as circumvent the safety mechanisms employed by the app.
See what you are dealing with: install and uninstall the app
List available emulators:
where the value of the environment variable $ANDROID_HOME is usually
/Android/Sdk . If nothing comes up after running the previous command, create an emulator using avdmanager tool, or via Android Studio GUI.
Fire up the emulator:
Install the app:
Launching the app on the emulator will give a dialog «Root detected» and the app will exit upon closing the dialog with the dialog’s button. This is because the app has a root detection mechanism to prevent tempering and that emulator is considered to be a rooted device. We are going to bypass this dialog.

The main piece to cracking the app is to make it debuggable . Currently, the installed app is not debuggable , so uninstall the app. First, find out its package name:
Then, uninstall it:
Make the app debuggable
An app should be debuggable if it is flagged as one in its AndroidManifest.xml file. Use apktool to unpack .apk , and then re-pack it with the altered manifest file.
where d stands for decode ;
-s means do not decode resources (we don’t need them. All we need is a manifest);
-o — output directory.
Now, repack with -d option, that will automatically add debuggable=»true» to the AndroidManifest.xml :
where b stands for build .
Option -d is very useful, as one would have to alter AndroidManifest.xml manually to add app:debuggable=true attribute to tag.
Sign the app
The app needs to be signed, otherwise the installation of the unsigned app will fail. Use apksigner to check whether the app will pass the verification process during installation:
The following template can be used to sign the app:
Signing the app is not in the scope of this post, hence no further explanation of the above command is provided. If you are not comfortable with signing on the command line (terminal), you can always sign your app in Android Studio. A keystore file can also be created with the help of Android Studio.
Install debuggable app
Upon launch, the app will show «App is debuggable» dialog – another hack-prevention mechanism. This is to be bypassed.

Bypass dialogs
There is little use of a debuggable app when one cannot reach the point which is to be debugged. In other words, the dialog «App is debuggable» prevents us from debugging a place in code that is called when the VERIFY button is pressed. To get to that stage, one has to bypass the dialog.
Decompile the app – see the source code
First, convert .apk to .jar :
Second, open GUI tool:
Third, with the GUI tool, open the .jar archive for source code inspection. After inspection, it is evident that dialog is set not to be dismissed on the click outside of it – only pressing the dialog button can close the dialog. The problem is that button’s click listener will exit the app. So, the way around it is simple: make dialog dismiss-able by clicking outside of it, i.e. change false to true in alertDialog.setCancelable«(false) . It can be achieved with the debugger setting the variable during runtime.
Attach the debugger
Run the app in «wait for debugger» mode:
where am is an ActivityManager ;
start starts a component;
-D enables debugging;
Next, a debugger must be connected to the app. The debugger resides on the local machine. To transfer debugging information from the device (emulator) to the local machine one should establish a connection – a socket connection. The setup is simple: using adb establish a socket connection between the app process and a socket on the localhost.
where tcp:4321 stands for «use port 4321 on the localhost and TCP as a transport protocol». 4321 was chosen for ease of typing and remembering;
jdwp:PID stand for «use process id of the app and a JDWP as a transport protocol».
Find PID by running:
On a UNIX machine, one can verify that there is a socket 4321 listening by running:
Describing options to lsof is out of the scope of this post.
If you have been following up to this point exercising all the commands on your machine, at this stage:
The app waits for a debugger to be attached to it.
There is a connection to the app’s process via localhost:4321 .
All that’s left is to fire up that debugger (DO NOT RUN THIS COMMAND):
where jdb is a tool provided by Java — a j ava d e b ugger;
-connect — establishes a connection to target VM using named connector com.sun.jdi.SocketAttach with argument values listed after : . Read this, if you want to know more about communication between debugger and VM.
The command attaches the jdb to listen to the localhost socket 4321 for data that is passed there by adb from the app. The problem with the above command and the reason I have asked you not to run it, is that as soon the debugger starts to listen to the socket, the app will resume: the code for showing the dialog will run and we don’t want that because we want to debug that code.
In order to suspend the execution of the app upon debugger connecting to it, pipe down suspend command to the jdb :
where suspend is a legitimate command to the interactive jdb command. To see what jdb supports, run jdb — it will give the interactive shell — then run help .
The output will be:
and at that moment debugger will be attached and the app will be suspended prior to any of its code being run.
Alter variables during runtime
Set breakpoint at the line when the dialog is made not dismiss-able:
Take a note that it is android.app.Dialog.setCancelable and not android.app.AlertDialog.setCancelable .
Resume the execution:
Print all local variables in current stack frame using locals command:
flag = true hints that this is not the place wanted – android.app.Dialog.setCancelable«() is called by something else somewhere else. What we want to see is flag = false .
resume till the desired output:
The place of interest is hit. Change the flag with the set command and resume ( set = assigns new value to field/variable/array element):
Continue with set flag = true and resume till the execution is not stopping at any breakpoint anymore. It should take two more times. After the app resumes, you should be able to close the dialog by clicking outside of it.
Get the secret
The technique is the same as for dismissal of dialogs – look into source code and try to see what can be taken advantage of. The secret is stored in the app, but is compared with the user’s input using java.lang.String.equals .

So, set a breakpoint to java.lang.String.equals and see the parameters! The bad news is, if you try to set a breakpoint on equals method, you will quickly realize that it is quite a popular method – you will be getting lots of hits on it, most of which (except one) you don’t want. So, let’s set a breakpoint prior to where equals is called – see the line in a try. catch block in the image above. It would be javax.crypto.Cipher.doFinal :

Set the breakpoint first, then type something into the input field of the app and click the VERIFY button. The breakpoint should be hit after this.
It is now a good time to set a breakpoint on java.lang.String.equals method and resume the debugging.
After resuming the execution with cont and hitting equals breakpoint, set the parameters to equals with locals command of the jdb . Several iterations might be required.
The secret is: I want to believe . Note, that there is no indication that that is the secret. It could be RAW . You just have to gather everything you got and check it.
The guide on cracking uncrackable Android apps on LEVEL 2 to be found HERE.
For more engineering insights shared by Mews tech team:
Источник


