- Use apps from your Android device on your PC
- How do I interact with apps?
- How do I know I’m using the multiple apps experience?
- How do I pin Android apps into Windows?
- How do I remove pinned Android apps from my Windows taskbar or Start menu?
- Are the apps from my Android device now installed on my PC?
- Can I access Android apps without linking my device?
- Can I open multiple apps at the same time?
- How to run Android apps in Windows
- Emulating Android on Windows
- Bluestacks
- Genymotion
- Dual booting
- Android-x86
- Link to Windows
- Surface Duo and Microsoft’s Emulator
- How to install Android on PC: These are your best options
- Using Android Studio and the virtual device
- Pure Android emulation with Genymotion
- Open source Android x86.org Android on PC
- Old but gold – BlueStacks
- One for the gamers – MEmu
- Comparing the best options to install Android on PC
Use apps from your Android device on your PC
With Your Phone apps, you can instantly access the Android apps installed on your mobile device right on your PC. Using a Wi-Fi connection, Apps allows you to browse, play, order, chat, and more – all while using your PC’s larger screen and keyboard. You can add your Android apps as favorites on your PC, pin them to your Start menu and taskbar, and open them in separate windows to use side-by-side with apps on your PC – helping you stay productive.
Note: For the best experience, we recommend making sure your Android device and PC are on the same Wi-Fi network and band. Some Wi-Fi networks offer different connection bands, like a 5 GHz or 2.4 GHz band. Make sure both your devices are connected to the same one. Learn more about how to do that in our Wi-Fi troubleshooting help.
How do I interact with apps?
You can use your PC’s mouse, trackpad, keyboard, pen or touch-enabled screen to open, type, scroll, and interact with apps. A few tips for using your mouse and keyboard:
Single click will behave the same as any single touch/tap interaction
Right click anywhere on your phone screen to navigate to the previous page
Click and hold will behave the same as a tap/hold interaction
Click and hold and drag to select content
Mouse scroll to move between pages vertically or horizontally
Some games and apps might not work with a mouse or keyboard. You’ll need to use a touch-enabled PC to interact with them.
If you’re encountering issues using Apps, our troubleshooting tips may help.
How do I know I’m using the multiple apps experience?
The requirements for using multiple apps are:
A PC running the Windows 10 May 2020 Update or later. For best performance, we recommend having at least 8GB of RAM.
An Android device running Android 11.0.
On your Android device, you need Link to Windows version 2.1.05.6 or higher, or Your Phone Companion version 1.20104.15.0 or higher.
Your Phone versions 1.20104.20.0 or higher.
How do I pin Android apps into Windows?
You can pin your Android apps to the Windows Start menu, taskbar, or add it to Your Phone app favorites.
To pin an app on your PC:
Open the Your Phone app
Right click on the app icon you want to pin or add to your favorites
How do I remove pinned Android apps from my Windows taskbar or Start menu?
If you’ve pinned an app to your taskbar, just right-click the app icon and select Unpin from taskbar.
If you’ve added an app to your Windows start menu, you’ll need to uninstall the app from your apps list. Go to Windows Settings > Apps & features, search for your app in the list. Select it, then select Uninstall.
Are the apps from my Android device now installed on my PC?
No, apps you open will be running from your Android device. The Your Phone app is mirroring apps from your Android device to your PC, meaning you’ll see the same thing on your PC that’s being displayed on your Android device.
Can I access Android apps without linking my device?
No, you need to connect your Android device to your PC via the Your Phone app in order to use this experience. Learn more about how to set up Apps here.
Can I open multiple apps at the same time?
If you have Android 11 on your Android device and one of select Samsung devices, yes. For most other Android devices, you can only open one Android app at a time.
Источник
How to run Android apps in Windows

When it comes to app selection, few platforms rival Android. Unfortunately, using your Android phone and tablet apps isn’t normally possible on Windows. There are ways to use your apps on a full screen if you know how to run Android apps in Windows, though. This way, you can enjoy the best Android apps and the best Android games on the big screen.
If you’re running a Chromebook, we’ve also put together a dedicated guide on how to install Android apps on Chrome OS.
Emulating Android on Windows
The easiest way to run Android apps on Windows is through an emulator. We have two different emulators, both with different focuses. If you’re interested in development, Google offers Android Studio, which includes an Android emulator. It’s really only for developers, though, while our two recommendations focus on end users.
Bluestacks

The Bluestacks App Player is one of the most popular and robust Android emulators around, allowing you to run 32-bit and 64-bit games and apps for Android 7.1.2 (Nougat) on your Windows desktop.
It’s free to use, and you can easily toggle emulation settings and launch apps using the custom-designed interface. “Layercake” technology uses hardware accelerators to improve the performance of Android games running on Windows-based machines.
If you have a Twitch or similar account and a PC with more than 8GB of RAM, you can even broadcast Android apps and games using the Bluestacks “stream mode” and OBS Studio. However, users may want to enable AMD-V or Intel VT-x within the BIOS for optimal performance, if available.
Bluestacks offers an optional subscription ($4 per month or $40 per year) that enables premium support, disables advertisements, includes wallpapers, and more. It’s also now compatible with the Galaxy Store, allowing you to use and play apps purchased through Samsung’s app store.
Here’s how to install Bluestacks to your computer:
Step 1: Download the installer from the official Bluestacks website.
Step 2: Launch the install application and choose the storage location for the app and data files. Unfortunately, you can’t change the Bluestacks directory — it will install on your boot drive by default.
Step 3: Once Bluestacks installs, launch it and enter your Google and/or Samsung account credentials. You’ll need this info to log in to the Google Play Store and Galaxy Store and access your Android app library.
Genymotion

While Bluestacks is focused on apps and games, Genymotion provides the full Android experience (though at the cost of performance). Genymotion offers several paid emulation modes, including an option to run Android emulation from the cloud. There’s a free version for personal use.
The app runs with Virtual Box, so you’ll need to download that beforehand. Otherwise, Genymotion supports templates for basically every popular Android device in existence, and you can emulate the experience with different devices using different versions of Android.
Here’s how to get started:
Step 1: Download VirtualBox for Windows.
Step 2: Download Genymotion for personal use.
Step 3: Open Genymotion and select Create Account. After you’re done setting up your account, activate it, and log in with your credentials.
Step 4: Click the Plus icon and select a device you want to emulate. You can also emulate a custom device.
And that’s it! Like Bluestacks, you’ll want to enable AMD-V or Intel VT-x in your BIOS before getting started. Genymotion can emulate Android 4.4 onward. Keep in mind that it’s focused on developers, so it’s not as user friendly as Bluestacks.
Dual booting
There’s an alternative to emulation that gives you newer versions of Android, but the setup is a bit more involved. It’s called “dual booting,” and it effectively transforms your Windows computer into an Android device. You’ll gain the option to boot into Android when you switch on your computer, and Android will work just like it does on your smartphone or tablet.
However, getting started is not as simple as installing native Android. Because computer hardware — processors, graphics cards, and hard drives — must be added to Android by a third-party developer, you’ll need to find a custom distribution that supports your machine.
Android-x86

Android-x86 brings Android to x86-based PCs with AMD and Intel processors. What’s interesting about this project is that users can install any flavor of Android, whether it’s the now-stale Donut (v1.6) or the more recent Pie (v9). The project even offers builds of LineageOS (cm-x86) that can run on x86-based processors.
For those seeking a more recent Android build, Android-x86 9.0-r2 was the latest release at the time of this publication. Based on Android-9.0.0_r54, it fixed an audio issue on the Surface 3 and another one regarding booting into UEFI mode. Contributors have released more builds since, though for earlier versions of Android.
Though customizations to the Android operating system are minimal, the Android-x86 team did add some meaningful tweaks to give your Android install a desktop-like interface. It comes with features like a new Taskbar launcher and the ability to launch apps in resizable windows rather than just full-screen.
Android-x86 also lets you customize Android to your liking. You can install third-party themes, home screens, and more without having to worry about whether or not they will play nicely together.
To use Android-x86, your PC must have:
- An AMD or Intel processor.
- 2GB or more RAM.
- 4GB or more disk space.
- An available USB port.
If your PC meets the requirements, you will need these three tools:
- A blank USB drive.
- Android-x86 downloaded to your PC
- UNetbootin downloaded to your PC.
Now let’s get started:
 Kevin Parrish/Digital Trends
Step 1: Find and open UNetbootin and click the Three Dots button to the far right of Diskimage.
Step 2: Locate and select the downloaded ISO file.
Step 3: At the bottom next to Type, select USB Drive from the list, and then click OK.
Wait for UNetbootin to copy and install Android-x86 to your flash drive.
Step 4: Reboot your computer. This may require you to hit a specific key to prevent Windows 10 from loading, like ESC or F12. A screen should appear allowing you to select Boot to the Boot Device Selection.
Step 5: Select your flash drive.
Step 6: From the UNetbootin menu, select Install Android-x86 to Hard Disk.
Step 7: Select the partition — or location — to which you want to install Android-x86. The program will ask if you plan to format the disk. If you’re unsure, don’t.
Step 8: Select Yes to install GRUB and then select Yes again.
Step 9: A prompt asks if you want to “make system r/w,” which enables Android-x86 to read and write data to your hard drive. Select Yes.
Step 10: Reboot your computer for the second time. Once installed, use the Google Play Store to install Android apps as you wish.
Link to Windows

Microsoft’s Your Phone app allows Android phone owners to send and receive texts from their Windows PC without using their mobile devices. Users can also access their phone’s photos from Windows 10 and see phone-related notifications in the Action Center.
Samsung takes this cool relationship one step further with Link to Windows. This technology now provides two services: Phone Screen and Apps. With the former, you’re essentially streaming a Samsung phone’s screen to an interactive window on your PC. With Apps, you’re streaming individual apps rather than mirroring the phone’s entire screen.
However, all Android apps remain on the Samsung phone. Moreover, this method requires the Windows 10 PC and Samsung Android phone to be on the same local network. Microsoft provides a list of compatible Samsung phones here — not all Samsung phones support Link to Windows.
Finally, this method requires the Windows 10 November 2019 update (at the very least) to work properly. All Samsung phones must have Android 9 or newer.
Step 1: Open the Your Phone app or download it from the Microsoft Store if it’s not installed.
Step 2: Sign in to your Microsoft Account.
Step 3: Move to the Samsung phone. Swipe down on the Quick Panel and tap Link to Windows. If it doesn’t appear in the Quick Panel, download it from the Google Play Store — it’s typically integrated into newer Samsung phones.
Step 4: If other Microsoft apps are already signed in, you won’t need to do it again on your phone. If not, sign in manually.
Step 5: Allow permissions when prompted.
Step 6: The Samsung phone and Windows 10 should begin synchronizing. When complete, tap the blue Allow button on the Samsung phone’s screen to allow the pairing.
If successful, the Samsung phone will display a switch that’s toggled on — tap it to disconnect at any time. The screen also lists the connected PC’s name and the Microsoft Account login name.
Step 6: With the Your Phone app open in Windows 10, click the Gear (settings) icon in the bottom-left corner.
Step 7: Verify that the Display My Phone Screen option is on.
Step 8: Select the Phone Screen or Apps option on the left to begin.
Surface Duo and Microsoft’s Emulator

The Surface Duo is a high-tech piece of equipment that first came out on September 10. This dual-screen device is a folding Android smartphone that operates on a Qualcomm Snapdragon 855 SoC.
It supports the same Link to Windows program that many Samsung devices do, and you can use the official Google Android Emulator with it, too.
Источник
How to install Android on PC: These are your best options
Android is the most popular mobile operating system in the world, but just because it’s meant for mobile doesn’t mean it can’t be installed on a desktop. There are many ways to get Android running on a PC, including virtual device emulators, bootable USB versions, and even full standalone applications like BlueStacks. Each has its advantages and disadvantages depending on your needs.
If you’re looking to install Android on PC, we have your back! Here is the full breakdown of each of the best options available.
Using Android Studio and the virtual device

For the most part, Android development requires a tool called Android Studio. This is the software developers use to enter their code, test their apps, and manage their projects. It also happens to include a powerful “Android virtual device manager” (AVD Manager) for setting up and installing emulators that can run full-fat Android extremely well.
Using this Android virtual device has many advantages. If you select x86_64 as the architecture, there is the option to run the Android virtual device using Intel’s Hardware Accelerated Execution Manager (HAXM) to speed up the performance. In many cases, this will offer a seamless experience; especially on more powerful hardware.
Another big advantage of the AVD is that it comes with the latest version of Android. In fact, this is how most developers will first try out new updates to Android, to see how they affect their apps. That means you can even try beta versions of Android before they’re released! Another way that the virtual device has evolved since the early days is by including the Google Play Store on some devices. This means you can access all the apps you’ve already purchased!
The AVD does require a little more set-up than some options on this list. You’ll need to download Android Studio first (alongside the SDK) and then you’ll need to create your new virtual device. This process does give you the option to choose the display size, memory, and even Android version. Unfortunately, the combination of Android Studio, the Android SDK (which houses the Android Virtual Device), and the Android platform all take up a lot of hard drive space.
This method will work on OS X, Windows, and Linux without issue. Android Studio, including the AVD Manager, can be found here.
Pure Android emulation with Genymotion

Genymotion is a legacy Android on PC project, offering pure Android emulation with thousands of configuration options available to tailor your experience. The software runs an Android Virtual Device from within VirtualBox, which you’ll also need to install.
One of Genymotion’s biggest draws is the simulation of GPS, camera, SMS & calls, multi-touch, and basically all the other familiar Android hardware features. Other features include ADB access, support for a variety of app testing frameworks, even cloud access through services like Amazon and Alibaba.
Remember though, Genymotion is primarily targeted at developers looking for an environment in which to test their applications. As such, it’s a professional environment with a selection of price plans to match. However, you can download and use the Personal Edition for free.
Open source Android x86.org Android on PC
Next on our list is a free open-source option – Android x86.org.
Based on the Android Open Source Project, Android-x86.org set out to make Android available to anyone with a PC. This makes Android x86 one of the best options if you’re looking to install the latest version of Android on PC and use it as your primary operating system or run it in a VM. The software offers near complete stock Android with no additions whatsoever, which is a mixed bag. The good news is that Google Play Services is installed by default. The bad news is that using something made for touch on a desktop is not that intuitive.
Unfortunately, installation is also a little more involved than some of the applications listed below. The standard method is to burn an Android-x86 version to a bootable CD or USB stick and install the Android OS directly to your hard drive. Alternatively, you can install Android-x86 to a Virtual Machine, such as VirtualBox. This gives you access from within your regular operating system.
From inside your Virtual Machine, you can install the ISO file and then boot into the operating system. Find an official guide to the installation options for Android-x86 here.
Old but gold – BlueStacks

BlueStacks is one of the longest-enduring methods to install Android on PC, founded in 2011 and still going strong. BlueStacks has impressive performance, though it’s got more to it than just an Android Virtual Device. Additional features include: a simplified UI, optimizations dedicated to gaming, key-mapping, multi-instance support to run multiple apps, and even Google Accounts at once.
The user interface on Windows is more akin to what you would see in a web browser. It offers quick app switching in a tab format on the top of the window. However, those hoping to install their own launchers will be disappointed. The option was removed with the release of BlueStacks 4. On the plus side, BlueStacks also integrates with Windows to transfer files like APKs and there is even universal copy and paste.
BlueStacks remains a virtual machine at its core. So you don’t quite get native system performance, but this keeps the application simple to install and run. The latest version, Bluestacks 5, runs on either 32-bit or 64-bit Nougat, and has many performance enhancements to run on both high- and low-end PCs. It is also heavily monetized, which some find distasteful. It will repeatedly request that you download apps from its partners, and suggest sponsored apps and games on the main menu.
Even so, BlueStacks remains one of the best methods of running Android on PC out there. Check out what BlueStacks has to offer by clicking on the link below.
One for the gamers – MEmu
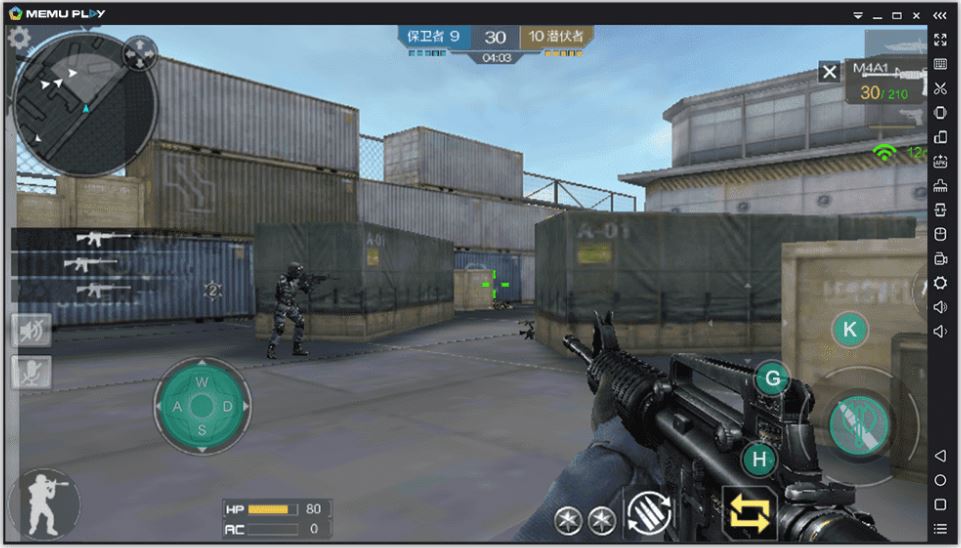
If you’re after a simple way to run Android games on a Windows PC, MEmu might be the way to go. The Chinese software is ad-supported, which might be a put-off compared to alternatives. However, MEmu’s gaming-focused features might be worth it for some.
MEmu supports multiple instances, allowing you to run several apps at once to level up multiple accounts. There’s also support for keyboard and mouse input as well as gamepads so you can play your way. Other functionalities include the ability to sideload apps and window resizing with a minimum sizing that prevents apps from becoming unusable.
In terms of performance, MEmu initially gained popularity as a faster emulator compared to BlueStacks 3. However, the race is much closer these days given BlueStack 5’s performance improvements. The latest MEmu version supports up to Android 7.1, with Android 5.1 and 4.4 compatibility included too.
There are a number of other game-focused clients that let you install Android on PC, including Gameloop (formerly Tencent Gaming Buddy), NoX, and others. Check out our list of the best Android emulators for more niche options.
Comparing the best options to install Android on PC
Each method has its advantages and disadvantages, but it really depends on what you want out of having Android on your desktop.
Bluestacks and other emulators like it have some baggage. Genymotion uses VirtualBox’s virtualization. Android-x86 works great as a proof of concept, but it isn’t that practical to use when comparing it to the other options discussed in this article.
On balance, we find installing the AVD Manager to be the optimal solution. While it comes packaged with Android Studio, the performance and flexibility are unmatched. Plus it is genuinely free, officially supported by Google, and constantly up-to-date. Hey Google! Why not release the virtual device separately?
Источник


