- Pinch to Zoom Android ImageView Tutorial
- Implement Zoom In or Zoom Out in Android
- XML Attributes of Scale Tag
- How to Add Zoom In/Out Animation in Android
- Zoom the image in android
- Implement Zoom In or Zoom Out in Android
- XML Attributes of Scale Tag
- How to Add Zoom In/Out Animation in Android
- Implementing a Custom Zoom on ImageView in Android with Kotlin
- Prerequisites
- Importance of zooming in Android
- Creating a customized zooming effect
- Conclusion
- Reference
- About the author
- Want to learn more about the EngEd Program?
Pinch to Zoom Android ImageView Tutorial
Hi and welcome to another tutorial from Codingdemos, today you will learn how to build pinch to zoom Android function on an ImageView using 3rd party library called PhotoView. The experience will be a lot similar to what you see today in social media apps.
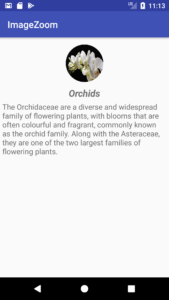
You will be building an app that have an Android ImageView and a TextView, when you tap on the ImageView an Android Alertdialog will appear on the screen showing you the image in full size where you can pinch and zoom on the image itself.
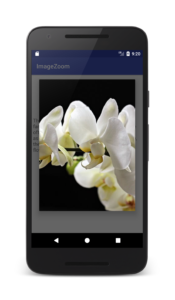
By the end of this tutorial, you will have an app that looks like this. (Large preview)
In this tutorial we will be using the following:
- – Android studio version 3.0
– Android emulator Nexus 5 with API 26
– Minimum SDK API 16
– PhotoView 3rd party library
1- Open up Android Studio and create a new project and give it a name, in our case we’ve named it (ImageZoom), choose API 16 as the minimum SDK, then choose a blank activity, click “Finish” and wait for Android Studio to build your project.
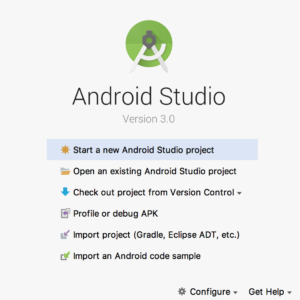
Create new Android Studio project. (Large preview)
2- Open up build.gradle (Module:app) and add PhotoView library.
3- Now you need to open up build.gradle (Project) and you need to add this line maven < url "https://jitpack.io" >inside (allprojects) tag.
4- Sync the project by clicking on (Sync Now).
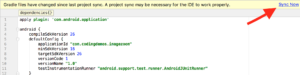
Android studio sync gradle file. (Large preview)
5- Open activity_main.xml file, here you will add 3 views:
– Android ImageView that will hold the picture.
– Android TextView for the image title and description.
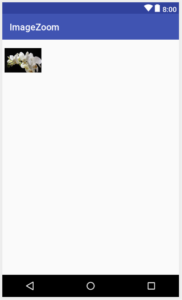
6- Add Android ImageView and make sure that you have added the image that you want to use for the ImageView inside the project drawable folder.
Android ImageView with image. (Large preview)
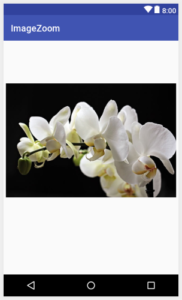
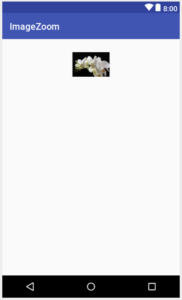
7- Reduce the size of the ImageView by adjusting android:layout_width and android:layout_height
Adjust width and height of Android ImageView. (Large preview)
8- Add some margin above the ImageView and place it in the center.
Android ImageView placed in the center with margin. (Large preview)
9- When you tap on the ImageView inside Android Studio preview window, you will see an empty space from top and bottom of the ImageView. You can fix that by using android:scaleType=»centerCrop» which allow the image to fill the remaining space.
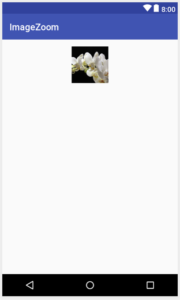
Android ImageView with scaletype. (Large preview)
10- Add Android TextView which will hold the name of the picture, this TextView will be placed below ImageView (ivIcon) in the center, add some margin from the top, try to increase text size to (20sp) and change text style to (italic and bold).
11- Now you add the final TextView for this layout which will hold the description about the picture, this TextView will be placed below (tvName), try to increase text size to (16sp) and don’t forget to add some margin from the top so that it doesn’t appear to close with (tvName) TextView.
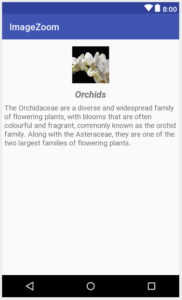
Flower title and description. (Large preview)
12- Now you are done working on activity_main.xml file, next you need to open up MainActivity.java file and initialize Android ImageView and Android AlertDialog.
13- Initialize ImageView (ivIcon).
14- Next you need to change the shape of ImageView (ivIcon) to circle using RoundedBitmapDrawable and Bitmap .
15- Build and run the app to see the progress.
Changed the shape of ImageView (ivIcon) to circle. (Large preview)
16- Now you need to work on Android AlertDialog, the AlertDialog will appear on the screen when you try to tap on ImageView (ivIcon). Before you start that, you first need to create another layout file that you will use it later for AlertDialog.
17- Create a new layout file and name it (dialog_custom_layout.xml), this file will have a PhotoView that will match the width and height of the screen.
18- Now go back to MainActivity.java file, to be able to tap on the ImageView you will need to use setOnClickListener and inside onClick is where you will create AlertDialog.
19- Build and run the app to test out Android pinch and zoom function.
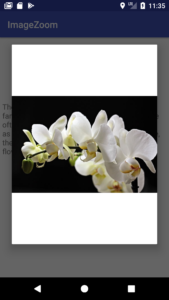
PhotoView image doesn’t completely fill out AlertDialog. (Large preview)
20- Hmm it seems that the image doesn’t fill the entire AlertDialog! You can actually fix it by using android:scaleType=»centerCrop» .
21- Build and run the app to see the result.
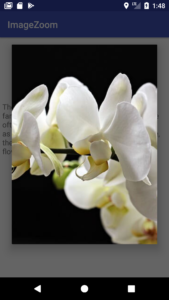
PhotoView image appears inside AlertDialog. (Large preview)
22- Great now you have a fully working app with pinch to zoom Android function 🙂
The source code for this tutorial is available on GitHub, I hope you find this tutorial helpful and if you have any question please post them in the comment below.
Источник
Implement Zoom In or Zoom Out in Android
Zoom In and Zoom Out animations are used to enlarge and reduce the size of a view in Android applications respectively. These types of animations are often used by developers to provide a dynamic nature to the applications. Users also feel the changes happening in the application by watching these kinds of animations.

XML Attributes of Scale Tag
The characteristics of Zoom In and Zoom Out animations are defined in the XML files by using scale tag.
| XML attribute | Description |
|---|---|
| android:duration | Used to define the duration of the animation in millisecond |
| android:fromXScale | Used to set initial size of the view in X-axis |
| android:fromYScale | Used to set initial size of the view in Y-axis |
| android:pivotX | To define the X coordinate of the point about which the object is being zoom in/out |
| android:pivotY | To define the Y coordinate of the point about which the object is being zoom in/out |
| android:toXScale | Used to set final size of the view in X-axis |
| android:toYScale | Used to set final size of the view in Y-axis |
How to Add Zoom In/Out Animation in Android
The following example demonstrates the steps involved in implementing Zoom In and Zoom Out animation to an image file. An image file will be added in the activity using ImageView.
Note: Following steps are performed on Android Studio version 4.0
Step 1: Create new project
- Click on File, then New => New Project.
- Select language as Kotlin.
- Select the minimum SDK as per your need.
Источник
Zoom the image in android


![]()
A simple pinch-to-zoom ImageView library for Android with an emphasis on a smooth and natural feel.
Simply add a ZoomageView as you would any typical ImageView in Android. The scaleType that you set on your ZoomageView will determine the starting size and position of your ZoomageView’s image. This is the inherited ImageView.ScaleType from Android. With a ZoomageView, the fitCenter or centerInside scale types usually make the most sense to use, fitCenter being Android’s default scale type.
If using a ZoomageView with a view pager, it is recommended that ViewPager2 is used.
Restricts the bounds of the image so it does not wander outside the border of the ImageView when it’s smaller than the frame size, and restricts the bounds to stop at the edges of the ImageView when the image is larger than the frame size. Default value is false.
Image will animate back to its starting size whenever it is reset if true, and will snap back to its starting size when false. Default value is true.
Determines at what times the image will reset to its starting size. Note that UNDER, OVER, and ALWAYS all have the effect of resetting the image to its starting position if its size has not changed. Default value is UNDER.
This will cause the image to pull itself into view on-screen if it is partially off-screen. Default value is true.
The minimum allowed scale for the image. Ideally this should be less than 1, must be greater than 0, and must be less than maxScale. Default value is 0.6.
The maximum allowed scale for the image. Ideally this should be greater than 1, must be greater than 0, and must be greater than minScale. Default value is 8.
Sets whether zooming is allowed. Default value is true.
Sets whether translation is allowed. Default value is true.
Sets whether double tap to zoom functionality is enabled. Default is true.
Sets the scale factor for double tap to zoom functionality. Default is 3.
Special thanks to @mchowning for all his help
Источник
Implement Zoom In or Zoom Out in Android
Zoom In and Zoom Out animations are used to enlarge and reduce the size of a view in Android applications respectively. These types of animations are often used by developers to provide a dynamic nature to the applications. Users also feel the changes happening in the application by watching these kinds of animations.
XML Attributes of Scale Tag
The characteristics of Zoom In and Zoom Out animations are defined in the XML files by using scale tag.
| XML attribute | Description |
|---|---|
| android:duration | Used to define the duration of the animation in millisecond |
| android:fromXScale | Used to set initial size of the view in X-axis |
| android:fromYScale | Used to set initial size of the view in Y-axis |
| android:pivotX | To define the X coordinate of the point about which the object is being zoom in/out |
| android:pivotY | To define the Y coordinate of the point about which the object is being zoom in/out |
| android:toXScale | Used to set final size of the view in X-axis |
| android:toYScale | Used to set final size of the view in Y-axis |
How to Add Zoom In/Out Animation in Android
The following example demonstrates the steps involved in implementing Zoom In and Zoom Out animation to an image file. An image file will be added in the activity using ImageView.
Note: Following steps are performed on Android Studio version 4.0
Step 1: Create new project
- Click on File, then New => New Project.
- Select language as Kotlin.
- Select the minimum SDK as per your need.
Источник
Implementing a Custom Zoom on ImageView in Android with Kotlin
December 2, 2021
Zooming is an in-motion operation done to enlarge or reduce the size of an image or an object in an Android application. It provides a powerful and appealing visual effect to the users.
Prerequisites
To best follow along with this tutorial, the reader will need the following:
- Make sure you have Android Studio installed on your computer.
- Knowledge of the fundamental concepts of the Kotlin programming language is required.
- Have basic mathematical knowledge of Matrices.
- Have basic knowledge of creating and running Android applications.
Importance of zooming in Android
- It gives a view of images that are not concentrated onto the current screen.
- Zoom control allows users to put in place a clear view to all the large and small objects on the screen.
- Zoom provides a way in which users can concentrate on a specified sector of the entire image and study it.
Creating a customized zooming effect
To successfully create a customized zooming action, several methods should be implemented.
To begin with, let’s create a class that extends AppCompatImageView and implement the following:
- View.OnTouchListener
- GestureDetector.OnGestureListener
- GestureDetector.OnDoubleTapListener
Within this class, ensure you have declared the following variables that aid in the creation of zooming controls.
Include the following constructor details in the code structure:
Create the following method that serves as the foundation for the zooming functionality’s creation:
Make sure you have declared myScaleDetector , myGestureDetector and myContext as global variables.
To retrieve the ScaleGestureDetector , which is usually an interface, we’ll create an inner class and implement, ScaleGestureDetector.SimpleOnScaleGestureListener . This class will then serve as the scale gesture detector.
This class overrides two methods, onScaleBegin and onScale which contains the general implementation of the ScaleGestureDetector interface.
onScaleBegin shows the mode level of the zooming which ought to be done.
The onScale method converts the original picture size to a given scale factor. The following code demonstrates how to use the onScale function in its entirety.
The method shown below is used to fix transitions and put matrix value within an array for analysis:
Another important method used to fit the image onto the screen based on its coordinates and the scale factor provided is as shown below:
getFittedTranslation is a method that handles the negative coordinates of the image and the case when the image is not zoomed.
The following snippet shows its implementation:
Finally, we’ll implement the following onTouch zoom control method. This method is used to handle the touch events.
Now that we’ve constructed the customized zoom functionality, we need to know where it applies for it to work. On your ImageView within the XML file, replace the ImageView with the package name as shown below:
Note: Your package name might be different from the one shown above.
Run the app and try to zoom in and out. It should work as shown below:


Conclusion
In this tutorial, we have learned what zooming is and how to implement a custom zoom functionality in an ImageView in Android using Kotlin.
To see the full code implementation, check out this GitHub repository.
Reference
Peer Review Contributions by: Eric Gacoki
About the author
Brandy is an undergraduate student pursuing Computer Science. She is passionate about Android development and Data Science. During her free time, she likes reading novels and singing.
Want to learn more about the EngEd Program?
Discover Section’s community-generated pool of resources from the next generation of engineers.
Источник


